The Grow Awards 2026 🏆 


Likes
Comments
Share
@Oyziphar
Follow
The end of last week and the beginning of this week we had very good weather (Indian summer) 😊, but the temperatures started to drop at the second half of this week with lots of rain and humidity. 😡
First signs of budrot accured and I had to install 2 ventilators to move the air. 👿👿👿 With small scissors I cut away the entire top that has bud rot 👻
Now that I have harvested the last pepper plants, I have been able to give the cannabis plants more space. This will also hopefully result in a lower humidity level.
Temperatures in the greenhouse this week : min temp 11.1°C - max temp 35.9°C
Heighest plant (Cookies Gelato) = 155cm
Smallest plant (Liberty Haze) = 135cm


Likes
14
Share
@Toughpuff
Follow
Very good plant to grow 8/10 for me 💯💯🔥 very high yielding with a crazy yield of 131grams of 1 plant very tall and skinny but dense buds 🙏🏽


Likes
7
Share
@MadeInGermany
Follow
Hey everyone 😃.
This week is still going perfectly 😃👍.
The trichomes have been checked (70% milky, 20% amber and 10% clear) so there is still some time until harvest :-).
Let's start the week:
Flowering day 56
Today the plant was checked for health.
Flowering day 57
Today it was poured with 1.2 l, only with Clean Fruits so that you can use up your remaining nutrients 👍.
Flowering day 58
The humidifier was refilled and the tent cleaned.
Flowering day 59
Today was only controlled.
Flowering day 60
The humidifier was refilled and the tent cleaned.
Flowering day 61
Today was poured with 1 liter, and the trichomes checked, of course the tent was also cleaned.
Flowering day 62
Today was cleaned, the plant cobtrolized for trichomes, mold and health.
everything looks great 👍.
And fresh osmosis water was filled in tanks for next week.
The way the trichomes look like, is harvested in about 10-14 days 👌👍.
Until the next update, I wish you all the best, stay healthy 🙏🏻 and let it grow 🍀👍
You can buy this Strain at
https://thecaliconnection.com/original-sour-diesel.html
You can buy this Nutrients at
https://greenbuzzliquids.com/
Type:
Original Sour Diesel ( Clone )
☝️🏼
Genetics:
Fem seeds- Original Sour Diesel to Original Sour Diesel BX3 RVSD Male
Reg seeds- Original Sour Diesel x Original Sour Diesel BX3 Male
👍
Vega lamp:
2 x Todogrow Led
Quantum Board 100 W
💡
Bloom Lamp :
2 x Todogrow Led
Cxb 3590 COB 3500 K 205W
💡💡☝️🏼
Soil :
Canna Coco Professional +
☝️🏼
Fertilizer:
Green Buzz Liquids :
Organic Grow Liquid
Organic Bloom Liquid
Organic more PK
More Roots
Fast Buds
Humic Acid Plus
Growzyme Big Fruits
Clean Fruits
Cal / Mag
Organic Ph - Pulver
☝️🏼🌱
Water:
Osmosis water mixed with normal water (24 hours stale that the chlorine evaporates) to 0.2 - 0.4 EC. Add Cal / Mag 2 ml per l water every 2 waterings . Ph with Organic Ph - Pulver to 5.8 .

Likes
69
Share
@Teamdirtbag2
Follow
She is now a skinny 17 inches tall. Defoleated all the bottom crap and cleaned her up. A little newt burn last week at 600 ppm. I have raised ppm to 680 so she may not be happy come the end of the week. She will have to get use to it. I'm sure she will be fine. Added second light, so it should get interesting.
Likes
2
Share
@smokeycropping
Follow
- LAS PLANTAS ESPERANDO SU CORTE YA NO SE ALIMENTAN MAS QUE AGUA SU LAVADO A LAS DEMAS QUE QUEDAN
- NO SE VEN CARENCIAS NI EXCESOS
- el hps de 600 MANTIENE MI AMBIENTE SIN MAYORES INCONVENIENTES
- TRICOMAS YA CON UN 20 % AMBAR LISTAS PARA EL corte!!


Likes
52
Share
@Salokin
Follow
The High intensity was to strong (clearly my fault) in the beginning which stunted her overall stretch, she however still delivered super dense, terpene and trichome loaded buds.
Likes
Comments
Share
@kilton_420
Follow
il y a eu un pique de chaleur, depuis j'ai eu des apparitions de carences
Likes
39
Share
@Hashy
Follow
Week 6
Light cycle=12/12
Light Power=150w
Extractor controller settings
High temp= 25c
Low temp= c
Temp step=0c
High Rh= 56%
Low Rh= %
Rh step=0%
Speed max=8
Speed min=2
Smart controller settings (during lights on).
Lights on=10.01-21.59
Radiator on= below 21.5c
Radiator off= above 22.5c
Dehumidifier on= not in use
Dehumidifier off= not in use
Smart controller settings (during lights off).
Lights off=22.00-10.00
Radiator on= below 18c
Radiator off= above 19c
Dehumidifier on= not in use
Dehumidifier off= not in use
VPD aim=0.6-1.4
DLI aim=35-40
EC aim=1.9
PH aim=6.2
Tue 30/1/24
#4 (Day 36)(Day 2 flower)
📋
Wed 31/1/24
#4 (Day 37)(Day 3 flower)
📋 H=52cm D=40cm DLI=26.5
🚿 foliar sprayed (Sumo Boost 2ml/L).
Thur 1/2/24
💧💧💧💧💧💧💧💧💧💧💧💧💧💧💧💧
Method= automatic
Feed=water
Neutralise=0.1ml/L
Roots=0.2ml/L
Easy Ph down=0.ml/L
Ec=0.2 PH=6.6/6.6
Time start=12.00pm
Finish time=13.45pm
(11×5 minute runs with 5 minute gaps)
Total flow rate=181ml/min
Flow rate per plant=45ml/min.
Total volume made=14L
Total volume left=4L
Total volume used=10L
Volume per plant=2.5L (Est)
Runoff.
Total runoff=1L
Ec=2.0 PH=6.1/6.2
💧💧💧💧💧💧💧💧💧💧💧💧💧💧💧💧
#4 (Day 38)(Day 4 flower)
📋 H=54cm D=38cm DLI=29.5
Lifted light and increasd power to 196w.
H=54cm D=45cm DLI=31.5
Extractor controller settings
High temp= 25c
Low temp= c
Temp step=0c
High Rh= 56%
Low Rh= %
Rh step=0%
Speed max=10
Speed min=2
Fri 2/2/24
#4 (Day 39)(Day 5 flower)
📋 raised camera, nearly touching the roof.
Sat 3/2/24
#4 (Day 40)(Day 6 flower)
📋 Defoliate a lot of lower leaves.
Sun 4/2/24
💧💧💧💧💧💧💧💧💧💧💧💧💧💧💧💧
Method= automatic
Feed=bloom nutes.
Neutralise=0.1ml/L
Silicon=1.0ml/L
Calmag=1.0ml/L
Terra Bloom=4.0ml/L
Sumo Boost=1.0ml/L
Roots=0.2ml/L
Easy Ph down=0.115ml/L
Ec=1.9 PH=6.1/6.5
Time start=12.00pm
Finish time=13.45pm
(11×5 minute runs with 5 minute gaps)
Total flow rate=190ml/min
Flow rate per plant=47ml/min.
Total volume made=13L
Total volume left=2.5L
Total volume used=10.5L
Volume per plant=2.62L (Est)
Runoff.
Total runoff=1.75L
Ec=2.4PH=5.9/6.2
💧💧💧💧💧💧💧💧💧💧💧💧💧💧💧💧
#4 (Day 41)(Day 7 flower)
📋 HST 1 cola.
Mon 5/2/24
#4 (Day 42)(Day 8 flower)
📋 H=69cm D=30cm DLI=46.0
She has started flowering now. She has grown 20cm during this week, fairly confident I have a good grip on this one and I'll be able to keep her from getting to big. I have seen how this strain can produce massive plants.
Back soon.
Take it easy.

Likes
21
Share
@Fullmeltalchemist
Follow
6.6 D66 - Hail satan motherfuck3rs
6.7 D67 -
6.8 D68 - Just keep growing just keep growing just keep growing just keep growing just keep growing just keep growing just keep growing just keep growing just keep growing just keep growing just keep growing just keep growing just keep growing just keep growing just keep growing just keep growing just keep growing just keep growing
6.9 D69 -
6.10 D70 -
6.11 D71 -
6.12 D72 -


Processing
Likes
80
Share
@RickJames_Mcdank
Follow
Well I have cutting down the nutes that after this I will start to flush her. I think she still need like 12 to 14 days.
But for now she is doing very fine. The smell is amazing and the Trichomes are showing so much!
Well see ya next week again.😀


Likes
61
Share
@GrowWithFlow
Follow
Hallo meine Freunde . Wir befinden uns in der 2 Wachstumswoche . Die Purple Lemonade FF von 420 Fast Buds machen sich großartig. Sie wurden von 0,5l in 8l Grownest Stofftöpfe umgepflanz . Der PH Wert wurde angepasst auf 6.2 und die Ladys lieben ihn . Dazu bekommen Sie jetzt bei jeden 2 gießen die hälfe der angegebenen Dosis von Hesi Bio Grow mit halber Dosis Hesi Wurzelkomplex und natürlich auch Hesi Super Vit . Das wars auch schon hier mit der Purple Lemonade FF , vielen Dank fürs zuhören und bis nächste Woche meine Growmies . Much love ❤️💛💚


Likes
8
Share
@Dendegrow
Follow
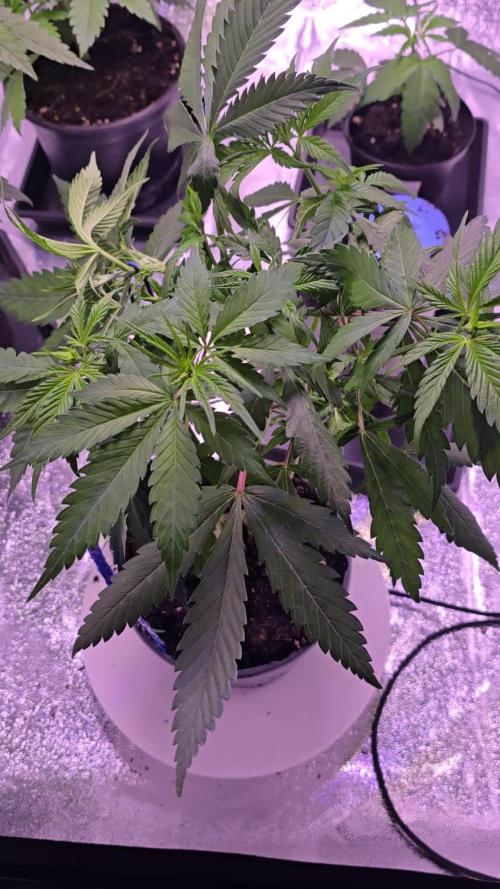
🎨 Monster Marker – Week 3 🌱
Last week, I accidentally snapped the main stem during low-stress training 😅✂️.
Luckily, she’s healed up perfectly 💪🌿, and now the side branches are just as tall as the main one – looks really cool! 😎
The smell is absolutely insane 🤯🔥, and I can’t wait to see what she will produce! 🌸✨
---
🎨 Monster Marker – Woche 3 🌱
Letzte Woche habe ich beim Low-Stress-Training leider den Hauptstamm abgebrochen 😅✂️.
Zum Glück hat sich die Pflanze perfekt erholt 💪🌿, und jetzt sind die Seitentriebe genauso hoch wie der Haupttrieb – sieht richtig cool aus! 😎
Der Geruch ist absolut pervers 🤯🔥, und ich bin mega gespannt, was am Ende dabei rauskommt! 🌸✨

Likes
11
Share
@Mr_Motalovah
Follow
OMG! (Oh My Growers) what an adventure we have here!
Looks like in a few weeks we'll be deep in a zenzational jungle! 😍
They're definitely comfortable, I can notice the roots and mycorrhiza combo just taking over the soil.
Leaves are branching out and getting think which is great to see, not as thick as I'd expected though.
Next week they'll be transplanted to final 11L fabric pots.
Happy Growing!
Likes
13
Share
@CalimannpackZ
Follow
Just added Mephisto 3 sour crinkles and 2 double grapes to the equation. It was meant to be 4 sour crinkles but one seed still ent popped so I’m hoping it will! On to the grow where I haven’t trained any plants it’s a fight for space but I’m happy with most of the plants few fast buds wedding still ent properly flowered yet week 7 on but am happy with a couple glues and the 3 runtz the runtz is frosty! The grape Walkers are starting to swell and fill out big time I am happy so far with it all had a couple burns and defincys through the 7 weeks so far but got over them! The grape walkers are the big budded plants then the frosty ones at the back are runtz then the rest are glues! Started defoliating plants
Processing
Likes
2
Share
@Cogollo_eu
Follow
**Encontrarás la traducción a español al final de la descripción**
From/Desde: 09/09/19 || To/Hasta: 15/09/19
From day/Desde día: 08 || To day/Hasta día: 14
Blueberry Cookies Diary / Diario de las BlueBerry Cookies:
https://growdiaries.com/diaries/38769-dinafem-039-s-blueberry-cookies-at-the-ocean
-----IMAGES & VIDEOS-----
V1 - Transplanting day. I'm using 10 l Aeropots as final recipient. I've used:
- Small layer of ATAMI HydroRokz (perlite) at the bottom of the pot, just for cover bottom holes and to retain a bit of humidity
- Over the perlite i placed 1l of mixture with BioBizz "All Mix" and Volcanic Soil
- Again over, 1l of mixture with BioBizz "Light Mix" + Volcanic Soil & Guano
- And filled the rest with BioBizz "Light Mix" + Volcanic Soil
It's the second time that i broke half of the roots of a plant doing a transplant, It happened to me just for not being careful enough to hold the soil by the lower part. While this is no good, no further signs of that mistake other than the recorded video ;).
V2 - Quick show up on how to correct the color of photos taken under red/ping/purple light.
First I merge the HDR image from 3 bracketed shots, then I apply my custom color adjustment in the HDR resulting image.
As i show in the video, to correct the red light, you have to enhance the blue and green curves, just play with a point in the curves until you find the best adjustment for each of both curves. Then you should go to tones, and play a bit with reds, pinks & purples... and.... Voilá, you can see the results, easy and effective..... but no more easy than using the right white spectrum.
P1 - Cookies Showdown before transplant
P7 - Volcanic soil and Guano
-----WEEK SUMMARY-----
This week was very easy, i didn't do anything to these babies apart from the transplant. This is the first time im mixing something with the soil, I hope not to overfeed the Cookies with the nutes, as i'm going to use the same nutrients i was using.
The first 10 days they were growing in my 60x60x40 tent (DP60), with a terrible chinese light that i always use the first week wen I plant.
PandaGrow 100W (50W draw) - http://www.pdgrow.com/index.php?m=Show&a=index&cid=12&id=53
So after transplanting when i place the plans under the Quantum Board or the Platinum LED, i've notice it on them immediately, they really don't like this kind of chinese lights.
Thus after the transplant the plants has started to grow and wide much more and much quickly.
-----WATERING CALENDAR-----
12/09/19 DAY 11 - 1,5 l after transplant with all week nutrients @ 0.8 EC & PH5.8
*****ESPAÑOL*****
-----IMÁGENES & VÍDEOS-----
V1 - Día de transplante. Transplantaré a AeroPots de 10 l. Para el transplante he usado:
- Una capa pequeña de ATAMI HydroRokz (perlita) en el fondo de los tiestos, sólo para cubrir los agujeros y retener un pelín de humedad.
- Encima de la perlita he puesto 1 l de mezcla de BioBizz "All-Mix" con tierra volcánica
- De nuevo encima he puesto otro litro de mezcla de BioBizz "Light-Mix" con guano y tierra volcánica
- El resto está relleno con una mezcla de BioBizz "Light-Mix" con tierra volcánica
Es la segunda vez que se me parter unas raíces por la mitad en un transplante, eso me pasa por no ser lo suficientemente cuidadoso como para agarrar el sustrato por su parte baja. Esto no es algo bueno, pero he de admitir que aparte del mal rato de que se te partan las raíces, a la planta no le sucede nada de nada, sigue creciendo al mismo ritmo que su hermana.
V2 - Un ejemplo rápido de como corregir la iluminación de una foto tomada bajo un espectro rosado o rojizo
En el vídeo primero compilo el HDR compuesto de 3 fotografías horquilladas y una vez compilado le aplico mi ajuste de color.
Como muestro en el vídeo, para corregir este tipo de luces hay que realzar las curvas de color azul y verde, simplemente con un punto por encima de la mitad de la línea media hasta encontrar los puntos más adecuados para tu luz. una vez encontrados, sólo hay que ir a los tonos y ajustar un poquito el rojo, rosa y morado.
P1 - Muestra de las Cookies antes del transplante
P7 - Tierra volcánica y Guano
-----SUMARIO SEMANAL-----
Esta semana ha sido muy sencilla, no les he hecho absolutamente nada a las pequeñas a parte del transplante. Esta es la primera vez que mezclo algo con el sustrato y espero no sobrealimentar las cookies ya que voy a seguir usando los mismos nutrientes que he usado con anterioridad y de la misma manera.
Los primeros 10 días han crecido en mi tienda de 60x60x40 (DP60), con una luz china terrible:
PandaGrow 100W (50W draw) - http://www.pdgrow.com/index.php?m=Show&a=index&cid=12&id=53
Siempre uso esa luz los primeros días de cada cultivo, por lo que al cambiarlas a la Quantum o al Platinum LED lo noto al toque, realmente no les gusta nada la luz china esa, inmediatamente se ponen a crecer y ensanchar mucho mas.
-----CALENDARIO DE RIEGO-----
12/09/19 DÍA 11 - 1,5 l después del transplante con todos los nutrientes semanales @ 0.8 EC & PH5.8

