Likes
Comments
Share
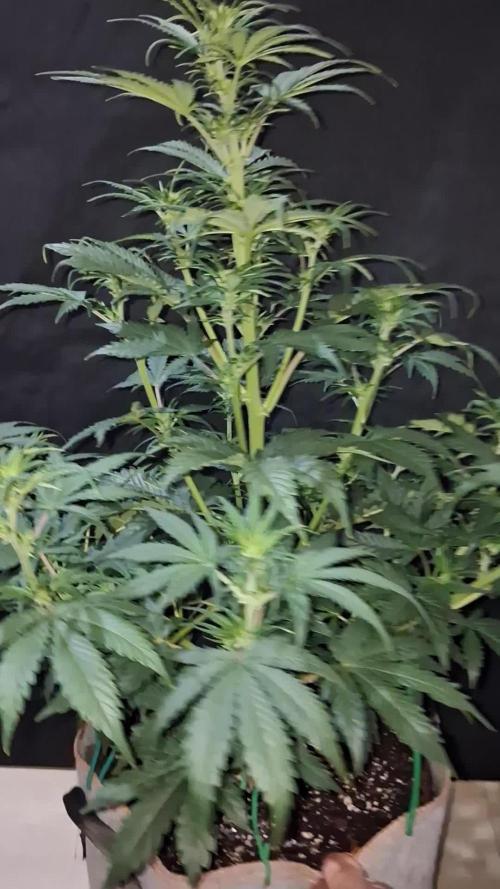
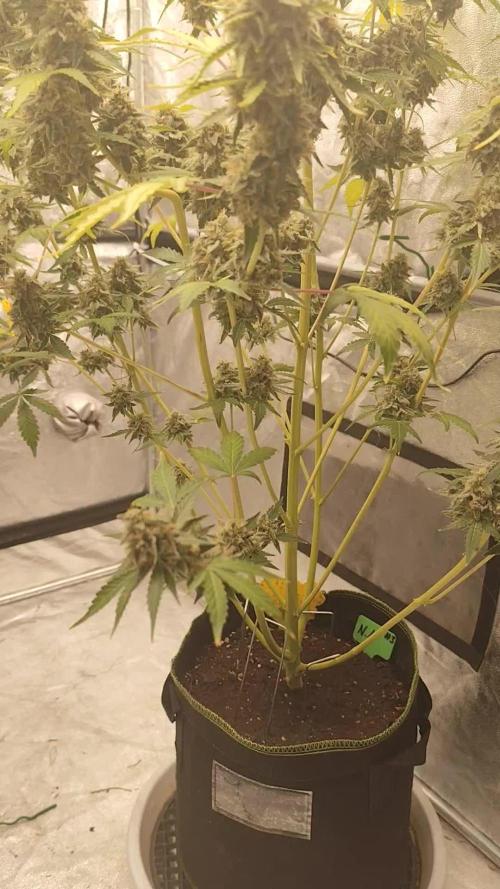
Day 28 I was away for 5 days and wow the growth... I'm sold on the auto-pots šŸ˜‚ Her top growth is a little burnt from the light I think while I was away she got a little too close šŸ˜‚Wasn't expecting her to triple in size. Shes definitely starting to flower. Humidity a little high from the rain storm were having atm. Even though shes gone into flower so quickly easily still the largest auto ive had yetšŸ˜
Likes
7
Share
@Salokin
Follow
Yesterday she was cut, run off ppms had been at zero for at least 4 days. For what this plant went through in terms of heat and humidity, I believe the outcome of roughly a kg wet is not too bad. Bud have a certain density to them but far away from what I prefer. However the presents of an abundance of Reepes is undeniable. ATM she smells very sweet with a hint of Creme and a bit of pine. She must be quite mold resistant, as the other plant in the tent with her was quite mold riddled and the Afghan didn’t catch anything in that tiny growspace.
Likes
8
Share
Buds are really starting to put on weight I was a little nervous because I have never grown autoflowers before and to I have never done low-stress training before so far everything has worked out magnificently minus the pH that was off and the temperature drop elsewise these plants are all significantly larger than originally anticipated
Likes
Comments
Share
@RunWithIt
Follow
Hey GD. The girls are coming along just how I like it. I did notice a little bit of tip burn the other day. So I hit them all with a flush last night. Going to wait a couple days before hitting them with another feeding. They're all putting off a solid odor now. Two of the banana ogs have a very skunky undertone. While the other one has a solid citrus undertone. But you could definitely tell it's the same strain. (The one with skinnier buds in the back left is the citrus smelling one) Then that brings us to the raspberry hygor which is also putting off a very fruity odor(think berries nestled in mint). Despite underperforming the banana ogs in regards to overall yield. It is nowhere near lacking in quality or terpene content, I believe. I should note I didn't put the pot under it to bring it to the same height as the ogs until last week, so it wasn't getting near as much light as the other plants. Either way, this grow is heading toward the latter end of it's cycle. Hoping to get a bit documented about raspberry hygor on seedfinder as well, since I haven't been able to find any reference material for this strain*. * A little sidebar note I wanted to add was how I sourced these seeds. My brother is affiliated in the cannabis industry here in Cali and hooked me up with these seeds as a Christmas present. He was not able to provide much details than the packaging themselves. One package is labeled 'raspberry hygor' and another is labeled 'banana og'. Each pack containing 25 reg seeds. The banana OG beans came with pollen with which I can experiment in the future.
Likes
85
Share
the c99s got ten days of plain water then came the chop at week 10 and 3 days with a fairly decent 30% amber all things considered !
Likes
2
Share
En esta etapa no agregue ningún nutriente a la solución para evitar que la planta tenga gusto al nutriente, así dicen los expertos que queman esta hierba. Yo lo hago solo por deporte, no porque lo fume. mantuve el ph en condiciones estables a como dictan los científicos en este rubro. la próxima😁 semana corto las plantas y las pongo a secar.
Processing
Likes
12
Share
Nice week of growth. The girls are about 13 inches on average, D and L are taller. Betty definitely seems like a sativa pheno compared to her sisters. I found some brown algae in my tubs, I did some research and discovered I needed to cover my net pots to eliminate light pollution getting into the tubs. There were only a couple of small spots, I was able to remove it by hand. I slapped some foil on the tubs and made sure each lid was completely sealed. PH has been holding pretty steady and I haven't seen much drift at all. Towards the end of the week it struck me that the stretch is coming. I did some rough calculations on my current height and max height ill be able to have and I feel I should flip to flower by the end of the week when I swap new water in. Another week of veg and a stretch may be too tall with my lights. So I changed the water late on day 42, pulled some fan leaves and adjusted my light timer so when they went out in the morning they'll be off for 12 hours. I've left the MH bulb in for the flip to help control the stretch this first week. I read you can leave it for the first 2 to 3 weeks but depending how this upcoming week of stretch goes I may pop in the HPS during early week 2 of flower to get a little extra height if I think I need it. Was not ready to take clones, I may try to pull some on day 47 coming up, just a busy time of year.
Likes
56
Share
Once again she passes my expectations, late to the show with trichome production. I'm surprised there is purple on the bud, maybe Purpinator does work. I thought I could see hints under the grow lights and thought my eyes were deceiving me, I was just being hopeful. But nah 2 of the 3(under the UV) have developed a beautiful tone of purple. I was never going to bother with a deep freeze but maybe the whole bud will change given conditions, that would be something, fingers crossed. šŸ¤” was a little skeptical that reducing temps humidity would change density, but it does, buds are solid something I've not been able to achieve before. Rule of thumb is never to surpass 60% RH in the flowering phase and try to progressively reduce it down to 40% in the last 2–3 weeks before harvest. The plant will react as it seeks to protect its flowers, responding by producing denser buds and a higher concentration of resin. Cannabis plants are sensitive to sudden temperature changes, especially in the flowering stage. Extreme heat or cold can impact bud density and overall yields. In nature as a defense mechanism from cold, the plant sensing sudden dips in temperature will attempt to remove the pockets of air within the bud, it achieves this by compacting itself in doing so to better protect itself from cold snaps which are normally indicators in nature that worse weather is on the way. Terpene levels are the highest just before the sun comes out. Ideally, you want as many terpenes present in your plants as possible when you harvest. Cannabis plants soak up the sun during the day and produce resin and other goodies at night. The plant is at its emptiest from "harvest undesirables," so to speak,k right before the lights come on. Freshly cut buds are greener than dried buds because they still contain loads of chlorophyll. However, when rushed through the drying process, the buds dry but retain some chlorophyll, and when you smoke it, you will taste it. Chlorophyll-filled buds are smokable, but they aren’t clean. Slow drying gives the buds enough time and favorable conditions to lose the chlorophyll and sugars, giving you a smoother smoke. How the plant disposes of the chlorophyll and sugars by a process of chemically breaking them down and attaching the decomposed matter once small enough to water molecules, which then evaporate back into the ether. Time must be given to the process to break down the chlorophyll and sugars. Think of it like optimizing the environment for decay. Plant growth and geographic distribution (where the plant can grow) are greatly affected by the environment. If any environmental factor is less than ideal, it limits a plant's growth and/or distribution. For example, only plants adapted to limited amounts of water can live in deserts. Either directly or indirectly, most plant problems are caused by environmental stress. In some cases, poor environmental conditions (e.g., too little water) damage a plant directly. In other cases, environmental stress weakens a plant and makes it more susceptible to disease or insect attack. Environmental factors that affect plant growth include light, temperature, water, humidity, and nutrition. It's important to understand how these factors affect plant growth and development. With a basic understanding of these factors, you may be able to manipulate plants to meet your needs, whether for increased leaf, flower, or fruit production. By recognizing the roles of these factors, you'll also be better able to diagnose plant problems caused by environmental stress. Water and humidity *Most growing plants contain about 90 percent water. Water plays many roles in plants. It is:* A primary component in photosynthesis and respiration Responsible for turgor pressure in cells (Like the air in an inflated balloon, water is responsible for the fullness and firmness of plant tissue. Turgor is needed to maintain cell shape and ensure cell growth.) A solvent for minerals and carbohydrates moving through the plant Responsible for cooling leaves as it evaporates from leaf tissue during transpiration A regulator of stomatal opening and closing, thus controlling transpiration and, to some degree, photosynthesis The source of pressure to move roots through the soil The medium in which most biochemical reactions take place Relative humidity is the ratio of water vapor in the air to the amount of water the air could hold at the current temperature and pressure. Warm air can hold more water vapor than cold air. Relative humidity (RH) is expressed by the following equation: RH = water in air Ć· water air could hold (at constant temperature and pressure) The relative humidity is given as a percent. For example, if a pound of air at 75°F could hold 4 grams of water vapor, and there are only 3 grams of water in the air, then the relative humidity (RH) is: 3 Ć· 4 = 0.75 = 75% Water vapor moves from an area of high relative humidity to one of low relative humidity. The greater the difference in humidity, the faster water moves. This factor is important because the rate of water movement directly affects a plant's transpiration rate. The relative humidity in the air spaces between leaf cells approaches 100 percent. When a stoma opens, water vapor inside the leaf rushes out into the surrounding air (Figure 2), and a bubble of high humidity forms around the stoma. By saturating this small area of air, the bubble reduces the difference in relative humidity between the air spaces within the leaf and the air adjacent to the leaf. As a result, transpiration slows down. If the wind blows the humidity bubble away, however, transpiration increases. Thus, transpiration usually is at its peak on hot, dry, windy days. On the other hand, transpiration generally is quite slow when temperatures are cool, humidity is high, and there is no wind. Hot, dry conditions generally occur during the summer, which partially explains why plants wilt quickly in the summer. If a constant supply of water is not available to be absorbed by the roots and moved to the leaves, turgor pressure is lost and leaves go limp. Plant Nutrition Plant nutrition often is confused with fertilization. Plant nutrition refers to a plant's need for and use of basic chemical elements. Fertilization is the term used when these materials are added to the environment around a plant. A lot must happen before a chemical element in a fertilizer can be used by a plant. Plants need 17 elements for normal growth. Three of them--carbon, hydrogen, and oxygen--are found in air and water. The rest are found in the soil. Six soil elements are called macronutrients because they are used in relatively large amounts by plants. They are nitrogen, potassium, magnesium, calcium, phosphorus, and sulfur. Eight other soil elements are used in much smaller amounts and are called micronutrients or trace elements. They are iron, zinc, molybdenum, manganese, boron, copper, cobalt, and chlorine. They make up less than 1% of total but are none the less vital. Most of the nutrients a plant needs are dissolved in water and then absorbed by its roots. In fact, 98 percent are absorbed from the soil-water solution, and only about 2 percent are actually extracted from soil particles. Fertilizers Fertilizers are materials containing plant nutrients that are added to the environment around a plant. Generally, they are added to the water or soil, but some can be sprayed on leaves. This method is called foliar fertilization. It should be done carefully with a dilute solution because a high fertilizer concentration can injure leaf cells. The nutrient, however, does need to pass through the thin layer of wax (cutin) on the leaf surface. It is to be noted applying a immobile nutrient via foliar application it will remain immobile within the leaf it was absorbed through. Fertilizers are not plant food! Plants produce their own food from water, carbon dioxide, and solar energy through photosynthesis. This food (sugars and carbohydrates) is combined with plant nutrients to produce proteins, enzymes, vitamins, and other elements essential to growth. Nutrient absorption Anything that reduces or stops sugar production in leaves can lower nutrient absorption. Thus, if a plant is under stress because of low light or extreme temperatures, nutrient deficiency may develop. A plant's developmental stage or rate of growth also may affect the amount of nutrients absorbed. Many plants have a rest (dormant) period during part of the year. During this time, few nutrients are absorbed. Plants also may absorb different nutrients as flower buds begin to develop than they do during periods of rapid vegetative growth.
Likes
2
Share
@Ninjabuds
Follow
The plants are looking really healthy. I’m still getting used to my new lights. I think I didn’t push enough light in week 2 of flower I’m ramping up the light intensity now. I had to whip out my par meter I was keeping the light to far off the plants. This light has to be closer to the plants than my mini sun. I’m lurking this light a lot I just need to get used to it
Processing
Likes
1
Share
@MrRaid
Follow
Think they ain't gonna stretch much now looks ok had to flush soil as she definitely dosent like alot of food light feeds for this strain maybe up It later on using very cheap led grow lights this setup is very cheap but it's for me to see the difference between a perfect setup to a budget setup still has most things she needs good airflow humidity is good can get hot as I didnt invest in ac but nothing over 28c most days they sit at 25c humidity 55% they growing quick even with no feed for 7 days this grow isn't at my home so only see these girls every 48 hours maybe 24 hours I'm feeling to check them day 35 and they stretched like crazy
Likes
37
Share
@MG2009
Follow
GTH SEED #1 in training, just super cropped on one side to even conopy. The first site im recording will be a clone,it is on back side of plant and will not produce. #2,#3,#4 pics,#2 is stripped of leaves at about 12 inches. 06/16/18 #4 is showing pre-flowers,#2,#3, no sign yet. #1 check in the morning. 06/19/2018 Still no pre -flowers on #1,#2,#3, #4 however is female so I Fimmed her to encourage side shoots to grow biggest of wider canopy. #1 reacting well to supercropping 20 tops as of today. Praying she is femalešŸ™šŸ™. She is a stretchy girl in flower 2 to 3 x her vegged height so trying to be low profile as possible.šŸ‘
Likes
24
Share
@SkunkyDog
Follow
Hallo zusammen šŸ¤™. Sie wƤchst sehr schƶn und macht keine Probleme. Rabattcode für den BIOTABS-Webshop https://biotabs.nl/en/shop/ GDBT420, damit erhalten Sie 15 Prozent
Likes
7
Share
@Melacolas
Follow
Les plants renfort tuteurs ,defoliations ,rincage des plants sans engrais l epuisement des feuilles place aux fleurs rincage peut etre du the de compost ou banane naturel les ravageurs nada netoyage aspirateurt froter le projecteur extra tourne h 24 mise en place d un ventillo mais les chaleurs font monter a 30 degrer les plants je surveille a la loupe d eventuel hermaprodite le stress l eaux tout 2 a 3 jours defoliation deux sessions enfin le run suit sont cours
Likes
8
Share
@Donwon310
Follow
266 grams out of all 4 plants, roughly over half elbow. Went with grove bags. Did 5 day dry then put into totes for few days and bagged after trimmed. Sticky buds with the piney nose to it with heavy gas .
Likes
41
Share
Week 3 is here This one is looking weird, but I had temperature problems in the night plus she is on a 12/12 because she shares a room with 3 photoperiods I topped her two days ago and the two tops are showing I fixed the heat problem and will switch the light cycle as soon as the photoperiods are done. Good growing everyone! 😊
Likes
4
Share
@Ensign420
Follow
|»» LOG DISCLAIMER: Not intended as a grow guide. Grow log entries are usually posted 3 weeks later and are for my learning reference. ««| Introduction - Week 15 Summary - Ensign's log, stardate 17541.8, Wow what an epic grow week! First week within a 12/12 light cycle and lots of training got done! Ca-Caw! Heady OG is blowing up with tops and been tucking to spread the canopy out a bit in the front left quadrant. But also started to let the right side grow through the netting. As for TKO, been training growth upwards as she stretches through the scrog netting. Towards the end of the week, her top soil sensor started to cut out and had to swap it out with a new one. Both the Heady OG and TKO clones have been transplanted into solo cups, but Heady OG is clearly struggling. To prevent the potential loss of the genetics, decided to take two more Heady OG cuttings. Started my first batch of lactobacillus (LAB) serum and am waiting for the water to activate. Also been researching about tissue culture and think this can be the solution to preserving genetics when space is limited. Anyways, Onwards Ensign! [START OF WEEK 15] ========================================================== ---------- [ 4x4 MAIN TENT ] ---------- Heady OG BX1 #1 [Round4 ~Wk8] - WEEK 15 - Pre-Bloom [Stretch Wk1] TKO [Round2 ~Wk13] - WEEK 15 - Pre-Bloom [Stretch Wk1] ----------- [ 3x3 VEG TENT ] ------------ Garlic Budder OG#1 - WEEK 07 - Full Veg Garlic Budder OG#2 - WEEK 07 - Full Veg Gorilla Goat #1 - WEEK 07 - Full Veg Gorilla Goat #2 - WEEK 07 - Full Veg 07/28/25 → 08/03/25 This Week's Estimated Goals ---------------------------------------------------------------------------------------------- DLI: ~13 mol/m²/d PPFD: ~300 μmol/m²/s VPD: ~1.0 kPa This Week's Meter Readings & Averages ---------------------------------------------------------------------------------------------- Light On/Off: 19:00 - 07:00 | Wattage: ~326.5W [LV04] Distance From Canopy: ~31ā€, 27ā€ DLI: ~15.60 mol/m²/d PPFD: ~361 μmol/m²/s VPD: ~0.71 kPa Soil %: [49.6, 36.1, 49.0, 47.1, 42.6, 43.0, 43.0, 44.6] ========================================================== Day 01 - Monday - 07/28/25 - Total Days: 106 ----------------------------------- Daily Averages ~[+01:00] - Temps: 83.6°F [28.7°C] - Humidity: 82.0% - VPD: 0.72 kPa - Soil %: [50, 36, 49, 47, 43, 43, 43, 45] ----------------------------------- - [+04:07]: Ca-Caw!! Let’s get this flower cycle started! --- Time to switch the clocks from 18/6 to 12/12 which will begin the stretch to flower! Let’s go! --- Within the AC Infinity App, --- For the Main Tent [4x4] controller, --- Changed the schedule from 'Vegetative [18/6]' to 'Flower [12/12]' --- Also made sure to sync the settings for each device. The current settings are: ------ GROW LIGHT (MARS HYDRO FC-6500): --------- The Mode is set to ā€˜ON MODE’ --------- The START/END times are set to 07:00PM/07:00AM --------- The SUNRISE/SUNSET Duration value is set to 20Min --------- The MAX value is set to 4 ------ EXHAUST FAN (AC INFINITY CLOUDLINE T6): --------- The Mode is set to ā€˜CONTINUOUS AUTO’ --------- The Temperature HIGH/LOW trigger’s value are set to 85°F/OFF --------- The Humidity HIGH/LOW trigger’s value are set to 87%/OFF --------- The MIN/MAX values are set to 1/8 --------- The Temperature Dynamic Transition buffer value is set to 2°F --------- The Humidity Dynamic Transition buffer value is set to 2% ------ HUMIDIFIER (AC INFINITY CLOUDFORGE T7): --------- The Mode is set to ā€˜CONTINUOUS TARGET’ --------- The VPD target value is set to 1.0kPa --------- The MIN/MAX values are set to 0/8 --------- The VPD Dynamic Transition buffer value is set to 0.2kPa ------ HEATER (AC INFINITY THERMOFORGE T3): --------- The Mode is set to ā€˜CONTINUOUS TARGET’ --------- The Temperature target value is set to 78°F --------- The MIN/MAX values are set to 0/8 --------- The Temperature Dynamic Transition buffer value is set to 2°F --- The only difference is the ON/OFF times for the grow light. Now lights will be on from 7pm to 7am (19:00 – 07:00). --- Everything else is identical to the previous veg schedule. --- Anyways, --- LET THE TWO-WEEK STRETCH TO FLOWER BEGIN!! - [+00:55]: Night check on the 4x4 tent. --- Ca-Caw! Looking great my ladies! --- Heady OG (BX1 #1) is continuing to blow up with more tops! The canopy is looking incredible! --- TKO is also looking great with tops everywhere! She has taken over this grow and hyped that - [+01:54]: Trained and tucked the top growth under the netting. --- Canopy is flat and even again. Great! --- Day one into the 12/12 flip and growth is looking great! - [+01:56]: Checked the Ecowitt soil moisture sensor data: ------------------ [ 4x4 MAIN TENT ] --------------- ------ 46% - [CH01 FT Ā» G30 - Heady OG BX1 #1] ------ 36% - [CH02 FB Ā» G30 - Heady OG BX1 #1] ------ 50% - [CH03 BT Ā» G20 - TKO] ------ 47% - [CH04 BB Ā» G20 - TKO] ------------------ [ 3x3 VEG TENT ] ---------------- ------ 40% - [CH05 BL Ā» GR7 - Garlic Budder OG#1] ------ 41% - [CH06 BR Ā» GR7 - Garlic Budder OG#2] ------ 40% - [CH07 FL Ā» GR7 - Gorilla Goat #1] ------ 44% - [CH08 FR Ā» GR7 - Gorilla Goat #2] --------- Veg: 38% - 45% | Flower: 45% - 55% --------- General: 30% [Dry] Ā«| 45 - 60% [Moist] |Ā» 70% [Wet] - [+01:59]: Checked the 3x3 veg tent. --- Mothers are all vegging along and the canopy is bushy and beautiful! --- Pots also look good too. No gnats! - [+02:01]: Checked on the propagation dome (in the 3x3), --- To refresh the air, lifted the top off for a bit. --- Clone growth looks great for the most part and getting curious on root growth. --- Heady OG looks green, but she has been very droopy the entire time. Not sure if this cutting will root, but there is no yellowing. May have messed up something in cloning. --- The TKO clone looks beautiful. incredible! --- Using a spray bottle, misted the top growth with RO water. - [+02:05]: Checked the humidifiers. --- Tanks are still full and no leaks found. --- Over the past week or so, been research about Lactobacillus and the organic benefits. Plan to give it a try and will start the process tomorrow. --- Shout out to Jeremy at BuildASoil for the YT videos and the Lacto recipe! --- LOYAL TO THE SOIL FOR LIFE! --- Anyways, Onwards Ensign! Day 02 - Tuesday - 07/29/25 - Total Days: 107 ----------------------------------- Daily Averages ~[+01:00] - Temps: 83.3°F [28.5°C] - Humidity: 80.4% - VPD: 0.78 kPa - Soil %: [50, 36, 49, 47, 43, 43, 43, 44] ----------------------------------- - [14:24]: Okay! Time to start some Lacto Serum! --- This lactobacillus serum is used to improve soil health and nutrient availability. This LAB serum can also be used to create fermented plant or fruit juices (FPJ/FFJ). --- Anyways, --- First need to make the rice wash solution! --- Filled a mini wide-mouth mason jar with 1 cup of White Rice. ------ Added 1 cup of RO Water --- Mixed the rice and water for a bit. --- Covered the jar with a paper towel and rubber-band. ------ [ ~10 MINUTES LATER ] - [14:38]: Great! --- Mixed the rice and water again before pouring a little over 1/4 cup into a mini wide-mouth mason jar. --- Covered the jar with a paper towel and rubber-band. --- The current room temps are around 80°F --- To start the microbial activation, going to let this rice water solution sit for a few days. - [14:45]: Smelled the solution through the paper towel. --- The solution smells like flour. Nothing foul. --- From what I understand the process is pretty simple: ------ Create the rice wash solution and let it sit for a few days to activate (white or brown rice). ------ Mix 1 part activated rice wash solution to 10 parts whole or raw milk. Then let it sit for a few more days for the lacto cultures to proliferate. ------ Once the milk separates into essentially curds and whey, strain out the curds and the extracted whey is the finished Lacto Serum. ------ This serum should remain shelf stable in the fridge for several months. ------ Alternatively, black strap unsulfured molasses can be added to the serum at 1 part molasses to 4 parts serum. This will make the product stable enough for non-refrigerated storage (lasts several months). ------ As for application, the serum can be used as a soil drench or foliar feed at 4mL (~1tsp) per gallon of water. --- Anyways, --- Will check on this in a day or so and am waiting until the solution turns from a flour odor to more of a sweet aroma. - [19:35]: Night check on the 4x4 tent. --- Ca-Caw!! Looking great my ladies! --- Both Heady OG and TKO are raging with more tops! -- [20:37]: Trained the top growth. --- Now starting to tuck mainly tucked Heady OG to spread growth out under the netting. --- Letting TKO stretch through the netting and only tucked the taller tops. Mainly trained the back area (won’t be able to train this once growth starts to ramp upwards) and made sure each square has at least one apical top. --- Also plucked and defoliated the Heady OG’s lower growth. Cleaned her legs and now she’s nice and smooth! --- Wow TKO’s main stalks are huge! Can really reach back area now so going to let her grow. - [20:47]: Checked the Ecowitt soil moisture sensor data: ------------------ [ 4x4 MAIN TENT ] --------------- ------ 45% - [CH01 FT Ā» G30 - Heady OG BX1 #1] ------ 36% - [CH02 FB Ā» G30 - Heady OG BX1 #1] ------ 45% - [CH03 BT Ā» G20 - TKO] ------ 46% - [CH04 BB Ā» G20 - TKO] ------------------ [ 3x3 VEG TENT ] ---------------- ------ 42% - [CH05 BL Ā» GR7 - Garlic Budder OG#1] ------ 40% - [CH06 BR Ā» GR7 - Garlic Budder OG#2] ------ 47% - [CH07 FL Ā» GR7 - Gorilla Goat #1] ------ 41% - [CH08 FR Ā» GR7 - Gorilla Goat #2] --------- Veg: 38% - 45% | Flower: 45% - 55% --------- General: 30% [Dry] Ā«| 45 - 60% [Moist] |Ā» 70% [Wet] - [21:34]: Checked the 3x3 veg tent. --- Ooo yea! All veg mama’s are thriving and bushy! --- Getting close to the grow light again so time for more training! - [21:53]: Super-cropped and trained the top growth. --- Pinched and bent the taller branches and lowered the canopy by 5-6 inches. - [21:58]: Checked on the propagation dome, --- To refresh the air, lifted the top off for a bit. --- Clones are growing along and hopefully rooting. --- Heady seems to be struggling, but she is still green. --- TKO is looking great and she is starting to get taller! --- Plan to check for roots in a couple days. --- Using a spray bottle, misted the top growth with RO water. - [23:07]: Time for a mini upgrade! Got a set of magnetic levels. --- Attached two levels to both the main tent and veg tent’s grow lights. --- Not really necessary, but the added levels will be useful during height adjustments. - [23:23]: Checked the humidifiers. --- Tanks are still full and no leaks found. Day 03 - Wednesday - 07/30/25 - Total Days: 108 ----------------------------------- Daily Averages ~[+01:00] - Temps: 83.6°F [28.7°C] - Humidity: 82.1% - VPD: 0.72 kPa - Soil %: [49, 36, 48, 46, 43, 43, 43, 44] ----------------------------------- - [23:36]: Night check on the 4x4 tent. --- Ca-Caw!! Looking beautiful my ladies! Wow! This is why we grow! --- Both Heady OG and TKO are looking healthy and tops are bursting through the netting! - [23:54]: Trained the top growth. --- Mainly tucked and continued to spread Heady OG out to fill in more squares in the front left quadrant. --- Did minimal training on TKO. Just letting her grow through the netting and wow growth is raging! --- Wow! The canopy is looking beautiful! - [23:59]: Checked the Ecowitt soil moisture sensor data: ------------------ [ 4x4 MAIN TENT ] --------------- ------ 55% - [CH01 FT Ā» G30 - Heady OG BX1 #1] ------ 36% - [CH02 FB Ā» G30 - Heady OG BX1 #1] ------ 49% - [CH03 BT Ā» G20 - TKO] ------ 46% - [CH04 BB Ā» G20 - TKO] ------------------ [ 3x3 VEG TENT ] ---------------- ------ 42% - [CH05 BL Ā» GR7 - Garlic Budder OG#1] ------ 47% - [CH06 BR Ā» GR7 - Garlic Budder OG#2] ------ 47% - [CH07 FL Ā» GR7 - Gorilla Goat #1] ------ 40% - [CH08 FR Ā» GR7 - Gorilla Goat #2] --------- Veg: 38% - 45% | Flower: 45% - 55% --------- General: 30% [Dry] Ā«| 45 - 60% [Moist] |Ā» 70% [Wet] - [+00:03]: Checked the 3x3 veg tent. --- Wow mother growth is raging again! --- Really wish I can flip these ladies to flower, but don’t have the space. --- Plan to start another round of mother cycling soon. Will probably super-crop tomorrow. - [+00:04]: Checked on the propagation dome (in the 3x3), --- To refresh the air, lifted the top off for a bit. --- Wow clones are growing! --- Heady OG is definitely going through some sort or rooting issue, but growth is still green. She is now starting to show signs of yellowing, so there may be roots, but not sure. --- On the flipside, TKO is crushing it! She looks healthy and perky! The yellowing of the lower growth along with the healthy and perky top growth means there’s successful rooting and the clone is translocating nutrients to produce root growth. I think. --- Using a spray bottle, misted the top growth with RO water. --- Oh! Also continuing to research tissue culture (TC) and have decided to give it a potential go. --- Shout out to Laur and ā€˜Plants In Jars!’ Her incredible YT videos have been a huge game changer and a highly recommend free resource for anyone trying to get into DIY tissue culture! --- Pretty much now I think tissue culture is the solution to my mother plant issue. --- From the little I understand, tissue culture is basically an advanced form of plant cloning and can be done quite safely at home. --- If done properly, plants suspended in tissue culture can be propagated and maintained indefinitely until needed. --- Each TC sample is basically a mini self-contained mother plant pod. --- Once needed, a TC sample can be brought back to a clone-like state for planting into solo cups. --- Aside from the technical process (which is going to be fun to learn), the largest challenge is maintaining a sterile environment during propagation. --- Anyways! - [+00:10]: Checked the humidifiers. --- Tanks are still full and no leaks found. Day 04 - Thursday - 07/31/25 - Total Days: 109 ----------------------------------- Daily Averages ~[+01:00] - Temps: 83.5°F [28.6°C] - Humidity: 81.2% - VPD: 0.75 kPa - Soil %: [49, 36, 49, 46, 43, 43, 43, 44] ----------------------------------- - [08:42]: Checked on the 3x3 veg tent. --- Both growth and pots are looking great! - [08:43]: Checked on the propagation dome, --- Clones both look bad and good. --- Concerned about Heady OG, but TKO has been healthy and perky the whole way. - [08:45]: Time to check for roots. --- Heady OG had one tiny root. Not ideal, but was actually surprised to find any root growth. Nice! --- Woah! Nice! TKO is bursting with roots! She’s definitely ready to be transplanted! --- Decided to plant both clones. Hoping that Heady OG will do better in the soil. --- Time to transplant the rooted cuttings! - [09:13]: Took 2 used solo cups (has bottom corners cut for drainage) and labeled each cup (Heady OG BX1, TKO). --- Partially filled each with some fresh (dry) BuildASoil 3.0 potting soil. --- Made sure that the soil was well packed. --- Inoculated each cup with Great White mycorrhizae along with a bit of Beauveria Bassiana. --- Misted the dry soil with a bit of RO water (~3 sprays each). ------ Sprinkled 1/64tsp of Beauveria Bassiana Plus ------ Sprinkled 1/16tsp of Great White - [09:26]: Time to plant! One clone at a time, --- Placed each clone into solo cups (also removed the clone tag). --- Made sure each solo cup had enough room for more soil. - [09:32]: Inoculated each Coco Coin with Great White mycorrhizae. ------ Sprinkled about an 1/16tsp of Great White onto each Coco Coin. --- Made sure to get the top and sides evenly. - [09:35]: Gently filled each solo cup with more soil. --- Completely covered the top of each Coco Coin and made sure to tuck the sides fairly snug with soil. --- Evened out the top soil. Each Coco Coin is about 1/4-1/2 inch below the top soil. - [09:44]: Added some BuildASoil Organic Straw Mulch to the top. --- Using the small straw bits at the bottom of the bag is great for solo cups. --- Time to water! - [09:51]: Filled a measuring cup with 2 cups of RO water. ------ Added 1/64tsp of Quillaja Saponaria Extract [60] ------ Added 1/16tsp of Horticultural Coconut ------ Added 1/16tsp of Horticultural Aloe ------ Added 1/8tsp of Mycrobe Complete --- Mixed and poured the solution straight into a spray bottle. - [09:54]: Took the dry soil weight of each pheno before watering, ------ Heady OG (BX1) weighed 261.4g ------ TKO weighed 240.9g --- Marked the starting weight on the back of each cup. --- While on a scale, --- Gently misted the straw mulch of each cup. --- Focused on the straw and sprayed as evenly as possible. --- Misted 5-10 sprays. Waited a few seconds, then misted again. --- Repeated this process until both cups weighed at least 300g --- There was no runoff. --- Oops! --- Had to slightly extend the day period (Lights usually turn off at 10:00). - [10:04]: Took the weight of both phenos after watering, ------ Heady OG (BX1) weighed 301.2g ------ TKO weighed 301.4g --- Marked the saturated wet weight on each cup. - [10:12]: Placed both cups into the propagation dome. --- Removed the side extensions along with the plug tray and have the cups resting in the main drip tray. --- Have the lid and lights suspended above the tray (~00 inches). --- Also increased the propagation dome’s bar lights. ------ Increased the intensity from 1 to 5 - [10:13]: Took general PPFD readings. ------ Clones were around 109 μmol/m²/s which gives a DLI of 7.06 mol/m²/d under an 18/6 light cycle. --- Turned the lights off and made sure that both were back to an 18/6 cycle (on from 16:00 to 10:00). --- Ca-Caw!! Done! --- Not worried about TKO, but getting concerned about Heady OG. Not sure if she is going to make it. - [14:23]: Checked on the Lacto Serum. --- The solution has been resting for 2 days. --- Smelled the rice wash solution through the paper towel. --- The odor has changed from the original flour odor but has not become sweet. However, the smell is getting there. I think. --- Will continue to check and still waiting until the solution changes into a sweet aroma. - [19:24]: Night check on the 4x4 tent. --- Ooo yea! Growth is looking beautiful and raging along! --- Both Heady OG and TKO are thriving with growth! The stretch is definitely ramping up! - [20:08]: Trained and tucked the top growth. --- Mainly focused on the Heady OG and spread her out a bit more evenly to fill in more squares. --- Wow TKO by far going to be the largest plant I’ve grown in a 4x4 tent. She’s extremely dense with healthy tops shooting up everywhere! --- Since I’m not tucking TKO anymore and she is getting taller, need to take readings and measurements. - [20:38]: Took the weekly general PPFD readings. ------ Heady OG (BX1 #1) was still around 361 μmol/m²/s which gives a DLI of 15.60 mol/m²/d under a 12/12 light cycle (at ~326.5W). ------ TKO was around 365 μmol/m²/s which gives a DLI of 15.77 mol/m²/d under a 12/12 light cycle. - [20:40]: Took the weekly height and light distance measurements. ------ Heady OG (BX1 #1) was still about 21.5" tall. ------ TKO was about 26" tall. ------ Heady OG (BX1 #1) was about 31" away from the grow light. ------ TKO was about 27" away from the grow light. --- Since Heady OG is clearly struggling to root, going to take a few more lower cuttings to make sure the genetics survives. - [20:52]: Filled a measuring cup with 1.5 cups of RO water. ------ Added 1/8tsp of Horticultural Aloe --- Mixed the solution and poured it straight into a solo cup. - [20:56]: Time to take the cuttings! --- Using a pair of trimmers (AC Infinity), --- Gently cut 2 small cuttings from Heady OG (BX1 #1). Took lower branches that did not reach the top canopy level. --- Trimmed and cleaned most of the nodes leaving the top node or two. --- Did not cut any leaf fingers. --- Made sure the tip of the stalk had a slanted cut (about 45-degree). - [21:02]: Placed both cuttings into the cup of aloe solution. --- Also made sure the cuttings were tagged. Not really necessary, but why not. - [21:05]: Placed the cup into the 3x3 veg tent. --- Have the cup resting in the propagation dome next to the planted clones. --- Going to let these cuttings soak for a day before refreshing with straight RO water. --- Let the two-day soak begin! - [21:06]: Checked the Ecowitt soil moisture sensor data: ------------------ [ 4x4 MAIN TENT ] --------------- ------ 47% - [CH01 FT Ā» G30 - Heady OG BX1 #1] ------ 36% - [CH02 FB Ā» G30 - Heady OG BX1 #1] ------ 50% - [CH03 BT Ā» G20 - TKO] ------ 46% - [CH04 BB Ā» G20 - TKO] ------------------ [ 3x3 VEG TENT ] ---------------- ------ 44% - [CH05 BL Ā» GR7 - Garlic Budder OG#1] ------ 41% - [CH06 BR Ā» GR7 - Garlic Budder OG#2] ------ 43% - [CH07 FL Ā» GR7 - Gorilla Goat #1] ------ 46% - [CH08 FR Ā» GR7 - Gorilla Goat #2] --------- Veg: 38% - 45% | Flower: 45% - 55% --------- General: 30% [Dry] Ā«| 45 - 60% [Moist] |Ā» 70% [Wet] - [21:08]: Checked the 3x3 veg tent. --- Looking great in the mother tent! --- Was planning on defoliating and taking new veg cuttings, but since Heady OG is struggling, going to wait a bit longer to start the mother cycling process. - [21:18]: Super-cropped and trained the top growth. --- Lowered the canopy a good 4-5inches. - [21:19]: Checked on the clones, --- Looking great! --- Heady is still struggling, but hoping she’ll perk up soon. --- TKO is looking perfect! She’s perky and I have no doubt that she’ll root just fine. --- More worried about Heady OG. - [22:08]: Checked the humidifiers. --- Tanks are still full and no leaks found. Day 05 - Friday - 08/01/25 - Total Days: 110 ----------------------------------- Daily Averages ~[+01:00] - Temps: 83.4°F [28.6°C] - Humidity: 83.0% - VPD: 0.68 kPa - Soil %: [51, 36, 49, 46, 42, 43, 43, 45] ----------------------------------- - [22:10]: Night check on the 4x4 tent. --- Ca-Caw! Let’s go ladies! Wow the garden is packed and looking incredible! --- Heady OG and TKO are looking perky and stretching through the netting with nodal growth everywhere! --- By far my healthiest grow cycle yet! - [22:21]: Did a bit of training. --- Slightly tucked and spread Heady OG a bit more to fill in the front left quadrant. --- Just going to let the rest grow! - [22:25]: Checked the Ecowitt soil moisture sensor data: ------------------ [ 4x4 MAIN TENT ] --------------- ------ 52% - [CH01 FT Ā» G30 - Heady OG BX1 #1] ------ 36% - [CH02 FB Ā» G30 - Heady OG BX1 #1] ------ 54% - [CH03 BT Ā» G20 - TKO] ------ 46% - [CH04 BB Ā» G20 - TKO] ------------------ [ 3x3 VEG TENT ] ---------------- ------ 44% - [CH05 BL Ā» GR7 - Garlic Budder OG#1] ------ 41% - [CH06 BR Ā» GR7 - Garlic Budder OG#2] ------ 46% - [CH07 FL Ā» GR7 - Gorilla Goat #1] ------ 48% - [CH08 FR Ā» GR7 - Gorilla Goat #2] --------- Veg: 38% - 45% | Flower: 45% - 55% --------- General: 30% [Dry] Ā«| 45 - 60% [Moist] |Ā» 70% [Wet] - [22:34]: Checked the 3x3 veg tent. --- Ooo yea! The veg garden is beautiful and wow growth is raging! --- Wow! The canopy is already stretching upwards and will probably need to train again tomorrow. --- Checked on the clones, --- Nice!! Growth is all around healthy and looking great! --- Heady OG looks less droopy. I think. --- TKO is looking perfectly healthy and already getting taller! Wow! --- Nice! Both Heady cuttings are looking healthy and not droopy. - [22:38]: Time to swap the aloe water out! --- Replaced the solo cup with a clean one filled with fresh RO water (1.5cups). --- Going to let this soak for another day before transplanting into Coco Coins for rooting. - [22:44]: Checked the humidifiers. --- Tanks are still full and no leaks found. Day 06 - Saturday - 08/02/25 - Total Days: 111 ----------------------------------- Daily Averages ~[+01:00] - Temps: 82.6°F [28.1°C] - Humidity: 83.2% - VPD: 0.66 kPa - Soil %: [50, 36, 50, 47, 42, 43, 43, 45] ----------------------------------- - [07:59]: Quick morning check on the propagation dome (in the 3x3 veg tent). --- Ooo yea! The clones and cuttings are looking healthy and green! --- Heady OG (BX1 #1) is droopy and seems to be recovering. I think? --- TKO is looking healthy and looking beautiful! --- Nice! Both Heady OG (BX1 #2 and #3) cuttings are looking good! These cuttings are quite a bit smaller than the last round, but they are healthy and green! - [20:06]: Night check on the 4x4 tent. --- Ca-Caw! Wow the canopy is thriving! --- Heady OG is looking healthy and perky! --- Wow! TKO is stacking up with nodal branching and crowning is everywhere with perky tops! - [20:13]: Did a bit of tucking on the front left quadrant. --- Could have trained Heady OG another week in veg before flipping to flower, but oh well. TKO needed to be flipped. - [20:32]: Checked the Ecowitt soil moisture sensor data: ------------------ [ 4x4 MAIN TENT ] --------------- ------ 45% - [CH01 FT Ā» G30 - Heady OG BX1 #1] ------ 36% - [CH02 FB Ā» G30 - Heady OG BX1 #1] ------ 66% - [CH03 BT Ā» G20 - TKO] ------ 47% - [CH04 BB Ā» G20 - TKO] ------------------ [ 3x3 VEG TENT ] ---------------- ------ 47% - [CH05 BL Ā» GR7 - Garlic Budder OG#1] ------ 44% - [CH06 BR Ā» GR7 - Garlic Budder OG#2] ------ 42% - [CH07 FL Ā» GR7 - Gorilla Goat #1] ------ 43% - [CH08 FR Ā» GR7 - Gorilla Goat #2] --------- Veg: 38% - 45% | Flower: 45% - 55% --------- General: 30% [Dry] Ā«| 45 - 60% [Moist] |Ā» 70% [Wet] --- Needed to swap out the batteries for TKO’s top soil sensor (CH03). --- Apparently there is a slight flaw with the programing on the WittFlows. Since the watering function is based on the channel and not the sensor, when TKO’s top sensor cuts out, the new CH03 (which is TKO’s bottom sensor) takes over. --- Anyways, - [20:38]: Checked the 3x3 veg tent. --- Veg garden is looking beautiful and wow top growth needs more training! - [20:53]: Super-cropped the top growth a bit. --- Lowered the canopy a few inches. --- Growth is getting out of control! Wow! Need to take cuttings soon to start the cycling process. --- Anyways! - [20:54]: Checked on the clones, --- Wow clone growth is looking very good! --- Heady OG seems to be recovering nicely in the soil and I’m getting more confident that she’s going to make it. Nice! --- TKO is looking great! She’s going to root and will be ready for transplant in a week or so. --- Both Heady OG cuttings are looking healthy and ready to be rooted! --- Time to plant the second round of Heady OG (BX1) cuttings! - [21:13]: Filled a measuring cup with 1.5 cups of RO water. ------ Added a pinch of Quillaja Saponaria Extract [60] ------ Added 1/64tsp of Horticultural Aloe ------ Added 1/32tsp of Mycrobe Complete --- Mixed the solution thoroughly. - [21:17]: Dropped 2 Coco Coins into the measuring cup. --- The coins immediately started to expand. ------ [ ~10 MINUTES LATER ] --- Took each fully saturated Coco Coin and temporarily placed them in half-cut solo cups. --- Using a squeeze bottle filled with Clonex, - [21:38]: Gently filled each pre-made hole with Clonex rooting gel. --- Time to plant the cuttings! - [21:43]: Using a pair of clean trimmers, made a final 45° cut. --- Also stripped and scrapped some of the stem’s outer membrane. --- To help with planting, gave each Coco Coin a squeeze to loosen the coco. --- Made sure to insert each stem straight and snug with the tip about a 1/4 inch from the bottom of the Coco Coin. --- Also secured the stem by pinching and pressing in the sides of the Coco Coin. --- After both cuttings were planted, --- Temporarily took the clones out of the propagation tray. Also placed the plug tray back in. - [21:53]: Placed both Coco Coins into the propagation dome’s tray. --- Since these cuttings are both identical cultivars, no need to really name. --- Added 1/2 cup of RO water to the bottom of the tray. --- Since I’m not using the dome lid (which is currently hanging above the tray), misted a couple of clear cups with RO water. - [21:55]: Covered both cuttings. --- Will need to mist the cups for the first few days in the tray. --- While rooting the cuttings, noticed that both clones (Heady OG BX1 and TKO) need to be watered already. --- Let’s go! - [22:02]: Took the initial starting weight range of both clones before watering, ------ Heady OG BX1 #1 Ā» 261.4g → 301.2g ------ TKO Ā» 240.9g → 301.4g --- General Solo Range: [Dry] Ā«| [Initial Cup Weight] + ~55-100g |Ā» [Wet] --- All phenos were last watered 2 days ago. --- Took the starting weight of both clones before watering, ------ Heady OG BX1 weighed 278.2g ------ TKO weighed 253.5g --- While on a scale, --- Gently misted the straw mulch of both cups with RO water. --- Focused on the straw and sprayed as evenly as possible. --- Misted 10-20 sprays. Waited a moment, then misted again. --- Repeated this process for both cups. --- There was no runoff. - [22:18]: Took the saturated weight of both clones after watering, ------ Heady OG BX1 weighed 278.2g ------ TKO weighed 253.5g --- Marked the final wet weight on the back of each cup. Also marked the watering date on the front. - [22:27]: Placed both phenos back into the tent. --- Done! Grow strong little ones! - [22:33]: Checked the humidifiers. --- Tanks are still full and no leaks found. Day 07 - Sunday - 08/03/25 - Total Days: 112 ----------------------------------- Daily Averages ~[+01:00] - Temps: 83.1°F [28.4°C] - Humidity: 83.0% - VPD: 0.68 kPa - Soil %: [48, 37, 49, 51, 42, 43, 43, 45] ----------------------------------- - [08:13]: Quickly checked on the propagation dome (in the 3x3 veg tent). --- Wow the clones are looking incredible! --- Heady OG is looking better and she’s still recovering. --- TKO is looking healthy and getting bigger. Nice! --- Both Heady OG cuttings are also looking healthy and look better than the first attempt (the recovering clone). --- Misted both cups with RO water. - [19:06]: Night check on the 4x4 tent. --- Ca-Caw!! Woah these ladies are definitely in full stretch! These girls are getting taller by the hour! Wow! --- Heady OG is looking beautiful and she is exploding with upwards growth! The middle of the canopy is basically at the same height as TKO. Incredible! --- Ooo yea! TKO is crushing it! Wow! She’s a good 7 inches above the scrog netting! --- The canopy is getting stacked with nodal growth! This garden is ramping up to be my best grow cycle yet! - [19:14]: Checked the Ecowitt soil moisture sensor data: ------------------ [ 4x4 MAIN TENT ] --------------- ------ 54% - [CH01 FT Ā» G30 - Heady OG BX1 #1] ------ 37% - [CH02 FB Ā» G30 - Heady OG BX1 #1] ------ 50% - [CH03 BT Ā» G20 - TKO] ------ 41% - [CH04 BB Ā» G20 - TKO] ------------------ [ 3x3 VEG TENT ] ---------------- ------ 41% - [CH05 BL Ā» GR7 - Garlic Budder OG#1] ------ 47% - [CH06 BR Ā» GR7 - Garlic Budder OG#2] ------ 47% - [CH07 FL Ā» GR7 - Gorilla Goat #1] ------ 49% - [CH08 FR Ā» GR7 - Gorilla Goat #2] --------- Veg: 38% - 45% | Flower: 45% - 55% --------- General: 30% [Dry] Ā«| 45 - 60% [Moist] |Ā» 70% [Wet] - [19:16]: Checked the 3x3 veg tent. --- Wow veg growth is raging with health and vigor! --- Mothers are looking beautiful and canopy is bushy! --- Nice! Clones and cuttings are looking healthy! --- Misted the cutting’s cups with RO water. - [19:46]: Back in the 4x4 main tent, --- Decided to tuck Heady OG a bit more and tried to spread the growth in the front left quadrant. --- Growth is going to be uneven but I think the left side will eventually even out. I think. - [19:54]: Quickly checked on the auto-watering system. --- System is still charged and no leaks or kinks found in the tubing. - [19:58]: Checked the humidifiers. --- Tanks are still full and no leaks found. --- Another week done and the garden is vibing and thriving! --- Next week will be the end of the stretch phase and as growth slows down, will hopefully see signs of budding. --- Ca-Caw! Stoked for this grow and can’t wait until these girls start to flower. - [+02:20]: TKO’s soil sensor cut out again.. --- Swapped out the unit with a new one and re-synced the channel to correct sensor ID. --- The old sensor got water damage. Going to try to dry it out, but really glad I have a couple spare units. --- Also glad that TKO seems to be taking the extra watering without any issue! May try to increase the soil moisture average next week for both pots. --- Anyways! Onwards Ensign! [END OF WEEK 15]
Likes
38
Share
Nothing special this week. I've defoliated the plants this week even though I've planned to to that next week, but it was just getting too messy. I'll need to defoliate even more later this week so that I can switch them to a 12H cycle on the 7th week, and not cause too much stress doing both things at once. Happy growing 🌿