
Likes
Comments
Share


@Jointjourney
Follow
This week, the plant continued to develop with no major issues. However, signs of a magnesium and calcium deficiency have started to appear, which may require adjustments in the nutrient schedule with Calmag. The plant was watered once with clear, pH-adjusted water to maintain a stable environment. A mild yet distinct aroma has also begun to emerge, hinting at the plant’s unique character as it matures. Overall, growth is progressing well despite the minor nutrient deficiencies.

Likes
8
Share

@Roberts
Follow
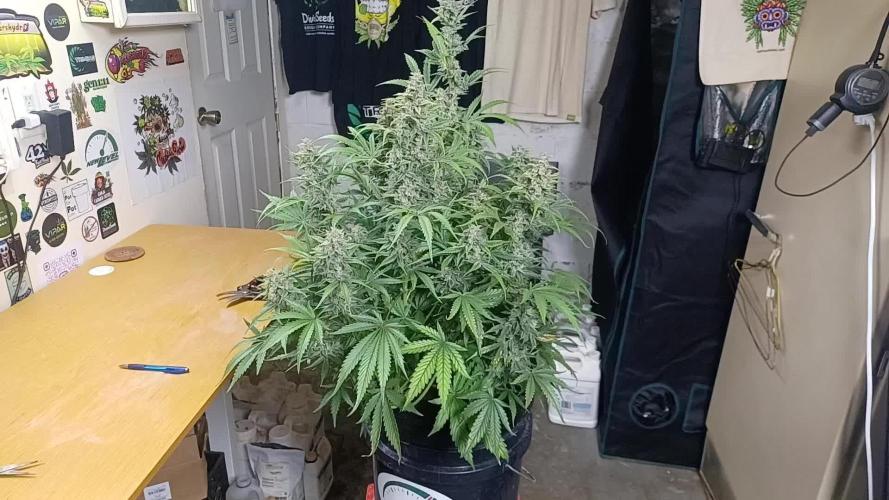
She is getting harvested today. She looks great and loaded in frosty flowers. She grew fast and well. Thank you Zamnesia seeds, Medic Grow, and Hon&Guan. 🤜🏻🤛🏻🌱🌱🌱
Thank you grow diaries community for the 👇likes👇, follows, comments, and subscriptions on my YouTube channel👇.
❄️🌱🍻 Happy Growing 🌱🌱🌱
https://youtube.com/channel/UCAhN7yRzWLpcaRHhMIQ7X4g.

Likes
12
Share


@2Stones1Bird
Follow
Checkout my Instagram @smallbudz to see the Small budget grow setup for indoor use, low watt, low heat, low noise, step by step.
30/11/2019 - Struggling with high humidity, change led strip color from red,green,blue to red and green.
1/12/2019 - Checked and adjusted the light distance.
2/12/2019 - Pot feels light and dry, gave her 1,5l PH 6.3 with a 1/4 of recommended Biobizz nuts, notice almost no run off.
3/12/2019 - Finally her first pistil appeared on the main stem I was starting to get worried.

Likes
36
Share


@brownbae420
Follow
Day 49
- Gummi Bears is doing great
- Wiz Stash Remix is OK
- Gorilla Cookies is Hungry and slumping
- Change cycle last week to 18/6
- Vibe: 😕
Day 30 - 3B OG x Samsquanch
- LST
- FIM - not on purpose
- growing well
- Feeding with confidence
- Vibe: 😍
Day 51
- All plants are PRAYING HARD
- Coloring improved
- No watering today
- Defoliated
- Vibe: 😇🙏
Day 52
- Plants are still lime colored
- Leaves are showing a deficiency of some sort
- Watered with 1tsp cal/mag
- All 3 flowering ladies wanted 1 gal of water each
-- Gorilla Cookies - 1430 ppm
-- Gummi Bears - 1260 ppm
-- Wiz Stash Remix - 1070 ppm
- Vibe: 😵
Day 33 - 3B OG x Samsquanch
- Current week Timelapse
- Vibe: 😍
- Readings
-- Lights 18/6 - Level 9
-- Temp: 70 (ideal) | 70.0 (avg)
-- Humidity: 55% | 53.5%
-- VPD: 1.1 | 1.14 kPa
- Vibe: 😇
"Life is like riding a bicycle, to keep your balance, you must keep moving." — Albert Einstein


Likes
22
Share


@daggaDNA
Follow
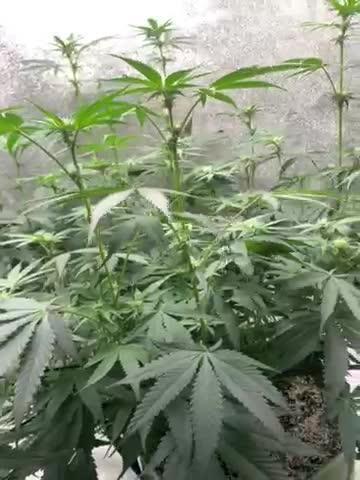
Ending the first week and entering the 2nd week leaving my plants as I'm off to Mary Jane Berlin. I'll be absent for 9 days so I'm facing the challenges how to make sure they'll be okay when I'm back.
As you can see I'm saying goodbye from perfect canopy with 9 plants as I've found 3 males that needed to be removed in order to prevent any polination during my absence. I'm eager to see what will happen when I'm back but for now I need to be in Berlin meeting some of you amazing people from the community.
Hopefully the remaining 6 are females and they will wait for me in a good state. I'm leaving them in the worst possible moment as they are stretching, showing sex, and weather forecast is extremely hot. This makes my runs unique with all the challenges we are facing each time. Who said growing is stress free? 😂💚
Likes
27
Share


@Frosty_farm
Follow
So at day 22 I got a small grow tent (36"x20"x63" because it's starting to get cold outside and plant was in a not so insulated shed. Hopefully my grow light will keep her warm enough for now. I will eventually have to invest in a small space heater with a thermostat. She's been though a lot of obstacles (temperature, humidity etc.) But I must say she's looking a lot better. I am open to any suggestions and thanks to the guys that gave me some info. I'm looking to get a cheap efficient fix for heating for my grow tent, if anyone have any suggestions please let me know. Thanks
Day 23......so my little grow tent is is doing it's job. Temperature is staying at about 78 to 82° so I'm a little happy. Still running grow light constantly until I figure out a way to heat efficiently. I do notice some water inside my tent but I do have a an inlet fan coming soon but I might just use it as an exaust. Day 24 bigger and prettier. She growing, I guess I'm doing something right😊. Day 25...... installed an exaust fan because I was getting sweat inside my tent because it's (my grow tent) is in a shed and with the heat inside the tent and the temp in the shed. Hopefully this helps my situation. I also got temperature sensor hooked up to a heated bulb so we'll see where this goes. But my plant is growing fine for now and I'm actually seeing some growth. Let me know what you guys think.

Likes
6
Share


@Elguacho420
Follow
Buenas a tod@s.... Séptima semana de estás green poison de sweet seed.. las veo bien, fuertes y engordando, rico aroma y parece q bastante recina, no quiero anticiparme a nada, faltan unas semanas y van a engordar algo más, es verdad q a mí parecer creo q las pasé a flora antes de tiempo( errores de novato ese y otros mas) pero puede ser mi parecer, pero podría haberlas dejado crecer algo más en su etapa anterior, apuntado para el próximo cultivo....💪🏻 X lo demás todo en orden, temperatura, humedad, pH, luz y nutrientes... Es verdad que las variedades pueden prometer mucho más, si hay carencias es x falta de experiencia la cual se aprende paso a paso🙏🏻 nos vemos en unos días, buenos humos para tod@s 🔥💨💨💨🏻😎⚕️
🇦🇷🤝🏻🇪🇦

Likes
4
Share


@LoganatorDude
Follow
Day 15
Smooth sailing so far! I’m happy with her progress, and excited to see her potential. I think I really like autoflowers :)
💪

Likes
3
Share

@zenderman
Follow
16/6/26.
day 15 of flowering.watered with all set of nutrients.
watering once in two days(4,5l on 20 l pot) with filtered and remineralised water PH6.0(twice only water,1-with nutrients)

Likes
14
Share


@Smile_gan
Follow
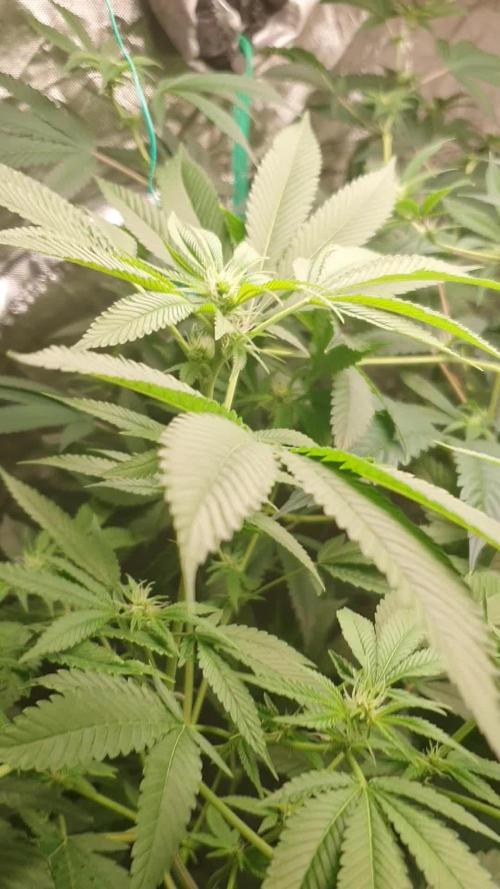
This week
BCN start flowering stage.
Pineapple found little bit white hair on node that sign of female on a little plant size.
I decision to feed Flower Fuel and Myco+ to both BCN plant.
For Pineapple still feed same last week Fish hormone and Myco+
At this point i turn on 2x 100W LM301B again. So, Totally wattage increased to 440W


Likes
89
Share


@Gunnen
Follow
So another week and some more thickening and ripening. The smell is like blueberry on one and the others are sweet as well. Slightly different smell to each. Watering when dry still at pH 6-6.6 and monitoring overall plant trichomes. At this point it's autopilot to the end. No more feeding with slow release and will slowly flush the remaining food out next few weeks. I like my trichomes to have some amber, not too much but mostly cloudy with some amber. Seems like most will be dense, except one plant I've called corona virus. It has smaller buds but are really resinous and smelly. Cheers and happy growing!

Likes
96
Share


@CBD_Sweden
Follow
The growing cycle it self worked out as expected, except that the pH-level was way off from where it should be, and I found out a bit too late. Because of this the outcome of the harvest didn't say much about the potential of this strain, but as soon as I got enough time and space, she will get a new chance to shine.
----------------------------------------------------------------------------------------------------------------------------------
2018-02-27.
This is my review / smoke report of this lovely cbd flower.
There are rock hard buds and almost no give at all, even in those smaller buds.
When you grind it the scent will appear more than just smelling on the buds.
It smells a little weak of grass, hay, pepper, some spicy and sweet.
The taste is grass, soil, pepper and exceedingly sweet fruit.
The effect is directly, the thc feeling above the eyes and in the forehead.
A little light ringing in the ears and a dry mouth.
After 10 minutes, the cbd kicks in and one feels that the neck and shoulders begin to relax and the feeling continues down over the back and chest down to the stomach.
A calm and well-being is found in the body.
After 15-20 minutes it is down in the legs.
But in a strange way, you also feel like doing something, or meeting some friends and just sitting and talking about fun things.
It is a very well-balanced strain and it fits in all sorts of contexts.
I also think it might be good for someone who needs something that makes you more social and dampens enough anxiety and rushing thoughts effectively.
I think this is a lovely strain and I highly recommend it to everyone but especially for more inexperienced people who want to soften with a pleasant medicine.
Likes
13
Share

@Gram_Solo
Follow
We got some big work to keep these 4 away from touching light, looking at raising the light somehow
I'm on it!
Added bud ignitor and bloom this week
Going to do more lst for 1 more week and hopefully they stop stretching 😅
Likes
2
Share


@gr3g4l
Follow
Parece que irán sobrados de tricomas, no tengo por que sufrir mucho por esto. El olor a la par que los tricomas, se huele cada vez mejor y se ven más tricomas.
Esta semana ya dejaron de crecer como lo hacian y se dedicaron más a engordar los cogollos.
Todas las ramas fueron sujetadas a los tutores de manera que no se tuercen cuando engordan los cogollos.
Likes
2
Share


@Luke_Lee
Follow
———————————————
WEEK 9 / DAY 58-64
BLOOM WEEK 2 / DAY 8-14
Mars Hydro FC-E3000
Floragard Professional GrowMix
11L fleece bags
Light: 50cm
Schedule: 12/12;
PPFD: 875umol/m2/s
DLi: 38mol/m2/d
20° C - 65RH
2L per Plant
Hesi Bloom Complex (5ml/2L water)
Hesi BOOST (2ml/2L water)
PH 6,5
Fan, extractor and pump ON 24/0.
————————————————————
- DAY-58 / Bloomday-08
The second week of flowering begins. The plants are doing very well so far and are developing magnificently. They have gained a lot of leaf mass since the time change.
The light has been adjusted PPfd: 875 / DLi: 38.
- DAY-59 / Bloomday-09
Today each plant was watered with 2L of water with 4ml Hesi Bloomcomplex and 2ml Hesi BOOST.
- DAY-62 / Bloomday-12
Today, at the end of the second week of flowering, the plants were little defoliated. They were then each watered with 3 liters of water with 2 ml HESI BOOST and 4 ml HESI Bloomcomplex.
- DAY-64/ Bloomday-64
The last day of the second flowering week.
Likes
14
Share


@eldruida_lamota
Follow
Vamos familia quinta semana de floración de estás Punch Pie de RoyalQueenSeeds .
Que ganas tengo de ver el progreso de esta variedad, las plantas están sanas, se ven con buen color.
La cantidad de agua cada 48h entre riegos, nutrientes de la gama Agrobeta.
Esperaremos que no me suba mucho la temperatura , por el momento se mantiene entre 26-27 así que lujo.
Esta vez me pasé un pelín con los productos pero echaré agua destilada y en unos días apañamos.
Estas próximas semanas veremos cómo avanzan y progresan estas flores.
Mars hydro:
Code discount: EL420
https://www.mars-hydro.com/
Agrobeta:
https://www.agrobeta.com/agrobetatiendaonline/36-abonos-canamo
Hasta aquí todo, Buenos humos 💨💨.
Likes
12
Share


@Jays_Not_Here_Man
Follow
Transplanted the ladies this week! Moved them into a 4 gallon pot, I plan on letting them get settled and flipping to flower soon.
Temps were good this week, RH was steady at about 60%. No big surprises with the transplant, however it did take them a day or two longer than my typical recovery time.

Processing
Likes
20
Share


@Easygrower
Follow
Hello growers day 29 on the balcony with the gorilla glue auto I don’t think she likes living on the balcony not much growth for day 29 but she’s going in the tent soon there’s nearly space for her she will be a lot happier there I’m just bending her over for now no pistols showing yet with is good for me as I want her to get abit bigger so until next week be safe and happy growing ✌️
