


Likes
Comments
Share


@CanarianGrow92
Follow
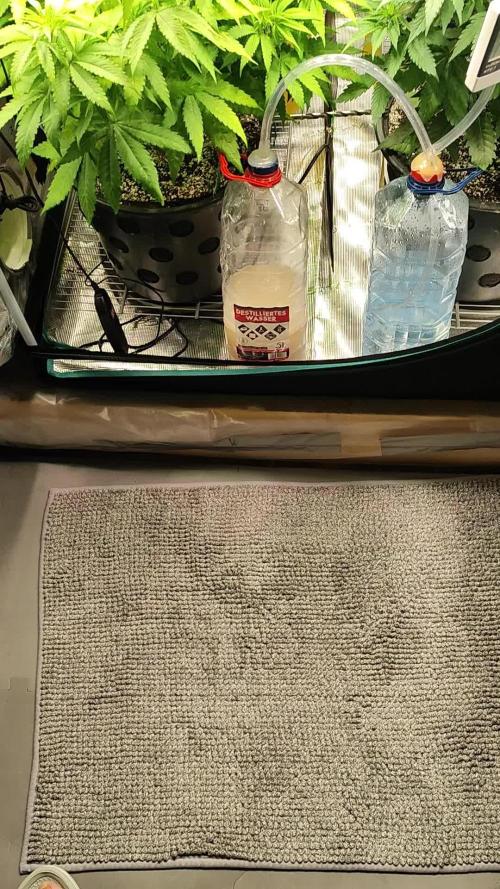
Perfect strain to grow, easy, fast and sweet as sugar totally covered in trichomes.
The plants showed a very equaled and stable genetics and are very generous with a little care, this strain is almost like walking directly into a dutch candy shop with all kind of winegum smells, simply perfect.



Likes
15
Share


@420keef
Follow
Buds are starting to fatten up! Can’t wait for the outcome, the smell is so strong and fruity! I love it, i think i will be using these nutrients more in the future!

Likes
10
Share


@PEANUTBUDDA
Follow
I'm still working out how much water to give, and I've probably under watered. The heat wave has driven the temps up, but these plants are still growing.
Started flowering around day 23. Tied them down to try to get more light to the lower flower sites.
Still haven't decided what to feed during flower, other than Big Bud. Any recommendations are welcome!

Likes
38
Share

@Kirsten
Follow
the plant is not looking good, as you can see. The bleaching on the leaves, I think it's light stress. If you have any ideas let me know in the comments.
I'm sure it will pull through and perk up soon. It's a little odd, but let's see what I can do.
Here's what I did this week.
11.7.25:
I watered with 1ltrs of dechlorinated water PH'd to 6.6 containing the following nutrients;
💜 1ml Ecothrive Trace
💜 1/4 TSP Ecothrive Biosys
PH: 6.6
PPM: 400
14.7.25;
I watered with 1L of dechlorinated water PH'd to 6.3 containing the following nutrients;
💜 1/4 TSP Ecothrive Biosys
PH: 6.6
PPM: 373
16.7.25:
I watered with 1L of dechlorinated water PH'd to 6.5 and the following nutrients;
💜 1.5ml Ecothrive Trace
💜 1/4 TSP Ecothrive Biosys
PH: 6.5
PPM: 363
As always thanks for stopping in this week, and let me know what you think about the bleaching 😊💚✌️🍃🤞

Likes
7
Share

@AlpenZilla
Follow
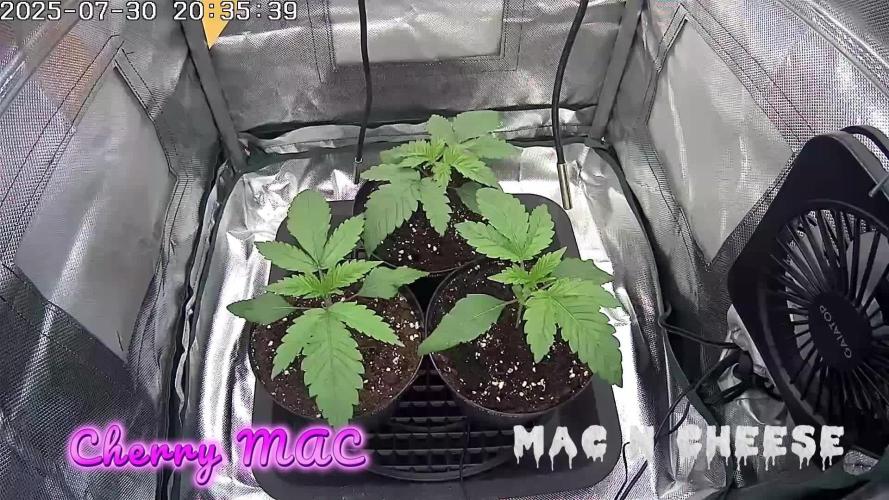
🏆 Harvest Report – MAC n Cheese
🌱 Strain summary:
MAC n Cheese delivered a solid mid-range yield with strong structure, excellent trichome coverage, and a clean fade during flush.
📦 Dry yield:
106.97 g of trimmed, dry buds
🌿 Plant traits:
• Compact structure with a balanced canopy
• Aroma: a mix of cheesy and cookie-like notes, slightly spicy with a creamy undertone
• Flush was clean and effective – no signs of stress or imbalance
• Buds were heavy, resinous, and matured evenly across the plant
📝 Final verdict:
A reliable strain with strong visual appeal and consistent growth. Very manageable, even in the final weeks, and responded well to EC control and light defoliation.
Terp profile leans toward dessert-like funk – definitely a keeper for future runs!
💧 Grown with:
Advanced Nutrients Masterline (pH Perfect)
Plagron Lightmix / Coco (80/20 blend)

Likes
Comments
Share


@Casa_das_Arvores
Follow
Olá amigos, obrigado por seguir meu diário!
Siga meu perfil, deixe seu like, comentário ou pergunta, ficarei feliz em ajudar se puder.
Mais uma semana demonstrando uma deficiência que me parece ser Magnésio, mas é sempre complexo quando se trata de coco porque o equilíbrio entre K, Ca, Mg e Fe é ainda mais complexo neste tipo de meio. O fato é que esses clones foram retirados com urgência sem que eu pudesse selecionar a mãe antes, e a planta mãe apresentou essa deficiência o ciclo inteiro e não havia nada que eu pudesse fazer para corrigi-la, então devo estar condenado a isso novamente. Vivendo e Aprendendo!
Fiz um ajuste na nutrição para poder testar. O objetivo é conseguir entregar o ppm de cada elemento bem próximo do feedchart Advanced Nutrients, mas usando fertilizante mineral muito mais barato e mais acessível no meu país, e algumas sobras que tenho da
@casadasarvoresgrow

Likes
9
Share


@Dthebudguy
Follow
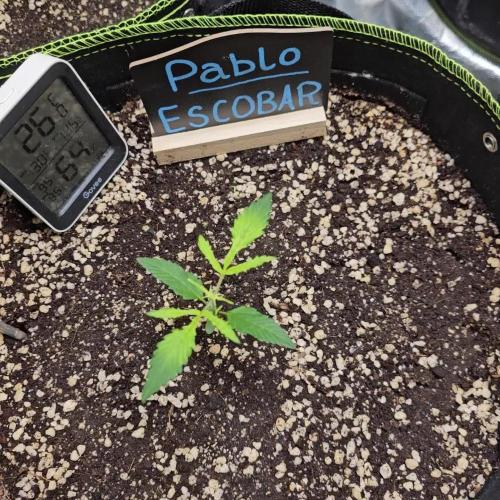
Pulled the plug on the small plants and putting effort into Pablo Escobar and Montreal auto .
Official grow diaries for each starting soon
Likes
11
Share

@Mannirumpel420
Follow
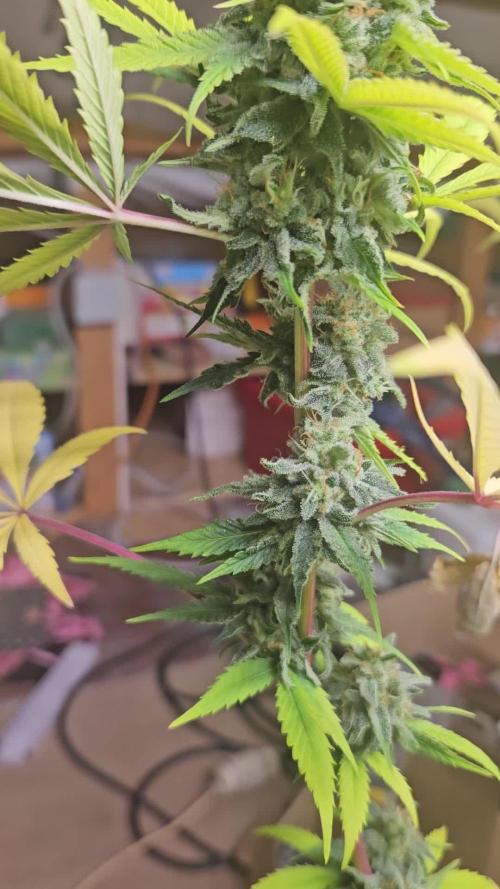
Sie hat unfassbar kompakte Blüten,obwohl ich ihr keinerlei Nährstoffe gegeben habe.Ich bin wirklich froh,dass ich von diesem strain stecklinge genommen habe.Ich werde mir ihre Entwicklung noch eine Woche anschauen und dann entscheide ich ob ich ernte. Heute startet der 50. Tag der Blüte und angegeben sind mindestens 63. Ich werde jedoch abwägen ob nicht schon etwas früher ernte,um dafür das Risiko für Schimmel klein zu halten. Sie riecht sehr stark nach Zitrone und ich kann es kaum abwarten sie endlich zu probieren.😋
Sie hat noch ein paar weiße Härchen,was bedeutet sie schwillt wahrscheinlich noch etwas an.An sich sind die Blüten schon Top Qualität und ich werde denke ich diese Woche ernten,wahrscheinlichin 5 Tagen.Da Ich sowieso noch Klone von ihr habe ist es nicht so schlimm,wenn ich etwas verfrüht ernte.

Likes
9
Share


@DaisyNabis
Follow
aplique preventivo de la semana, mis bellas han ido creciendo paulatinamente,manstengo hidratadas con agua y solo alimento una vez a la semana.


Likes
27
Share


@BoytzzBudzz
Follow
Yoooo!
Welcome back 🙌🏼
Just a quick update for week 7 of flower. Plants looking incredible. Zkittlez is really packing on the frost now and starting to develop some lovely colours. The Runtz seems to be continually packing on size and developing - most of the trichs are still clear but I’m seeing cloudy and a few amber ones here and there, so I’m looking to get the flush going in a few days time.
Thanks for stopping by!
Cheers 🤟🏻


Likes
10
Share


@CanadianFillmore
Follow
Start of week 6! Week 5 went well, the girls are all very sticky and smell incredible! The super lemon haze continues to need extra feeding, she's a hungry lady! Both blueberry plants are packing on a lot of weight as the branches are bending and twisting, I tried them up to give them extra support.

Likes
74
Share

@RockoCalenberg
Follow
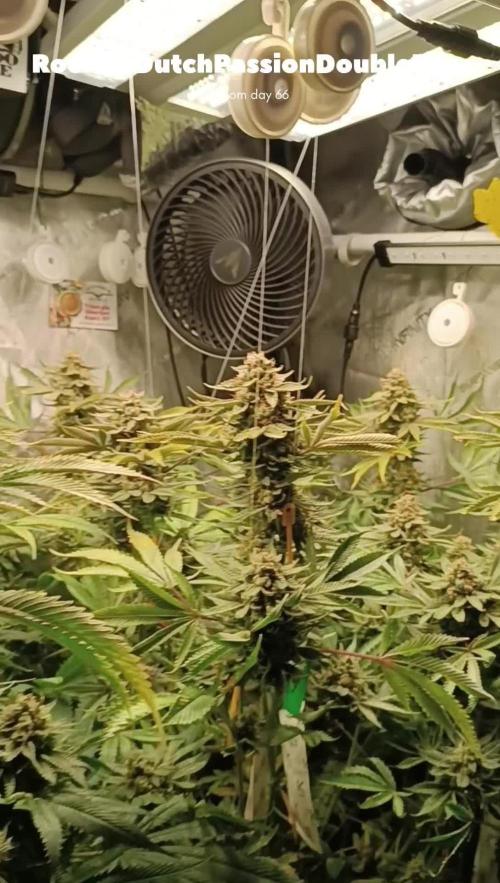
Blütetag 66 / Tag 126 –
Final Ripening – Kush bereit, Gusher kocht noch
Der Dutch Passion Double Run geht jetzt klar in die finale Reifephase.
Beide Pflanzen zeigen sehr deutlich ihre genetischen Unterschiede – vor allem beim Reifetempo. Während die Triangle Sherbet Kush schon stark nach Ernte aussieht, lässt sich die White Gusher 33 noch etwas Zeit.
🌡️ Klima
Klimatisch wurde es diese Woche wieder etwas kühler und feuchter.
Das merkt man im Zelt sofort: Die Luftfeuchtigkeit steigt schneller und der VPD wird etwas schlechter.
Ohne Klimaanlage lässt sich das nicht immer perfekt ausgleichen, aber in dieser späten Phase dürfte das die Pflanzen nicht mehr wesentlich beeinträchtigen.
🌿 Pflanzenstatus
Beide Pflanzen befinden sich sichtbar im Endspurt, allerdings mit unterschiedlichem Tempo.
Die Triangle Sherbet Kush wirkt inzwischen nahezu ausgereift. Die Buds sind massiv angeschwollen, dicht und schwer. Viel Wachstum passiert nicht mehr – sie konzentriert sich jetzt hauptsächlich auf Reife und Harzproduktion.
Auch die Blattstellung zeigt das deutlich: Viele Fächerblätter stehen im typischen Kanu-Modus und wirken fast unbeweglich. Die Pflanze signalisiert ziemlich klar, dass sie langsam fertig ist.
Die White Gusher 33 dagegen braucht noch etwas Zeit. Sie wirkt insgesamt etwas aktiver und schiebt stellenweise sogar noch leicht nach, obwohl einige Buds schon recht weit aussehen.
Struktur / Genetikvergleich
Gerade jetzt zum Ende wird der genetische Unterschied besonders sichtbar.
Die Triangle Sherbet Kush bringt klassische Kush-Struktur:
extrem kompakte, schwere Buds, dicht gestapelt und massiv angeschwollen. Die Blüten wirken fast wie gegossen.
Die White Gusher 33 ist ebenfalls sehr frostig und kompakt, wirkt aber insgesamt etwas struppiger und leicht blättriger aufgebaut. Zwischen den Buds sitzt etwas mehr kleines Blattmaterial, und durch das leichte Foxtailing wirkt die Struktur lebendiger.
Kurz gesagt:
• Triangle Sherbet Kush: kompakte, schwere Kush-Buds
• White Gusher 33: etwas sativa-lastigere Struktur mit Foxtails
🔬 Blütestatus / Trichome
Bei der Triangle Sherbet Kush sind bereits einige bernsteinfarbene Trichome sichtbar. Viele Köpfe sind milchig, aber noch nicht vollständig durchgehend trüb.
Eigentlich wäre sie schon fast im Erntefenster, darf oben aber ruhig noch etwas weiter Richtung Bernstein gehen, damit auch die unteren Buds sauber ausreifen.
Die White Gusher 33 ist hier noch etwas zurück.
Milchige Trichome nehmen zwar zu, aber Bernstein ist noch kaum vorhanden.
Dazu kommt, dass sie stellenweise weiterhin Foxtails bildet – teilweise sogar an kleineren Buds, bei denen man dachte, sie wären schon fertig. Genau das macht das Timing etwas tricky.
Was beide Pflanzen aber deutlich gezeigt haben:
Diese Woche wurde noch einmal kräftig eingezuckert. Die Harzproduktion hat sichtbar zugelegt und der Geruch wird zunehmend stechender und intensiver.
💧 Pflege
Die Nährstoffphase ist abgeschlossen.
Gegossen wird jetzt nur noch mit klarem Wasser, damit die Pflanzen sauber in die Endreife laufen können.
⏳ Ausblick
Jetzt beginnt das klassische Ernte-Timing-Spiel.
Die Triangle Sherbet Kush wäre vom Gefühl her eigentlich schon bereit.
Die White Gusher 33 braucht dagegen noch ein wenig Zeit.
Darum heißt es jetzt: Geduld.
Eine Ernte in etwa einer Woche ist gut möglich –
es kann aber auch sein, dass die White Gusher noch etwas länger stehen bleibt.
Viel fehlt auf jeden Fall nicht mehr.
🏁 Wochenfazit
Kush ist bereit.
Gusher braucht noch.
Grow on 🌱
Rocko
Flower Day 66 / Day 126 –
Final Ripening – Kush ready, Gusher still cooking
The Dutch Passion Double Run is now clearly entering the final ripening phase.
Both plants are showing their genetic differences very clearly – especially when it comes to ripening speed. While the Triangle Sherbet Kush already looks very close to harvest, the White Gusher 33 still wants a little more time.
🌡️ Climate
The climate this week became a bit cooler and more humid again.
You notice that immediately in the tent: humidity rises faster and the VPD drops slightly.
Without an AC it’s not always easy to balance perfectly, but at this late stage it shouldn’t affect the plants too much anymore.
🌿 Plant Status
Both plants are clearly in the final stretch, but moving at different speeds.
The Triangle Sherbet Kush now looks almost fully matured. The buds are massively swollen, dense and heavy. There isn’t much growth happening anymore – it seems to focus mainly on ripening and resin production.
The leaf posture also says a lot: many fan leaves sit in the typical canoe position and hardly move anymore. The plant clearly signals that it’s almost finished.
The White Gusher 33, on the other hand, still needs a bit more time. She looks slightly more active overall and in some places she even keeps pushing a little more, although some buds already look quite advanced.
Structure / Genetic Expression
At this stage the genetic differences become especially visible.
The Triangle Sherbet Kush shows classic Kush structure:
extremely compact, heavy buds stacked tightly and swollen to the maximum.
The White Gusher 33 is also very frosty and compact, but overall appears a bit rougher and slightly leafier. There are more small sugar leaves between the buds, and the light foxtailing gives the flowers a more lively structure.
In short:
• Triangle Sherbet Kush: dense, heavy Kush buds
• White Gusher 33: slightly more sativa-leaning structure with foxtails
🔬 Flower Status / Trichomes
The Triangle Sherbet Kush already shows some amber trichomes. Many heads are milky, though not completely cloudy yet.
She’s basically already inside the harvest window, but it wouldn’t hurt if the top buds develop a little more amber so the lower buds can fully mature as well.
The White Gusher 33 is still slightly behind.
Milky trichomes are increasing, but amber is still rare.
She is also still producing some foxtails, even on smaller buds where you would think development was already finished.
One thing that became very obvious this week though:
Both plants got noticeably more frosty. Resin production clearly increased and the smell is getting sharper and more intense.
💧 Care
The nutrient phase is finished.
From now on the plants are only getting plain water as they move into the final ripening stage.
⏳ Outlook
Now it becomes the classic harvest timing game.
The Triangle Sherbet Kush feels almost ready already.
The White Gusher 33, however, still needs a bit more time.
So for now it’s simply about waiting a little longer.
Harvest in about one week seems possible –
but it could also be that the White Gusher stands a bit longer.
The finish line is very close now.
🏁 Weekly Summary
Kush is ready.
Gusher still needs time.
Grow on 🌱
Rocko

Processing
Likes
7
Share


@DrewbieDoobieNoobie
Follow
Week 5 of flower cotton balls are forming Starting the heavy flower feeding and using the rain rings on the pots see video, so far so good just waiting for these ladies to bulk up I have one light that is getting replaced on the next grow as is has some leds not lighting up so its running at 70% and the plant in the lower left corner is showing it its way smaller than the other 5,,, oh well, till next time be safe.


Likes
13
Share

@420DeepGrow
Follow
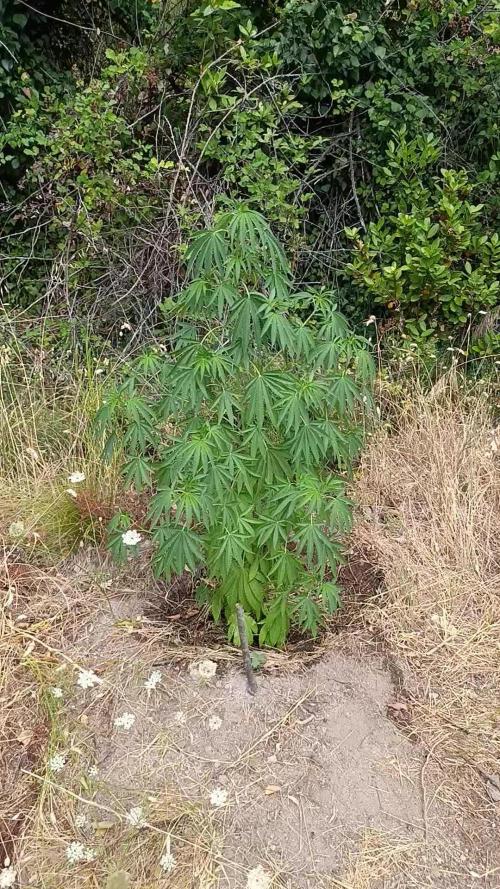
📆 Semana 2
El stretch alcanza su mayor intensidad. La planta continúa creciendo con rapidez, las ramas laterales se expanden y las primeras preflores ya son visibles en la mayoría de las puntas. La estructura queda prácticamente definida para afrontar la floración.
El consumo de agua sigue aumentando, por lo que mantener un riego constante y una nutrición equilibrada será clave para completar esta fase con el máximo vigor.
⚡ EC: 1.2–1.3
💧 pH: 6.2–6.5
🌡️ Agua: 20–23°C
🌫️ Humedad: 50–60%
💡 PPFD: Luz solar exterior
🌡️ Temp. ambiente: 20–32°C
🔥 Nota: La planta continúa aumentando su ritmo de crecimiento. Unos tallos fuertes y una estructura bien formada serán clave para obtener una floración abundante.
Seguimos creciendo fuerte 💪!
Likes
17
Share


@reirrac1
Follow
She’s a beast! As bushy as my gold glue from last round but 3x the heigh and size. I’ve had to go in for defol every week, and she’s still filling back up by the minute. A vast majority of the bracts are beginning to turn purple at the tips, leading me to believe this girl might turn purple before she’s done! Smells like sweet fruit and skunky cologne. Starting to fade here and there, so I’m increasing feed strength to mid-flower and letting her ride it out.

Likes
34
Share


@marihoochi
Follow
I am convinced that I've managed to avoid a nitrogen toxicity by monitoring the inputs and the runoff of individual pots. There is only 1 plant remaining whose runoff was 300 above inputs and was showing the curled, too-dark leaves . The plants look happy, yesterday I played some rocking Mozart for them and they loved it!
Today Oct 12 (Canadian Thanksgiving almost) is 2nd Day of Week 4 In Bloom and 87Days Old. I defoliated yesterday quite a bit; I've read that this is a no no as it takes energy to repair but I did it anyway, the plants reacted like they appreciated the haircut😶 I'll never know how it affected the buds. The buds are no longer hiding under the foliage as much👍 Took some of these pictures and video with only 1 light on - to try and show their "true" colour.
Inputs Temp 20, PH 6.3, EC 1.8
Runoffs 1 Pot 2.1EC, 6 Pots 2.0EC, 4 Pots 1.9EC, 4 Pots 1.8 EC, 1 Pot 1.7EC
Oct 16 - 32 Days In Bloom 91 Days -- Fed Again-Inputs: Temp 20, EC 1.8 PH 6.3
Run off: Temp 20, PH 6.3 EC 1.8, 1.9, 2.0 on all pots😊 First time using Enzymes; see if I notice anything. Smell has definitely increased in the last couple of days.😁
I am stoked on how these budlets have developed, the ladies are forming almost textbook style and right on time! (finally from providing proper nutrition and environment). Rails of goodness are starting. This has been the best indoor grow to date .

Likes
19
Share


@GoldenWeedGrower
Follow
Legend
Timestamp: 📅
Measures: 🛠️
Water: 🌊
Actions: 💼
Thoughts: 🧠
Events: 🚀
________________________________
📅 D29/V27 - 21/09/23
🛠️
🌊 1L
💼
🧠 She's growing very fast now and she looks healty. Maybe the silica made his job or maybe can be the CO2 dispenser effect ? We'll see.
🚀
________________________________
📅 D30/V28 - 22/09/23
🛠️
🌊
💼 I cropped the main bud by mistake and then topped it
🧠 It's ok, I have about 10-11 buds now to keep until the end
🚀
________________________________
📅 D31/V29 - 23/09/23
🛠️
🌊
💼 Mounted the SCROG. Made LST, big defolation and a couple of timelapse videos
🧠
🚀
________________________________
📅 D32/V30 - 24/09/23
🛠️
🌊 3L
💼
🧠 The total energy of the plant remain the same, so I expect (or better hope) a big grow of secondary buds in the next days. Let's see !
🚀
________________________________
📅 D33/V31 - 25/09/23
🛠️
🌊
💼 Added Rhino Skin to the RES
🧠
🚀
________________________________
📅 D34/V32 - 26/09/23 - and added water and nutes.
🛠️ EC is 1.0, pH 5.5.
🌊 6L of water and nutes
💼 Made LST with Timelapse
🧠 She seems ok 👌
🚀
________________________________
📅 D35/V33 - 27/09/23
🛠️ EC is 1.0, pH 5.5
🌊
💼 LST almost HST
🧠
🚀
