
Likes
Comments
Share


@PatriciaGant
Follow
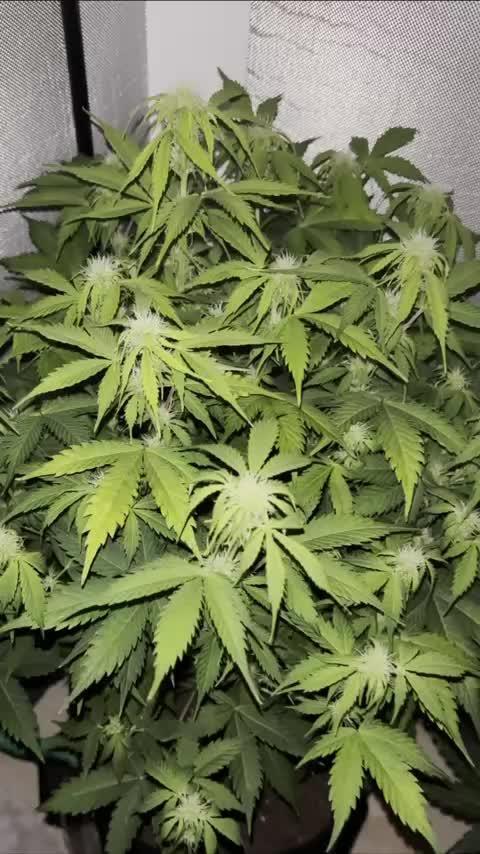
here we go the few last weeks of theflowering stage in the live of this little beauty, thx watching by have a nice grow. all nutrients are in ger section.

Likes
15
Share


@DailyhighclubNLyara
Follow
Still busy weeks lol,
The buds grew amazingly this week and I’m really happy with how dense the weed feels. Previous grown was under a Blurple 1000W (10W measured 😅) and vergeleken met de lamp die de dailyhighclub.nl aan mij heeft gegeven is dit 1000x beter. Dit licht komt gewoon zoals beschreven: DHCxAR1000 pro 110W Full Spectrum LED! Ja sowieso reclame hoort erbij en ik ben gewoon ontzettend tevreden met dit licht!
Ik probeer een zo budget mogelijke grow te kweken zodat iedereen zn eigen weed kan kweken. Autoflowers zijn bijna zo simpel als goede aarde an goed opletten op hoe je water geeft, liever te weinig dan te veel. Nou das niet zo moeilijk, zeg ik als lui persoon.
Maar DikkeToppenWilNietStoppen

Likes
37
Share


@Ferenc
Follow
Close to harvest these beauties... I have checked trichomes they are ready but I still give several days more or I week from now:) No more nutrition since week 15... I want to flush them properly:)


Likes
11
Share


@squirtle42
Follow
German:
Seit dem letzten Update ist nicht viel passiert.
Der ein oder andere Trieb ist noch ein wenig in der Höhe gewachsen.
English:
Not much has happened since the last update.
Some shoots have grown a little in height.
Likes
2
Share


@m1ndofAC
Follow
Started off week 2 of flowering on 11/19. All of the ladies look good with the Tangerine Dream being the only set of clones to start showing bud sights and not just pre-flowering. Did a significant amount of clipping and clipped most of the fan leaves on the main colas of my ladies and side branches too. I also began playing classical music for them!
True to it’s genetics my Tangerine Dreams are putting off numerous side branches with side branches coming off those branches! Since flowering my Cotton Candy has grown the most. Before flowering it was just barely half the height of my TDs and now they’re taller! As for the Chronic Thunder it’s always been the tallest but in flowering it’s focus has all been on the side branches without me even topping it.


Likes
12
Share


@AlexS
Follow
Week 8 day 51
1 day left to harvest the first one🤩🤩
I think the rest will be ready at day 56.
Processing
Likes
2
Share


Likes
15
Share


@RDWCGrowing
Follow
2/1/2024- Pre-Germination Activities Day 1
I have 21 weeks until final photo is do.. I took 3 seeds out of cold storage and will let them get to room temp for the next 48 hours before I go with Glass of water for germination. I have 3 beans because I will start from the very beginning helping ensure I present the best Pheno. This is going to be a fun one.. I am a few days away from being able to clear my tent out for this run.. I have a breeding run in right now and the Seeds are a few days away from being mature enough for me to take down the girls.
Once I get them down I will need to get my tent cleaned up and turned over right away. This is going to be close, I will have to time them to the water and into the tray at the right time.. because I will need to get lighting on them right away.. I have my 2X2 and my light ready incase I need to hold them in the cloning machine if the others are not done in the next few days.. Glad I have options that can stretch me out for a week or 2 to give me a little more time.
2/2/2024- Pre-Germination Activities Day 2
I checked on my breeding run to see how close the seeds are and if the tent is ready for me to clear and clean but alas I am still going to need a few days. I setup the emergency 2X2 and that should give me 2-3 weeks. The plan is to still wait one more day to allow the beans to warm up to room temp and then drop them in Water sometime tomorrow.
Form my Emergency 2X2 I have the following:
4" inline fan and carbon filter
Fan
VS-2000 light
2/3/2024- Germination Activities Day 0 - Dropped the Beans in.. Today is 0 day.. Go.. Go .. Go..
2/4/2024- Germination Activities Day 0-1 - Checked in on them this morning and no tap roots yet.. covered them back up and back in to the closet they went. I setup the Root Riots and the Seed tray for them. I Ensured my water that I was soaking the root riots in was PHed to 5.8 and I used RO water.
Afternoon Update: Checked on my Breeders and they are done. I started to harvest them, I took down the one I had reversed with STS and I took down the Black African Magic- All but one bud, I wanted to get some pics of that one today.
I was only able to get 2lbs into the Cannatrol because I had to be very careful to keep the bud from the plant that was treated with the STS separated from the other seeded bud that was pollenated from the plant I reversed.
Cannatrol could have held an additional 2oz of wet but not today. Ideally I need 1 more Cannatrol so I can take an entire Tent, but will figure that out. I put an additional 1.5lbs into the freezer to wait it's turn into the Cannatrol, I would have left it on the plant and taken it in 4 days when the dry cycle gets done but wasn't sure how much 2.2 lbs was equivalent to chopped and wet trimmed.
2/5/2024- Germination Activities Day 0-2 - Checked in on them this morning and 2 of them have very small tap roots out.. one still doesn't going to give them some more time. I will check in on them this evening and see if they are more open if so I will transfer the ones that are ready to their medium and seed tray.
2/6/2024- Planting Day TRUE Germination Day 0- Checked in on them this morning and all 3 of them have tap roots out. I broke the bottom of the tap root for #1 which was the biggest.. pretty sad.. I hope she survives.. I tried to be careful it just snapped off when I was trying to get it in the root riot right. Other than that all three are now in their in-between home in the 2X2 while if finish clearing and cleaning out their forever homes.
2/7/2024- Germination Day 1- Checked in on them and no surprise no sprouts yet. Sprayed the dome to moist it and light spray to the tops of the Root Riots.
2/8/2024- Germination Day 2- #3 is popped and it looks like #2 will be popped by this evening.. I got my second Cannatrol today so now I can take down the rest of the tent and get it into the dry/cure.
2/9/2024- Germination Day 3- #2 is popped as well.. so I have #2 and #3 up and still waiting to see on #1 but that might be a loss since I accidently broke off some of the Tap root when transplanting.
2/10/2024- Germination Day 4- #1 has Popped... We have ignition on all 3.. YAY!! I finished clean up and install of RDWC system, this time was unique the back left buckets 3 inch pipe wasn't seated correctly so I had to clean up about 12 gallons of water all of the floor. I also had two leaks coming from one of the Waterfall return junctions, this is why I do a full pressure test before I put anything in. I will continue to monitor it through tomorrow to ensure that I am good to go and then I will finish setting up the baskets and prepping the water to be ready for the ladies planting day!!!
2/11/2024- Germination Day 5- #1 Of course is going to be my trouble plant.. No matter what If she lives through planting in the system and making it, I think I might not cull her at all regardless, she has been such a problem, makes me wonder if she will be super worth it towards the end.. We will see as we go through this grow, but #1 has a piece of the shell on the leaves,
Other than that I set up a new thing I have been doing since last grow converting my Baskets into Sure plants so I can see exactly where the water is when I plant them and ensure I have the water up high enough that they are able to access it and grow but not too high were they are drowning.
2/12/2024- Germination Day 6- Everything seems to be going good.. will just keep them moist and let the roots grow for a few more days before I transplant to forever home.
2/13/2024 - Germination Day 7- Just keeping them Moist.
2/14/2024 - Germination Day 8 - Planting day.. they are now in the system.. :-)I had to fill the water to the bottom of the basket where I could see water on the bottom rocks and just coming up where I had created my whole/ sure plant.
2/15/2024 - Germination Day 9- Top fed just a little to keep them moist and encourage root growth towards the water. I ensured the PH is right at 5.98-6.02 range.
2/16/2024 - Germination Day 10- Top fed just a little to keep them moist and encourage root growth towards the water.
Likes
5
Share


@Tacofever88
Follow
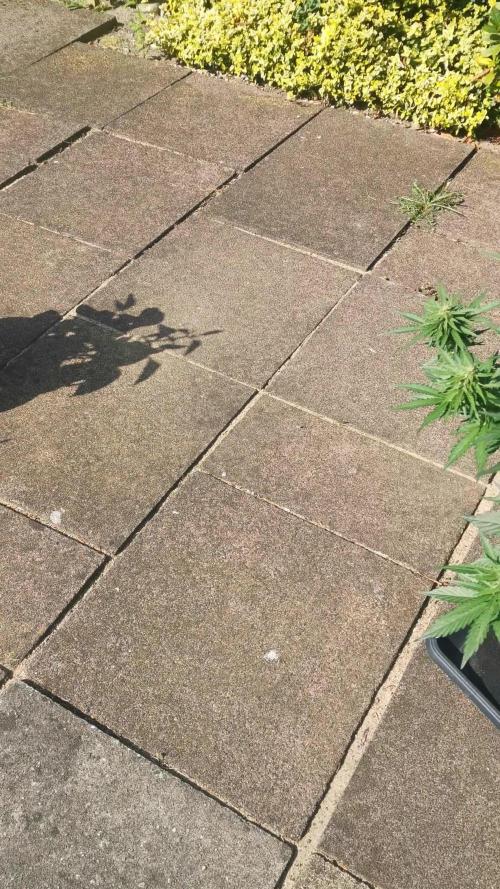
Growing like a weed..... up to my chin now and I'm about 5'11"
I feel I'm going to have to add some serious reinforcement to these branches.
The blueberry cheese has some heat stress as it's out in the sun all day, also s9me twisted growth I've never saw before.
Likes
27
Share


@LockDownGrow
Follow
Starting too show the early stages of pre flowers , everything has gone nice up until now , she grew a very compact but bushy plant , that seemed too just bush about this week ,

Processing
Likes
6
Share


@OroVerdeOrganics
Follow
Some plants seem to be turning colors early.
Pretty fast flowering varieties so not concerned.
Covered in trichomes.
It’s beginning to smell super fruity.
Likes
27
Share


@adam_pawloski87
Follow
Over all was an amazing grow, super sticky dense nugs with smell of berries, highly recommended for everyone!!


Likes
9
Share


@bigolebuds
Follow
Week 8 12/22-29: Getting close to chop day.. planning to start the “flush” soon.. Trichomes looking cloudyyyy
Likes
51
Share


@Dunk_Junk
Follow
Just waiting and watching trichomes & pistils.
As of today all the trichomes are milky, but not all of the pistils have changed colour. A lot of them are still white.
So on she goes!!! 😎

Likes
6
Share


@CrashTest420
Follow
Smells piney on the pistols. Switched led to flower as 2 have started put them both on dutchpassion bloom a and b full reccomended ammounts fingers crossed still
Processing
Likes
80
Share


@RickJames_Mcdank
Follow
So now she is really starting to showing her nice buds. As you can see she stretched out more and thats good because I have a feeling that they are gonna bo some nice full colas.
I start adding Alga Bloom with 2 ml and by the next watering I upped the volume to 3 ml.
Next week I will go up to 4 ml of Alga Bloom with 1 ml of Green Sensation.
She is really looking strong like bodybuilder. Branches are tough and hard.
Her roots are hea;ty and stron too. I saw a little piece of root sticking out of hte hole at the bottom of the pot.
The roots are so strong that I can hold the main stem and lift it with the pot and all.😀
Till next week!

Likes
2
Share

@BudBeezy
Follow
Welcome to week 8 of my grow diary. Everything is going well so far. Unfortunately, a little mildew has formed in a few places. I treated the leaves with a mixture of one tablespoon of vinegar and 1 liter of water. No new mildew has formed since the treatment. The plant seems to be the perfect place for insects to settle down and start a family😂
See you next week!


Likes
190
Share


@Herbalize
Follow
Hello Folks 😎
8th week of flowering,it's time to flush these girls !!!
40 liters of water per plant, with ajusted ph ( 6.2 ) and the senescence has begun 👌
I managed to reduce the daytime temperature to 23 ° C and much cooler at night 15/16 ° c
my plan is to harvest between 63 and 70 days, it depends on the maturation of trichomes ( already almost all milky )
2 different smell and shape i like that ! the little one smell like fresh melon 😵 and the big one smell typical strong hazeeee
Follow, like and comment if you enjoy it
I also have a second diary with 2 Remo Chemo
Peace Love & Weed 😍👊