


Likes
Comments
Share


@Ieiogrow94
Follow
Eccoci di nuovo qui!!!
Super eccitato per questa nuova collab con Anesia Seeds, team davvero al top, che mi ha dato l’opportunità di testare questa nuova genetica e di condividere i progressi con tutti voi!!!
Come sempre partiamo nei bicchieri per poi travasare.. Questa volta verrà svolto tutto sotto la Lumatek Zeus 465 ProC, mi aspetto molto da questo ciclo!!
Settimana strabiliante!!!
Grazie a tutti per il supporto ❤️🍀🔥

Likes
3
Share

@Krautis_IndoorFarm
Follow
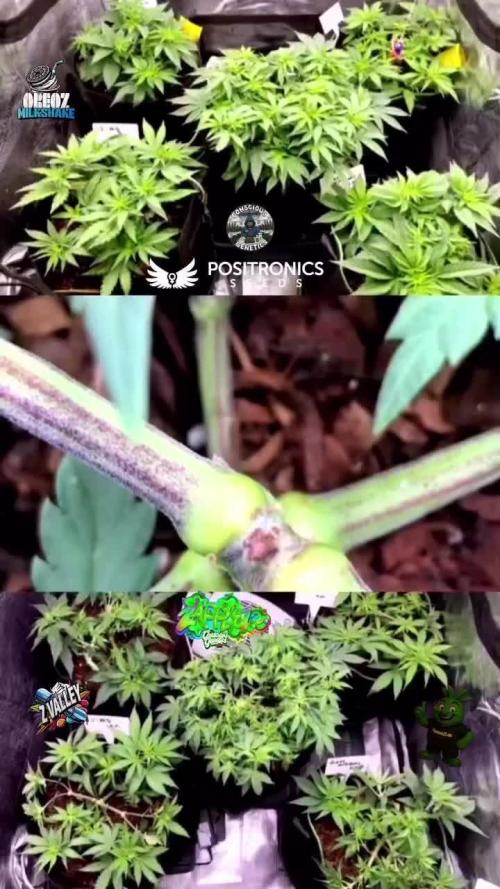
Tag 41!Der Endspurt zur Blüte hat begonnen! 🚀
Die Veg-Phase läuft sensationell! Unsere Mädels stehen nach dem intensiven Training extrem stabil und buschig da. An Tag 41 ist die Struktur perfekt geformt, um am kommenden Freitag in die Blüte zu starten. Wir nutzen diese letzten Tage der Wachstumsphase optimal, um sie final auf den großen Stretch vorzubereiten!
🌟 Das Wichtigste auf einen Blick!
• 🏆 Zustand der Pflanzen: Volle Vitalität, dichter Wuchs und keinerlei Stress. Sie sind gesund und bereit, ihre Nährstoffreserven für die Blütenproduktion aufzufüllen.
• 🌱 LST abgeschlossen: Die gleichmäßige Blattdecke ist das Ergebnis des erfolgreichen Low-Stress-Trainings, ideal für maximale Lichtausbeute unter dem SCROG.
• 🚨 Blüte Stichtag, Freitag, 19. Dezember! Nur noch wenige Tage, dann schalten wir um auf 12/12 und lassen den Stretch beginnen. Die Spannung steigt! 🔥
Bleibt dran, um den Übergang in die Blüte mitzuerleben!
🌱 Die Crew & 🤝 Das Ökosystem
Die Pflanzen (Genetik):
• Z-Vally (2x) & OreoZ Milkshake (2x) | von @positronicsseedsgermany @positronicsseed
• Zapplez 2.0 (1x) | von @conscious__genetics @conscious_genetics2.0
Das Ökosystem🐻💚
• Substrat (Living Soil): @panova25.de / @living_roots_pro
• Community: @cannacommunity.deutschland420 @cannacommunity.deutschland / @cannacommunity.germany
#LivingSoilGrow #Tag41 #BlüteCountdown #FreitagStart #LSTTraining #Zapplez20 #OreoZMilkshake #ZValley #CannabisTraining #OrganicGrow #GrowUpdate


Likes
Comments
Share


Likes
6
Share


@xmackobox
Follow
Hola amigos arrancamos nuevo cultivito, por ahora os traigo los videos que subo a YT como ya sabéis le estoy dando caña al canal, buscarme allí, me llamo como aquí, xmackobox.
Poco mas, se empezaron a germinar el día 14/02/24. Algunas se pasaron a maceta el día 16, otras en 17 y se terminaron de plantar en maceta definitiva de 11 L el día 18/02/24.
Para la primera semana de crecimiento ya meto fotos detalle de todas.
**ACTUALIZADO**
26/02/24 llevamos 12 días desde que se empezó a germinar, todas brotadas perfectas excepto 1 que como veis parece atrofiada o con algún problema, no desarrolla el ojo principal es decir su punta apical.
Esperaremos a ver que hace esta plantita :D
Likes
14
Share


@m0use
Follow
*=UPDATE=*
Smoke Report
*=UPDATE=*
Harvest Totals
**Smoke Report and effects** to follow after cure, May 10th ish.
This was my second ever indoor grow, and compared to my last grow I have learned a lot.
My goal this time was to get about 1.5-2oz a plant, up from my previous goal of 1oz a plant from last grow. Best part is I got to my goal!!😁 Next goal will be 2oz+ a plant.
This was the last time I will be using my homemade grow tent, it was compromised out of recycled Styrofoam, miss-tint paint and glue, it provided me what I needed to get the job done one a extreme budget but it is preventing me from doing more. The main problem I ran into this grow was humidity control/space. The fan broke half way through and I was too lazy to get a new one as I figured I'll wait till I get a real tent. This mind set enabled some mould to flourish and that is why I had to harvest early. I felt if I let the plants go 2 more weeks, I would have hit 2oz a plant, it was only a few grams away, however if I kept going with the mould I would have been down to 1oz after all the rot was cut out from both plants, that shit fucks up your grow fast if you don't manage your air circulation.
So the main things I learned:
1) I was underfeeding my plants in there 2nd half of life, thus the buds from the previous grows and this one suffered a bit. This grow does have the most dense buds I have ever grown, but it could have been better.
2) PH is key, I still did not have a PH meter but was blindly altering the PH of my water by adding in some citric acid, not only to neutralize the chlorine but also lower the PH a bit. When I did test the soils PH using a soil testing kit, it was lower then previous grows. This helped get more nutrients into the plants and grow bigger. previous grows the PH was 7-7,5 ish
3) You can get an "ok" harvest off of blue lights, my grow was under seven 18" 6500k 18w sunblaster LEDs, and I thought they would never get over 1oz a plant because they don't have the best spectrum for cannabis in flower, among the other dumb things I do as a novice grower. but they worked out just fine, still going to upgrade in time with proper lighting in the 3500k range.
4) Once the plants get bigger and buds start to becoming more dense, the air circulation is needed, its is not longer optional for a budget grow in a shity homemade tent.
5) Defoliation works. my plants have ruffly the same amount of buds, however the plant that I fiddled around with mainlining and defoliation had bigger fatter buds vs popcorn nugs like the opposite plant.
6) Fungas gnats are annoying, fuck them, use nematodes to kill them flat in there tracks.
7) Getting better at making edibles. :)
So other then that, the only real differences between this is last grow is lower PH in tap water, more lights, slightly bigger pots, bit more feed and different genetics from a different breeder. I followed everything else ruffly the same. My own hydro break down from lights alone is below.
I did not notice any big difference between the two plants and there phenotypes, I was meaning to take a clone and try and grow it outdoors again but forgot and that was my last of the seeds. I was surprised that one of them was a male. not even hermi, full blown male. I'm not into breeding or I would have kept him,
Yields:
Plant # 1 - male, killed
Plant # 2 - 42.1g bud, 13.15g trim (1 .49oz, 0.46oz) bigger fatter buds
Plant # 3 - 45.1g bud, 13.15g trim (1.59oz, 0.46oz) smaller nugs, almost all popcorn.
=Overall - 87.2g total bud, ave 43.6g a plant. 26.3g trim ave 13.15g a plant.
Smells:
plants 2-3 - both smelled the same, in the beginning they had a lovely sexy lemon sent, then in the end it just turned into something else, I think some of the moulds in the tent altered it a bit. Will wait till after cure to see what its like, I noticed some changes in just drying and having them in the jars for two days now.
Now that the cure is all done and finished the two strains smell a bit different in there respective jars but there smoke is almost identical.
plant #2 or pheno #1 is more of a classic OG Kush smell to me, its earthy, herbal and pungent. Hints of pine in there with lemon bit woody.
plant #3 or pheno #2 is more of a bright one, It's sweet smelling with berries in it, some hints of almost floral like in it, not quite rose or lavender something else, not what I was expecting at all. I like this smell better vs the other plant.
Smoke Report
It took its sweet time but I finally got it in. I myself do not smoke, so I relay on my roomie for this part of the report, they are a long time smoker 10+ years. They have reported that the smoke smooth and easy going, they would say it was a bit smoother then my previous grow of OK Kush CBD and Blackberry. the only noticeable differences between the different phenos is that pheno #1 is more pungent that phoneo #2 but over all the smokes flavours and quality are the same just brighter in phone #2, I feel these are a bit off from the original seeds I grew back in the day from my first ever grow but still high quality. this was rated as a equal balance of sativa and indica feels on smoking but the smells where leaning towards sativa a bit.
m0use
+++++++++++++++++++++++++++++++++++++++++++++++++++++++++++++
Cost + Time Analysis Of Growing Cannabis. m0use’s Breakdown
+++++++++++++++++++++++++++++++++++++++++++++++++++++++++++++
Light Schedule
===
growth: 18h on 6h off
flower: 12h on 12hr off
GROWTH: 35days
5am-11pm-on -- 11pm-5am-off
---
Cost of kwh with on-peak "20.8c", mid-peak "14.4c" and off-peak "10.1c".
5am - 7am -- 2hr @10.1c/kwh off-peak
7am - 11am -- 4hr @20.8c/kwh on-peak
11am - 5pm --6hr @14.4c/kwh mid-peak
5pm - 7pm -- 2hr @20.8c/kwh on-peak
7pm - 11pm -- 4hr @10.1c/Kwh off-peak
---
6h @10.1c/kwh
6h @20.8c/kwh
6h @14.4c/kwh
---
Using the previous c/kwh numbers above I can find out the daily cost of the lamps in the 3 peak periods. growth and flower
6h x 10.1c/kwh = 60.6c/kw * .126 kw = 7.64c off-peak
6h x 20.8c/kwh = 124.8c/kw * .126 kw = 15.72c on-peak
6h x 14.4c/kwh = 86.4c/kw * .126 kw = 10.89 c mid-peak
The "h" hours and "kw" kilowatts cancel out and we are left with a value of "c" cents per peak period
add all the peak periods up and you get your cost of running the lights in cents per day c/d
---
growth : 7.64c + 15.72c + 10.89c = 34.25c/d
FLOWER: 52days
===
8am-8pm-on -- 8pm-8am-off
---
Cost of kwh with on-peak "20.8c", mid-peak "14.4c" and off-peak "10.1c".
5am - 7am -- 0hr @10.1c/kwh off-peak
8am - 11am -- 3hr @20.8c/kwh on-peak
11am - 5pm --6hr @14.4c/kwh mid-peak
5pm - 7pm -- 2hr @20.8c/kwh on-peak
7pm - 8pm -- 1hr @10.1c/Kwh off-peak
---
1h @10.1c/kwh
5h @20.8c/kwh
6h @14.4c/kwh
---
Using the previous c/kwh numbers above I can find out the daily cost of the lamps in the 3 peak periods. growth and flower
1h x 10.1c/kwh = 10.1c/kw * .126 kw = 1.27c off-peak
5h x 20.8c/kwh = 104c/kw * .126 kw = 13.10c on-peak
6h x 14.4c/kwh = 86.4c/kw * .126 kw = 7.77c mid-peak
The "h" hours and "kw" kilowatts cancel out and we are left with a value of "c" cents per peak period
add all the peak periods up and you get your cost of running the lights in cents per day c/d
---
flower : 1.27c + 13.10c + 7.77c = 22.14c/d
Lights
===
LED’s I use are 18w each and I have 7 lamps on an aray.
18w*7 = 126w | 126w/1000 = 0.126Kw
growth: 18h/d lights on * .126kw lights hydro use = 2.27kw/d
flower: 12h/d lights on *.126kw lights hydro use = 1.51kw/d
G:79.45 + F:78.52 = 157.97kw for the entire grow.
Cost
growth : 7.64c + 15.72c + 10.89c = 34.25c/d
flower : 1.27c + 13.10c + 7.77c = 22.14c/d
The time my lights where on in the grow for 12 weeks and 1 day, or 85 days.
growth: 35d * 34.25c/d = 1,198.75c ÷ 100 "100c in a dollar" = .99
flower: 52d * 22.14c/d = 1,152.28c ÷ 100 "100c in a dollar" = .52
the "d" days cancel out and we are left with a total cost of the lights for my 85day grow.
11.99 + 11.52 = .51
Using the regular calculation of grams harvested divided by watts used is not accurate to me, it does not account for all the time the lamps are on, the length of grow to the over all cost. The calculation that makes sense to me is this, harvested dry weight of usable cannabis buds/trim/keif/whatever in grams divided by total kw used. Could also combine it with grams per total single use costs “anything you used only for this grow and wont reuse in the next, or fractions of multi use items like fertilizers if they ½ full” and see how much you’re investing per gram.
"kw" ÷ "g" = kw/g
"$" ÷ "g" = $/g
I have harvested 4oz or 113.5g on 157.97kw, this includes buds and trim in mycase.
157.97kw ÷ 113.5g = 1.39kw/g of usable cannabis. I’d still try and aim for under 1kw/g.
.51 ÷ 113.5g = :text.20g
The other ratio would have been, 113.5g to 126w = 0.9g/w just shy of the 1 mark.
So in total, it cost me 20c per 1g I grew in light electricity alone.
Not to bad.
legend,
kwh = kilowatt per hour
kw = kilowatt
w = watt
h = hour
c = cents
$ = dollars
d = day
LED= Light Emitting Diode

Likes
9
Share

@420DeepGrow
Follow
📆 Semana 3
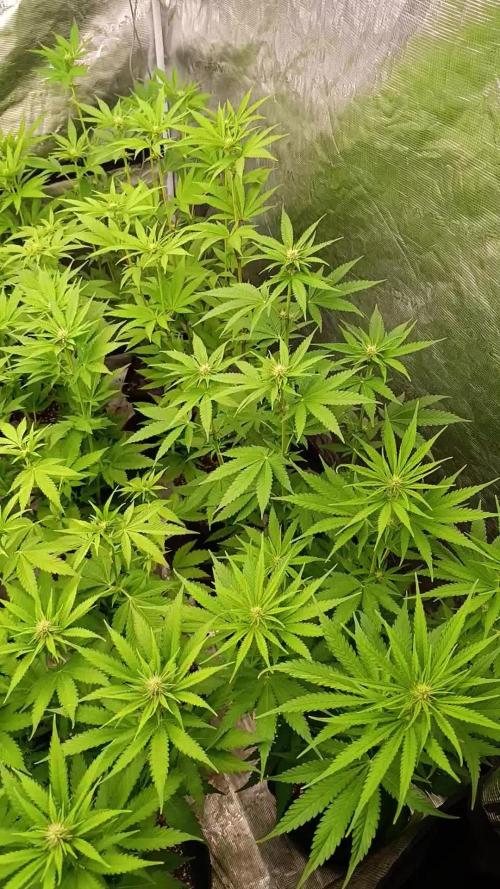
El stretch llega a su fin y las plantas comienzan a concentrar su energía en el desarrollo floral. La estructura formada durante las semanas anteriores queda bien establecida, con múltiples puntas bien expuestas y una copa uniforme que aprovecha eficientemente la luz disponible.
Los grupos florales empiezan a ganar tamaño y densidad, mientras los pistilos se multiplican en todos los puntos de crecimiento. Durante esta semana se introduce Bloom Booster para acompañar el inicio de la fase de engorde y favorecer una formación floral más intensa.
⚡ EC: 1.6
💧 pH: 6.2–6.5
🌡️ Agua: 21°C
🌫️ Humedad: 40–45%
💡 Intensidad: 900–1000 PPFD
🔥 Nota: La tercera semana marca el comienzo del desarrollo floral activo. Una nutrición equilibrada y la incorporación de potenciadores de floración en este momento ayudan a maximizar el número y tamaño de los futuros cogollos.
Seguimos creciendo fuerte 💪!

Likes
7
Share


@RizlaZA
Follow
Incredible strain this, grew hassle free from the start. Keep her healthy and give her what she needs and it will produce some dense, trich covered goodness.
The smoke is Incredible but has a massive kick so be warned. Estimate these girls will be 25%
THC.

Likes
144
Share


@roro_204
Follow
I received the clones from An out of province breeder.
It reached me after three days of driving on the road with no light. Their future was not certain.
I didn’t think I would need that many fans for the clones because they are so tiny, I figured they didn’t need that much maintenance.
I was 100% wrong when I’m working with this many plants.
I ended up getting mild mildew on top of the soil on the first week because there was barely any air circulation.
At this point I didn’t have any Ventilation put up yet. And one fan on the floor. I ended up installing three fans in one room. No issues
Likes
47
Share


@StarLorr
Follow
Helloing 👋🏻 visitors.
The clone stretched out fast.
And little pistils started to come out
😁 it's a GIRL!!!!!

Likes
31
Share


@TheHighentist
Follow
I had a good harvest set up, in order to keep everything sterile.
The drying went good and steady with converting my grow tent to dry tent.
-Humidity through drying 53-58% RH
-Temp a bit high 18-23
10 days of drying
Very satisfied with this grow as my first grow. I said i would be more than happy with 100g (dry and trimmed) and i weighted in 95.9g PLUS about 5grams i plan to smoke now 😇 So very happy.
Currently in curing jars
Not harsh taste, even with no curing.
Nice and fruity and a deep high.
I will test the THC levels after curing and update my blog.
This will def not be my last grow. I had a lot of fun
Thanks to everyone on growdiaries that has been giving me pointers and tips 🙏
👉*Btw. I was growing with a "Viparspectra V300" LED through Veg and flower



Likes
9
Share


@ElmCult
Follow
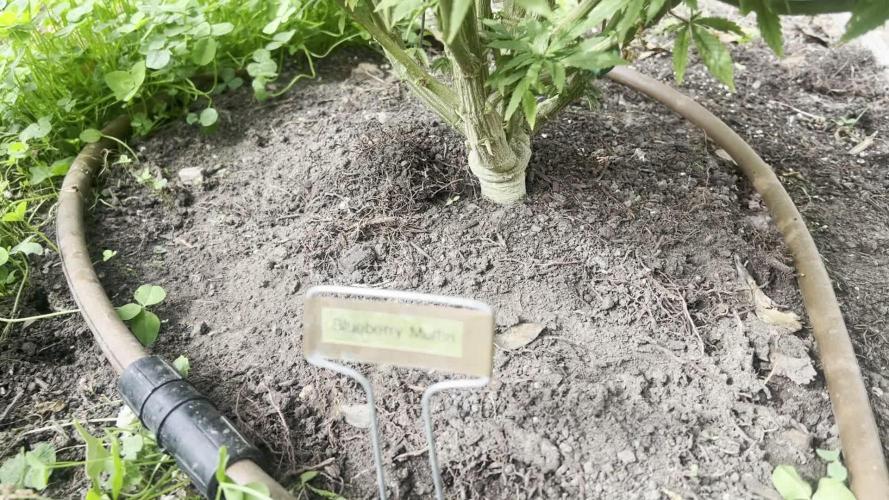
Great growth so far, for autos these are very uniform I’m impressed compared to other genetics I’ve grown for autos piña takes the cake already. So far very happy with them. 2.5 inches at the start of week 3


Processing
Likes
30
Share


@CBD_Sweden
Follow
2018-03-20 Week 12 Day 1
New week and not much to say. No water or nutes today, just the regular weekly check to see that they look nice and healthy.
Raised the lamp about 10 cm to make sure that the girls don't get burned again.
Crazy Cookies nr1 is 52 cm
Crazy Cookies nr2 is 49 cm
-----------------------------------------------------------------------------------------------------------------------------------
Strain information:
The word synergy is a business term first quoted in the early eighties to describe mutual enhancement through interaction or cooperation, where the end result gained is greater than the sum of the parts used. What do synergy and the Crazy Cookies cannabis strain have to do with each other you may well ask?
The parents of the forthrightly indica Crazy Cookies are marijuana royalty. OG Kush and Girl Scout Cookies. These strains of contemporary legend have been combined to cerebrum shattering effect. The cured flowers deliver a mouth-watering and couchlocking 24% THC. The initial delectable spacey upbeat onrush compliments of the Durban Poison coursing through the genes of the Cookies soon becomes a lush and rich, inescapably delicious body flux.
There should be a picture of a Crazy Cookie nugget in the dictionary next to the word synergy. Crossing the OG back into the Cookies has amplified the psychoactive effects of the notorious lineage of both parents. This is an indica with a capital I.
As a breeder it would be fair to assume that injecting more OG into the Cookies would result in an OG-dominant Cookie, or even close to a pure OG, but something else has happened. Some long dormant genetic switch has been flipped and a standalone indica has emerged whose spicy notes and earthy tones, hints of grape and horny pheromone are an absolute pleasure.
Paying this breed some careful attention as it grows will reward you substantially, indoors or out. Typical hybrid vigour is shown throughout each grow phase. Stout plants to 80cm can be expected indoors and muscular examples with fluted stalks growing to two metres can be easily achieved outdoors. Good bracing is necessary as the flowers mature. With more than 500g at harvest per robust plant, colas can easily snap and twist branches.
-----------------------------------------------------------------------------------------------------------------------------------

Likes
14
Share


@ao_grows1978
Follow
Week 7 of flower in the books and the Kush is in the home stretch. Pistils are all turning orange and buds are getting thick and resinous. She's got a nice citrusy smell and the colas are all swaying in the breeze. Shout out to Seedsman for these stable genetics. No deficiencies or issues that I had to fix along the way. Really happy I still have a couple more seeds left over.

Likes
15
Share


@Sid93
Follow
the plant keeps swelling at a slow pace. looks bigger every day and smells stronger

Likes
13
Share


@HashCakes
Follow
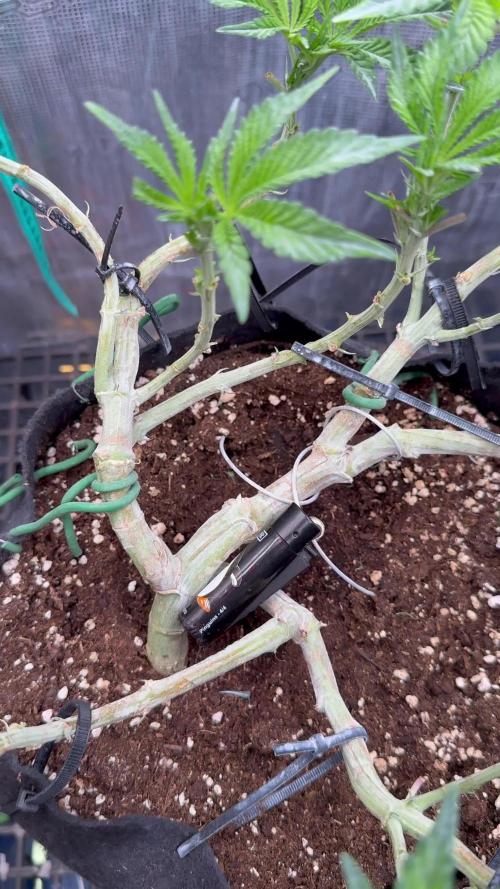
Gently dropped in a scrog with the biggest squares I could find to prop up or tie off heavy branches on #2. Used it to spread out #1 a bit but this late in the game tried to avoid as much pulling and bending as possible.
#1 finally picking up some weight. This one has more of a spear formation. Guessing about 4-5 weeks left. Super frosty and smelly though.
#2 just a tank. Nothing but dense golf balls. My goal was 8oz per plant and feel pretty confident this might be closer to 10ish. I'm guessing about 21ish days. Planning on deploying Winter Frost a week from today.
Topping of with 80% strength solution kept EC level between changes..
So tough to do these things justice in pics and videos.



Likes
10
Share


@GoldenWeedGrower
Follow
📅 D43 - 26/09
📜New res and new light setup (only bloom lights): so T decreased and I need to take under control the H. Changed res with flowering mix. EC is 2 and pH 6. Removed SCroG net.
✍️ 2 EC
♒ 6 pH
🌊 10 L
📏 50 cm
📅 D44 - 27/09
📜 Posed a new SCroG net over the buds, only to give a support and guide the buds. As EC is raising, today I will give her only 2 L of water with only calmag and hydroguard. I purchased another lamp, that will arrive tomorrow with dimmers both on bloom and veg lights
✍️ 2,2 EC
♒ 6 pH
🌊 10 L
📏 55 cm
📅 D45 - 28/09
📜 Added of fresh water as the EC is raising too much. Let see if I've to add more later, trying to take EC under control. pH is quite stable , but it always goes decreasing and never raising. NEw lamp setup: I've purchased one that seems really good with 2 dimmers for both VEG and BLOOM lights. Very compact but powerful. Now I put bloom dimmer on 100% and veg dimmer on 80%. I'm not sure about the light time: the product sheet say 9-12/24 but now I'm 18/24. I will sniff around others diary to see what to do.
✍️ 1,8 EC
♒ 5,9 pH
🌊 9 L
📏 60 cm
📅 D46 - 29/09
📜 Added 1 other L. of fresh water and stabilize the EC 0n 1,5 and pH 6.1 I decided to keep the ligths on 18/24. Nothing else to report
✍️ 1,5 EC
♒ 6,1 pH
🌊 9 L
📏 65 cm
📅 D47 - 30/09
📜 So far so good. EC and pH are stable now and Lucy is healty and she's growing very fast.
✍️ 1,5 EC
♒ 6,1 pH
🌊 9 L
📏 65 cm
📅 D48 - 01/10
📜 Added 2 L with EC = 1,4 and pH= 6,1. Now the res is stable on EC 1,6 and pH 6,1. She's drinking about 2 liters and more every day. Tomorow I will report last day of 2nd flowerng week, So the harvest should be in the middle of November.
✍️ 1,6 EC
♒ 6,1 pH
🌊 9 L
📏 70 cm
📅 D49 - 02/10
📜 Last day of second week. Lucy is growing a lot and my tent is very small. I could consider to buy another tent, we will see. Added 2 L of water with only calmag and Hydro. I will keep the res untile the middle of next week.
✍️ 1,5 EC
♒ 6,1 pH
🌊 8 L
📏 75 cm
Likes
Comments
Share

@RBG
Follow
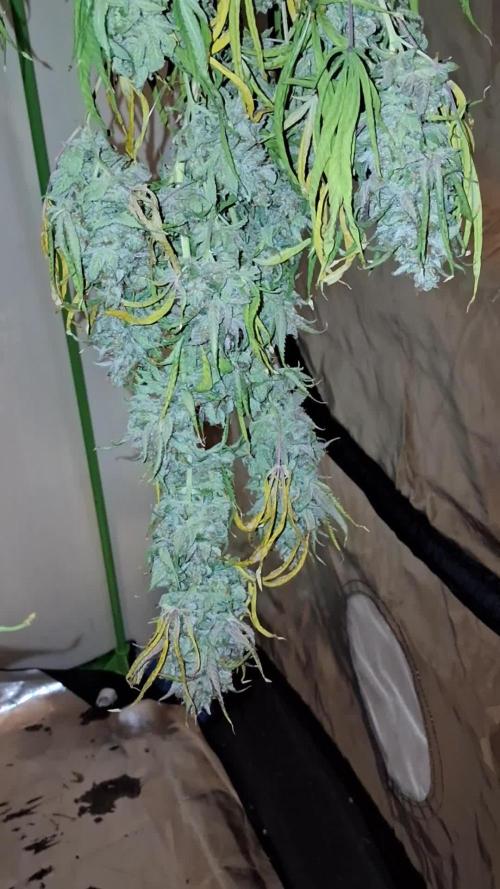
All done and up for drying, will come back in a bit and write me a paragraph on the ladies that have been taken down!
Overalll very happy with the outcome, they went over there suggested flowering times by a few weeks. Ceremony was the only one on her top side that had just started to finish up but she flowers for about 12 weeks so understandable but weve only got that 1 room to dry n grow in currently until more equipment arrives for the next coco ladies
Drying on 55% RH with a 21-23 room temperature.