


Likes
Comments
Share


@CheeRz
Follow
Almost Done. 💚💚💚 From now on the ladies just gettin' tab water. Wedding Cake and Cookies Kush #2 r ready to go in a few days. Cookies Kush #1is lookin'like she needs at least 1 maybe 2 weeks from now 😂.

Likes
2
Share


@Almo420
Follow
I'm just all to excited with how the next two weeks are gonna span out😁
Started giving only water this week as the plants are fading fast, and im seeing an amber trichome here or there.
Not to long now!😄

Likes
2
Share


@Ninjabuds
Follow
My Purple Kush seedling is the smallest in the tent, and it's been a slow starter. It's finally showing some signs of life, but honestly, I'm not sure if it's going to catch up with the others. I might just cut my losses and focus on the stronger plants. It's a tough call, but sometimes you have to make those decisions. I’m going to keep the plant for sure just because I want to see what purple kush looks like
The weather has been absolutely gorgeous this past week! We've been hitting that sweet spot of 70 degrees during the day, perfect for getting outside and soaking up some sun. Then, it cools down to a comfy 50 degrees at night, which is ideal for sleeping with the windows open. I've been loving all the fresh air!
I finally got around to building that little wooden planter for my windowsill. It was a fun project, and now my regular plants have a nice new home. It really brightens up the room, and I'm thinking of adding some herbs to it soon. Maybe I'll even try growing some basil!

Likes
21
Share


@hydroponicganja
Follow
Everything seems to be going as planned.
First grow Auto strains :
Ak auto (1)
Kush Auto (x3)
General hydroponics nutes.(1/2 strength)
hps+led total of 815 watts.
DWC
24h lights
LST+topping on 2 plants.
LST on 2 plants
anything else you want to know hit me up.
led at 24"

Processing
Likes
8
Share


@weed_gastro
Follow
Day 42, start of flowering week 3: they are growing nicely, had to do a lot of defoliation on each plant, except the one in the 3L pot.
Day 43, I started to discover that the roots are coming out aggressively from the bottom of the pot. I did not move the ones in the back, but I guess same thing.
The one in the 3L pot doesn't have this problem.
Day 45: getting really excited for these guys! I'm trying to keep the temp and humidity low, and I hope I can achieve some of the purple color :P any advice on that?
day46: defoliaton

Likes
7
Share


@BasedBuds_89
Follow
Great week. Added some big bud nutrients and defoliated a bit. The buds are swelling nicely, the Advanced Nutrients is doing its job without a bit of burn.
Likes
19
Share


@proud_to_grow_loud
Follow
Fun to grow and took to lst and supercropping very well. I am keeping a mother of the stinkiest pheno I got. I made some other seeds that I will be growing out after Jinxproof's pheno hunt. I will be doing a few grows coming up here and its going to be gnarly! Stay tuned in for modern genetics that have been tested and stabilized. These were bag seed from regular seed of LA confidential given to a friend that won them in a giveaway from DNA Genetics.


Likes
226
Share


@Kitties_and_Colas
Follow
~_~_~_~_~_~_~_~_~_~_~_~_~_~_~_~_~_~_~_~_~_~_~_~_~_~_~_~_~_~_~_~_~_~_~_~_~_~_~_~_~_~_~_~_~_~_~_~_~_~_~_~_~_~_~_~_~_~_~_~_~_~_~_~_~_~_~_~_~_~_~_~_~_~_~_~_~_~_~_~_~_~_~_
9/24/21
😽💨 Week 5 is here! Everyone is looking pretty healthy however the bud development looks closer to week 3/4 imo and I really don't like the node spacing on plant #1, I wish we had limited some of her stretch sooner. I don't see large intact colas in that plant's future, probably long bud spiraled branches but its not the end of the world lol...We gave a tomato cage to the freak mainline for some added stability (she's definitely going to need it). All buds are beginning to frost and look as if they'll be coated by the end!! (something i really didn't expect from this strain)..We're still giving them more calcium than we typically do and will probably only stop when it comes time for their finishing flush....Thanks for reading if you made it this far, we'll update again midweek, until then happy harvest friends!!
❤️💡🌱😻
YouTube: https://youtu.be/5P8IRDEw0yI
~_~_~_~_~_~_~_~_~_~_~_~_~_~_~_~_~_~_~_~_~_~_~_~_~_~_~_~_~_~_~_~_~_~_~_~_~_~_~_~_~_~_~_~_~_~_~_~_~_~_~_~_~_~_~_~_~_~_~_~_~_~_~_~_~_~_~_~_~_~_~_~_~_~_~_~_~_~_~_~_~_~_~_
9/28/21
😸 Color was starting to fade on plant #1, its been a PH rollercoaster in that pot, this happens sometimes when we reuse Promix, we flushed her alone with a mild leeching solution and she's already looking better today than she has in the last 3 days, I think she'll finish just fine ❤️..happy growing everyone!! 😽💨
~_~_~_~_~_~_~_~_~_~_~_~_~_~_~_~_~_~_~_~_~_~_~_~_~_~_~_~_~_~_~_~_~_~_~_~_~_~_~_~_~_~_~_~_~_~_~_~_~_~_~_~_~_~_~_~_~_~_~_~_~_~_~_~_~_~_~_~_~_~_~_~_~_~_~_~_~_~_~_~_~_~_~

Likes
21
Share


@BruWeed
Follow
Esta planta estuvo dos semanas en etapa de enraizamiento, tres en crecimiento y ocho semanas en floración.
No tuvo ningún problema con nada, me resultó de fácil cultivo.
En esta cosecha obtuve ciento cuarenta y siete g en total.
Utilice una maceta Root House de 10L.
El sustracto que utilice fue de Nube Verde, en su composición se incluye turba de categoría, perlita, humus, compost, tierra, dolomita y vermiculita.
Sin duda volvería a probar esta genética otra vez, supero mis expectativas.

Likes
8
Share

@Nony_grows
Follow
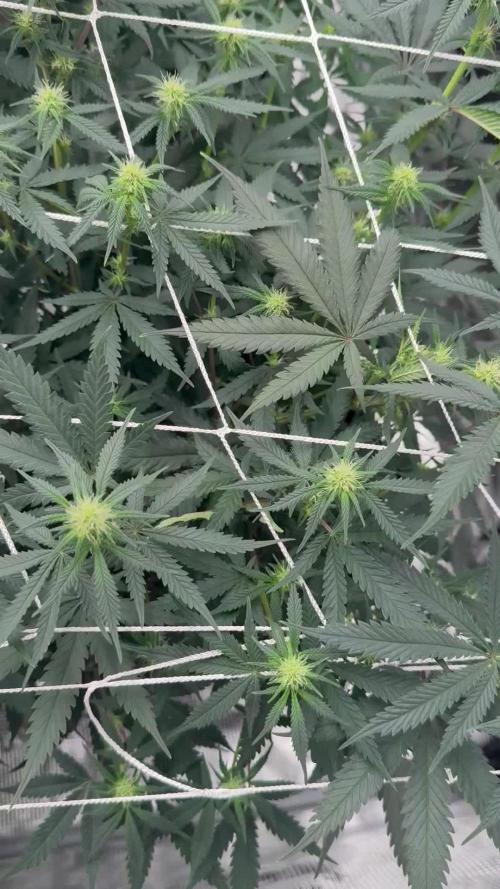
Everything is going as planned, some phenos of the nana glue are putting on trichomes! Plants are starting to slow down on the stretch. I’ll lollipop and defoliate this tent in a few days and get ready for the flower to bulk up . Also going to feed them in the upcoming week to make sure they have all the food they need to fatten up in mid to late flower

Likes
4
Share

@Bear_Grows_Green
Follow
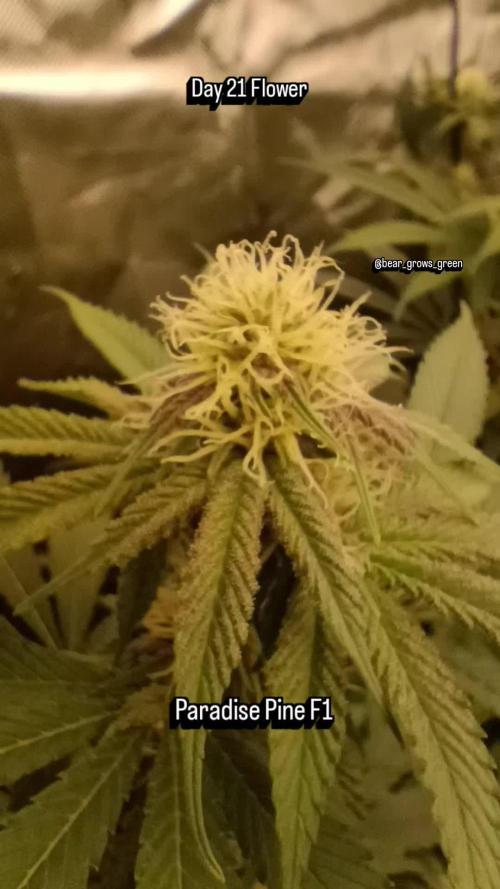
01/22 day 15 start of week 3. Everything going great. Tomorrow is a feed day. This week is a team week also.
01/23 supplemental feed day gave 10.5 gallons total
01/24 heavy defoliation should be done til harvest
01/27 got 7 gallons water 4 gallons compost tea tea instructions in videos
Processing
Likes
13
Share


@Cheesefarmer420
Follow
Another week done, finished up week 6 of flowering, week 10 of the whole grow. The buds are continuing to fatten up, inching closer and closer to harvest. Noticed the first few Amber tricombs on some of the upper buds, going to be leaning off the big bud and switching to overdrive to help aid in ripening and the final bulk. I’d like the run them another 4 weeks giving them a full 9-10 weeks in flower. But will judge harvest on a near 45/55 or 50/50, Cloudy/amber tricomb production.
Likes
6
Share

@El-Ecko
Follow
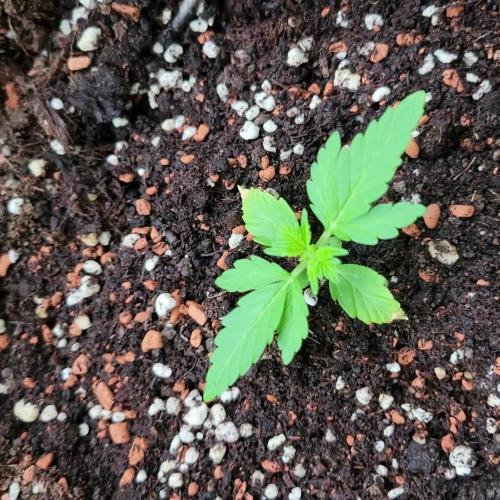
3 Weeks of Growth
Daytime temperatures have gone from 15° to 30° in just one or two days. But I really can’t complain… because I needed the warmth, too😅. Little Pearl is doing very well… the strong sun has played a part, but I’m still happy.
It is and always will be outdoors, so you just have to deal with the conditions as they come.🌊❄️☀️🌻🌱


Likes
9
Share

@BLAZED
Follow
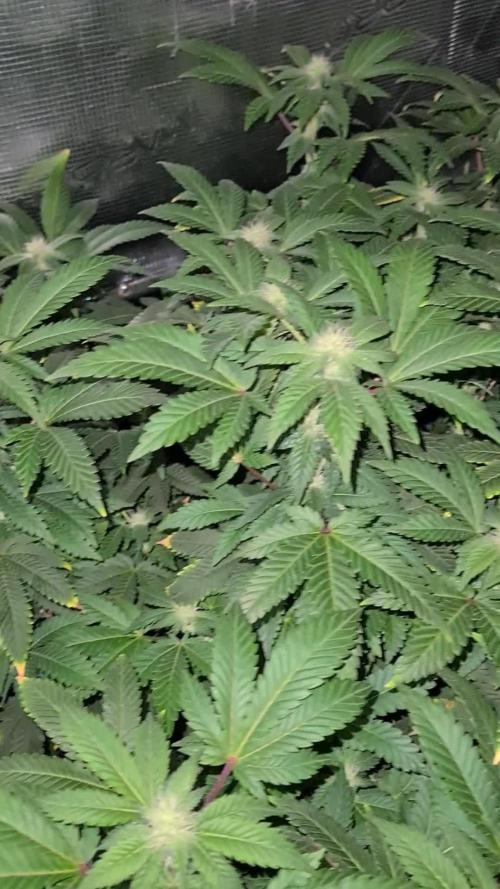
Week 16 (30-9 to 6-10)
30-9
Temps: 18.8 to 24.6 degrees
Humidity: 54% to 69%
Watering: Both 500 ml.
Dry Weight #1: 3.6 kg. #2: 3.7 kg.
1-10
Temps: 19.9 to 24.3 degrees
Humidity: 59% to 71%
Watering #1: 500 ml.
Dry Weight #1: 3.8 kg. #2: 4.0 kg.
2-10
Temps: 19.2 to 23.8 degrees
Humidity: 60% to 72%
Watering #1: 500 ml. #2: 700 ml.
Dry Weight #1: 4.0 kg. #2: 3.8 kg.
3-10
Temps: 18.2 to 23.3 degrees
Humidity: 57% to 65%
4-10
Temps: 18.5 to 24.2 degrees
Humidity: 54% to 66%
Watering: Both 500 ml.
Increased the light's intensity from 60% to 65%
Dry Weight: Both 3.7 kg.
5-10
Temps: 18.2 to 24.1 degrees
Humidity: 55% to 69%
Watering: Both 500 ml.
6-10
Temps: 18.4 to 24 degrees
Humidity: 53% to 65%
Watering: Both 500 ml.
Dry Weight #1: 4.2 kg. #2: 4.1 kg.

Likes
2
Share


@Solocultivo
Follow
29 macetas de 20-18 litros aproximadamente
Dia 32 de Floracion Super Suelo
Sin fertilizantes
Apoyado con biortilizantes @bioinsumoschakrana
Melaza
Te de Bokashi
Humato Postasico
Potenciado
@Knactive
Knactive el mejor bioestimulante 100% orgánico para todo tipo de plantas , el cual activa la autodefensa contra el estrés oxidativo y potencia la síntesis interna de todas las fitohormonas.
https://instagram.com/knactive_?igshid=MzRlODBiNWFlZA==
Vital Juice
Es un producto Chileno hecho en base a algas: durvillaea antarctica y ascophyllum nodosum.
Likes
3
Share


@OldskoolHed
Follow
Had to tie down some mains diagonally. She has more stretch than her mother for sure. Smells super skunky with that sweet candy in the background right now. Feeding every other day.
Likes
3
Share

@frankensoil
Follow
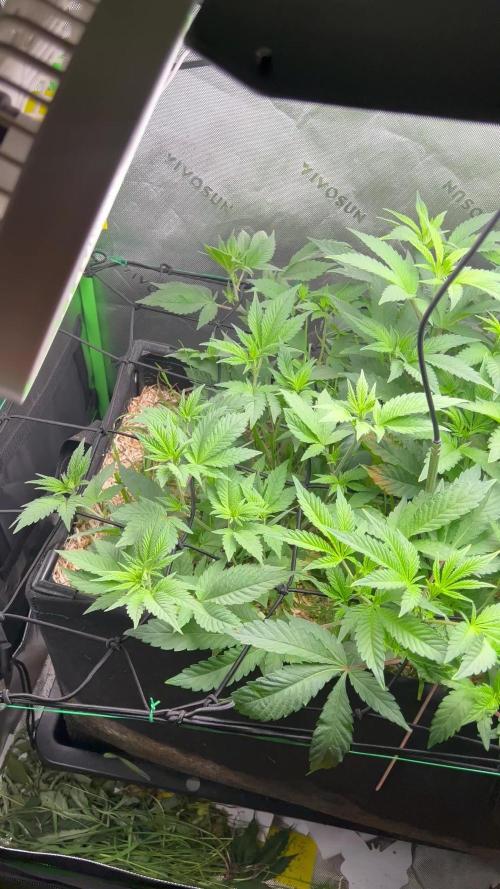
Die Pflanzen wurden endlich in die Blüte geschickt und dürfen jetzt erstmal schön nach oben wachsen
Likes
Comments
Share

@Esmiraldo
Follow
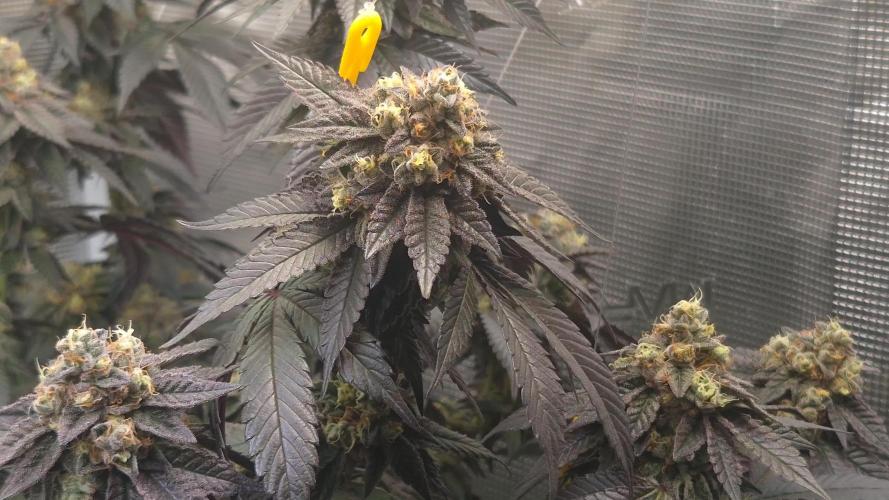
Ziemlich heiße Woche, mit maximal Temperaturen von 30 Grad im Zelt und minimal Temperaturen von 25 Grad Celsius


Likes
14
Share

@LovelyTerps
Follow
July 15 2026
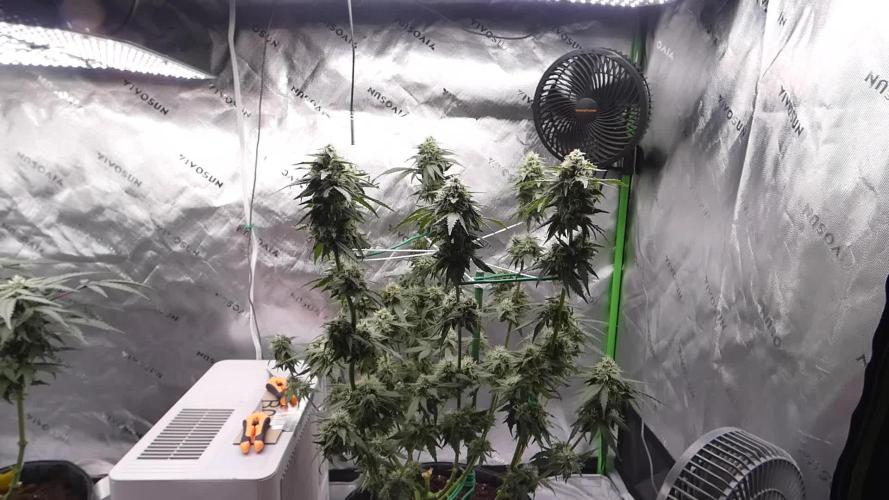
She's finishing up mid-flower by the looks of things. Her buds are rock hard and dense, and her aroma is continuing to mature and lose its sharpness in favor of a candy-floral-earthy aroma. Flowers are beginning to swell, and pistil hairs are starting to die off.
She has been a thirsty gal consistently throughout flower so far. Even with all the big leaves removed she continues to drink like a sailor, with her 2.3 Gallon self-watering base being filled 1-2 times per week. I anticipate that her thirst will slow down now that she's moving into late flower, and then keeping humidity and temps under control will get a little easier.
Light intensity at the top is around 40-42 DLI give or take, and most of the lowers are getting about 26 DLI. I'm targeting 1.5 VPD in the daytime, and during lights off I have my dehumidifier scheduled to turn on and target 40%RH regardless of temperatures (VPD still tends to average around 1.5 right now at night).
I'm still anticipating she'll be ready for harvest in about 3 weeks time, but it will ultimately depend on trichomes.

Likes
3
Share


@AustinRon
Follow
Week 8 - Flower Week 4
Lemon Jeffrey by IRIE Genetics (14 Starts for 8 Finishers)
63-70 Days Flower (9 - 10 Weeks)
Seeds Wet: Monday 14 May 2023
Harvest Date Range: [ 2023-08-11, 2024-08-21]
Weeks Observations
- Local weather conditions have been unseasonably HIGH Humidity. First time in 3 years am unable to reduce to standard levels. Dehumidifier being installed today.
- Today is the 21st day since flip - we’ve experienced bolt since week 1, up to 5” in a day
Start of week:
- Dates: [2023-07-10: LJ2Q 57:F:4:1, 2023-07-16: LJ2Q 63:F:4:7 ]
End of Week:
- Plant Height Range: [ 30, 44, in]
- Water/Day/Plant: [ 720, ml]
EnvironmentalCurrent:
- Scotoperiod: [ 12, hrs] # 1900 - 0700 + 24
- LightIntensityPeak: [ 975, µMol/m2/s ]
- DailyLightIntegral: [ 42.1, Mol/m2] # Target: < [ 40, Mol/m2/day]
- LightDistance: [ 12, in] # Despite SuperCropping (Bending & Twisting), we’re wishing 12” of the Light at End of week
- TempAvg: [ 77.5, °F]
- RH: [ 66.9, %]
- VPD: [ 0.85, kPa] # Achieved Ideal ‘Early’ - need to bump to 1.05 to 1.1
- FeedwaterPerPlantPerDay: [ 720, ml]
- FeedwaterPerDayTotal: [ 5760, ml] # 1.5 Gal/Day
- EC: [ 2.0, mS]
Environment NOTES:
- Because room temperature overnight is 68°F, we need to
1. Nightly (2200) CLOSE AC VENT to Grow Room
2. Daily (0700) OPEN Vent to Grow Room
- Goal is to maintain TENT & CABINET TEMPERATURES OVERNIGHT
- RULE
- CLOSE Room Airflow during ‘Daylight’ periods(2030 - 0700) When on Flipped Schedule (Night LIGHT/Day DARK)
- OPEN during ‘Nightime’ Period (0700 - 2200)
Objective
- 8 Plants, Single Colas, Sea of Green
SOP:
- WEAR CLEAN GLOVES FOR ALL SEED OPERATIONS
- CLEAN All Instruments before use
- Light Strengthveg := 100 + (#nodes * 100)
- Light Strengthflower := [ 1000, 600, µMol/m2/s]
- Scotoperiodveg := [ 1300, 1900, 6, hr]
- Scotoperiodflower := [ 0700-1900, 12, hr]
Environment
- Mid Flower (2 Weeks) (Week 8-9) (F4-F5)
- Temp: 78-82°F
- VPD: 1.1 ± 0.1
- Photoperiod: 12/12
- Light Strength: 930 µMol/m2/s
- EC: 2.3
- Late Flower (Week 10-14) (F5-F9)
- Temp: 78-80°F
- VPD: 1.2 ± 0.2
- Photoperiod: 12/123
- Light Strength: [930, 850, µMol/m2/s]
- EC: 2.1 # Week 9-11
- EC: 1.4 # Week 12
- EC: 1.1 # Week 13
- Finish (Week 14) ( F10)
- Temp: 78°F
- VPD: 1.3 ± 0.2
- PPFD: 750 peak
- Resin Bloom ONLY
- EC: 0.8
Rooted Leaf Hydro 1.7 - 1.9 EC (Half RLA,Hydro Chart, EC to Targets):
- Primer A: [ 8, ml, gal]
- Primer B: [ 8, ml, gal]
- Silica Skin: [ 4, ml, gal]
- SLF-100: [ 5, ml, gal]
- PhotosynthesisPlus: [ 6, ml, gal]
____________________
Mon 10 Jul 2023 # Flower 4
LJ2Q 57:F:4:1
- W/ Dehumidifier Installed, our Environment is now …
Tue 11 Jul 2023
LJ2Q 58:F:4:2
Refill Res
- [x] 6.5 - 7 Gal
- [x] Primer A&B: [ 8, ml, gal], [ 80, ml]
- [x] Silica Skin: [ 4, ml, gal], [ 40, ml]
- [x] Photosynthesis+: [ 6, ml, gal], [ 60, ml]
- [x] SLF-100: [ 5, ml, gal], [ 50, ml]
- [x] Dr. Bohners: [ 10, drops]
- [x] ECRange: [ 1.9, 2.0, mS]
- [x] TempReservoir: [ 60, °F]
Wed 12 Jul 2023
LJ2Q 59:F:4:3
Thu 13 Jul 2023
LJ2Q 60:F:4:4
Friday 14 Jul 2023
LJ2Q 61:F:4:5
Sat 15 Jul 2023
LJ2Q 62:F:4:6
- Plants per Feed Line: 4
- Feedwater per Line per feed (FPL): 120
- Feedwater per event (FPE): [ 480, ml]
- Events per day (EPD): 12 # Hourly Fertigation During Lights ON
- Feedwater per day: FPE X EPD: 480 x 12: [ 5760, ml, day]
- Mix 2 Gallons @ 75% Strength (Medium Chart, FW 3)
- Primer A: [ 7.4, ml, gal], [ 15, ml]
- Primer B: [ 7.4, ml, gal], [ 15, ml]
- CalMag Fuel: [ 3, ml, gal], [6, ml]
- SilicaSkin: [ 3, ml, gal], [ 6, ml]
- Lush Green: [ 3, ml, gal], [ 6, ml]
- Root Anchor: [ 3, ml, gal], [ 6, ml]
- Peak Bloom: [ 3, ml, gal], [ 6, ml]
- Resin Bloom: [1.5, ml, gal], [3, ml]
Sun 16 Jul 2023
LJ2Q 63:F:4:7

