


Likes
Comments
Share


@Gardens_of_Of
Follow
The final day arrived. She got all her trichomes filled up with milk and around 5% Amber while flushing for the last 6-7 days. It took her around 60 days of flowering to reach this point.
Smells like the coffeeshops in Amsterdam. Let’s see how long it takes to dry.


Processing
Likes
62
Share


@OwlGang_Uk
Follow
Week 2 - The Plants Are Loving Their Environment. I Think The Coco Soil Have The Gorilla Glu & Stardawg Thinking They’re Coconut Trees. Lol I’m Experimenting Trying To Create My Own Foliation Spray And Nutrient Additive To Go With A Base Nutrient And It Seems To Be Working. Overall The Girls Are Happy & Healthy And I’m Very Satisfied With Week 2. #OwlGang #AGrowingEmpire


Likes
327
Share


@FoTwenny
Follow
9/1 Update:
Welcome back to my garden! Thanks for following me on this 16 strain photoperiod SOG grow adventure!
If you're just joining us. We have 18 photoperiod seedlings in the tent. 16 of them will go into 12"X12" square pots in a 4x4 sea of green. I plan to top once just above the third node. I will also allow the 2 shoots from the second node to grow with the top two to form 4 main colas.
The Gorilla x Cookies sprouted 8/26! STILL nothing from Jenny Kush.
Weak-sauce!
The garden is happy and healthy! I am going to transplant this upcoming weekend into 6" x 6" square pots so they have room to stretch their legs and build a nice foundation before going into bloom. With Jenny seemingly out if the running, we have 17 seedlings and 2 of them are regular seeds. Hopefully at least one of the two will be female. I am going to say both will be little ladies! If we have an extra female she will veg a bit longer to go on the other side of the 4'x8' bloom tent. That's all I have to report today!
Thanks for stopping by my garden!
Please check out my other diaries & give me a follow!
Happy growing my friends! ☺️🌱
Peace, ☮️
Love, 💚
and Frosty Nugs! ❄️🌲
- Fo' Twenny


Likes
5
Share


@CRIM_mir
Follow
OCTOBER 20 (DAY 24): Week four has begun, and I am now so completely full of questions. I’ve got preflowers on at least 2 of the 3 plants, the terminal nodes (is that right?) on all three are looking... uh... busy... lots of long, skinny growth coming out of the bud sites. I am wondering if this means it’s time to start transitioning to bloom nutes, or if I’m a little early yet.
On the subject of bloom nutes..... wtf? There are so many options, and it’s hard to tell what can be used with other things and what products are supposed to be direct competitors. This is definitely going to require some trial and error.
I’m also not sure what to do about the lights. Because I’m using LST on some but not all of the plants, one is significantly taller than the others (and thus closer to the lights)... this looks like a grow question.
OCTOBER 21 (DAY 25): After dealing with a runaway heat problem in my tent and major height discrepancies between the LST’ed plants and the control plant, I decided to reorganize the tent... again. I’ve got my tiny tent in a nook in my bathroom, and there aren’t any ports for intake fans at the bottom of the tent (just windows), so I had been running a small intake fan shoved right up between one of the mesh intake windows and the wall. That didn’t give a ton of open air for the intake fan to draw from, so I rotated the tent 90 degrees so the intake fan has the open room air to pull from. I also raised the LST’ed plants by about 6” so the canopies of all three plants will sit roughly equal. We’ll see if this works.
Τoday I fed the plants again. I’m not sure if I am going to prefer to go the FF Bembe route or the AN Big Bud/Bud Candy/Overdrive route, so I am doing a side-by-side on my LST’ed plants. Plant 3 received Bud Candy today, while plant 1 will get Bembe starting next week.
I have only been feeding the plants nutes once a week. I’m wondering if I should step that up or just stick to once a week unless the plants start squawking. Any feedback would be much appreciated.
TL;DR:
To flower or not to flower... to feed or not to feed... to water or not to water... these are the questions. Control plant = winning.
***************************** LST Kit Info *****************************
In case anyone is interested in the LST kit I am using: https://www.etsy.com/listing/831218796/growth-manipulation-kit-for-low-stress
Engineered Essentials offers these in two sizes — regular and seedling/clone. I think these autos are small enough that I should have gone with the seedling size, but I have some on the way and will report back once I give them a shot and can compare.

Likes
8
Share


@VanillaGorilla
Follow
OCT 9- DAY 46 - This girl is my prettiest girl in the tent. Also stinkiest.
Likes
49
Share


@hawkeye_diesel66
Follow
This week she was really putting on the weight. She'll be taken down on day 71. I can't wait to see what she weighs in at. This is by far the biggest autoflower I've grown and the best producing plant. Her stem was split on day 63.
Processing
Likes
23
Share


@MadeInGermany
Follow
Hi everyone 🤗.
Welcome to a new diary.
Cuttings were cut and rooted last week 🙂.
Today they were placed in 11 pots in Canna Coco Proffesional +.
Green Buzz Liquids is used for the fertilizer 😀👍.
Made in Germany 🤗.
I looked at the compositions of the individual elements and I am very impressed and excited about him 😎.
Greetings go out to Green Buzz Liqudis, and a big thank you for the support 🙏🏻👍.
Which training methods I will use will be decided spontaneously each day 😃.
I wish you a lot of fun with the diary, stay healthy l and let it grow 🌱.
You can buy this Strain at
https://thecaliconnection.com/seeds/girls-scout-cookies-34.html
You can buy the fertilizer at
https://www.greenbuzzliquids.com/
Type:
Girls Scout Cookies
☝️🏼
Genetics:
GSC Tint Mint
👍
Vega lamp:
2 x Todogrow Led
Quantum Board 100 W
💡
Bloom Lamp :
2 x Todogrow Led
Cxb 3590 COB 3500 K 205W
💡💡☝️🏼
Soil :
Canna Coco Professional +
☝️🏼
Fertilizer:
Green Buzz Liquids :
Organic Grow Liquid
Organic Bloom Liquid
Organic more PK
More Roots
Fast Buds
Humic Acid Plus
Growzyme Big Fruits
Clean Fruits
Cal / Mag
Organic Ph - Pulver
☝️🏼🌱
Water:
Osmosis water mixed with normal water (24 hours stale that the chlorine evaporates) to 0.2 - 0.4 EC. Add Cal / Mag 2 ml per l water every 2 waterings . Ph with Organic Ph - Pulver to 5.8 .


Likes
40
Share


@PapaBlob
Follow
13/05 Un léger excès d'azote. C'est bien trop vert.🤔
15/05 Elle peut bien mieux.. zut!.. j'ai été trop maladroit avec celle-ci. Mais c'est pas fini alors elle peut me faire mentir.. Hein!.. Aller.., un petit effort pour papa.😇

Likes
24
Share


@Firepharmer
Follow
Rock hard buds Miicrobialmass for the win and the new led is killer. The knobs like knots grow out of the sides of the buds are something to look at wow !!! Monkey berries is in flushing mode , slurricane won’t be far behind in the next week or 2 I’ll flush


Likes
12
Share


@Ieiogrow94
Follow
Eccoci qui...
Scusate per il ritardo ma sono stato super impegnato, SIAMO ENTRATI NELLE ULTIME SETTIMANE DI FIORITURA!!
Ormai si vede una maturazione costante giorno per giorno ed ha tutte cime come PIETRE, durissime e super colorate!!!
Grazie a @KhalifaGenetics e @xpertnutrients per la collab e a tutti per il supporto🔥🌲❤️

Likes
2
Share


@Greenbean15
Follow
Large 2x4 tent: Pineapple Express far back left corner, white widow front left corner; berry-white middle and purple trainwreck far right.
Small 2x3 tent- purple trainwreck on week 7-8 of flower and white widow on week 3-4.
Male-separated in a dark non-aerated room
All the girls are growing well. Berry white suspected plant is still looking indica. Purple trainwreck is budding well and stretching too. Much more than I’ve seen other PT plants do, I don’t think the nodes are too spaced out though. White widow is starting to frost up. This particular plant is a clone, the mother developed buds on the leaves and the fan leaves were covered in trichomes giving me lots of good trim for edibles. The leaves are already beginning to frost up. The Pineapple Express is a bit out of control, I had to put a second net up to control her. I went ahead and super cropped her as well, I did snap a few branches but she doesn’t appear to be phased by the damage.
I selectively pollinated specific branches on each female in the larger tent. The male was removed before the pods opened. I think one pod may have already split but I tried to minimize his natural pollination. He was moved into a different room with no air flow and no light. Pods opened in a few days and I used tips to collect pollen and then dab onto buds. Pollinated branches are marked with a green tie around them. I’m hoping that by spraying the tents with water after pollinating that I didn’t pollinate the entire tent.
Here’s to hoping for neat seeds for in the future whenever I am able to grow again and for good bud 👩🌾🏼🌱


Processing
Likes
11
Share


@Vegasgrowermx
Follow
3erd week in the pocket still using Sun ligh i started giving them a root enhancer nothing else had to use mad farmer to bring the ph water down Las vegas water ph is too high my ph reader was reading 7.5 so it was adjusted to 6.5
Likes
1
Share


@Dr_Med_Rasen
Follow
🗓️ Week 5 – Nutrient Refresh, Net Adjustment & Light Optimization
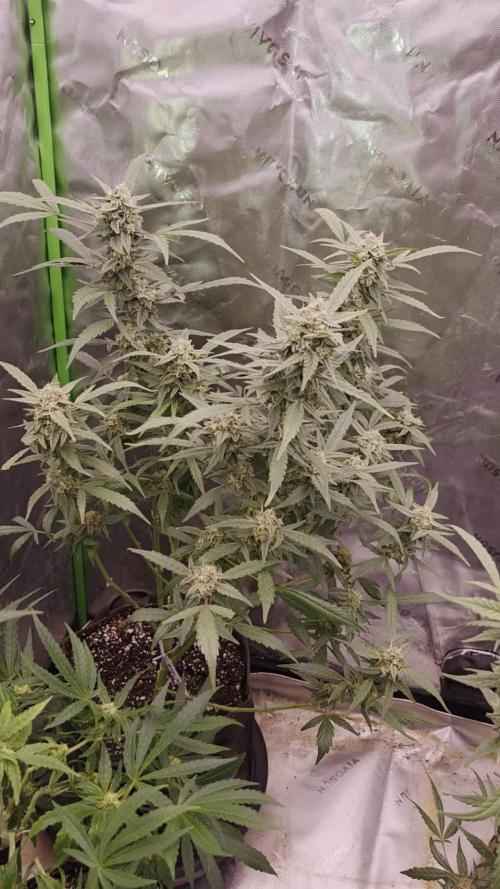
Arrived in week 5 with a complete nutrient solution refresh. This time using 2.5 ml/L Plagron Hydro A & B and 1 ml/L Plagron CalMag Pro, mixed into a total of 13 liters of water (the bucket turned out to be bigger than expected, according to the Amazon specs 15L). pH adjusted to 5.5 using Hesi pH-.
During the water change, I lifted the SCROG net briefly to check on the roots – they’re looking great: bright, healthy, and strong. Net was repositioned afterward.
The light is now running at level 8 out of 10, delivering around 800 PPFD in the center and about 700 PPFD at the edges, with a distance of 35 cm to the canopy – everything’s well dialed in!
—————
🗓️ Woche 5 – Nährlösung, Netz & Licht-Feinschliff
In Woche 5 gab’s ein frisches Nährstoff-Update: Die komplette Lösung wurde ausgetauscht – diesmal mit 2,5 ml/L Plagron Hydro A & B sowie 1 ml/L Plagron CalMag Pro auf insgesamt 13 Litern Wasser Eimer misst mehr als gedacht – laut Amazon-Beschreibung 15L. Der pH-Wert wurde auf 5,5 eingestellt mithilfe von Hesi pH-.
Beim Wasserwechsel habe ich das Scrog-Netz kurz nach oben gezogen, um den Wurzelzustand zu checken – sehen super aus: hell, kräftig und gesund. Danach das Netz wieder sauber positioniert.
Die Lampe läuft nun auf Stufe 8 von 10, was etwa 800 PPFD in der Mitte bringt. Am Rand sind’s ca. 700 PPFD, bei einem Abstand von 35 cm zur Pflanzenspitze – also alles gut im grünen Bereich!



Likes
13
Share

@Bread_n_Buds
Follow
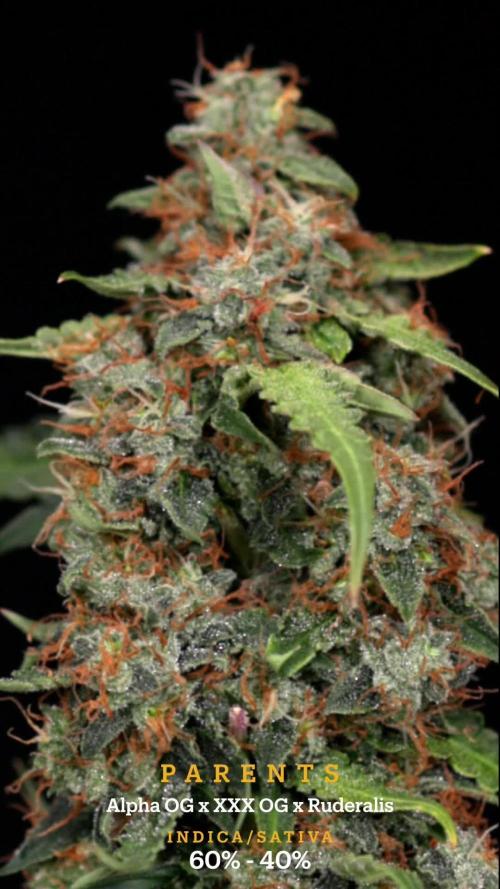
This week I present the HARVEST of GODFATHER OG Autoflowering #2. The first plant is another monster, the one you found last week, the one before harvest. Thanks to an exceptionally long transition period between vegetative and flowering, it has developed a large quantity of cannabis and truly splendid flowers, with impressive resin production, beauty, and robustness.
The plant has a lanky appearance, due, as mentioned, to a longer-than-average transition period between vegetative and flowering. It almost seemed like it wouldn't flower, but then, perhaps due to genetic characteristics or the addition of Power Buds to stimulate initial growth, the plant performed at its best in a small pot.
Pot and soil - This plant was grown in an 11-liter pot with Plagron BiloLight Mix organic soil.
Lighting - The Zamnesia Phytonaut 480W LED lamp, used from mid-flowering onward, allowed fruiting. We achieved a PPFD (photosynthetically active photon flux density) between 800 and 1200 μmol/m²/s, with cycles of 24, 23, 20, and finally 18 hours.
Z https://www.zamnesia.io/it/14526-lampada-led-per-coltivazione-phytonaut-480.html (National link in case Google doesn't work)
Growing system: Zamnesia Ecosystem, fan, extractor, and grow tent, all made by Zamnesia.
Trichhomes: We let the plant mature longer than usual to bring out its indica characteristics; this time, there are numerous amber trichomes and beautiful red-tipped trichomes.
Fertilization: Grown with Plagron Official, a 100% organic base fertilizer, and all recommended additives.
Visit www.plagron.com for grow cycle calculations, product selection, and general information.
All nutrients are available on the Zamnesia website. Also check out the live substrate and the fantastic new Zammi product line.
You can find this excellent strain here:
https://www.zamnesia.io/en/11102-blueberry-crumble-auto-zamnesia-seeds-feminized.html
(Google it if the link doesn't work; it's a national link)
You can find this excellent strain here:
https://www.zamnesia.io/it/14330-godfather-og-auto-zamnesia-seeds-femminizzato.html
(Google it if the link doesn't work; it's a national link)
Terpene // Caryophyllene, Myrcene, Limonene
Parents // Alpha OG x XXX OG x Ruderalis
Genetics // 60% Indica / 40% Sativa
THC // 26%
CBD // 0-1%
Climate // Mediterranean
Resistance // Mold Resistant
Taste // Aroma // Sweet, Fruity, Spicy Pine Diesel
Effect // Relaxing, long-lasting, body high, calming
Zamnesia Description - Godfather OG Automatic by Zamnesia Seeds is the autoflowering version of one of the most potent OG strains on the market. With 26% THC, a rich terpene profile, and a full flowering cycle of 9-10 weeks, this indica-dominant hybrid is ideal for growers seeking fast, aromatic, and intense results without compromise.
Godfather OG Auto is the result of a cross between Alpha OG, XXX OG, and Ruderalis. This blend retains the potency of the original OG while incorporating the speed and autoflowering potential of Ruderalis. The 60/40 indica-sativa balance ensures fast and reliable yields.
Every hit delivers the classic OG bouquet: sweet fruity notes, fresh pine, wood, and a subtle diesel aftertaste. The smoke is dense, aromatic, and satisfying, perfect for lovers of bold, complex flavors.
Compact and discreet, Godfather OG Automatic is perfect for small spaces, balconies, or grow tents. Indoors, it can reach a height of 100 cm with yields of up to 450 g/m², while outdoors, it reaches 120 cm with a potential yield of 150 g/plant. All this in just 9-10 weeks from seed to harvest, with feminized seeds for maximum reliability.
"The best that nature has to offer"
www.zamnesia.com

Likes
25
Share


@kizdog
Follow
So this week I saw some decent bud development! There are a couple of colas with tips a little too close to the light, but they aren't getting super high PAR measurements so I think they're good. I added PK 13/14 this week, so I wanted to see some interesting changes. Not as much as I thought, but some flowers are noticeably much fatter than a few days ago. Had an issue with the top layer of my coco getting dry which I realised to be from the 15L dehumidifier I had in there, right next to my pot 😳 So that's now on full power in the room outside of the tent. The heat can be a bit of an issue, reaching 27-28c briefly some days. There's been a couple of fluctuations in the humidity, from 55% RH to 70%, so I've straightened the ducting and tried to perfect my ventilation and environment as much as possible. I'm debating buying a co2 bag to help my plant deal with the heat and intense light. The trichomes are really starting to show, with the 60x magnifier I can see so many cool heads. It just seems that my buds aren't really filling out beneath the pistils, causing me to worry. This week there were so many photos that even after picking out my favourites I ended up with 111 of them! Also, it's worth noting that the nutrient amounts I have listed are in *ml/1.5l. Happy growing!
KIZDOG
Likes
1
Share


@Dailydabs420
Follow
Growing well so far. This week I added some LST to encourage outward growth. Things started to get a little wonky towards the end of the week bit once she starts to stretch out i think she will look a little neater.