
Likes
Comments
Share


@ButtersStotch
Follow
2019-12-08 (day 9) -not much too add, seedling is growing. Atmosphere in tent is stable, slightly colder than I'd like but nothing I'm worried about. My second Meizhi 600 showed up and I will add it most likely in week 3 or 4. I may pop 2 more seeds to grow simultaneously with these two girls, just a bit worried about the coverage of these lights, we'll see I haven't made up my mind yet. I'll likely implement nutes by the end of next week.

Likes
3
Share

@Pheno_Minds
Follow
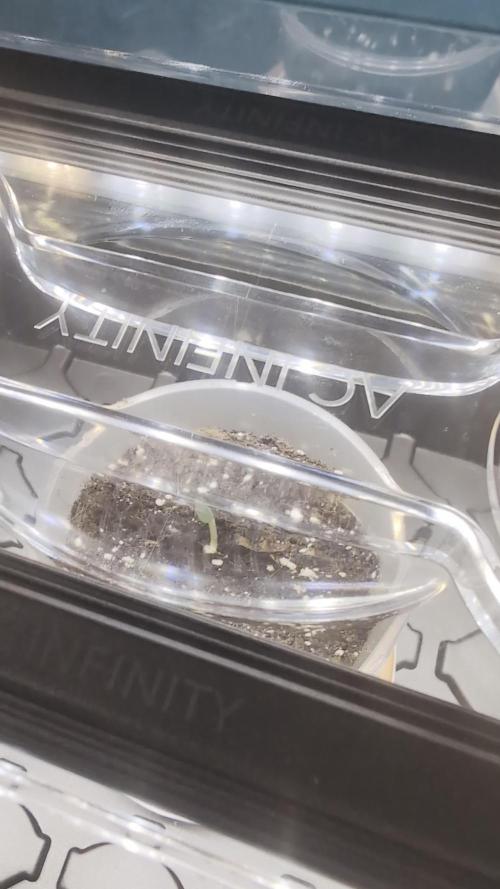
Gezogen im Eazy Plug 2,5 x 2,5 und in dem RQS Propergator.
Danach in den Becher mit Plagron Lightmix eingesetzt und ins AC Infinity Gewächshaus gestellt. Nutze es zum ersten mal und hatte die Lampe zu niedrig eingestellt.
Jetzt steht sie im Sweetspot.
Likes
5
Share


@CannaBossBizz
Follow
Nothing really Changed. Did a topping today. She's A little taller. Love to See her growing ❤️

Likes
27
Share


@Trickybis82
Follow
OK so this week I have officially changed yje light cycle and have been running a 12/12 and will of course carry that on now until the end if we get there.
The food amounts have now changed on to flowering amounts and even though the plants are different in size they both look really well.
I have started to feed them both the following
Micro 32ml
Grow 12ml
Bloom 48ml
Ph is 6.0
These amounts are based on 20 litres of water.
So I am hoping to see changed and some flower heads popping through (I hope).
Let's wait and see what happens as again this is my first 12/12 run. So really hoping for the best here lol.
Peace out growmies
Likes
22
Share


@Slobasian
Follow
Both plants same weight just ones more built into a bat and the other is built with small strong side shoots


Likes
4
Share

@Enki_Weed
Follow
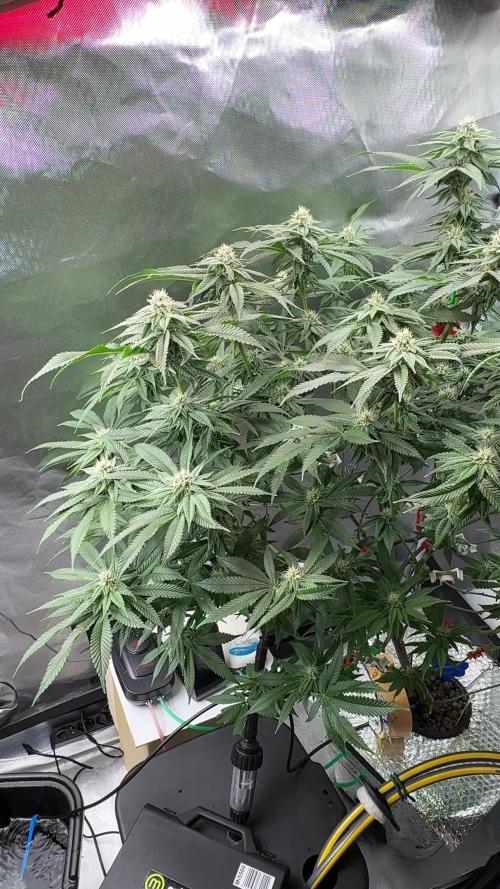
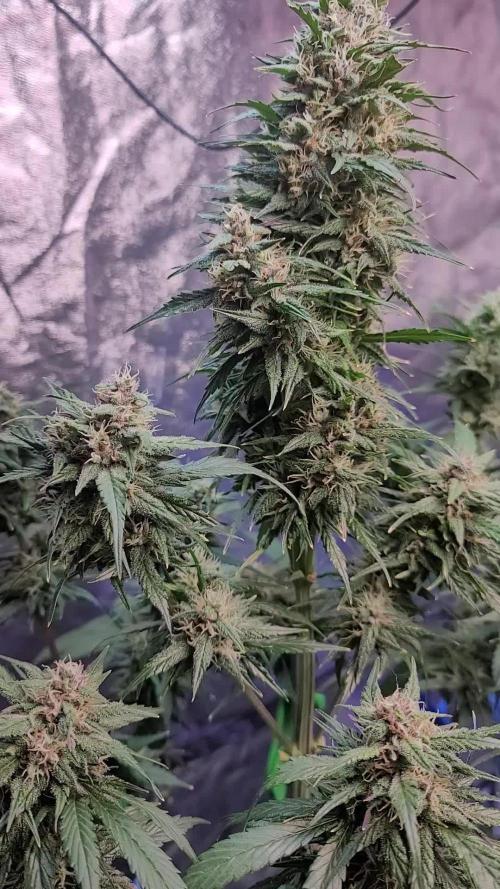
Wir sind jetzt in der Mitte der Blütephase und die AK-47 fängt ordentlich an, Muskeln zu zeigen. Die Trichombildung ist massiv und zieht sich schon weit über die Zuckerblätter – der typische AK-Geruch wird von Tag zu Tag intensiver!
Ich habe gerade einen kompletten Wasserwechsel durchgeführt, damit die Lady für den Endspurt frische Nährstoffe (besonders Phosphor und Kalium) zur Verfügung hat.
💧 Wasserparameter (aktuell):
• pH-Wert: 5,8 – 6,2 (wird stabilisiert, nachdem die Sonde etwas gezickt hat)
• EC-Wert: 1,6 (Ich habe den Wert von 1,8 leicht gesenkt, da die Blattspitzen eine leichte Überdüngung anzeigten)
• Wassertemperatur: 19°C – 21°C
🔍 Beobachtungen & Herausforderungen:
Die Pflanze war letzte Woche etwas wählerisch. Ich habe bemerkt, dass der EC-Wert gestiegen ist, während der Wasserstand sank – ein klares Zeichen, dass die Nährlösung für ihren aktuellen Durst einen Tick zu stark war.
Optisch steht sie super da: ein sattes, tiefes Grün und eine sehr vitale Blütenstruktur. Die ganz leichten "verbrannten Spitzen" an den Blättern nehme ich als Signal, den EC-Wert jetzt bei 1,6 zu halten. Das ist der "Sweet Spot", an dem sie am effizientesten arbeitet, ohne Salzstress zu bekommen.
🛠️ Was diese Woche gemacht wurde:
• Reservoir-Wechsel: Komplett frische Nährlösung angesetzt.
• Monitoring: Tägliche pH-Kontrolle (aktuell manuell, da der Monitor kalibriert werden muss).
• LST/Pflege: Ein paar große Fächerblätter wurden strategisch entfernt, um die Lichtdurchlässigkeit zu den unteren Buds und die Luftzirkulation zu verbessern.
Nächstes Ziel: Die Blüten beim Anschwellen beobachten und die Werte stabil halten!

Likes
3
Share


@JackTheSparrow
Follow
I lollipop them today!!!!!😁😁😁😁😁😁
It's their 37 day and they just started getting into Flower and getting taller
so I Lollipoped them and did a little bit of defoliation
so the light will get to the bit lower buds sites
since I did some LST in a bit later stage which went incredible.
But it meant some buds sites are big but still a bit lower in comparison so I didn't take them out of course.
And i did some SCroG but took it out the day before the lollipop and we'll see if the girls are fine I will put it back in 2 days or so depending on the plant growth
Likes
72
Share


@Papa_T
Follow
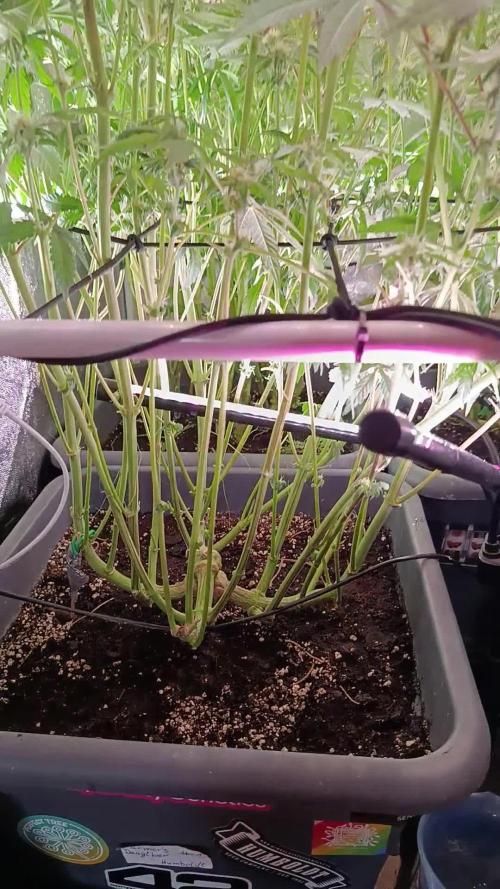
Well here we are finally out of the three week germination/seedling stage and now we’re on to week 1 of vegetation phase of Penelope’s life.
Wednesday Sep 15 Day 22 W/k 4
-No water pot still heavy
-First day of vegetation have celebrate with her first topping
-She’s got to learn this is a harsh world
-Removed janky leaves
-Sink or swim
-Let’s go
Day 23 W/k 4
-No water
-She’s grown significantly since yesterday
-Topped two lower branches
-Very happy with her progression
-She’s adapting to her condition and responding well to training
-Leaf blemishes are just battle scars
-Don’t be making no bitch ass plants up in this garden
Day 24 W/k 4
-No water
-Not much really to say today
-Just grow
Day 25 W/k 4
-Same as yesterday
-Grow
Day 26 W/k 4
-Feeding day with aerated tap water two gallons 62.5 PPM base
-Add 1 tsp Cal/mag - 319 PPM
-Add 1.5 tsp Grow - 708 PPM
-Final - 2 Gallon 6.2 PH - 717 PPM
-Runoff 1.5 L 5.58 PH 3510 PPM
-It’s been an abusive day
-Getting water boarded
-Getting some more topping HST
-Bottom fan leaves will probably curl and get trashed
-She’ll be fine
-Told her I was sorry and I won’t do it again
-That’s a lie haha
Day 27 W/k 4
-No water
-Bottom leaves curled a bit as expected after the waterboarding
-She’s just loving life and exploding
-Get yet knickers on for the ride
-Smacked her around some more with a light defoliation and topping two branches
-This is it for topping I’ve got her set up the way I want now
Day 28 W/k 4
-No water
-Perked up again today after more defoliation and LST
-Taking to LST well
-Not much more to say
Was a pretty abusive week for Penelope. She’s pulled through like a champ though. So she’s all HST’d up and set up for how I want to develop her. Now it’s three weeks of veg! She’s gonna be a brute!!
LET’S GO!!

Likes
15
Share


@JUNGLE_B4RNS
Follow
Hey what’s up fellas ✌️
Week 2 of flowering,
I have trim the legs by cutting all the small shoots in the bottom that won’t reach the canopy. And removing some few big fans leaves that are covering some lower shoots.
I gave them a lil bit of nutrients during this week, last time was about 13 days ago. Just to support the stretch.
Keeping an eye on the plants is the best way to know when to feed them.
Lights are at max level now, all the ladies should have plenty enough space to grow without reaching the cooking zone. The Mars-Hydro led is just a bit lower and closer as it produces less heat.
✅New Growers Tips✅
✅Trim your plants legs, don’t waste energy on the bottom popcorn buds.
✅Your plants are stretching, they need Nitrogen, stick to your Grow/Veg. nutrients
✅Always pop more seeds than expected to grow, look at the shitty plants in the middle between the 2 scrog in the video, those plants were germinated same day than the ones in the scrog... Keep the best phenotypes and put the shitty ones at the trash.
That’s all for this week 😉
Stay tuned for the Jungle Show 😂👍
(I’m looking for a job in the Cannabis industry as Master Grower, Mineralogist, Quality Control)


Likes
2
Share


@eh_eh_eh_buds
Follow
welp i pushed them 1 more week and now they are receiving the flower nutrients, i gave these ladies a heavy defoliation last week and as you can tell now it does not even look like a took a leaf off.. will possibly give 1 more like defoliation and then let them all put on the weight, lets see what these ladies are made of 😆

Likes
7
Share


@Bingbings_garden
Follow
Hellow growers.
Not quite sure whats going on but im now under the impression this isnt an auto as labelled. Lights have been on an 18/6 schedule but now i have set them to 12/12. I should be seeing pistils by now if it was an auto lol. I aint mad if it aint but i have veged a monster. Her stem has lots of girth her canopy is nice and even. Defoliated 22/11
Yay positive they are not automatic. So correcting info.
Likes
6
Share

@For2itous
Follow
Cut out a few leaves blocking buds. Smaller plant didn't like the quantity of nutes like the taller girl so cut back on her but 40in girl still giving full and loving it. Strawberry terps starting to come through, Lsd overpowering her in smell but any time I move leaves its super fruity 🍓 hope they continue to pack on weight. Can't wait for the full terps to come through. Happy growing 🌴
Likes
22
Share


@Limez
Follow
Cant say much about this week because i wasnt home. a friend harvested her. The Smell was good and i hope the trichomes were perfect. i will give a review about the taste and smoke when its fully cured an dried.


Likes
1
Share
@Ger-Smurf
Follow
Herzlich Willkommen in der 4 Blütewoche der Farmer's Daughter 😸 die Damen haben sich die letzten Tage noch mal durschnittlich um 10cm gestreckt. Die Blütenstände zeigen sich jetzt auch eindeutig bei allen 3. Ich hoffe euch und euren Damen geht's gut 😁
Update von 04.05.2026 : heute wurden die Ladys ein wenig entlaubt.

Likes
8
Share


@XanabaGrows
Follow
Just got a second light (Mars Hydro TS1000) to cover this 4 by 4 Tent. I don’t know if i should harvest, i don’t have a magnifier, but i have one o the way. Let know know what you think.

Likes
7
Share


@hash_thetics710
Follow
Cali smoke on and off lately- plants don't seem to mind too much.
They've been flowering for more than about a week now - I've up'd my nutrients a tiny tiny bit - fairly consistent though.
A couple of pests - leafhoppers - have been spotted tearing some small holes on a couple of my leaves
Just have been flicking off about two or three everyday, nothing to serious to worry about I think.
Also, I sprayed a foliar spray 'Diamatacious Earth' about a week ago - all over the bottoms and under sides of my plants - I'm hoping to not have to re apply another spray but might in the next couple of weeks if pests continue to infiltrate!
I went overboard on the tablespoons I used in my hand sprayer, applied a thick layer haha.
OVERALL - Plants maintaining healthy growth. Might look to lollipop or remove some unneeded giant fan leaves soon!!
THANKS FOR READING!! AUGUST 26, 2021

Processing
Likes
21
Share


@jboog80
Follow
Going into week two of flower. All are looking great. However, my clones that I took are not rooting yet. Out of 16 clones, I have one rooted clone. Thankfully it's off of my keeper. I think I let my rockwool cubes get too dried out. I fucked up!
I need new sunglasses! Can't get good pictures with the cheap ones that I have now.


Likes
8
Share

@IndigoMist8
Follow
Plants are are still doing well. MP#4 will be harvested next and the other are not too far behind.
I had to remove two large, mid stem nugs from GZ, due to caterpillar damage.
Weekly BT & silica foliar along with molasses watering