


Likes
Comments
Share


@KarlsKraut
Follow
Samen am 30.04. getauft und am 02.05. eingetopft.
20g Green House Feeding BioGrow in der Erde eingemischt.
Am 04.05. das Licht der Welt erblickt.

Likes
4
Share


@GrowPassionItalyChris
Follow
Procedono gradualmente, hanno sofferto un po' il freddo al buio e ciò ha comportato un rallentamento nell'assorbimento del cibo...ma si sono riprese ed iniziano a riempirsi di infiorescenze resinose e profumate! Sono state rimosse le ultime foglie grandi!


Likes
5
Share


@Ieiogrow94
Follow
Eccoci qui...
Tutto va per il meglio, questa settimana si inizia a vedere la resina e ora si inizieranno a formare le cime, per questo aggiungo Sugar Shot di @xpertnutrients vedremo l'evoluzione settimana prossima.
Grazie a tutti per il supporto🔥🌲❤️

Likes
54
Share


@Rasta_Faraev
Follow
19.09.21. Всем привет, дорогие соратники-гроверы. Время летит, Халку 2 недели, встречайте юбеляршу. 😄 Жирнющая, низкорослая, толстая, мохнатая, просто бомба а не девочка. Я думаю её низкий рост и жирность связаны с использованием хорошего led светильника и клрневого стимулятор, который работает. Пересадили девочку в 10 л мешок. Кстати, для безпроблемного пересаживагия, я беру два стакана, у одного отрезают дно и делаю два боковых надреза. Вставляю его в стакан у которого внизу есть дренажные отверстия. При пересадке, я достаю разрезанный стаканчик и вставляю его в новый горшок. Остаётся лишь дорезать боковые надрезы и вуаля. Всем до скорой встречи, Растафарай!!! 🙏Спасибо за внимание 🙏
21.09.21. Халкуша продолжает пухнуть и... Не расти😄 Преподнял немного лампы, кормление через день. Опрыскивание перед каждым сном.
24.09.21. 19 дней. Совсем не 0очет расти вверх, только в ширь, преподнял лампу на 10 см. Красавица, ведь правда?

Likes
16
Share


@Caertner
Follow
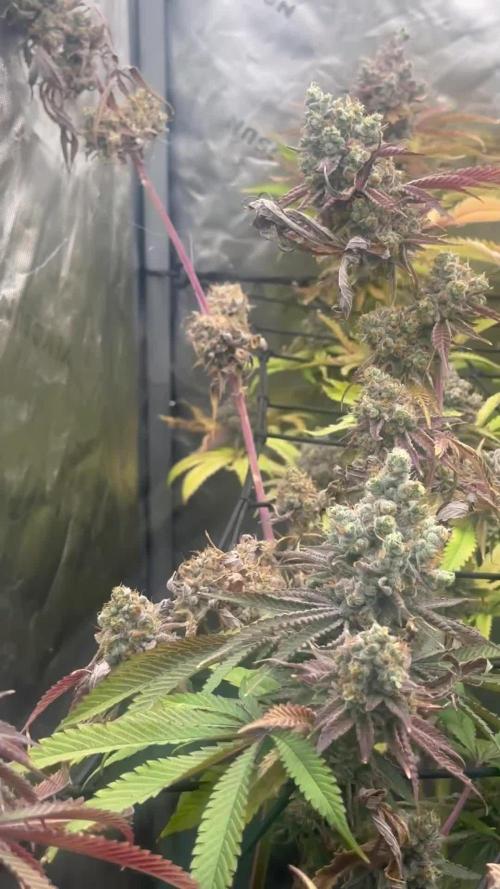
Genug Vegi, jetzt gibt's Fleisch.
Umzug ins Blütezelt. Systemtechnik machts einfach. Keine Erde, kein Dreck... nur ein Paar Wasserspritzer.
Zeitrafferkamera ist aufgebaut. Erster Test war ok, aber das geht besser.
Da heute auch Wasserwechsel im Blütekreis war, konnte ich sie langsam an die höhere Düngekonzentration gewöhnen... ob die Stunde was bei den Blattspitzen bringt ist fraglich. Ich berichte.




Likes
27
Share


@ButterfliesLittleFarm
Follow
Hello Diary.
It ended the fourth week of flowering on my small farm. When I open the box, I am overwhelmed by the strong fruity scent. I have never had such a scented farm before. 😋
The plant looks really impressive, it is a little over a meter high, it is full of flowers that literally cover the whole branch, especially the main cola. 😎
Along with two Haze Berries on the farm, there is also one Fat Banana Auto, on which brown spots have started to appear. For now, Haze Berry looks healthy which gives him a rating more for resilience.
Watering is every 2-3 days, with BioBizz being added every other time. Maybe it’s too much for Fat Banana after all. Preventively I add CalMg 1.5 ml / lit.
Let’s take a look at what happened last week.
07/11/2020 - Day 44.
Watering. I preventively added 1ml / l CalMg and regulated p.H. at 6.3 with Plagron’s Lemon Kick.
Temp / Humidity on the farm - 25.4 degrees and 44% humidity.
09/11/2020 - Day 46.
Watering. Since I noticed leaf decay, I watered like two days earlier just by adding CalMg and I regulated p.H. at 6.4
Temp / Humidity on the farm - 25.7 degrees and 44% humidity.
12/11/2020 - Day 49.
Photographing and watering. This time I added BioBizz as scheduled for the current flowering week.
Temp / Humidity on the farm - 24.8 degrees and 44% humidity.
Overall, I am pleased with how the plants look and how well they are progressing. Now that the intense smell is there, I somehow see a light at the end of the tunnel. Two to three weeks and the harvest is coming. See you soon. 🙌
Likes
26
Share


@MiyaguiOkPolilla
Follow
Esta cepa es fenomenal, la saqué a exterior en la última semana y media para aumentar sus terpenos y minimizar la degradación con solo 3 horas de luz directa, 7° C noches y días de 15° C ; me recuerda mucho a Critical Bilbo, un aroma dulce, intenso y muchísimas ventajas de parte de la genética: Resistencia a plagas, podas violentas y entrenamientos de cualquier tipo. Fácil de obtener esquejes y mucha producción de resina 🤤💐.
Me encanta esta cepa en exteriores pero en interior ha mostrado ser más que apta, sólo al final de su etapa ha mostrado algunas flores macho pero creo que es causa del estrés por las bajas temperaturas en sus últimas 2 semanas.
Saludos a todos y muchas gracias por pasar a ver los diarios ☺️

Likes
8
Share


@Midwest_X_Mayhem
Follow
GSCE is making crazy gains. The BB has also started to pack on great weight but much more bushy and has passed the GG4 in both size and appetite. As for the GG4 for not sure why she slowed down for a little while but as of today(Day30) she is starting to strech out more like the GSCE. The rando bag seed is starting to really take off as well noticed small pistils starting just a couple of days ago. Bumped the watts up to 290w(85%) probably wont go any higher.
4/11 Week 5 has ended and im more then pleased with the results so far being that this is my very first time growing. The GG4 has shown the most growth these past couple of days as far as the autos go. The bag seed on the other hand had streched at least 8" in less than 1 week. If anyone has any suggestions, tips, criticism whatever ill take any and all of it.

Likes
20
Share


@Ginger_gnome
Follow
Was a productive week with the aerogarden grow box. Cleaned the tank, water pump, air stones, nutrients probe and a massive massive clean up with the plant itself. I must have removed close to a pound in leafs from this plant over a 3 day period, every time I'd look at it id see a section that I missed. I lowered the PPM down a bit and also trying to keep the temperature in the res down a bit also. Hoping to be done in a few weeks.
Happy growing everyone

Likes
13
Share


@FlavoursUk
Follow
So, things are going great. The RO water change left me with a nice sterile clean res. The plants are loving the lighter feeding and it shows.
The trolmaster has my light schedule dialled in with the sunrise and sunset setting
Make sure you follow my YouTube and Instagram accounts linked on my profile page.

Likes
54
Share


@BudXs
Follow
Geurilla set up because it is ultra important that my neighbors, wife, police dont find it
Gravity fed drip system feeds mini hempy buckets. Continous drip, bucket takes about 35 hours to drain. This will be a mostly video based diary going forward.
Contest or not, I challenge all to this fun solo grow.
This strain is a favorite of BeanswithPork and was gifted to me in December 2019. I checked the seeds for mites
Follow along and see if I dont get busted

Likes
77
Share


@Basementganja
Follow
Flowering slowly, likely due to the roots having low PH(4-5)..
I flushed her a few weeks back.. I'm done experimenting with nutrients for now; I had better results, with less issues with just using the basics.
*Special Nug picture - This Bud-site has a different shape/structure compared to every other nug on this plant.. Never seen this before, on any other strain.
Likes
19
Share

@Wilstang
Follow
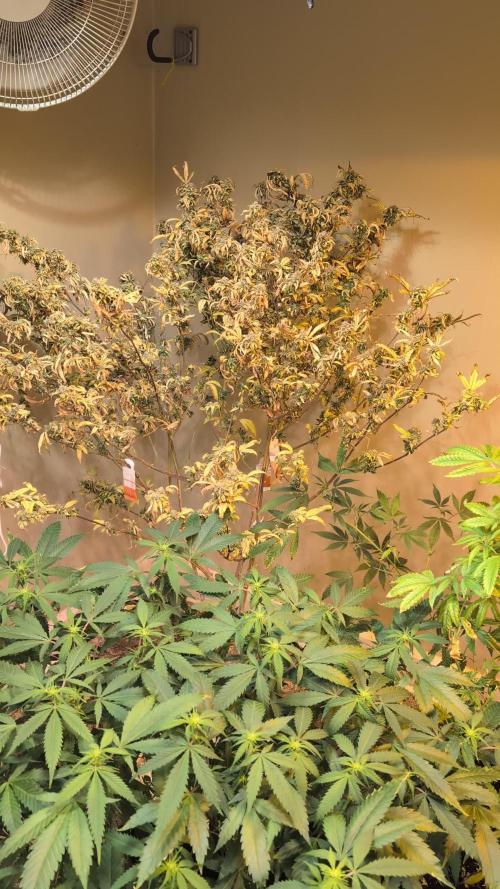
IPM
https://www.arbico-organics.com/product/mite-predator-phytoseiulus-persimilis-plus-sachets/mite-predators
https://www.arbico-organics.com/product/spidermite-destroyer-stethorus-punctillum-adults-larvae/pest-solver-guide-mites





Likes
28
Share


@m0use
Follow
This has been a fun week for this Cheese from Humboldt, it has made a mini flower on one of its fan leaves and a bee got wrecked in one of its flowers. I want to say it got stoned, but no idea if they can, the bee was super chill I could pet it and get real close with the macro lens, it did not care one bit. It could have been injured from something else like a predator or pesticide but she was gone by the following evening.
Other then that nothing to new, the plant is growing nicely and I have no complaints about it. I keep comparing the smell from it to the other cheese variety from Dinafem I'm growing and they are different but I cant yet focus in on how, will be better adept at doing this once they are both in flower, I got high hopes for both plants.
Added in the standard 2 week fertilizer Acti-Sol Tomato & Vegetable 4-6-8, had it fortified into the soil from the get go so did not add extra it in till now. About one month out.

Likes
18
Share


@DabNinja710
Follow
5/3/2020
this is my first grow. Today I took the seedlings and put them in there pots.
Tomorrow ill start the lights.
I added...
2 tsp Big Bloom
¼ tsp Holy Mackerel
1 tsp Boomerang
5/4/2020
I just checked on the seedlings. There both already popping there heads out of the ground already.
5/5/2020
Turned the light on for the first time for this grow and for the first real time ever.
Added:
1 tsp Kelp I kelp you
¼ tsp Kangaroots
¼ Microbe Brew
5/6/2020
First real leafs sprouted today!
5/7/2020
Nothing to report today. A rest day.
I will be just giving the. Plain water for the next couple weeks.
5/8/2020
I gave her a little less than ½ gallon of PH'd water. (Around 6.5PH)
I can see the 2nd set of leafs growing. And she's about 1¼" tall.
5/9/2020
She's seems to be coming a little slow. I'm worried I messed something up. Overwaterkng lights to close? Idk. Im more worried about the Zkittlez Auto a little more than this g.g. I'd really hate to see i messed them both up.
* also added a vent to the outside for the exaust fan. I think this will help a ton and it seems to be working pretty good. I'm going to be getting a Ac Infinity cloudline t4 fan in pretty soon this will help a ton.
Likes
5
Share


@Gingercannacat
Follow
LST only pheno is turning purple and the topped one is forming bigger bud packed with resin. They are progressing rapid now.
3 to 4 weeks to go

Likes
37
Share


@GrownwithLED
Follow
After germinating the seeds are transplanted into small pots with soil (see tutorial in VIDEO above). The soil is prepared with water mixed with a little bit of BIO NOVA Roots (0,5 ml/l), which aids the development of the seedling. Transplanting is very easy now, because they have grown a STRAIGHT tap-root while hanging during the SERIOUS' WAY of germination. This straight root allows for easy potting of the seeds. Simply make a little hole in the center of the soil with your pinky finger and carefully place the germinated seed with the white root pointing DOWNWARDS into the hole. Best is to lay it onto one side-wall of the hole with the seed shell right at the surface. Then I push the other side inwards and enclose the whole root with soil. At the end only the top of the seed-shell peeks out of the soil. IT IS VERY IMPORTANT to plant the seeds NOT TO DEEP into the soil. The seedling only needs extra strength to work itself upwards thru the soil and you run the risk of the soil drying out and the seed dying off. When you PLANT THE SEED VERY SHALLOW into the soil (=with the top of the seed-shell still peeking out) your seedling can grow out right away and you have a small plant already 24 hours after putting the seed into the soil.
The small seedling sometimes still has the seed-shell on its 'head', it normally falls off by itself, but sometimes you have to carefully help and take it off with your finger nails. Be careful to NOT clip of the seedling accidentally when you do this!
The seed-shall has an inner lining, which feeds the small seedling when it germinates. This inner lining sometimes gets tangled around the stem of the small seedling after the shell has fallen off. This little skin MUST be taken off the stem right away! Once it dries up, it gets hard and can strangulate the seedling around the stem. In order to avoid this, the skin must be taken off as soon as possible! I show it in the pics above and also made a video about taking off the inner lining of the seed.


