Likes
Comments
Share
@somnabull
Follow
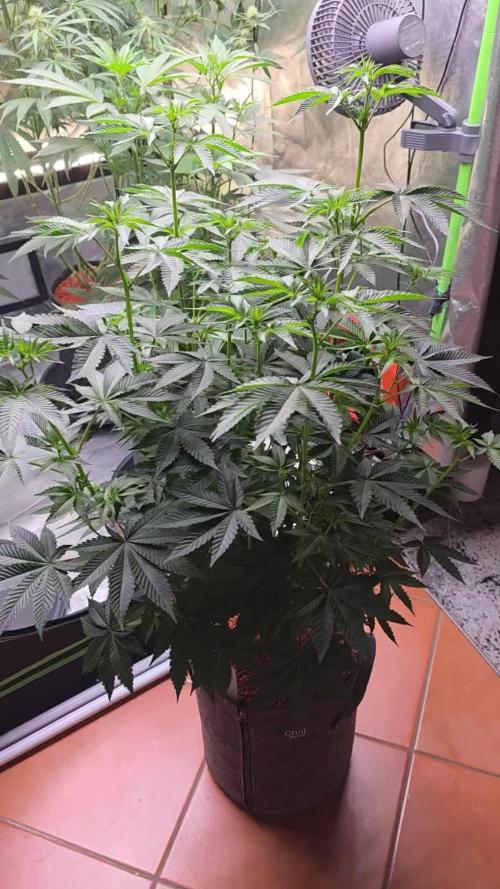
ROYAL MEDIC WAS BORN ON 25 AUGUST NOW SHE IS 36 DAYS WEEK6, ROYAL MEDIC 37 DAYS.WEEK6, I DEFOLATED HER AND MADE NET ON 1 OCTOBER. IF I HAVE MISTAKES PLEASE TELL ME THANKS, IT WAS MY FIRST TIME
Likes
14
Share
Likes
Comments
Share
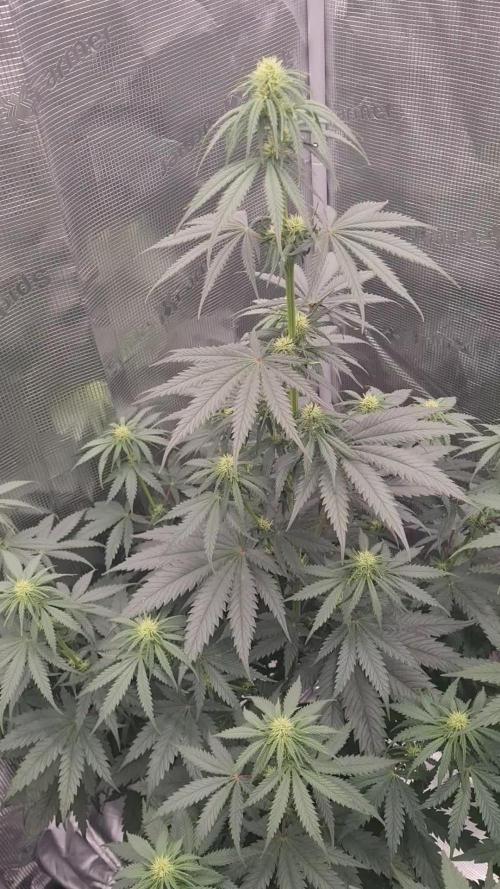
After this wild bushy stretch I had to do Late HST to keep them tops from burning
Likes
6
Share
Likes
16
Share
Week 7 of flower starting today for this amazing Green Gelato Auto and man she's fattening up fast these last weeks and she's stacked with trichomes .. When opening the tent I can smell a gassy citrus smell with some sweet earthy tones too just like they describe thid strain on the site .. So for now i will slow down feeding considerably and then flush this bad girl with ph'd water and flawless finish.. Really pleased to have this strain for Christmas time its going to be straight 🔥 Thanks everyone for passing by and showing love hope you have a great Sunday tomorrow and Happy Growing to you all!!! Update Day 80: Hello everyone i inspected her with the lens and i saw even too many amber trichs on the buds this means the THC is already decreasing in favour of CBN so i decided to cut this baby tomorrow at night time so will post more pics after cut then going to make a final harvest update with the dry weight !! She will be hanging drying after a nice wet trim at 60%rh and 20 C for 5-7 days or till the stems nearly snap.. Thanks for passing by and leaving a like my friends hope you have a lovely week!!
Likes
Comments
Share
Developing into a nice little bush. just started pre-flower, should be a monster.
Likes
17
Share
I got a week and a half notice that I had to go on a work trip out of country for 10 days, so the clown show continued. I was definitely overwatering them. Thanks @shinsimilla, I saw the difference after waiting a few extra days. Also, I definitely should have started LST at least a week earlier than I did. Now for work issues: I found an old security camera that the cats had knocked over a million times and damaged. With a lot of tape, I got it working again and set up in the tent so I could see what’s going on while gone. Be warned, the photos are NOT good quality. I also looked up DIY self-watering systems. I needed it as simple as possible to reduce the risk of something breaking while I was thousands of miles away. I found one where it wicks water up a cotton or wool string. Here's the link: https://youtu.be/P0hn5cKZ0Z0 I cut up an old 10K shirt that was made of cotton. I had just broken down my balcony garden since it’s already getting cold here. I took two long planters, lined them with a construction garbage bag to be the reservoirs. Even though the floor of the grow tent is waterproof and I put plastic between the floor and outside of the grow tent, I didn’t want to risk any water getting out while I was away. I was nervous y’all. Basically, you wet the fabric then use a chopstick to run the it through the plant from bottom to top. It needs to be long enough to have a few inches sitting in the bottom of the reservoir. I filled each with 3L of water with the BioBizz nutrients mixed in and ph’d to 6.1. More info in week 5.
Likes
5
Share
Beginning of week 4 so far so good. The girls are reacting well to there training. Vita race from plagron is a game changer. They are super green and healthy everytime I feed them you see the difference.Did some defoliation. Nothing major just removed any leaf overlapping or blocking light to lower parts of the plant.
Likes
170
Share
Bonjour à tous les padawans et les maîtres jedis Jour42 ma plante entre bien en floraison je pratique sur elle une defolliation pour permettre aux têtes de prendre la lumière La floraison des plantes de cannabis La plante de cannabis passe par différentes étapes de vie avant de parvenir à la récolte. Ces étapes sont : la germination, la pré-croissance, la croissance et la floraison. Pour les autofloraisons il n'est pas nécessaire d'avoir de changer le cycle de lumière elle entre en floraison automatiquement voilà d'où elle tient son nom "d'autofloraison" L'origine de l'auto-floraison vient de la sous-espèce "cannabis sativa ruderalis" , qui à l'origine produit de très faibles niveaux de THC. C'est en croisant cette variété de marijuana avec d'autres qui produisent des niveaux de THC plus élevés qu'à vu le jour ce magnifique compromis que sont les variétés auto-fleurissantes avec des taux de THC très satisfaisants. En parallèle, cela a permis d'améliorer la production de ces variétés, qui initialement étaient exceptionnellement basse. Pour des résultats optimaux, en culture Outdoor (extérieur), je recommande que la germination des graines de marijuanaAuto-flo se fasse entre avril et août. En culture Indoor(intérieur), la photopériode idéale que ce soit pour la croissance comme pour la floraison est de 20h de lumière. N'oubliez pas que ces graines ne sont pas tributaires de la photopériode pour passer en floraison. Il est préférable d'utiliser des pots d'une capacité de 10 à 20L dès le début, étant donné que leur cycle de vie est réduit, les auto-flo n'ent pas besoin de plus de volume pour se développer. Vu sa petite taille (et la discrétion) elle fait l'objet d'un bon choix pour la culture de cannabis sur balcons. La première variété de Lowryder auto-floraison a été créé à partir de cannabis indica sativa croisé avec des génétiques de cannabis sativa rudelaris par la banque de graines de marijuana "The Joint Doctor". Puis vinrent la White Dwarf de "Buddha Seeds", la Roadrunnerde "Dinafem", l' Auto Stoned d' "Autofem", la Speed Devil de "Sweet Seeds" , la Maxi Gom de "Grassomatic", la Flash, la Gnomo de Kannabiaet bien d'autres. Jour42 defolliation (video) Avant toute chose n'oublions pas de bien désinfecter ses outils et bien ce laver les mains. Quesque la defolliation ? LES CULTIVATEURS AMATEURS, PRENEZ GARDE, MAIS NE PRENEZ PAS PEUR La défoliation consiste à retirer les feuilles des plants de cannabis en intérieur afin d'accroître le rendementfinal. Le cultivateur amateur doit faire preuve de vigilance lorsqu'il commence à appliquer cette technique de taille. Malgré le débat sans fin entre ceux qui prônent cette technique et ceux qui la dénigre, il n'y aucune raison pour qu'un amateur ne s'y essaie pas afin de voir si ça lui convient ou non. COMMENT DÉFOLIER Que vous tailliez les feuilles ou les branches des plants de cannabis, il vaut mieux utiliser un sécateur stérile qui est confortable en main. Arracher des feuilles à la main manque de finesse et engendre souvent par accident, l'arrachement des couches d'une tige en plus de la feuille. L'objectif principal de la défoliation est de permettre une meilleure pénétration de la lumière et de promouvoir la production de plus grosses têtes. Les feuilles éventails qui font de l'ombre doivent être retirées. Tailler la tige principale et/ou les pousses secondaires n'est pas de la défoliation. La règle d'or lorsque vous donnez à vos plantes un rafraîchissement est de commencer avec les feuilles nourricières les plus grandes et les plus larges, en taillant du bas vers le haut. Il est important de retirer les feuilles stratégiquement et non pas au hasard. Pensez également qu'il vous faut limiter votre rafraîchissement à approximativement 10 à 20 % des feuilles totales de votre pied. Il est très facile de s'emporter durant la taille et de se retrouver avec des plantes chauves. Un excès de taille de feuilles empêchera la photosynthèse et paralysera vos plants. QUAND FAUT-IL DÉFOLIER Il est assez rare d'appliquer la défoliation comme seule technique pour obtenir un fort rendement. La taille des feuilles est généralement associée à d'autres méthodes de tailles et de palissage pour un meilleur rendement telles que le topping ou étêtage, le FIMming, le LST, le manifolding, le supercropping et le ScrOG. Les cultivateurs utilisant la méthode ScrOG auront besoin de retirer toutes les croissances inférieures ainsi que les feuilles et les tiges se trouvant sous le filet. Les plants de cannabis peuvent être défoliés dès lors qu'ils sont passés de la phase de plantule vers la phase de croissance végétative. Cependant, il est recommandé aux cultivateurs amateurs de laisser aux plantes 1 à 2 semaines de croissance végétative avant de s'attaquer à la défoliation de celles-ci. De plus, certaines variétés sont plus sensibles à la taille que d'autres et de ce fait, seront plus stressées par la taille des feuilles. Surveillez minutieusement le comportement de vos plants après la taille. Une période de convalescence de minimum 3 à 7 jours avant de recommencer la défoliation est fortement recommandée pour éviter trop de stress aux plants. Les cultivateurs peuvent également défolier pendant la phase de floraison, ce qui permettra à l'énergie de la plante d'être concentrée vers la production de têtes tout en limitant l'ombre et l'excès d'humidité. Néanmoins, il est important de ne pas défolier trop tard sous peine de simplement blesser ses plants inutilement. LES AVANTAGES DE LA DÉFOLIATION Évidemment, l'avantage numéro un de la défoliation, c'est l'augmentation du potentiel de rendement de cette technique de taille pour tous types de cannabis allant de la photopériode aux variétés autofloraison. Ce n'est pas un secret que les fleurs qui reçoivent plus de lumières deviennent plus grandes et larges que celles dissimulées dans l'ombre des feuilles. De plus, retirer les feuilles intérieures des plants touffus aide à prévenir toutes menaces de moisissure. Les plants très feuillus avec un feuillage intérieur dense produiront une quantité importante de têtes pop-corn. Dans le pire des cas, les branches de têtes et les têtes qui sont denses succomberont au pourrissement. Si vous observez des gouttes d'eau se former sur la surface des feuilles, il est grand temps de penser à faire de la défoliation. Libérer la zone inférieure et médiane des feuilles est un excellent moyen d'améliorer la circulation de l'air. LES DÉSAVANTAGES DE LA DÉFOLIATION Les plants de cannabis en intérieur bénéficient de la défoliation pour deux raisons. La première est parce qu'ils reçoivent la lumière d'une source stationnaire au-dessus d'eux, et la deuxième est parce que les conditions environnementales sont contrôlées par le cultivateur et non Mère Nature. Les plants d'extérieurs eux, n'y gagnent pas beaucoup, car les cas échéants se vérifient pour eux. Le soleil traverse le ciel, illuminant sur sa route, différentes portions de la plante de son lever à son coucher. Les cultivateurs en extérieur n'ont pas besoin de manipuler les plantes afin qu'elles se développent en adoptant une structure plate puisque le soleil est infiniment plus puissant que n'importe quelle lampe de culture et qui plus est, il est toujours en mouvement. Tailler les feuilles des plants extérieurs les rend également plus vulnérables aux conditions humides et brise leurs barrières naturelles contres les nuisibles. De nombreux cultivateurs d'intérieur peuvent, et malheureusement, c'est souvent le cas, réduire le rendement final à cause d'une défoliation faite au mauvais moment et/ou excessive. Tailler les plantules n'est pas conseillé et engendre souvent des plants nains. Scalper les plants matures est encore pire, et au lieu d'obtenir de longues branches de têtes, vous obtiendrez probablement encore moins de fleurs. De même, tailler des plants malades ou en mauvaise santé à n'importe quelle période de la croissance risque de paralyser la croissance plutôt que d'encourager la formation de fleurs denses. Jour44 Arrosage une fois sur 2 topmax de biobizz Jour46 arrosage avec de l'eau ph6.3 à laquelle j'ajoute 0.8g par litre d'eau de feeding enhancer greenhouse. Jour47 léger arrosage. Jour48 léger arrosage
Likes
1
Share
Likes
3
Share
@Chubbs
Follow
This week we did a major defoliation and lollipop on the girls. We also switched to Bloom A & B with a PK booster 3ml/gal of each. Over all I'm excited to see as they just started flower and look amazing. I bumped up the co2 this past week up to 750ppm. I can't wait to see the flower progression through the next few weeks. Happy Growing
Likes
5
Share
@skaf420
Follow
The plant is now driving to her max. The Salt stress is now in his highest point. The trichome production is still going one. Im still happy with the results :D
Likes
4
Share
@Jofflepov
Follow
Just growing. Lots of wind here so I had to give extra support again.
Likes
27
Share
Servus Moin! Die letzte Woche läuft an! In dieser Zeit gieße ich nur noch mit Wasser. Die Epic Buzz hat sich prächtig entwickelt und richtig feste Buds gemacht. Bin super zufrieden.
Likes
13
Share
@squalino
Follow
​Période du 08/04 au 14/04 ​État de la plante (J+6) : ​📣 Remerciements ​Un immense merci à toutes les personnes qui suivent ce journal ! Un merci tout particulier à @MIA_BIOTABS pour sa grande gentillesse, ses précieux conseils et son cadeau qui booste cette session. Merci à tous pour votre soutien ! La plante a bien verdi et développe ses premières feuilles dentelées. Elle est vigoureuse mais la tige est assez élancée. ​Hauteur : 7 cm ​Gain de croissance : + 6,5 cm depuis la naissance. ​Soins du 14/04 : ​Nutrition : Mise en place des Biotabs (3 tablettes enfoncées à 10 cm, disposées en triangle à mi-chemin entre le tronc et le bord du pot). ​Arrosage : 1 Litre d'eau avec 1g de Bactrex. pH ajusté à 6,3. ​Configuration technique : ​Lampe : Lumatek ATS 300W Pro (75%) à 100 cm. ​Climat : 25°C jour / 21°C nuit | HR 50%. observation le mélange startrex et silicium flash fait leur effet. la plante est vigoureuse et sont tronc est déjà gros je trouve .. merci a tous a bientôt
Likes
1
Share
@Cannerd
Follow
How ya doing mates?? Awesome week last week - all photos and logs have been added so be sure to check it out! This week is going great so far! I've switched to an early vegetative state nutrient system. As you'll see in the daily logs early this week, this bumps up the micro and grow nutes, and keeps the bloom at 0.6ml/gal. A quick note about last week - I'm unable to update the measurements, but please note that those nutrient amounts are measured in ml/gal, NOT ml/l. Anyhow, this week I'm just waiting to get my order of diatomaceous earth so that I can make up another batch of soil. I'm still debating between topping this week before repotting or letting them take root in the new pots first. Decisions decisions lol. I think at the very least I'll clean up some of the lower growth to make sure the energy is being spent at the right places. I've been switching back and forth between just LST and mainlining in the past - but I think I really like the ease and cleanliness of mainlining. The draw back is the recovery time they take in the process haha. UPDATE: The D.E. has come in, and I repotted the girls this week. I mixed in about 1.5-2 cups D.E. for the whole pot, as well as some Bat Guano and Kelp Meal for micro and macro nutrients to use on dry cycles. I've also included some photos of the mother plant to give an idea of what's to come! I've just started to flower it, which is the first time for this strain - so I'm pumped! Day 15: M.C. 01-21 After reviewing the last set of photos from last week, I figured I'd play it safe and dimmed the light back down to 25% strength. The mother plant is almost ready for flower, and I'm down some tents so she'll be taking this one over shortly. These photos were taken shortly after the lights went off, and they look quite happy! You can see some of the side branch developement in today's photo for MC-01. The pots are fairly dry now, and I've decided to move to the next stage in the nutrient regime. This kicks up the Micro and Grow nutes, while maintaining the Bloom amounts. M.C. 02-21 A nice top photo for MC-02, you can really see the lighter green in this photo. Not to worry though, as these will darken back to a vibrant green as long as I give her what she needs shortly! The pots are fairly dry now, and I've decided to move to the next stage in the nutrient regime. This kicks up the Micro and Grow nutes, while maintaining the Bloom amounts. M.C. 03-21 Look at that little leaf poking out from the 2nd node! Some slight yellowing you can see too, but again, not to worry. The new mix should rectify that. I've decided to move to the next stage in the nutrient regime. This kicks up the Micro and Grow nutes, while maintaining the Bloom amounts. Day 16: M.C. 01-21 Today is the day - for the mother! I've cleared out some space and moved plants around. So back out to the grow room these girls go! MC-01 seems much better today with the reduction in light. The 5th node is almost flattened out and the 6th coming through still. Most notably though, you can really see the work she's put into the side branches! The branches at nodes 2 and 3 are starting to produce more leaves - great sign! The new growth at the top is also a nice dark green. Added 500ml water to the tray. M.C. 02-21 MC-02 seems to have liked the adjustment of light as well. She's got nice dark green growth at the top, and the little branches at the 2nd node seem to have a full leaf! Added 500ml water to the tray. M.C. 03-21 The photo from today is cool, because you can see how close MC-01 & 03 are, even though there's almost a full node difference. MC-03 is stretch out a bit to compete with her sister for the light haha. She's also put some more effort into the side branches that you can see. Added 500 ml water to the tray. Day 17: M.C. 01-21 I figured a video would be the best way to illustrate the changes today! They've been back in the grow room under the Veg dedicated light for a day now and seem to be loving it! MC-01 has its' 5th node out, splitting the 6th node, and I can JUST see the 7th node coming in. I don't think they'll get too much more height, as you can see that the side branches are starting to stretch now! She's definitely going to be well tangled in the roots by the end of the week when I hope to repot her. M.C. 02-21 MC-02 is doing great despite the difference in height! You'll notice the side branches stretching out at nodes 2 & 3. The pots are also still fairly wet at their center, so I'll hold off on water most likely. At least this clone will have time to root more while we wait for the supplies! M.C. 03-21 MC-03 also has great side branching! If you take a look at the group photo from today, you'll see that both MC-01 & 03 are practically the same height, but MC-03 snuck in there by the stretch haha. Day 18: M.C. 01-21 My order of D.E. came in last night, perfect timing! As you can see, her roots have fully reached the bottom, and have started to migrate upwards with the water that's absorbed. The soil was a little dry for my liking, which made things a little difficult/dusty but still no mishaps! Watered around the root-zone before covering with more soil to keep the gnats down. M.C. 02-21 Not quite as much lateral root growth as MC-01, but still plenty enough for a repotting! Her soil was a little dry as well. Ideally I should have given them a light misting from the top of the soil and let is drip down to keep the dusty bits together haha. M.C. 03-21 Nice and thick root growth, no issues with repotting, and strong stalk. The extra spacing in the nodes may prove to be helpful during the training phase. Day 19: M.C. 01-21 Some nice top shots today as they slowly get acclimated to their new homes. Once I see them push out a new node, I'll probably top them. This is to make sure that they're taking to the new pot without causing any extra stress before they can take it. Today I watered them with an early veg nutrient. I like to stay cautious with nutrient boosts since they're in soil - not to mention the added nutrients from the repotting. M.C. 02-21 Top shots for the girls today. Not much change, but also no immediate signs of shock either, so I'll take it. M.C. 03-21 You can't really see it in this angled shot, but the small branch at the second node is coming along nicely! I think the girls are happy that they each have their own tray not haha. Day 20: M.C. 01-21 Definitely noticing some slow changes to the top nodes when comparing the pictures from the previous day. The leaves are slowly starting to separate, and I'm not noticing too much yellowing yet which is good. Watered with 500ml water to keep water migrating upwards to meet the roots. M.C. 02-21 Not noticing much change in this girl today, but that's okay. She's most likely focusing on the root developement instead which I can't complain about! Watered from the bottom. M.C. 03-21 Maybe seeing some separation in the top leaves, however more notably are the small branches at the 2nd node that you can see better here. Still a bit of stretching with them as they get longer. I might even keep them on for clones later on. Watered from the bottom. Day 21: M.C. 01-21 Looks like she gained some distance last night, as the top node is now above the fan leaves, unlike 2 days ago. I'm really getting eager to top them, as I don't want them to waste too much time and energy growing tissue that I'll just end up cutting off. I'll be bumping the nutrients up starting next week to keep the progress going, moving to a mid-veg stage shortly. I'm going to let things dry up tonight for a fresh boost of water tomorrow to give it a dry cycle as the pot is still a bit heavy. M.C. 02-21 MC-02 really worked hard last night it seems, as she almost completely flatted out her top leaves! I think she's ready for a topping, but I'll let her benefit from the headstart and let the other two catch up and root before. dry cycle for her tonight as well. M.C. 03-21 MC-03 was busy last night too and is now slowly flattening out the top node as well! Maybe tonight they'll have enough progress to go topless afterall haha. Dry cycle in prep for watering tomorrow.
Likes
35
Share
@nonick123
Follow
Día 101 (09/09) Riego con 500 / 1000 ml H2O pH 6,5 Parece que se ha parado un poco el amarilleamiento que subía tan rápidamente por las plantas! Día 102 (10/09) Riego con 500 / 1000 ml H2O pH 6,5 Excepto LemonPaya, todas las plantas empiezan a llenarse de tricomas! 😍 Día 103 (11/09) Riego con 500 / 1000 ml H2O pH 6,5 Estoy emparanoiado con que la floración va lenta... Día 104 (12/09) Los cogollos no se están formado correctamente... Algo pasa... Los pistilos tienen un extraño color verde y no engordan... OnionOG #1 es la única que tiene un ritmo normal... Riego con 250 / 500 ml porque las temperaturas empiezan a bajar a 25 ºC diurnos / 22 ºC nocturnos y está bajando el consumo de agua... Día 105 (13/09) La deficiencia empeora... Solo se salvan OnionOG #1 y KS1 #2... Día 106 (14/09) La deficiencia sigue empeorando... Solo se salvan OnionOG #1 y KS1 #2... Día 107 (15/09) La floración se ha ido al traste! (Excepto OnionOG #1 y KS1 #2) Tras preguntar a Lurpe, GD e IG concluyo que el super soil tiene un bloqueo de nutrientes Debido al bloqueo, se ha detenido la floración en 4 de las 6 plantas Siguiendo las recomendaciones de Lurpe, hago flush hasta que el agua de escorrentía tiene una EC 2,5 (1250 PPMs) A ver si les da tiempo a recuperarse... 💦Nutrients by Lurpe Solutions - www.lurpenaturalsolutions.com 🌱Substrate PRO-MIX HP BACILLUS + MYCORRHIZAE - www.pthorticulture.com/en/products/pro-mix-hp-biostimulant-plus-mycorrhizae
Likes
12
Share
@Xabii
Follow
Short week due to harvest. Plant started to smell a little less, hope I did not loose that taste because the harvest ain't gonna be much. Values are average of the day. DATE - EC(us/cm) 20250607 1630 20250608 1654 20250609 1668 20250610 1722 20250611 1628 DATE - PH 20250607 5.85 20250608 5.85 20250609 5.85 20250610 5.86 20250611 6.13 DATE - ORP (mV) 20250607 248 20250608 237 20250609 235 20250610 224 20250611 188 DATE - °C - RH% (Tent Temp/RH) 20250607 24.7 55 20250608 24.5 54 20250609 24.2 48 20250610 24.8 52 20250611 24.2 52 DATE - °C (Reservoir) 20250607 21.0 20250608 20.8 20250609 20.2 20250610 20.8 20250611 21.1 DATE - CF 20250607 16.30 20250608 16.54 20250609 16.68 20250610 17.21 20250611 16.28