
Likes
Comments
Share

@Kirsten
Follow
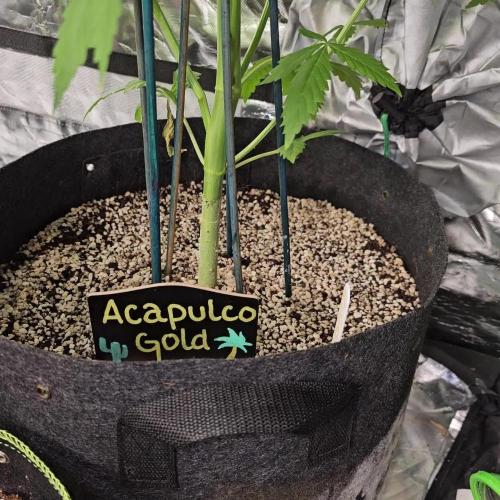
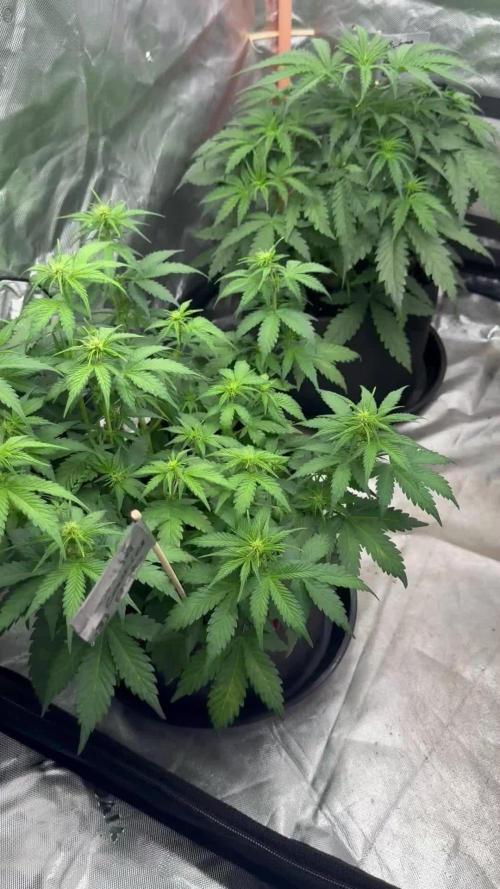
This week, the plant is feeding heavily and has grown well.
I super cropped the main stem to help with the plant becoming too tall, afterwards I made some scaffolding and a sling to hold the break and prevent it from snapping. It has taken very well.
Before the training I performed, I used 4 bamboo canes to stake the base. The plant had become very top heavy so this has really helped.
The plant was becoming very tall so I thought this would be something to try out.
Here's what I did this week.
18.7.25:
I watered with 2ltrs of dechlorinated water PH'd to 6.4, containing the following nutrients;
💜 2ml Ecothrive Trace
PH: 6.4
PPM: 365
22.7.25:
I watered with 3ltrs of dechlorinated water PH'd to 6.6 with;
💜 1 TSP Sea K
PH: 6.6
PPM: 485
25.7.25:
I watered with 2ltrs of dechlorinated water PH'd to 6.5, containing the following nutrients;
💜 2ml Ecothrive Trace
💜 1/4 TSP Ecothrive Biosys
PH: 6.5
PPM: 361
28.7.25:
I watered with 6.5ltrs of dechlorinated water PH'd to 6.0 with;
💜 7ml Trace
💜 1.5 TSP Ecothrive Biosys
PH: 6.0
PPM: 351
Thank you for checking in this week and hanging out in the comments 😁💚✌️🌱🙌

Processing
Likes
10
Share


@CanadianFillmore
Follow
Start of flushing for the blueberries, both blueberry plants have very heavy, sticky, stank buds, I'm looking forward to harvesting these beauties!
Start of the last week of nutes for the super lemon haze, she has packed in the weight, buds have filled out nicely and stickier than the blueberries. She's still hungrier than the Blueberries, taking an extra 2 liters of feed each week. If the trichomes are showing cloudiness by day 5 of this week, I'll flush her early.


Likes
10
Share


@ZombieKushAddicted
Follow
the girls are now in my backyard, they are in a 1.5 x 1.2m terrace completely amended by @elcaudilloorganicproducts
Likes
2
Share


@Drtomb
Follow
Just finished week 3 and everything looks amazing. Been fighting a gnat infestation. Been running some Mosquito dunks. This week I'll run a H2o2 in the res. Hopefully this will take care of them. Also placing yellow sticky traps in every bucket to catch stragglers.

Likes
20
Share


@HisHope
Follow
11/10 Week 7
Coloring is deepening, hairs stand straight no ambering, leaves are beginning to fade so meh couple of weeks maybe?
11/14 Feeding day
1 gal at 6.5PH with 5ml Cal Mag , 5ml Bio-Bloom, 5ml Fish Sh!t
Processing
Likes
13
Share


Likes
13
Share


@HAN_GROWER17
Follow
Esta semana esta rodeada de una paleta de olores bastante rica, se siente bastante agradezco contar con un buen filtro de olor (artesanal), el que cumple al 100% su trabajo, si se dan cuenta hay flores que se ven bien buenas, plantas que prometen ser bien productoras, esperemos se mantengan asi y las otras plantas que van un poco atrasadas culminen con un buen resultado.
Hemos implementado una poda RIB, para ver si potenciamos aun mas los resultados.
!Saludos!
Te invito a comentar cualquier sugerencia.

Likes
48
Share


@Regenwurm
Follow
Klima durchweg sehr gut.
2 mal reines Regenwasser und 1 mal Zusätze von Green Buzz in dieser Woche gegossen.
Den Ladies geht es auch ohne Dünger (mit sehr wenig Dünger) in dieser Phase hervorragend.
Den Haupstamm HST um die Seitenteilen zu puschen. Lichtstärke auf 45 % erhöht bei gleichem Abstand von rd. 40 cm. Heute Licht auf 45 % erhöht.
Luftfeuchtigkeit und Temperatur punktlandung, in der Nacht etwas zu hoch und in dieser Woche nur 2 l Wasser zum befeuchten gebraucht. Heißt, wegen platzgründen kommt diese Woche der befeuchtet raus und der entfeuchter in das Zelt. Mitte bis Ende der Woche stelle ich um auf Blüte.

Likes
5
Share


@CecilioJardinero
Follow
Llegando al final :3
En una semana más comenzaremos con la aplicación de limpiador de raíces.


Likes
15
Share


@420Consinc
Follow
----- WEEK 9 -----
----- Day 57 -----
Easy day of watching.
Just 1 pic today so far. not much reason to go downstairs to take a pic yet. Glookies is turning Purple on sugar and fan leaves now.
Harvest is very soon. I'd wager within 7 days now just going to depend on the High I get off tester nugs.
***Update***
I destroyed the trellis and took em out for some pics and vids.
Trichs = Tropicana is ready Tuesday, Wedding Cake probably Friday or within that weekend.
----- Day 58 -----
Last couple days.
Fed about 30ml of Cal/Mag and 30ml of Molasses.
Wanted to just keep the photosynthesis process and the plant in general alive for reveg. Was getting a bit too yellow for my liking.
Harvest soon.
----- Day 59 -----
Harvested Tropicanna Glookies today
Deleted this week by accident trying to make it a harvest week, so remade it.
Will add harvest week once plants are dry and tester has been smoked to give proper info
Put some more photos in. Basically the tent is 4 feet wide and the ruler is 12 inches long from bottom of duct tape
Really loving the colors of this plant.
------ Day 60 -----
Fed only the Wedding Cake - 5-10ml of Calimagic and 20ml of molasses (NO Liter level marked or PPM or PH, i could cut today its done but im just maturing the trichs)
Tropicanna Glookies is a friggin BEAUTIFUL strain.
Moved the Wedding Cake in the tent so largest nugs are furthest away from light and dropped light from 1000w to 600w to save electricity
Chop on Wedding Cake happens at mostly amber trichs. Prob 5-6 days max for that i'll know when I check trichs tonight and update with photo.
----- Day 61 -----
Wedding Cake is about 5% amber... so prob 6 days or so. Slow day today.
----- Day 62 -----
Feeding is today, going to just use some CaliMagic and Molasses again.
Trichs aren't golden yet, so not chop time ... 8-9 weeks is what it is supposed to take, but it's got at least another 5-8+ days until 30-40% amber trichs for Indica couch-lock effect to shine in the Wedding Cake.
Tropicanna could still be going right now, but I did not want more than 5-10% amber gold trichs to prevent a couch-lock effect. This has worked very well. On day 64 I will post a smoke report and full harvest/trim details as Saturday/Sunday is trimming. Will have dry weight results of Tropicanna (per plant, and as a whole).
Tropicanna being sent to lab for full analysis will post results when they arrive (Usually 2-3 weeks after sending sample via mail)
------ Day 63 ------
Nothing to talk about today, slow day. almost done.
*Update*
1 pic, i think it explains everything.
Likes
3
Share


@Growrnotashowr
Follow
Buds are fattening and the smell is a mix of gas, berries and something else funky I cant put my nose on it

Likes
47
Share


@Mrs_Larimar
Follow
March 9th.
I nearly forgot the Update from the " Eggs"
These Plants are growing in less than 10 g of Soil
Feeding/ watering daily . They are diving into the Feedingsolution
Its alittle tricky to keep them happy but , I feel it works
Flowers are stacking and Leaves are fading alittle
everything asign for Final Weeks
Those Runtz smell like Heaven
I still have alot of Fun with those Grows

Likes
1
Share

@Jessi576
Follow
👉 Week 6 Bloom👈
👉11.04.2026 - 17.04.2026👈
👉 Days bloom: 36-42👈
Everything as planned.
Beautiful bud development at every plant at the moment.


Likes
20
Share

@TrickzGrowz
Follow
Sie wird langsam echt zu groß und deshalb wird sie heute getoppt, damit auch die unteren Triebe zoch ziehen können. Ich möchte mich auf 4 Haupttriebe konzentrieren.
Processing
Likes
34
Share


@rhodes68
Follow
12/6 Week 16
The girls are slowly finishing waiting on more bud closure before flushing, trics are fine.
May notice we dont so much flush as just remove nuets continuing 10-20% runoff and let the plant use up stores.
12/7
FF10 still has not closed up, not close, the 9 and 11 were pretty clearly done. These just wont stop so I wont mess with the nuets
Not a lot of fade very slight
12/8
Slowing but still going
12/9
Putting FFT-11-1 on flush (front plant) this evening, she is there. At least a week
12/11
Putting FFT-11-2 into flush not because she is done but because if the buds get any bigger she is going to break.
Triple caged her keep it from happening now.

Likes
5
Share

@Mr2toke
Follow
19.04.26
This plant is getting big. I plan to keep her in veg until the autos are finished, then ill spread her across the 80x80 all on her own, scrog style

Likes
13
Share


@Crazy_Doofus
Follow
The top was too heavy and hanging sideways. Upper half is cut, leave the rest for another week
24/01 lower part is cut
Small harvest


