
Likes
Comments
Share


@ThaKiloVillain
Follow
Defoliated throughout the days.
The past week nutrients fed were at ph 5.7/5.8. Switched to 6.0 now.
Smell is strong. Friend commented he could smell the red pop upon entering the front door immediately.
Feeding to run off every other day still.
Added calmag this week. Not sure if I will continue to use or not. I do not want it to affect colors from changing as I approach later into flower.
Added a temp & humidity meter this week. Usually reset once a day, or every other day.

Likes
23
Share


@Zurban_Poison
Follow
Hello!
32 sprouts feel great!
In 2 weeks I will choose the 16 best plants. and transfer them to flowering mode.
The fight for a place in the grow tent begins! Only the strongest will remain!


Likes
70
Share


@CBD_Sweden
Follow
@MephistoGenetics,
Hi all the happy people here in GrowDiaries.
This is my second cultivation ever and it will be fun to try a bigger space than my closet grow.
First, I'm just going to say I'm done with the construction of my new growroom.
The room is 2.14 meters by 1.7 meters and has a ceiling height of 2 meters.
It provides a floor area of 3.6 square meters.
I use a 54 Watt Lightwawe T5 for germination and 2 Pcs 400 Watt HPS lamps.
I have a channel fan that replaces the room air about 40 times an hour to get a comfortable environment in the room, the air enters a fresh air intake from the outside.
The air is purified through a carbon filter to then leave the room to the rest of the basement.
Then I use that heat to heat the rest of the basement.
I will use 10 pcs 15 liter Autopots to grow with and a 100 liter water tank that supplies the pots of water and nutrition.
I will grow completely organically in soil and will watercure my buds to get the best possible medicine for me.
But there are no cultivation rooms to be displayed here, so I continue with what is most important.
Today I have put my seeds in paper towel and hope the seeds have germinated within a few days.
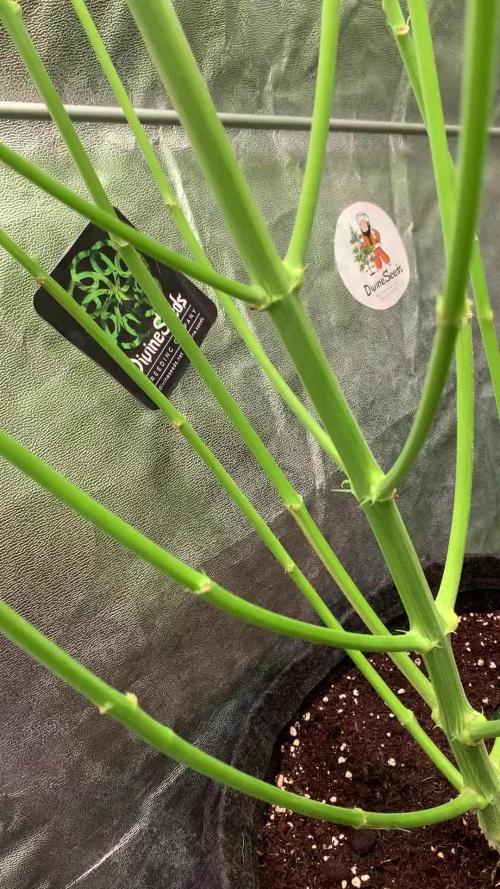
I am very excited to see how the new growroom will work and how this Illuminauto 21 - Sour Crinkle will turn out.
Illuminauto 21 - Sour Crinkle (Grape Crinkle x Sour Crack)
Two of our fastest and frostiest varieties collide to make a sweet and sour delight!
Expect super frosty, compact nugs that won't be a toke for novices.
Destined to be a great strain for extraction work too!
Plant size - Small - Medium
Cycle time - 60-65 days from sprout
Indica/Sativa - 80/20
Frost level - Extra Ridiculous
https://www.mephistogenetics.com/product-page/illuminauto-21-sour-crinkle
.................................................................................................................................................................................................................................................................................................................................................
2017-08-21. Started to germinate the seed.
.....................................................................................................................................................................................................................................................................................................................................................
2017-08-23. Seed germinated and put in small pot in the humidity dome.
.........................................................................................................................................................................................................................................................................................................................................................
2017-08-27. Slow and steady she grows.
---------------------------------------------------------------------------------------------------------------------------------------------------------------------------------------
2017-08-28. Transplanted in 15 liter autopot. Check the roots on this girl
-----------------------------------------------------------------------------------------------------
2017-08-29. New movie of the girl.
-------------------------------------------------------------------------------------------------------------------------------------------------------------------------------------------------------------
2017-08-29.
Hello to you who read my diary, I just want to say that I am pleased that you have chosen to check in with me and in my diary.
I just want to say that I do this for myself and for a steady flow of my medicine.
Everything you read and see in my diary is 100% honest and I will never distort or beautify anything here.
I document my crops so that I can learn from my mistakes and also to look back at those different crops.
I try to update with pictures every day and with text if something special has happened in the garden.
This is my strainhunt for the best medicine and the beginning of my journey with cannabis and the cultivation of it.
-----------------------------------------------------------------------------------------------------------------------------------------------------------------------
2017-08-30. Cleaned the room this morning, just vacuuming and cleaning with chlorine solution. Im testing the fan to control temp and humidity, it works great.
Added some pics and a movie. Everything is looking great right now.
-------------------------------------------------------------------------------------------------------------------------------------------------------------------------------
2017-08-31. 3 new pics.
---------------------------------------------------------------------------------------------------
2017-09-01. New pics and a video from the grow room today.
------------------------------------------------------------------------
2017-09-02. New pic.
----------------------------------------------
2017-09-03. New video from this morning.
---------------------------------------------------------------------
2017-09-04. Week 2 starts now, new pics.
-----------------------------------------------------------------------------------------------------------------------------------------
2017-09-05. KL 08.00. Cleaned the room this morning, just vacuuming and cleaning with chlorine solution.
KL 12.00. The girl got 2 liters of water with nutes in it, added a video.
---------------------------------------------------------------------------------------------------------------------------
2017-09-06. KL 08.00. The girls woke up after their beauty sleep, the leaves are always a bit down after 6 h of darkness, but they will stretch now when the HPS lamp starts.
Everything looks good and I keep trying to tuck the leaves so they get the maximum amount of light where needed. Added pics and video.
--------------------------------------------------------------------------------------------------------------------------------------------------------
2017-09-07. Day 17 from sprouting. I have never tested PH in my grows, when growing organic in soil iv learned that it adapt PH by it self. But im curious by nature so i had to test.
Kl 10.00 Tested PH in the soil, it was 6.9 and tested my tap water and it was 6.8. Added video of the girl.
Kl 22.30. New pics.
------------------------------------------------------------------------------------------------------------------
2017-09-08 KL 08.00. Good morning, added new video.
2017-09-08. Kl 23.50. Gave every girl 3 liters of water and nutes, added new video.
------------------------------------------------------------------------------------
2017-09-09. Kl 21.00. Defoliated a lot and added pics.
-----------------------------------------------------------------
2017-09-10. Kl 08.00. Last day of week 2. New video.
2017-09-10. Kl 23.00. 3 new videos.


Likes
17
Share


@BLAZED
Follow
Week 13 (24-4 to 30-4)
24-4
Temperature: 23.8 degrees (lights on) 18.9 degrees (lights off)
Humidity: 66% (highest) 53% (lowest)
No pictures.
Opened the reservoir for a couple of minutes.
25-4
Temperature: 24.7 degrees (lights on) 18.9 degrees (lights off)
Humidity: 66% (highest) 52% (lowest)
Increased the strength of the light from 60% to 65%.
26-4
Temperature: 25.2 degrees (lights on) 19.5 degrees (lights off)
Humidity: 66% (highest) 51% (lowest)
No pictures.
I emptied the reservoir, there was 2750ml left.
I made a 15L new feed and added it to the reservoir.
Opened the reservoir for a couple of minutes.
27-4
Temperature: 26 degrees (lights on) 19.9 degrees (lights off)
Humidity: 65% (highest) 47% (lowest)
28-4
Temperature: 26.4 degrees (lights on) 21.5 degrees (lights off)
Humidity: 64% (highest) 47% (lowest)
Opened the reservoir for a couple of minutes.
29-4
Temperature: 26.4 degrees (lights on) 20.6 degrees (lights off)
Humidity: 64% (highest) 39% (lowest)
Increased the strength of the light from 65% to 70%
Opened the reservoir for a couple of minutes.
30-4
Temperature: 27.4 degrees (lights on) 21.1 degrees (lights off)
Humidity: 62% (highest) 47% (lowest)


Processing
Likes
11
Share


@Alexanderbeno
Follow
hello ,I started again and increased moisture to 60% and two seed are ready and its good,i use my airpot 🆒design,i happy know your respose me,thanks.
Likes
9
Share


@Bread_n_Buds
Follow
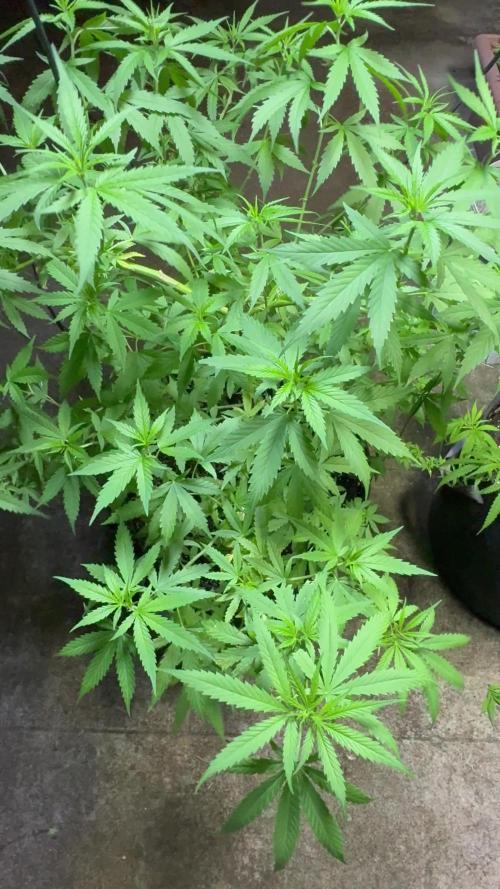
We are on day 34.
To tell the truth, she is around her 30th and is the second Pineapple Express born a few days later because she was placed a few days later. In fact it is a few days later than the others but no big deal.
We are in the transition phase or, if you want, pre-flowering, the plant reveals its sex with sexy hairs at the internodes. If it's female. If it is male or hermaphrodite, which is impossible with the F1 Hybrids, hairs will not emerge but little balls containing pollen. These will pollinate your ladies, even all of them if things go badly and the result will be lots of seeds. This is one of the main reasons to LOVE F1 HYBRIDS. All the breeders did what they wanted, mixing various genetics several times. All plants are poly hybrids we have f1 hybrids, let's go back to the beginning to avoid all the problems of modern growing.
Now let's see how it turns out, let's see the flowers and then let's talk about everything you want. Look at my flowers first, if you are hesitant or look at my flowers coming soon.
If you have underestimated this aspect of the F1 Hybrid, go back and think about how many times you found the balls on the paint, full of pollen that fertilized your ladies.
Do you like having young ladies impregnate you? Absolutely not for me and this is a very valid reason why you can choose the F1 Hybrid. Really guys suck the seeds and the genetics of the various breeders if they don't do a job like this it means that they are super hybrid poles with genetic traces scattered here and there. Inglourious bastards.
Here we don't want to be Aryan but to cultivate healthy plants with safe results.
Our Pineapple Express F1 HYBRID goes very, very well, even with very slight signs of overfeeding but lighter than the others, almost non-existent. Nothing that affects the final quality and beauty, you will see in the end.
To fix this little thing we go to flush with pH 6.2 and only give Aptus Regulator which should rebalance the plant and soil before delicately moving on to fertilizers for flowering.
Site Description
ZAMNESIA SEEDS - PINEAPPLE EXPRESS F1 HYBRID AUTOMATIC: FRUITY FLAVORS AND ENERGETIC EFFECTS
Combining Trainwreck with Hawaiian, Pineapple Express F1 Hybrid Automatic brings a beloved strain to new heights. This autoflowering F1 hybrid cultivar ensures exceptional uniformity, reliability, and stability, making it well-suited to growers of all experience levels. If you've not checked out Pineapple Express F1 hybrid Automatic for yourself just yet, now is the time.
GROWING PINEAPPLE EXPRESS F1 HYBRID AUTOMATIC
All it takes is 8–9 weeks from germination before Pineapple Express F1 hybrid Automatic is ready to harvest. Thankfully, very little effort is required throughout the growing process, aside from a bit of maintenance, to ensure ample, high-quality harvests. Thanks to its F1 genetics, Pineapple Express F1 Automatic offers superb resilience and uniformity, meaning all plants will have a similar height and appearance, and will churn out comparably large yields. Reaching heights of 50–70cm, Pineapple Express F1 Automatic is not an overbearing plant and can effortlessly slot into any setup. Once ready to yield, growers can see a return in the region of 400–550g/m² indoors and up to 200g/plant outdoors.
AROMAS, FLAVORS, AND EFFECTS OF PINEAPPLE EXPRESS F1 HYBRID AUTOMATIC
Just one hit of Pineapple Express F1 hybrid Automatic treats users to a rich assortment of flavors and aromas. This strain offers strong pineapple notes alongside moments of citrus, spice, and pine, making for a mouth-watering blend that's extremely moreish. Bolstered by 21% THC and an array of cannabinoids, Pineapple Express F1 Automatic showcases an energetic and uplifting high that will have you feeling chatty in no time. So if you've been looking for a strain to enjoy with friends, Pineapple Express F1 Automatic could be just the thing.
As for fertilizers, I'm doing a small comparison experiment to finish off the fertilizers I had at home, it's not 100% indicative, it's only on two specimens but given the stable genetics I decided to try to compare the results of Plagron Vs Aptus , both excellent brands which they will certainly produce beautiful plants which are already of excellent stable genetics. In the next few weeks the comparison will be more evident now the seedlings are still very small and just potted.
So seeds of all brands, in addition to these great F1 Hybrids and the entire Zamnesia line, fertilizers and everything related to the world of cannabis, you should buy them from the best online store in the sector www.zamnesia.io

Likes
39
Share


@Mrs_Larimar
Follow
March, 30th
The lambsbreath was transplanted today into 20l Airpot
She was growing so fast, that she needed a bigger Pot
I added some Living Organics to enrich my Soilmix
After that she got anice benefical Drink
Lights are running on 50 Percent, distance to the Plant is 40 cm
Happy growing
Amazon US:
XS1000 10% off: it10mlarimar http://yx-8.cn/0y-6
XS1500 5% off: it15mlarimar http://yx-8.cn/0yA
XS2000 5% off: it20mlarimar http://yx-8.cn/0y2Y
XS4000 5% off: it40mlarimar http://yx-8.cn/0y5k
Amazon Canada
XS1000 10% off: it10mlarimar https://amzn.to/38udUVe
XS1500 5% off: it15mlarimar https://amzn.to/3esVUyr
XS2000 5% off: it20mlarimar https://amzn.to/3l5zAfg
XS4000 5% off: it40mlarimar https://amzn.to/3l7k5Uj

Likes
8
Share


@snoopdogguy
Follow
I basically skipped week 17 as there was nothing new except I added some compost tea that I made with come compost, vegetable scraps, a few cedar clippings and neam oil (oh and some fertilizer ... I forget what)
Sprayed with neam oil/soap mix

Likes
22
Share


@Selkot
Follow
these 2 seeds from the same pack are definitely different: the topped girl is massive, with multiple heads that are only starting to stop growing (i hope she will finally concentrate on her buds!), while the LST girl has a nice structure with 6 buds that are growing day by day.
one classic, the other with great potential... i love this session. 😊
miscalculation on my part at the beginning of the week: I doubled all the nutrients, confusing the volume of my cans... 😓
coco is not forgiving, the burns appeared the next day;
but fortunately, it is corrected just as quickly: I emptied the bowls and diluted the water in the tank, I performed a haircut on the two girls (one burned, the other a little wilted), and here they are in great shape at the end of the week. The resin appeared on the LST girl this week.
another thing: the bleach has already proved its worth; not a single worm in my water, no more smell of algae in the tank, despite a rather sporadic maintenance... 😏


Likes
4
Share

@Organic473
Follow
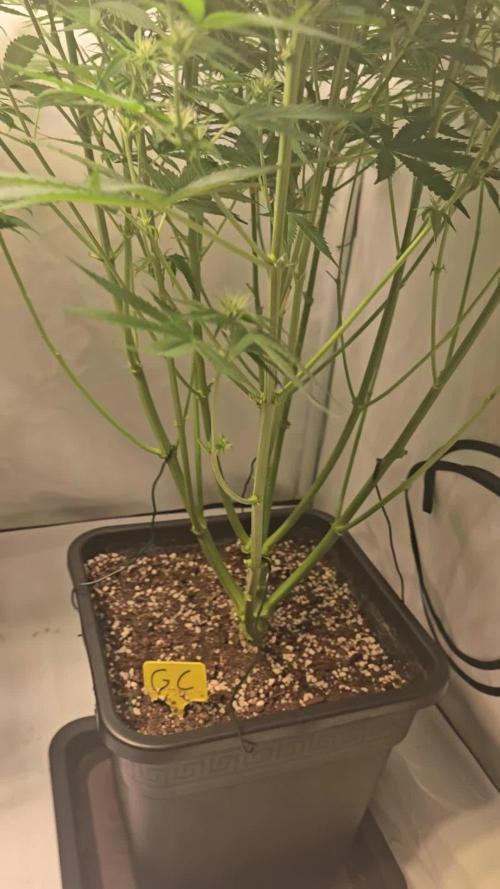
The lamp is closer to the canopy as her final weeks of veg are set. She is responding very good in this extended veg.
Likes
12
Share

@ThatsmyGrow
Follow
Just a another great week, lets wait for the fat Gorilla buds. She turn over last week so huge, its crazy
Likes
16
Share


@Yog69
Follow
After overfeeding the plants in the past, I've been feeding not enough, lateley. Plant #1 shows nutrient deficiencies.
after giving more nutrients, plant #1 seems to recover. The build up of flowers is amasing. The flowers smell really sweet.😀
Likes
15
Share


@sethheredia
Follow
Going steady this week! Gonna go a couple more weeks and then flip to 12/12. Added 2 new clones to the tent as well,
2x Indian Rhino x The Matrix. Curious to see the differences between strains and also differences in growth between seed/clone. I won’t be keeping track of those 2 in this diary though. Thanks for reading, happy growing!
Likes
44
Share


@SooSan
Follow
13 jours de 12/12
OK il y a du changement !
Dans la partie du scrog vertical le stretch n’a pas été assez fort
J'ai donc abandonné la culture verticale pour cette fois
J'ai donc fusionné le bas de la tente pour avoir un espace de 90x60x90
Le ts1000 a été retiré pour laisser la place aux barres du FC-E 4800
Et bien sur gros LST pour gagner en surface et gagner 20 à 30cm de hauteur
Vu qu’il y a 16 plantes mais que sur growdiaries on ne peut mettre que 8 variétés j'ai divisé en 2 diaries pour le bas de la tente
1️⃣
🏠 90x60x90
☀️ FC-E 4800 => puissance a 20%
🍁
1x Black Bomb / Philosopher Seed
2x Amnesia Lemon / PEV Seeds
1x Blueberry / PEV Seeds
1x Blueberry / 00 Seeds
1x Wappa / Paradise Seed
1x Dark Phoenix / Green House Seed
1x Quick Sherbet / Exotic Seeds
1x Mango Cream / Exotic Seeds
1x Banana Frosting / Sensi Seed
1x Hindu Kush / Sensi Seed
4x Fast Mix / Sweet Seed
📎 https://growdiaries.com/diaries/122084-grow-journal-by-soosan
📎https://growdiaries.com/diaries/124052-grow-journal-by-soosan
2️⃣
🏠 30x60x50
☀️TS1000 => puissance a 50%
🍁 4x Quick Sherbet - Exotic Seed
📎 https://growdiaries.com/diaries/122080-grow-journal-by-soosan

Processing
Likes
7
Share


@Mrg7667
Follow
(Week 34)Realized that my plants looked a little phos deficient. BioGrow has plenty so i adjusted my ph back down to 5.8 plants looking allot happier.
Using baking soda as ph up, very little needed.


