
Likes
Comments
Share

@DogDoctorOfficial
Follow
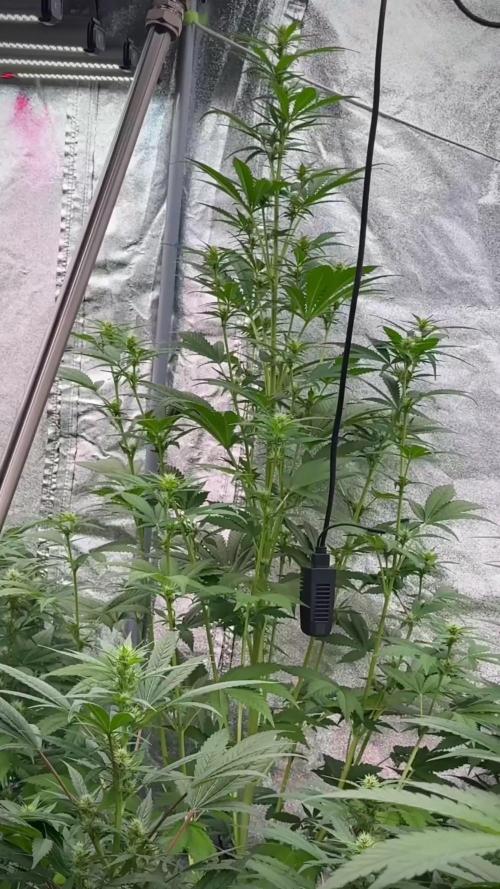
Week 3 Flower – Super Silver Haze (Zamnesia Seeds)
Grower: Dog Doctor
Strain: Super Silver Haze
Breeder: Zamnesia Seeds
Phenotypes: SSH #1 & SSH #2
Stage: Flower – Week 3
Pots/Medium: 11L fabric pots, custom super soil (Aptus amendments)
Watering: Hand watering, irrigation by substrate moisture
Tent: 8×8 shared room
Control: TrolMaster Hydro-X + Tent-X, WCS substrate sensor
Lighting (room): F.O.G. Black Series 600W + ThinkGrow ICL-300 (x2) + Lumatek Zeus Compact Pro 465W
Climate this week: ~29.6 °C, 67% RH (VPD ≈ 1.37 kPa), CO₂ ~700 ppm
⸻
This Week at a Glance
• Structure: Both phenos are thriving and still tracking like twins—compact plants with clean symmetry now at ~120 cm. Bud sites are stacking; white pistils are abundant.
• Leaf morphology: Classic hybrid look—rounded blades, neither narrow “pure sativa” nor broad “pure indica.”
• Roots: Pots are clearly “alive”—great colonization and visible vigor through the fabric.
• Defoliation: Performed a light defol only to open the canopy and improve airflow/light to interior sites. No heavy stripping.
• Media & feed: Continuing the same program as last week (Aptus + Plagron). No All-In-One Liquid for now—the super-soil and pellets are carrying base NPK exactly as intended.
Fewer photos this week (busy!), but there’s a room video and a couple of room shots showing the general happiness of the canopy.
⸻
Feeding Program (unchanged from Week 2)
• Aptus: Regulator, CalMag Boost, Top Booster
• Plagron: Power Buds, Sugar Royal, Green Sensation
• Why this mix now: We’ve pivoted from early growth stimulation to floral support, aromatics, and metabolic efficiency. The super-soil + pellets provide the backbone; the liquids fine-tune the bloom signal and energy management.
(You noted solution pH ~6.3, low input EC because the medium is pre-charged, and healthy daily uptake at ~1.5–2.0 L per plant, irrigating around 19–20% substrate dryness, kept as operational context.)
⸻
Environment, Monitoring & Why It Matters
• Temperature & RH: ~29.6 °C and 67% RH. That calculates to VPD ≈ 1.37 kPa (not “137”—decimal matters).
• What this does:
• VPD in the 1.2–1.5 kPa range drives active transpiration and nutrient flow—good for biomass and stacking.
• With higher temps, plants demand steady water availability and reliable Ca/Mg delivery to avoid tip-burn or micro-deficiencies.
• Risks if this persists:
• In late flower, warm & humid microclimates can increase powdery mildew/Botrytis pressure inside dense colas.
• Heat can push foxtailing, reduce volatile terpene retention, and increase overall plant stress.
• Mitigations already in play:
• Light defol to open the canopy (great call).
• Strong, clean airflow in the 8×8 (dual 6″ exhausts with carbon filters + filtered intake).
• TrolMaster WCS sensor guiding irrigation by moisture and watching substrate EC—keeps the rhizosphere stable.
• AC unit arriving—expect a meaningful drop in day temps; aim to settle around mid-20s °C with RH mid-50s as flowers pack on.
• Lighting layout: F.O.G. Black Series 600W + ThinkGrow ICL-300s + Lumatek Zeus 465W provide a broad, balanced spectrum across the room. PPFD varies by position (natural growth and fixture spread), which is fine—site-by-site variation keeps edges productive while the center stacks. As biomass increases, incremental dimming or fixture height tweaks can hold the canopy in that efficient PPFD window without overshooting.
⸻
Genetics Note (because she’s a queen)
Super Silver Haze is old-school royalty—her name carries cups and history. Seeing these phenos remain compact, calm, and synchronized in early flower is a treat. It’s a reminder that legendary haze lines can deliver refined structure when the root zone, spectrum, and climate are in tune.
Thank you to Zamnesia Seeds for the representation of this classic, so far, these two are everything we hoped for.
⸻
What to Watch Next
• Stretch trajectory: At ~120 cm now, expect the last of the vertical push to taper soon. Netting/support only if needed—right now form is clean.
• Microclimate hygiene: Keep leaves gently moving everywhere; defol only in small passes to avoid shocking resin production later.
• Moisture-guided irrigation: Stay with the WCS moisture trigger to prevent both saturation pockets and drought spikes as flowers thicken.
• AC commissioning: Once installed, re-check overnight RH (often creeps up in cooler dark cycles); a slight dehumid bump at lights-off is a big win for late-flower health.
⸻
Gratitude & Credits
• Genetics: Zamnesia Seeds
• Control & sensing: TrolMaster Hydro-X + Tent-X, WCS substrate sensor and more
• Lighting: Future Of Grow Black Series 600W, ThinkGrow ICL-300 (x2), Lumatek Zeus Compact Pro 465W
• Nutrition: Aptus Holland + Plagron
• Room design: 8×8 with dual 6″ carbon-filtered exhausts and filtered intake
From seed to now: steady hands, living soil, measured light, and a room that keeps getting smarter. These Super Silver Haze phenos are writing a beautiful chapter. On to Week 4.
📲 Don’t forget to Subscribe and follow me on Instagram and YouTube @DogDoctorOfficial for exclusive content, real-time updates, and behind-the-scenes magic. We’ve got so much more coming, including transplanting and all the amazing techniques that go along with it. You won’t want to miss it.
• GrowDiaries Journal: https://growdiaries.com/grower/dogdoctorofficial
• Instagram: https://www.instagram.com/dogdoctorofficial/
• YouTube: https://www.youtube.com/@dogdoctorofficial
There’s a new series blooming and it’s more than just plants. It’s about process, patience, and paying attention.
⸻
Explore the Gear that Powers My Grow
If you’re curious about the tech I’m using, check out these links:
• Genetics, gear, nutrients, and more – Zamnesia: https://www.zamnesia.com/
• Environmental control & automation – TrolMaster: https://www.trolmaster.eu/
• Advanced LED lighting – Future of Grow: https://www.futureofgrow.com/
• Root and growth nutrition – Aptus Holland: https://aptus-holland.com/
• Nutrient systems & boosters – Plagron: https://plagron.com/en/
• Soil & substrate excellence – PRO-MIX BX: https://www.pthorticulture.com/en-us/products/pro-mix-bx-mycorrhizae
• Curing and storage – Grove Bags: https://grovebags.com/
⸻
We’ve got much more coming as we move through the grow cycles. Trust me, you won’t want to miss the next steps, let’s push the boundaries of indoor horticulture together!
As always, this is shared for educational purposes, aiming to spread understanding and appreciation for this plant. Let’s celebrate it responsibly and continue to learn and grow together.
With true love comes happiness. Always believe in yourself, and always do things expecting nothing and with an open heart. Be a giver, and the universe will give back in ways you could never imagine.
💚 Growers love to all 💚


Likes
9
Share

@Canabetter024
Follow
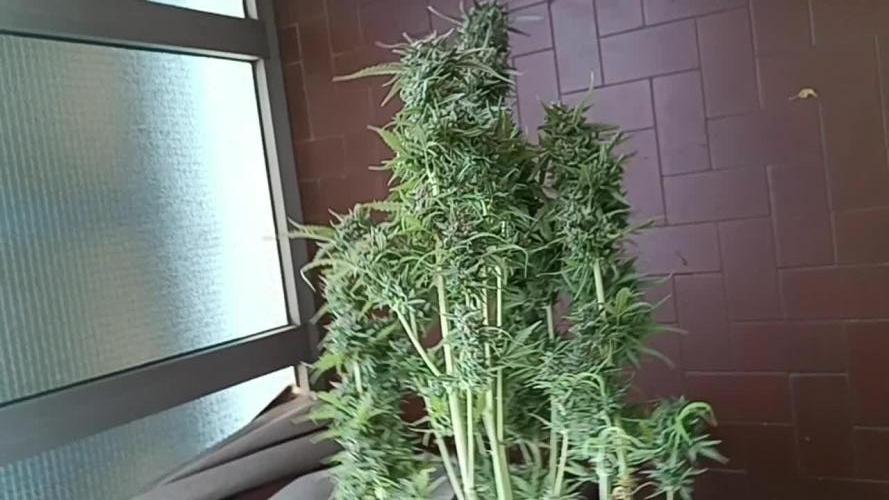
Long grow but she is a beast she is a short monster glistening in resin hard compact buds she was a cal mag thirsty lady but now starting to become full green an no spots or yellowing about wk 10/11 will harvest

Likes
4
Share


@Jimmy_Jankens
Follow
1/12/23 all plants stretching nicely. P4 is vary one sided and P1-3 have similar structures. Starting 12/12 cycle tomorrow, still no pre-flower but should have signs by the end of next week. Hoping for at least 2 oz of or each plant.


Likes
46
Share


@Mr_Motalovah
Follow
Hello growers and tokers! 👋 👩🌾 🧑🌾.🔥💨
These ladies are smelling great!! 😍😋
Enjoying the density and formation of these buds as well.
They got a bit denser this week.
Harvest is right around the corner.
You can start seeing some amber trichomes so she's almost there.
I flushed this week and will be flushing next week.
Most likely will be harvesting next week. 😄
Have a great one!! 🙌😃

Likes
25
Share


@OZDAOgrow
Follow
During this week, I have only occasionally defoliated to get better light on the inflorescences.
I don't know when to put it into flower yet, as the smallest bush (Fruit Diesel) is looking quite pitiful, having just turned a month old. Other bushes are a couple weeks ahead of Fruit Diesel.
What do you think, should I give it another week of vegetation or should I switch it to flowering at the end of the week?
Likes
18
Share


@AlexJekomust
Follow
Finally we are in bloom, the plants are fine and continue to grow with few problems, in this phase the Mimosa Evo in the abs pot, has some leaves locked inwards, while the others are fine, I wonder if I should worry about An excess of fertilizers or environment? The Tutankhamun has these tips pointing downwards and I don't understand why, I only gave water for almost 1 week but nothing has changed, the Gorilla Zkittlez is exploding with flowers and the other Mimosa continues to grow, although I believe that I will harvest a few grams from that plant! I also started giving him Bud Candy to increase the flavor and a little yield!


Likes
Comments
Share


@gadjoo
Follow
07/13/2022
watering 1.67l for each plants (root 1-grow 1.2-bloom 0.4 [ml/l])
07/16/2022
watering 1.5l for each plants without nutrient
07/18/2022
defoliation
watering 1.67l for each plants (root 0.5-grow 1.2-bloom 0.7 [ml/l])


Likes
18
Share


@eldruida_lamota
Follow
Que pasa familia, vamos con la cosecha de estas Tropicana Cookies Fast Flowering, de FastBuds.
Por dónde empezar, las flores son bien compactas , y van repletas de resina, tienen tonos rosados por dentro muy bonitos, y tiene un aroma súper dulce aunque engañar engaña porque saber sabe más tropical y cítrica.
Es muy sencilla de cultivar, es de ciclo bastante corto aunque también si le dais una semana más no pasa nada agradecer se agradece al final.
Mars hydro:
Code discount: EL420
https://www.mars-hydro.com/
Agrobeta:
https://www.agrobeta.com/agrobetatiendaonline/36-abonos-canamo
Hasta aquí todo, Buenos humos 💨💨💨
Likes
6
Share


@Puff_TM_Dragon
Follow
Was seeing plenty of cloudy to amber trichromes. Sticky. It was time. I’m wondering if there is a chance I can reveg this plant.
Likes
2
Share


@dwotTV
Follow
Moving right along, tucked inside out of the weather for a couple days but back outside and happy now.
Likes
41
Share


@Kmikaz420
Follow
Désolé mais pendant plusieurs jour je n arrivé plus à charger mon journal ?
Bref dernière arrosage avec nutriments ;) on y arrive tous doucement .
Autrement j ai eu un petit départ de bud rot sur la melon gum (rien de méchant 2 calices coincé entre 3 immense têtes ;) j ai donc enlever les 2 têtes et désinfecté aux mieux (les 2 têtes n avez rien j ai donc pu les goûter hier soir et j doit dire l effet est vraiment sympa ;)

Likes
31
Share

@Mr_Motalovah
Follow
Hello growers and tokers! 👋 👩🌾 🧑🌾.🔥💨
As you can see these ladies are growing nicely.
They're both at the same height 59cm but one is wider than the other.
Quite nice so far. That's 12cm in one week same as the Royal Gorilla.
Evenly spread canopy, the one that had better shape from the start now has longer colas.
Both are stacking nodes nice and tight.
They have a nice green color to them but you can't really appreciate that in the pictures.
I'm still trying to get a hand of this new phone, I might just go back to the camera. 🤔
Starting to get a little shine to them, I think this strain will be the first in forming trichomes.
They give off a nice smell but I can't put my finger on it yet.
Feeding 1,5L each, every other day. Will be increasing as they ask for more.
How do they ask for more?
When feeding if the soil is drier than normal I give a 150-200ml increment of water.
I do that until they stop feeding so much then i just maintain that amount.
I start reducing if it takes longer to dry.
That works good for me. The old finger in the dirt trick. 👍
Nothing like knowing exactly what your ladies need first hand.
**Info and pictures were taken at day 12 of flower.**
Hope you enjoyed this week's update. Stay tuned for next week. 😃
If you like this check out the other diaries of the strains in the tent. 😄
Take care and stay safe!
One love!✌️🏽

Likes
10
Share

@Shivashamboom1
Follow
prime 2 piante tagliare......hanno un profumo speziato dolce, buonissima 🤤


Likes
70
Share


Likes
17
Share


@Geili_Seili_fireinfireout
Follow
Erste woche in blüte geschaft. Heute ein wenig entlaubt und weiter gehts
Hoffe noch auf etwas mehr strech. Da ich bei SOG spargel beforzuge.
Aber extrem robust die mädels👌😊🔥
Die besten und saubersten stecklinge (weil im labor alle 2-3 monate getestet) gibts wie immer hier bei ROOTS-FARMS österreich👌🌱 the best in austria and maybe europe


