


Likes
Comments
Share


@Master_weeda
Follow
Bonjour à tous les padawans et maîtres jedis
Jour77 arrosage avec 2 litres d'eau ph6.3
Day80 j'ajoute en griffant la terre 3 grammes de feeding biobloom et arrosage avec 2 litres d'eau ph6.3
Ce sera mon dernier engraissage je commence mon rinçage la semaine prochaine
Jour82 arrosage avec 3 litres d'eau ph6.3

Likes
44
Share


@GmansGarden
Follow
Sept 15- She is getting Thicker I will Be Calling Her Shorty because she is short but sweet none the less. The Top Colas are Smelling Strong.
Sept 16- Progressing I don't think I will Have Coke Bottle Buds. More Like Large Popcorn Lol 🤷♂️🤷♂️. But this was the Runt out of this grow 4 Males 1 Female. Which Im about to set an Girl SC Auto with my Male Blue Dream to Breed
Sept 18- Leaves are changing Color as it gets closer to Harvest time.
Sept 19- Getting Redder and Greener. Added a Table Spoon Of Honey into my Nute Soup 😉😉😏😏
Sept 20- Looks like I may Get some Decent Buds
Sept 21- Her Kitty Stink 😂🤣
Likes
16
Share


@Ensign420
Follow
Introduction - Week 14|07 Summary -
Ensign's log, stardate 9437.65,
Great week of growing! Wow what a good week!
Growth in the main tent has all around been incredible!
Submitted my first submission to the Global Grow Cup! Filmed a video of the solo cup container (marked with the ticket/order number) that will be used for the competition. Also had to fill and prove the solo cup holds 2 cups of soil. Now I need to root a clone (for the first time), transplant her into this cup, and submit my 2nd entry before the 30th of this month.
As far as my first attempt at cloning, have already begun the rooting process! Managed to take cuttings from 3 out of the 6 phenos in the main tent (the first cutting was also my first time topping). Soaked the cuttings for two days before planting them into Coco Coins. So far everything has gone surprisingly well! The clones are now rooting under the propagation dome with the vents fully closed. Will check for roots soon!
At the end of the week, growth was just raging! Was planning on flipping to flower in a week, but decided to begin the first week of flower next week! Thus this is the last week of veg. Plan to flip to 12/12 next Monday!
Onwards to next week!
[START OF WEEK 14|07]
==========================================================
Garlic Budder #1 - WEEK 14|07 - Full Veg Wk5
Garlic Budder #2 - WEEK 14|07 - Full Veg Wk2
Garlic Budder #3 - WEEK 07 - Full Veg Wk5
Garlic Budder #4 - WEEK 06 - Full Veg Wk4
06/03/24 → 06/09/24
This Week's Estimated Goals
----------------------------------------------------------------------------------------------
DLI: ~26 mol/m²/d
PPFD: ~400 μmol/m²/s
VPD: ~1.0 kPa
This Week's Meter Readings & Averages [Lights On: 16:00 - 10:00]
----------------------------------------------------------------------------------------------
DLI: 24.56 mol/m²/d
PPFD: 379 μmol/m²/s
VPD: 0.91 kPa
Soil %: [32.7, 37.6, 37.9, 34.1]
==========================================================
Day 01 - Monday - 06/03/24 - Total Days: 098
-----------------------------------
Daily Averages [~23:00]
- Temps: 80.7°F [27.1°C]
- Humidity: 74.4%
- VPD: 0.90 kPa
- Soil %: [31, 34, 39, 35]
-----------------------------------
- [09:57]: Quick morning check!
--- #1 is looking a bit droopy, but almost lights off (at 10:00) so not concerned.
--- Nice! Mainly wanted to check on #4 and she is looking great! She’s perked back up and looking good!
- [23:08]: Evening check.
--- Wow! It’s a jungle in here!
--- #1 has gotten too big? Nah!? Keep on growing girl!
--- #2 is growing and definitely getting bigger! Growth just looking really weird.
--- #3 has continued to get larger and is looking quite uniform in growth!
--- #4 is growing and looking perky again!
--- Even the original #1 and #2 phenos (in the back) are looking good!
--- Wow! #4 is really getting close to the light.
- [23:14]: Checked down both fill tubes.
--- Both reservoirs were completely dry!
- [23:27]: Checked the Ecowitt soil moisture sensor data:
--- 30% - [CH01 EB1 - Garlic Budder #1]
--- 34% - [CH02 EB2 - Garlic Budder #2]
--- 39% - [CH03 GFP - Garlic Budder #3]
--- 32% - [CH04 FPT - Garlic Budder #4]
- [23:32]: Poured 4 cups of distilled water down EB1’s fill tube.
--- Poured 2 cups of distilled water down EB2’s fill tube.
- [23:38]: Checked the humidifiers.
--- Refilled the 4X4’s humidifier with distilled water.
--- Tomorrow, plan to defoliate and start cloning for the first time!
--- Going to take multiple cuttings from both #1 and #4 for sure, but still deciding on the rest.
--- Getting hyped!
Day 02 - Tuesday - 06/04/24 - Total Days: 099
-----------------------------------
Daily Averages [~23:00]
- Temps: 81.4°F [27.4°C]
- Humidity: 74.3%
- VPD: 0.93 kPa
- Soil %: [29, 35, 38, 32]
-----------------------------------
- [11:59]: Time to film the first entry for the Global Grow Cup!
--- Going to be using BuildASoil 3.0 potting soil.
--- Filming the video using a stand and my phone.
--- This video is mainly to establish the container that the plant will be grown in. Also to prove that the container is a 16oz container and that it can hold 2 cups of soil.
--- The ticket (order) number also had to be written on the cup.
- [12:36]: Done!
--- The video had to be done in one continuous shot with no edits (my original submission does not have the logo).
--- There was also a photo that needed to be shot which shows the cup filled with 2 cups of soil (just like the video, the original image submission did not have the logo).
--- I think I did everything correctly, but also sent an email for verification of submission and validation.
--- Getting hyped!
--- [*smokes a bowl]
--- Going to defoliate today along with for the first-time, going to take cuttings for clones!
--- After a bit of online research, decided to split the cloning process into two days.
--- Today going to take cuttings and will soak them in a solution of aloe for 24hrs. Afterwards will change the water out and use straight distilled water.
--- Then in a couple days, plan to transplant into coco plugs (Coco Coins) for rooting.
--- For optimal results, also be using a rooting hormone (Clonex).
--- Well.. Here goes nothing!
- [17:01]: Evening check.
--- Wow! #1 is looking huge! Her main top is stretching above the lower canopy which is continuing to bush out.
--- #2 is growing along. Growth is gnarly and a bit droopy, but she’s getting taller!
--- #3 is looking great! Still a bit small, but she is continuing to get larger.
--- #4 looks like she needs a watering.
--- Both plants in the back are also looking surprisingly great as well!
- [17:05]: Checked down both fill tubes.
--- Both reservoirs were completely dry!
--- As far as today's defoliation, going to leave #2 and #3 alone and will focus my defoliation and cloning on the rest of the plants.
--- This will be my first attempt at cloning, also going to try topping for the first time today.
--- No pressure Ensign. What can possibly go wrong right?
- [17:27]: Time to start the cloning and defoliation process!
--- Filled a measuring cup with 3 cups of distilled water.
------ Added 3/4tsp of Horticultural Aloe
------ Added 1 more cup of distilled water
--- Mixed the solution and poured an even amount into three separate solo cups.
--- Made sure to mark two of the cups (#1 and #4). The unmarked one will be for any other clones from amongst the 6 phenos (if any at all).
- [17:43]: Time to top and defoliate #1!
--- Using a pair of brand new trimmers (AC Infinity),
--- Gently cut the main stalk to even out the canopy.
--- Then trimmed and cleaned most of the nodes leaving the top node or two.
--- Also trimmed the leaf fingers a bit before placing the top cutting into the cup of aloe solution.
--- Now for the rest of the cuttings!
--- [~45 minutes later]
- [18:32]: Managed to finish defoliating and cutting the rest of the clones.
--- Took two more lower cuttings from #1 (3 clones total).
--- Took 3 lower cuttings from #4
--- While defoliating, decided to try and clone the original #2 pheno as well. Took 4 small cuttings.
--- Similar to the top cutting, trimmed and cleaned each lower node for each cutting before placing them into the cups.
--- Before finishing up the 2nd cutting, I noticed the first cutting (the top cut that was also trimmed) was drooping.
--- So I did not trim and the leaf fingers for the other cuttings.
--- In total there were 10 cuttings taken for potential clones.
--- My main focus was to take cuttings and to clean up all the lower growth from both #1 and #4.
--- Defoliated and cleaned up the back original phenos as well (also trimmed back the cover crop).
- [18:35]: Temporarily placed the cuttings onto the floor of the 4x4 tent.
--- Took the trimmings (about 3 cups) and spread them onto the top mulch of #1 and #2.
--- Time to set the environmental controls for the 3x3 veg tent.
- [18:43]: Within the AC Infinity App,
--- For the Veg Tent [3x3] controller,
--- Adjusted the 'Vegetative [18/6]' Schedule for the grow light.
------ Set the Mode to ‘On Mode’
------ Set the START/END times to 04:00PM/10:00AM
------ Set the MAX to 1
--- The IonBoard S33 is now utilizing around 60.8W (at intensity 1 out of 10).
--- Adjusted the 'Vegetative [18/6]' Schedule for the exhaust fan.
------ Increased the Humidity’s HIGH trigger value from 81% to 87%
--- Adjusted the 'Vegetative [18/6]' Schedule for the humidifier.
------ Decreased the VPD target value from 1.5kPa to 0.8kPa
- [18:52]: Moved the cuttings into the 3x3 veg tent.
--- It begins! I think.
--- Going to let these cutting drink some aloe for a day before switching to straight distilled water.
--- Hmm. Could be the white floor of the 3x3 veg tent, but have noticed the S33 has a whiter spectrum whereas the FC-6500 seems to be warmer in color.
--- Anyways,
- [18:58]: Poured 4 cups of distilled water down EB1’s fill tube.
--- Poured 2 cups of distilled water down EB2’s fill tube.
- [19:06]: Filled a pump sprayer with 5 cups of distilled water.
--- Focused mainly on the straw mulch of #4.
--- But also misted the straw mulch for the rest of the plants a bit.
- [19:12]: Checked the humidifiers.
--- Refilled the humidifiers with distilled water.
- [19:44]: Going to be using Clonex rooting gel before planting the cuttings into Coco Coins (pre-soaked with microbes and aloe). But before that begins, going to transfer the Clonex gel into a squeeze bottle.
--- Gently peeled back the seal on the original Clonex bottle. Just enough make a tiny opening,
--- Then slowly and carefully poured the gel into an empty squeeze bottle.
--- Also removed the sticker from the original bottle and placed it onto the new one.
- [19:54]: Perfect!
--- Instead of applying the gel to the cutting, going to be applying the gel to the Coco Coin.
--- This squeeze bottle will make applying the gel a lot easier.
--- Will take PPFD readings tomorrow.
--- Also will change out the aloe solution to distilled water.
--- I really hope I didn’t screw things up before they could even begin.
--- Don’t die on me ladies!
--- Please.
Day 03 - Wednesday - 06/05/24 - Total Days: 100
-----------------------------------
Daily Averages [~23:00]
- Temps: 81.9°F [27.7°C]
- Humidity: 75.5%
- VPD: 0.90 kPa
- Soil %: [29, 36, 38, 36]
-----------------------------------
- [09:40]: Quick morning check!
--- #1 is looking a bit droopy, but looking okay. Topping is a high stress technique so going to take some time to recover. Don’t plan on flipping the main 4x4 tent to flower for a good week or so which should be enough time.
--- #4 looks great! The defoliation seems to have no effect on growth. Nice!
- [09:41]: Also quickly checked on the 3x3 veg tent,
--- Nice! The cuttings are looking great!
--- No yellowing and they all seemed to have turned up towards the light.
--- So far so good!
- [22:53]: Evening check.
--- #1 is continuing to dominate this grow! She has spread wide and looking incredible!
--- #2 is looking gnarly, but getting there.
--- #3 is getting larger! But still a runt. By far, her leaves are the darkest of the bunch, but she is still growing!
--- #4 looks happy and growing along beautifully! Wow!
- [22:55]: Checked down both fill tubes.
--- Both reservoirs were completely dry!
- [22:59]: Poured 5 cups of distilled water down EB1’s fill tube.
--- Poured 2 cups of distilled water down EB2’s fill tube.
- [23:05]: Checked on the 3x3 veg tent.
--- Ooo yea! The cuttings are still green! Nice!
- [23:07]: Took PPFD readings.
--- The cuttings were around 121 μmol/m²/s which gives a DLI of 7.84 mol/m²/d
--- Nice! These levels are on the lower range for seedlings (~100-300), perfect! I think.
- [23:14]: Swapped the aloe water out to straight distilled water.
--- Going to let these cuttings soak for one more day before planting.
--- Please don’t die girls!
- [23:15]: Checked the humidifiers.
--- Refilled the humidifiers with distilled water.
--- Ooo yea!
--- Tomorrow is the big rooting day!
Day 04 - Thursday - 06/06/24 - Total Days: 101
-----------------------------------
Daily Averages [~23:00]
- Temps: 81.9°F [27.7°C]
- Humidity: 75.2%
- VPD: 0.91 kPa
- Soil %: [32, 38, 38, 34]
-----------------------------------
- [16:20]: Evening check.
--- #1 is a bit droopy, but growth is looking green and healthy.
--- #2 is looking bigger! She’s also looking sort of droopy.
--- #3 is growing along nicely! Looking good girl!
--- #4 is looking great! A bit droopy but plan to water today.
- [16:23]: Checked down both fill tubes.
--- EB1's reservoir still has some water.
--- EB2's reservoir was completely dry!
- [16:23]: Checked the Ecowitt soil moisture sensor data:
--- 28% - [CH01 EB1 - Garlic Budder #1]
--- 36% - [CH02 EB2 - Garlic Budder #2]
--- 37% - [CH03 GFP - Garlic Budder #3]
--- 30% - [CH04 FPT - Garlic Budder #4]
- [16:30]: Using a pump sprayer,
--- Misted the straw mulch of #4 with 6 cups of distilled water.
--- Focused mainly on the straw mulch.
--- Also misted the straw mulch of #3 (in the grassroots fabric pot) a bit.
- [16:43]: Poured 5 cups of distilled water down EB1’s fill tube.
--- Poured 3 cups of distilled water down EB2’s fill tube.
- [16:52]: Checked the Ecowitt soil moisture sensor data:
--- 56% - [CH01 EB1 - Garlic Budder #1]
--- 44% - [CH02 EB2 - Garlic Budder #2]
--- 40% - [CH03 GFP - Garlic Budder #3]
--- 45% - [CH04 FPT - Garlic Budder #4]
- [17:01]: Took general PPFD readings.
--- #1 was around 379 μmol/m²/s which gives a DLI of 24.56 mol/m²/d
--- #2 was around 333 μmol/m²/s which gives a DLI of 21.58 mol/m²/d
--- #3 was around 293 μmol/m²/s which gives a DLI of 18.99 mol/m²/d
--- #4 was around 378 μmol/m²/s which gives a DLI of 24.49 mol/m²/d
- [17:09]: Took the weekly height and light distance measurements.
--- #1 was about 21" tall.
--- #2 was about 13.5" tall.
--- #3 was about 9.5" tall.
--- #4 was about 19.25" tall.
--- Hmm..
- [17:19]: Adjusted the right oscillating fan a bit.
--- Re-angled the CloudRay S6 oscillating fan upwards. Been noticing that the air has been hitting the tops of the plants so easing off a bit (#1 is still getting hit, but she’s huge so not too worried).
- [17:23]: Back to the measurements!
--- #1 was about 9.5" away from the grow light.
--- #2 was about 17" away from the grow light.
--- #3 was about 17.5" away from the grow light.
--- #4 was about 11.5" away from the grow light.
- [17:46]: Checked on the 3x3 veg tent.
--- Cuttings are still green! They do look a bit droopy but no signs of yellowing.
--- Okay!
- [17:55]: Time to begin the rooting process!
--- For my first attempt at rooting, going to be using Coco Coins pre-soaked in saponins, microbes and aloe.
--- To further help with rooting, going to also be using Clonex rooting gel.
--- Filled a measuring cup with 4 cups of distilled water.
------ Added half of 1/64tsp of Quillaja Saponaria Extract [60]
------ Added 1/16tsp of Horticultural Aloe
------ Added 1/8tsp of Mycrobe Complete
--- Mixed the solution thoroughly.
--- Time for the Coco Coins!
--- 10 cuttings means 10 Coco Coins.
- [18:09]: Dropped 10 Coco Coins into the measuring cup.
--- The coins immediately started to expand.
--- A bit too much.. Oops!
--- Poured the solution and Coco Coins into a pitcher.
--- Added 2 cups of distilled water to the solution (now at 6 cups).
--- Great! The coins are pretty much fully expanded, but going to wait a bit longer to fully saturate each coin.
--- [~20-30 minutes later]
- [18:42]: Great!
--- Took the seedling and flood tray from the AC Infinity propagation dome and placed all 10 Coco Coins into the slots.
--- Gave each Coco Coin a quick shake to remove excess solution. The coins were not dripping with solution but still pretty saturated.
--- Arranged them into 3 groups with the cuttings in mind.
--- Also tried to keep the pre-made holes intact.
--- Time to inoculate the Coco Coins!
- [18:54]: Using a squeeze bottle,
--- While keeping the nozzle from making contact with the coco, gently filled each pre-made hole with Clonex rooting gel. Just enough gel to fully cover the hole of each coco coin.
- [19:00]: Time to plant the cuttings!
--- Gave each cup a misting of distilled water. Focused on wetting the top growth with water.
--- Okay!
--- To avoid mixing cuttings up.
- [19:01]: Starting with the original #2 pheno cup,
--- For each cutting,
--- Using a pair of clean trimmers, made a final 45° cut about 1/2" from a bottom node.
--- Then stripped away and scared the protective membrane below the node before planting.
--- Made sure the node was about 1/2" below the surface of the coco.
--- To help with planting, while inserting each cutting, gave the Coco Coin a gentle squeeze to loosen the coco. This also helped to ensure the coco and gel was in good contact with the cutting.
--- Once the cutting was planted into the Coco Coin, made sure to place back in the same spot (made sure to keep the cuttings in their groupings).
--- Once a cup was complete, made sure to keep the label with the group.
--- Re-misted the top growth as needed to keep it wet.
--- Also wiped the trimmers with isopropyl alcohol in between cuttings (plan to use 10% bleach solution for next time).
--- Repeated this process until all 10 cuttings were cut, planted, and in the tray.
--- The coco coins fit perfectly into the tray and don’t reach the bottom. Nice!
--- The bottom air gap is important.
--- Poured a bit of distilled water through one of the empty slots into the bottom of the tray. Just enough to fill the bottom of the tray, but not enough to reach any of the Coco Coins (~1/4cup).
- [19:35]: Placed the propagation tray with cuttings into the 3x3 veg tent.
--- Placed the first layer of the propagation dome on before giving the sides a misting of distilled water.
--- Also sprayed the top of the propagation dome before covering the cuttings.
--- Vents are all fully closed.
- [19:40]: Placed the bar lights onto the top of the dome before configuring the controller.
------ Set the START/END times to 04:00PM/10:00AM
------ Set the bar light’s intensity to 2 (out of 10).
--- Also made sure the propagation light controller’s time was in sync with the Controller 69 Pro.
- [19:47]: Took PPFD readings.
--- The cuttings were around 136 μmol/m²/s which gives a DLI of 8.81 mol/m²/d
--- The PPFD levels are similar to the floor.
--- Perfect!
--- Going leave the IonBoard S33 on during this rooting process.
--- Will check back tomorrow to cycle the air under the dome.
- [19:56]: Checked the humidifiers.
--- Refilled the humidifiers with distilled water.
- [20:17]: Quick night check!
--- Ooo yea! Growth is raging and looking perky!
--- Mainly checked on #1 and #4 which were looking incredible!
--- Keep on growing ladies!
Day 05 - Friday - 06/07/24 - Total Days: 102
-----------------------------------
Daily Averages [~23:00]
- Temps: 82.7°F [28.2°C]
- Humidity: 76.2%
- VPD: 0.89 kPa
- Soil %: [37, 40, 38, 35]
-----------------------------------
- [10:03]: Decided to increase the ambient temp in the 3x3 veg tent.
--- Within the AC Infinity App,
--- For the Veg Tent [3x3] controller,
--- Adjusted the 'Vegetative [18/6]' Schedule for the heater.
------ Increased the Temp target value from 78°F to 82°F
--- Hopefully this will help to keep the veg tent at a more consistent temp.
- [22:26]: Evening check.
--- Ooo yea! The garden is looking incredible!
--- #1 is looking perky and just bushing out! Wow!
--- #2 is getting big! Growth is weird and leaf fingers are huge! Just going to let her grow.
--- #4 is looking happy and growing along like a champ! Nodes are starting branch out and she is turning into a bush!
- [10:28]: Checked down both fill tubes.
--- Both reservoirs were completely dry!
- [22:33]: Poured 5 cups of distilled water down EB1’s fill tube.
--- Poured 3 cups of distilled water down EB2’s fill tube.
- [22:40]: Checked on the propagation dome (inside the 3x3).
--- Ah yea! Looking great ladies!
--- Lifted the top of the dome to let some fresh air in for a bit.
--- Wow!
--- Leaves still look nice and green!
--- So far everything looks great!
--- Just going to continue on!
- [22:53]: Checked the humidifiers.
--- Refilled the humidifiers with distilled water.
- [11:01]: Decided to adjust the humidifier for the 3x3.
--- Within the AC Infinity App,
--- For the Veg Tent [3x3] controller,
--- Adjusted the 'Vegetative [18/6]' Schedule for the humidifier.
------ Increased the VPD target value from 0.8kPa to 1.5kPa
--- The higher VPD level will essentially turn the humidifier off.
--- I won’t be needing the humidifier for a good week so might as well save the water.
Day 06 - Saturday - 06/08/24 - Total Days: 103
-----------------------------------
Daily Averages [~23:00]
- Temps: 81.6°F [27.6°C]
- Humidity: 74.9%
- VPD: 0.91 kPa
- Soil %: [35, 40, 37, 31]
-----------------------------------
- [07:40]: Quick morning check!
--- #1 and #4 are looking perky and happy!
--- Also checked on the propagation dome,
--- All cutting still look green! Hyped!
- [20:02]: Evening check.
--- Wow the garden is raging with growth!
--- #1 has blown up! She has clearly recovered and growth is ramping up again!
--- #2 is stretching upwards!
--- #3 is now the smallest of the 4, but still getting larger!
--- #4 is looking incredible! Wow! Growth looks perky and happy!
- [20:05]: Checked down both fill tubes.
--- Both reservoirs were completely dry!
- [20:10]: Poured 6 cups of distilled water down EB1’s fill tube.
--- Poured 2 cups of distilled water down EB2’s fill tube.
- [20:16]: Checked the Ecowitt soil moisture sensor data:
--- 35% - [CH01 EB1 - Garlic Budder #1]
--- 40% - [CH02 EB2 - Garlic Budder #2]
--- 36% - [CH03 GFP - Garlic Budder #3]
--- 27% - [CH04 FPT - Garlic Budder #4]
- [20:19]: Using a pump sprayer,
--- Misted the straw mulch of #4 with 5 cups of distilled water.
--- Focused mainly on the straw mulch.
--- Also misted the mulch of #3 a bit (in the fabric pot).
- [20:27]: Checked propagation dome (in the 3x3),
--- To cycle the air under the dome, lifted the top off for a bit.
--- Ooo yea! Everything is still green and looking great!
--- Keep on rooting ladies!
--- Oops!
- [21:45]: Checked the humidifiers.
--- Refilled the humidifiers with distilled water.
Day 07 - Sunday - 06/09/24 - Total Days: 104
-----------------------------------
Daily Averages [~23:00]
- Temps: 81.5°F [27.5°C]
- Humidity: 74.8%
- VPD: 0.91 kPa
- Soil %: [36, 40, 37, 36]
-----------------------------------
- [08:18]: Quick morning check!
--- Nice! The main tent is looking great! #1 and #4 are both raging with growth!
--- Checked on the propagation dome (inside the 3x3) and the clones are still looking green!
--- Wow! Everything is going almost too well! Just keep on growing!
- [19:08]: Evening check.
--- Garden is just exploding with growth! Seems everyone has fully recovered from the defoliation and topping!
--- Wow #1 is bushed out and looking incredible!
--- #2 is growing really starting to get large! Growth still is funky, but stoked none-the-less.
--- #3 is starting to fill in the pot! Getting larger!
--- Wow! #4 is getting taller and looks healthy and green!
- [19:12]: Checked down both fill tubes.
--- Both reservoirs were completely dry!
--- Wow the canopy is really starting to get taller and closer to the light. May need to raise it up soon.
--- Absolutely surprised how low the light levels have been throughout this entire cycle. Barely moved the light and have not increased the intensity past 2 (out of 10). Less is really more.
--- Anyways!
- [19:18]: Checked the Ecowitt soil moisture sensor data:
--- 36% - [CH01 EB1 - Garlic Budder #1]
--- 41% - [CH02 EB2 - Garlic Budder #2]
--- 37% - [CH03 GFP - Garlic Budder #3]
--- 34% - [CH04 FPT - Garlic Budder #4]
- [19:19]: Poured 6 cups of distilled water down EB1’s fill tube.
--- Poured 3 cups of distilled water down EB2’s fill tube.
- [19:24]: Checked propagation dome (in the 3x3),
--- To refresh the air, lifted the top off for a bit.
--- Sweet! Still green! Wow!
--- Using a spray bottle, misted the top growth with distilled water.
- [20:35]: Checked the humidifiers.
--- Refilled the humidifiers with distilled water.
--- Wow what a week!
--- Growth has been just insane in the 4x4 tent! All plants have fully recovered and have just exploded with growth.
--- I think it’s time to flip to flower!
--- Also, I’m absolutely baffled about how well the cloning process has been going.
--- So far no issues!
--- Not complaining, but just surprised. Keep on growing ladies!
--- If all goes well, should have fully rooted clones soon ready for transplanting (into solo cups of course).
--- Absolutely hyped for next week!
--- Maximum warp Ensign, Engage!
[END OF WEEK 14|07]

Likes
5
Share


@Mr_nugs_lover_David
Follow
Looks absolutely gorgeous, again I'm dealing with some fungus gnats and that's why it's full of yelllow sticky traps everywhere guys haha, the smell is now starting to be very noticeable It's pretty sweet and at the same time kind of spicy and herbal, let's see how this lady keeps developing her beautiful flowrs, stay tuned guys!! 👨🌾🔝


Likes
6
Share


@valiotoro
Follow
Easy trim✂️
Harvest in 2 times first the top buds then the lower!
No popcorn 🍿
The smell is delicious cookie & lemon 🍋 🍪
The buds are extremely dense 🤩
See you in 2025 for the smoke report
Take care 💜
Baxter loves you🕺🏽

Likes
49
Share


@masterofsmeagol
Follow
IVE MADE MORE VIDEOS BUT THEY JUST DON'T SEEM TO UPLOAD AND IT'S FAR TO SLOW TO DO IT FROM HOME
6/27 Made last week a five day week to get back on track. It's still overcast and rainy. It's not raining a lot bit it's consistent. Despite the weather the plants are doing phenomenal. I'll update later. It's 1pm. It's been raining consistently since 11. Just a sprinkle but it's steady. I'm going to begun uploading the weeks weather on my diary. I may start a new diary for the plants I light depped as they are flowering pretty good. Rain stopped and it's just overcast for now. I looked at some videos and did a comparison of videos one week ago and videos today and HOLY SHIT! WHAT A DIFFERENCE. Especially the light depped 10th planet. Well everything but that was the most significant difference. I'm astonished at the health and growth despite the crummy weather. Continued to rain. Just got harder. Plants are taking it but it's flooding underneath the pallets a little but it will be fine. The light dep however has me concerned. The 10th planet is looking spectacular. The bigger purple punch I'd looking good too. The smaller one though looks to have a pollen sack coming off one of the branches. Considering its not on the otherside I assume it's not just a swollen calyx. I don't mind chucking it especially if that means I don't hurt my other girls so I want to make sure. I sent videos to a few other growers and I'll add a question on here. Those three plants have been isolated from the rest for a few days due to rain. I have the suspect isolated alone until I can confirm. It sucks cause the light Depp was going good and the6ve all got little flowers.
6/28 Well that fucking sucks. ALL THREE plants I tried to light depp hermed on me. I could see male flowers. Luckily I had been keeping a really good eye on them and it was preflowers mostly. At least I caught it. One or two stamines on each plant. Would've been really easy to miss. Only one had STARTED to elongate into a stem so I think I caught it early enough. Plus since all this rain they've been kept in a different location then my big girls. Glad I did that now. Boy the roots looked good on those plants. I just grabbed the stalk and lifted and it came right out of the pot. I held it there admiring it for a minute. This sucks. At least the real plants are doing good. As far as I know. No male preflowers that's for sure. I've got some feedback from other growers and the videos are a little blurry but I had found a light leak and I'm certain these plants hermed. I know I could've tried to save them but I didn't want to risk it. I compared what I was seeing with Google photos and other websites. Aside from the larger ball with its stem, there were also several little bumps besides developed calyxes that were weaving into little buds. Trust me that I wouldn't cut down my plants if I wasn't 110% sure. I might've been able to "save them" but to me it's just not worth the risk.
6/29 I was second guessing myself pretty hard last night due to some responses I got on my light dep and messages I got from other growets. Made my anxiety horrible but I looked on several video's I'd taken again and I know what I saw. I felt better after that. This was after I researched and waited THREE days until I saw the ball on the stem and the groupings of small nubs under a fresh yellow flower. These plants were flowering good and it sucks to lose them. One MAY have been ok but one was a runt and had all the characteristics of a true hermaphrodite. They were only in 3's and I couldn't risk my harvest for an experiment. Still sucks. Oh well. Sun is starting to come out. Plants seem to be doing fantastic. I have one spot on a leaf that looks like a pillar munched on a leaf so I'll probably get the bt out soon as I have a dry day that I can apply it. I'll have to check the weather. I need to start a nute regiment but the plants aren't telling me they need anything yet.
6/30 I fucked up dates or dodnt do it yesterday or it didnt save right so I'm leaving this blank today is the 1st.
7/1 I have still only watered s couple times and I haven't had to feed. This week I'm going to start nutes. I had some external ersonal situations that have kept me from my plants. I'm hoping to get back on track. I noticed some pillar damage so I'll need to dig out the BT. This morning I saw this giant ground hog by my cage. Hated too but had to get rid of him. Of course some of the blowback landed on the leaves of one of my plants. I tried to clean it as best I could. Better than that fat bastard eating everything in one night. I broke a branch either falling around it or bulling through when I was pissed or I LST it the wrong way and the wind broke it against the tomato cage. Nice big branch too on top. I tried to fix it with duct tape but we'll see. The plants need me to spend sometime with them. I need to clean them up. Apply bt and give them their first feeding. I'll update as I go. They don't seem nutrient deficient by any means but I don't think it would hurt to start the nutes.
7/2 Bags were lighter today and if it wasn't going to rain tonight and tomorrow I'd he watering. Plants look great so soil isn't depleted yet I guess. They're growing rather rapidly. The branch I broke didnt make it. Had an idea it wouldn't but I had to try. I waited on the BT on account of the rain. I may go back over and change my mind and water with silica or a mild nute solution or maybe apply the BT. Depends what time I get back. I have some work I need to do over there. There's a few that I need to clean up the bottoms on. Pest damage is minor and limited to one or two plants and a leaf or two only.
7/3 More rain. It was supposed to rain this morning too but it didn't. We got .33in yesterday and through last night so I thought that was ok. Looking back on my previous diaries I'm doing things significantly different than before. I had used a lot more nutes earlier on. This morning I mixed two gallons of 2tsp of big bloom and fed it to the 9 plants in smart pots leaving the container plants as they have much more water in them. Looking back at other diaries I previously had, WPM and septoria by this time not to mention a shit ton of other pests I was fighting by this time. Since I poisoned where the cagexwas multiple times and sprayed the cage before it was moved I luckily don't have that problem yet knock on wood. I'm planning to apply BT tonight to deal with the moth larvae if there are any. I'm looking at plants around this area and im seeimg SOME septoria and pm on raspberry bushes and burdock so it is around. I made sure my cage is not by any other vegetation this year and is sitting on asphalt with the bags on raised pallets. Good thing I did or I guarantee they'd be flooded by now. I've been seeing multiple complaints from maine growers online (AND THEY HAVE HEALTHY PLANTS!) saying this is the worst year ever. Maybe they need a dose of fusarium oxysporum to keep them humble. This is maine. If you don't like the weather just wait five minutes. Meanwhile I'll be doing my sun dance hoping for sun. "Hard to grow cannabis with no sunlight" said another grower on my forum.


Likes
12
Share


@InsideAz
Follow
Added a second scrog net for the taller plants last Friday. Constantly defoliating to increase light penetration but not trying to stress the plants. (Selective leaf picking)
Plants loved the tea I have them last week. Visual improvements in every plant 2 days later.
Top dressing later this week on 9/29:
5 tablespoons Gaia green 444
5 tablespoons Gaia Green 284
15 tablespoon Wiggle Worm Earth Worm Castings
Light increased to 75%
Likes
2
Share


@Ninjabuds
Follow
My new grow pros solutions under canopy lights are really making the colors popBlack Runtz is a captivating plant with its dark, fading leaves and wild-looking buds. The trichome density is incredibly thick, giving the buds a frosty appearance. It's a truly unique and beautiful plant.


Processing
Likes
10
Share


@yaron
Follow
So this week we have a heatwave witht 30 degrees celcius,looking good so far except the smallest one.
she is a week or so younger but stays fairly small,but looks healthy.
cheers!


Processing
Likes
27
Share


@Dunk_Junk
Follow
Things are progressing very well!
She grew ANOTHER 14cm this week. Now 57cm tall.
I would like to grow this strain again in a bigger pot. I think she'd make a fab big plant.


Likes
14
Share


@Greenislandfr
Follow
Les buds gonfle doucement, j'alterne 1 engraissage sur 3 arrosage délibérément, je ne cherche pas le rendement sur cette variete jessaye vraiment de concentré la puissance au maximum dans les têtes, l'odeur est de tropicale est dominante 75% environ et les note de haze 25% c'est très leger et puissant en même temps je ne m'attendait pas a ca venant d'une "15% de thc"

Likes
7
Share


@Jays_Not_Here_Man
Follow
Not a whole lot of height this week, but some nice leaf development. I may have overwatered them and slowed their growth, we’ll see how they progress 🇨🇦❤️🌱😎💨
Likes
2
Share
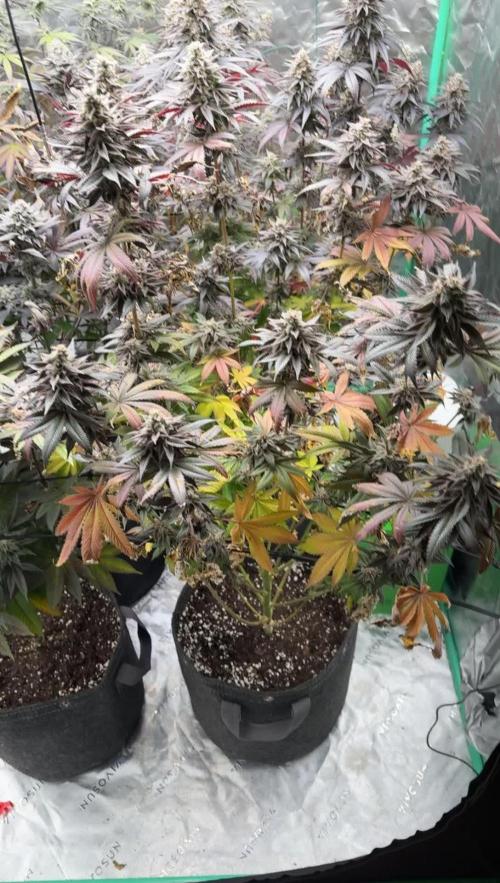

@TTerpz
Follow
Start of week 13
(Day 49 of flower)
9/20/25
Fed with 1/4 strength of nutrients: 9/24/25
Flushed with water 9/26
Likes
21
Share


@The_La
Follow
It was an interesting grow in hind sight, I had my ups and downs along the way . It was my
First haze and wasn't prepared for the 12 wk flowing cycle.
My girls took until wk 3-4 to show any hairs!! I was starting to think that they would never do it.
I was battling with my nighttime temps , sometimes they would drop to 3c. I installed a 190w 1.5m greenhouse tube heater and managed to raise it to 9c.
I installed another a few weeks after and managed to keep a temp of 12c when lights were off.
It seemed like I was constantly waiting for a growth spurt as the flowers didn't seem to kick off until
Around wk 8 .
I had some foxtails, mainly on the left side
Of my tent , the foxtails were like crowns ( 4 growing out of the tip of the cola).
This also made the main bud a bit loose .
The flavour is nice and sweet with a pungent smell, some have said like cheese .
It is a really strong bid to smoke , one joint and that's it for 2 hours , really creative .
I wouldn't grow this strain again due to the sheer amount of time that goes into it , not to mention the extra nutes and electricity , but I will keep some back as it is a lovely experience.
I also used a pollinator machine and got 30g of hash from my trim which is always a nice bonus .
Thanks to valhallas garden, totem and spinner Caribbean for their support during this grow .
I may lay low for a while on GD as I had a bit of a scare with an address of a friend accidentally appearing in a photo ,
Likes
45
Share


@PapaSmurf416
Follow
Bought a PH kit the cheap one with the vial and drops realized I’ve been watering and foliar spraying around 7 maybe slightly higher. Adjusted PH before last foliar to 6.5 roughly also maybe slightly under and WOW. Noticing the chlorophyll coming back strong and evenly. Wasnt a major issue but I had been wondering about it seems to be solved now. Also super exited both DragonsBlood have the bleeding trait!! Thank you to everyone providing answers and tips for me. Going to flower in another 2 weeks or so.