
Likes
Comments
Share

@Jardin33ro
Follow
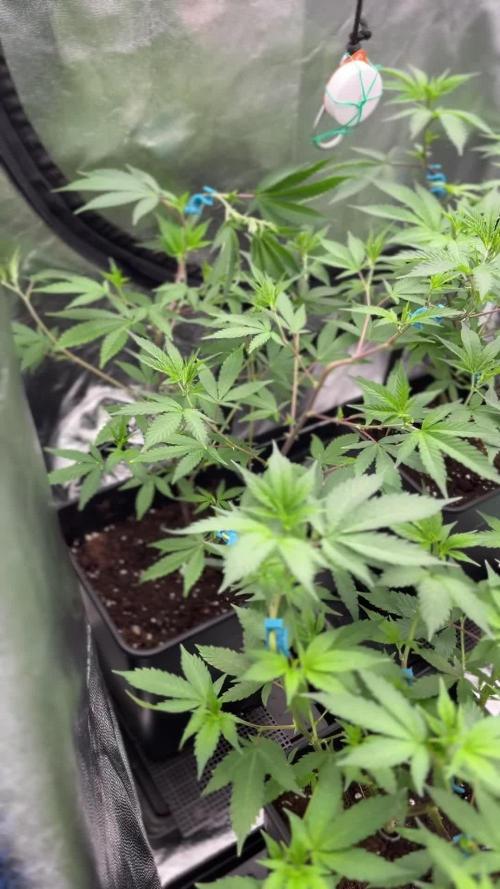
Buenas! En esta semana toco trasplante y primeros preventivos foliares, IPW de athena para preventivo 1 vez a la semana. El trasplante lo hicimos a maceta de 7L, quiero ver si puedo tener mas control de los riegos. Seguimos mateniendo humedad y de a poco suben las temperaturas, ya que no tengo aire acondicionado para un mayor control. Pero se hace lo que se puede y vienen hermosas. Ya largan ese olor característico de la cepa, un buen citrico mandarino

Likes
5
Share

@Gewaltmann
Follow
Wie auch bei der runtz, hoffen wir mal dass sich die stretch in weiteren Grenzen hält. Die sunday wächst ziemlich buschig. Hier werde ich beim lollipoppen auf jeden Fall jede Menge zu tun haben.
Ich habe zwischendurch auch kleinste Äste wie bei der runtz, entfernt. Ebenfalls ein zwei Blättern die andere kleinere Blüten verdecken.
Die Lampe läuft schon auf 65%. Mehr wird aufgrund der Temperaturen einfach nicht gehen. Aber bei 440 Watt sollte das auch ausreichend sein.
Auch hier habe ich den ersten Zucker entdeckt. Ich bin gespannt wie sie sich weiterentwickeln wird im Gegensatz zu der runtz 🤔🤷🏼


Likes
6
Share


@GrapevineGrower2
Follow
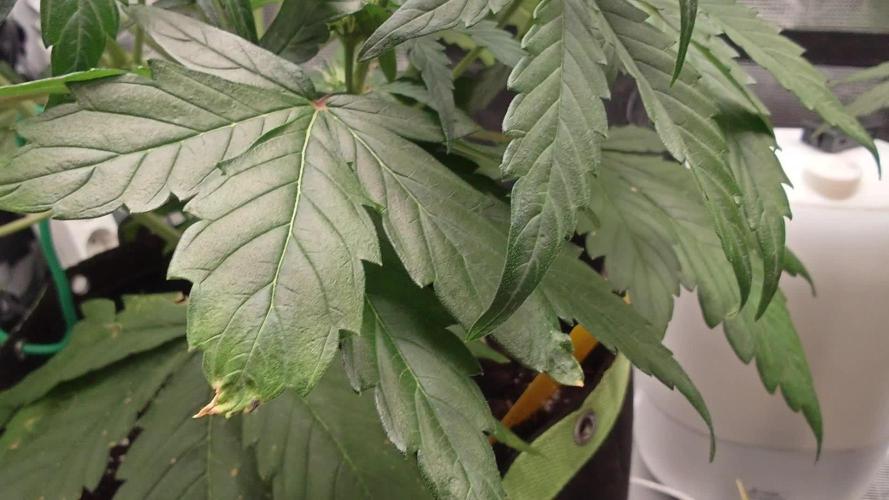
Another straightforward week in the grow room. All three Phenos continue to look fine with good leaf color. I've been working on this super soil recipe for three grows now. I learn a little more with each attempt and come to find this particular blend in larger 7 gallon grow bags IMHO is passing the eye test. All three are in stretch, so I'll continue to keep an eye out over the next 2-3 weeks. In the 3x3, I have manage height. No additional feedings just watered ph'd between 5.8 and 6.2. I do water at top as well as bottom (wicking). These girls are already beginning to exhibit a loud smell. Just bought a new carbon filter, which I will swap out today. This closes out the week. Thanks for stopping by.

Likes
41
Share


@MrHightimes
Follow
maaaan, i cant wait to grow more of this! such a pretty plant!!!! Gonna be ready soon!

Likes
21
Share


@MrWolfe
Follow
Bounced back just fine after the strip and just chillin getting fat, not really a fan of these pots, I don't feel I can water as evenly and full soak like I can with my Gro Pro pots.

Likes
4
Share


@Kannamar
Follow
25/04/2023 Day 69
I cut the "twins" and finally discovered the inside of the DWC MyPot.
I took lots of pics so you can see the unexpected plant of the seed that I lost in the clay and then germinated anyway and found an awkward path to the surface through a tiny hole! Unbelievable!
I also found that the watering tube from the pump had moved during manipulation, don't know for how long it has been pressed between the upper and lower parts on the DWC.
Pretty sure for that final plants had received less or no feeding solution, and the use of Clean might not have been efficient.
I guess it's also the reason why I found the white (?) on the top of the clay, salts and something else, because of lack of watering.
Will come back in 3 weeks, will be dry and then I'll can trim and weight. And smoke, yeah!
Not expecting much and could be hard to smoke if the cleaning was not efficient.
Anyway, the next one will be better!

Likes
Comments
Share


@Organic473
Follow
Persistence and patience she almost died but with care she is pulling through. Neglected to log week 4 so here goes week 5


Likes
11
Share


@BudBeezy
Follow
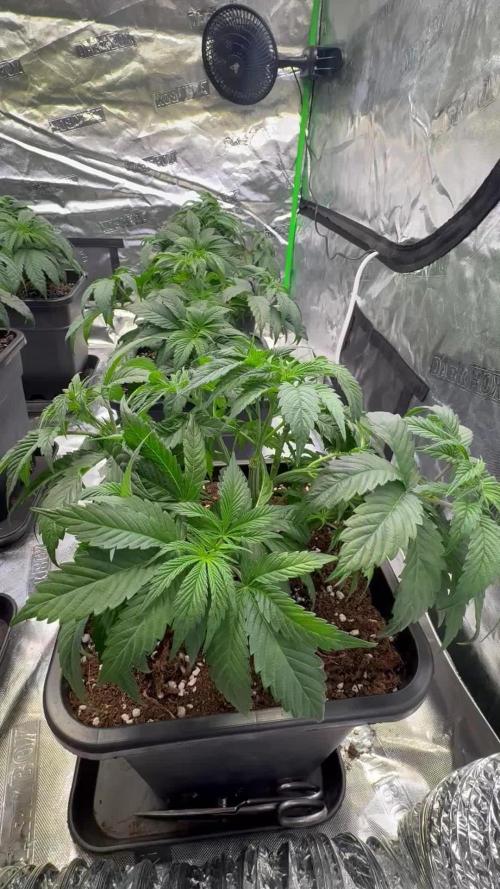
Welcome to week 12 of my grow diary. There's not much new this week. The plant is growing as it should and is slowly starting to stretch. I have increased the watering quantity to 10 litres as the soil dries out too quickly. Unfortunately, my nettle slurry has now been used up. The stem is now 3cm wide.
See you next week ✌️
Likes
10
Share


@eldorado1977
Follow
I was planning to trellis net this tent, but unfortunately I’ve had to water these with a lot of runoff as I had a lot of buildup in the soil. The Recharge magic powder fucked my PPMs all up so I switched back to just the Pure Blend Pro and a little kelp/humic juice every 4 waterings or so. Anyways, I don’t have a convenient way to get rid of runoff right now so I need to take the plants out to water. so I can’t trellis. I have some drain trays on the way so maybe that’ll help


Likes
10
Share


@RedbeardGrow
Follow
A metà settimana la pianta è in continuo progresso, i fiori si gonfiano adeguatamente, la cima sta maturando a vista d'occhio. Monitorerò il comportamento dei fiori ed il colore dei Tricomi. Attendo la fine della settimana per mostrare gli ulteriori progressi.
Processing
Likes
150
Share


@RussianGrower
Follow
Hello, again in touch Russian grower. Today my girls 70 days, 10 weeks. The fruits make me very happy, and the smell knocks me down. Soon I plan to make the harvest Bubblelicious Auto, my patience is not enough, and in appearance we can say that this is a full Mature flower.
Despite the additional air filtration and automated odor neutralizers for bathrooms, the smell is coming out the door. But it remains to endure quite a bit, so I'm not afraid. The most difficult is behind, but a lot of pleasant in the future.
Bubblelicious Auto - The smell of these plants has become simply stunning, like a hammer blow to the face, I hope the quality of the final product will not be worse. They look like beautiful porn Actresses 😍 In the microscope I see amber trichomes.
Neville Haze Auto-lives up to my expectations. They do not have enough space for full flowering, but soon they will be spacious. Because of their neighbors, I can't really smell them. The plant is very cheerful, progressing, but I think it will bloom for at least three weeks.
I also have some good news, mail delivery brought me measuring instruments, so now my diaries will be more accurate.
I Express my gratitude to all those who follow my progress and support me. Your moral support is very important to us. I'm not going to stop, and promise to please you with new and more interesting diaries. Hope all goes well and the police pass by me! 😎


Likes
6
Share


@IamCy
Follow
Week 6...........
Getting frosty
Edit: on day 41,I already have amber but it's still packing on weight. I don't know what to do at this point.
Likes
8
Share


@AustinRon
Follow
Week 7 - Flower 3
Sangria - by Twenty20 Mendocino
4Q 2022
Veg Week 4: Wednesday 01 February - Tuesday 07 February 2023
Start of Veg - 1 Node
Start of Week: [ 2022-02-15, SA20 50:B3:7:1]
End of Week:
[ 2023-02-21, SA20 56:B3:7:7]
HeightWeekStart: [ 10.5, in]
HeightWeekEnd: [ TBD, in]
Start Date: 28.12.2022 # Seeds Wet
Harvest Window: 17 - 27 March 2023, 79 - 89 Days
EnvironmentGermination
- LightDistance: [ 14.5, in]
- LightStrength: [911, 505, µmol/m2/s]
- Temp: [ 79, 85, °F]
- RH: [ 73, pct]
- HumidifierTrigger: [ 69, %]
Fertigation
(BioAg, Mammoth-P)
- [x] R&R/Recalibrate BluMat’s at next IDEAL pot moisture
__________________________
Wednesday 15 February 2023
SA20 50:F:7:1
Thursday 16 February 2023
SA20 51:B3:7:2
Friday 17 February 2023
SA30 52:B3:7:3
- Blumat watered to 400 ml Runoff. Turned sensor knob 1 pt Tighter.
- Nonetheless - plants look Awesome, and Saturday looked Better!!!
Saturday 18 February 2023
SA20 53:B3:7:4

- Adding BioAg CytoPlus to Res
- Ful-Power: [ 20, ml, gal], CytoPlus: [ 1.25, gm, gal], Photosynthesis Plus: [ 6, ml, gal], SLF-100: [ 5 ml, gal]
Sunday 19 February 2023
SA20 54:B3:7:5
- After EMPTYING the Reservoir yesterday - Sangria is cranking her transpiration, pot is demonstrably lighter. We’re cooking w/ Gas!!!!
- Added CytoPlus cited yesterday


Monday 20 February 2023
SA20 55:B3:7:6
- [x] Crank Light to Maximum Height & Reset CORNERS @500 PPFD (For full Light penetration) - Monitor TEMPs (May have to reduce to maintain cabinet temperature < 82 °F
- [x] Monitor TIPS for Light Burn as we’re 200 PPFD Above Optimal
CORNERS

CENTER

Tuesday 21 February 2023
SA20 56:B3:7:7
- 0800 Look, bleh - an hour later - happy. And it looks like SHE WAS WATERED AGAIN.
- Basic goals - Raise Light to maximum, adjust light w/ Dimmer. Min Corners ~500, Max Center 1000, PPFD
- [x] Adjust dimmer to nominal 500 PPFD in Corners
- [x] Turn BluMat down 2 pts
- [x] Raise light to top of Cabinet # I want it DRYER IN THE BOTTOM than BluMats current setting.
Light DistanceCanopy: [ 15, in]
Light DistanceCenter: [ 13, in]
WaterAmt: [ 1350, ml, day]

Processing
Likes
2
Share


@Munchiesfrommars
Follow
Highly recommend and already started a 2nd grow of this perfect strain Auto Brooklyn Sunrise
You can check my new report on my profile page
The best taste ever
The best mood and very happy and powerful all day
Amazing smell of citrus
Amazing look
Best strain from autos that I have ever grew.
Super lucky with this !
Likes
18
Share


@eldruida_lamota
Follow
Que pasa familia, vamos con la tercera semana de vida de estas Tropicana Cookies Fast Flowering, de FastBuds.
Vamos al lío , las 3 plantas se colocaron en macetas de 7 litros definitivamente.
El ph se controla en 6.2 , la temperatura la tenemos entre 21/24 grados y la humedad ronda el 60%.
Ir van creciendo y no llevan ni mal ritmo ni mal como, veremos como avanzan las próximas semanas.
Mars hydro:
Code discount: EL420
https://www.mars-hydro.com/
Agrobeta:
https://www.agrobeta.com/agrobetatiendaonline/36-abonos-canamo
Hasta aquí todo, Buenos humos 💨💨💨


Likes
3
Share


@carlitoshaze44
Follow
Día 6 de diciembre ,tenemos una amanecida de gran niebla que se mantuvo en la mañana con ello una alta temperatura en la noche del cultivo amaneciendo este a 90% de humedad
Después del encendido de la luminaria y colocar dos pequeños humificadores de usar y tirar..en dos horas ,la humedad se mantiene bien.
55%
En el día de antes de ayer se le aplicó un buen riego.
Día 7
Humedad en el cultivo de un 60%
Hoy le e metido otro riego con todos sus nutrientes de vegetación y metiéndole un poco de floración
La EC 1100
El ph 6
Un ventilador dejó de ser oscilante para quedarse fijo.. hahaha meteré otro en unos días más grande y oscilante .
