


Likes
Comments
Share

@HOMEGROWBOOK
Follow
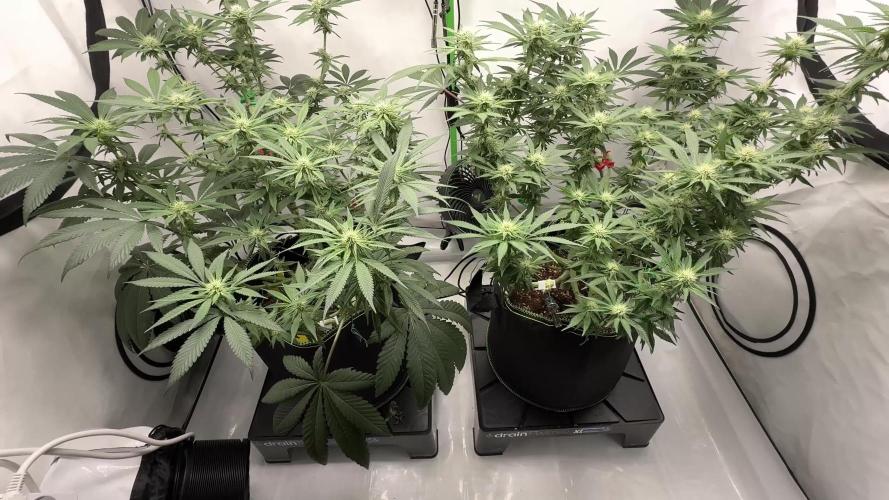
Der Stretch neigt sich dem Ende zu und das Netz wurde entfernt – beide Pflanzen stehen jetzt stabil und frei im Raum.
Nach dem Lösen des ScroG zeigt sich deutlich, wie kräftig die Struktur aufgebaut wurde:
dicke Stämme, starke Seitentriebe und ein gleichmäßiges, volles Blätterdach.
24K Gold reagiert mit einem beeindruckenden Stretch-Finish. Ihre Haupttriebe sind kräftig und leicht über dem Restniveau, perfekt verteilt für maximale Lichtausbeute. Die ersten Blütenansätze sind klar zu erkennen – kleine weiße Härchen schießen an allen Spitzen hervor.
Gelato 33 bleibt etwas gedrungener, aber sehr kompakt und buschig. Ihre Top-Sites sind gleichmäßig verteilt und zeigen ebenfalls die ersten Pistillen. Das entfernte Netz hat ihr Raum gegeben, sich frei nach oben zu entfalten.
Eine gezielte Entlaubung wurde vorgenommen, um die unteren Bereiche zu öffnen und die Luftzirkulation zu optimieren. Das Laub ist tiefgrün und gesund – keine Mängel oder Verbrennungen sichtbar.
Düngung & Werte:
• 💧 Canna Coco A + B → 6 ml/l
• 📈 EC: 1.6 pH: 5.8
• 🌡️ Temperatur: 25–26 °C
• 💧 Luftfeuchtigkeit: 50–55 %
• 💨 Umluft: stark & konstant
• 💦 Tropfbewässerung mit kontrolliertem Drain
Der Fokus liegt nun voll auf Blütenbildung – die Pflanzen stehen stabil, haben den Stretch abgeschlossen und beginnen mit sichtbarem Blütenaufbau.
Ein sehr kräftiger Start in die Hauptblütephase!


Likes
89
Share

@wolfvb
Follow
🌿 Khalifa Kush - Hitting 115cm in the Berlin Sun! ☀️🌳
Let's go! Welcome to the new week for the Khalifa Kush. She is doing absolutely amazing out on the balcony and has officially reached 115cm tall!
📈 The Details / Progress Report:
Vegetative Powerhouse: Just to clear the air she is not in flower yet! Since she is a photoperiod plant and we are in the middle of the Berlin summer getting around 16 hours of daylight, she is strictly in her vegetative phase. She is using all this long, glorious sunshine to pack on as much size and structure as possible before the days get shorter. ☀️
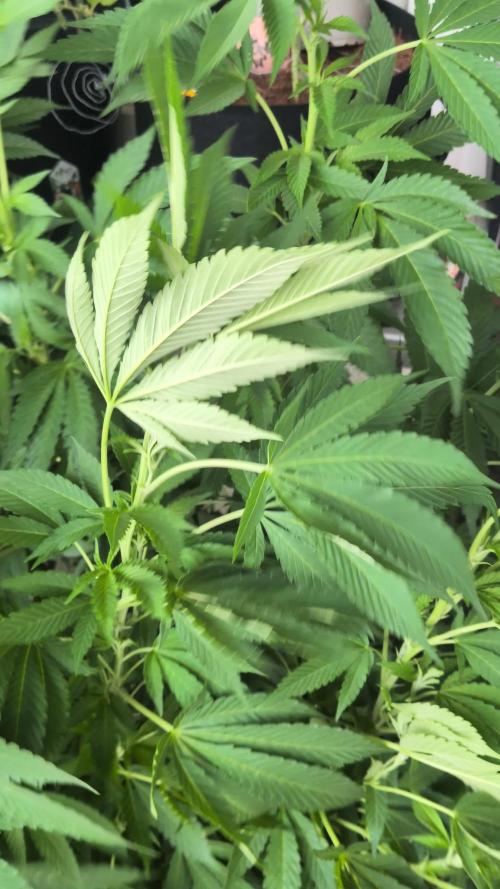
Bushy Structure: Standing at 115cm, she isn't just getting tall; she is getting incredibly bushy. If you look at the wide, you can see how well she has filled out. The lateral branching is super strong, building a solid frame to handle the outdoor breezes.
Flawless Foliage: Taking a closer look at the fan leaves, the canopy is just pristine. The leaves are a vibrant, healthy green, praying straight up, and showing absolutely zero signs of pest damage or nutrient issues. She is perfectly dialed in right now! 🍃
Node Development: While we are still waiting on the light cycle to flip, those top nodes are getting incredibly tight and structured. She is prepping herself perfectly so she can explode with bud sites when the time comes.
💧 Next Steps:
With her hitting 115cm and vegging this hard, the main priority is just keeping her well-fed to support all this explosive green growth. I'll make sure she stays secured against any heavy balcony winds and just let her keep soaking up these long Berlin days!
She is looking incredibly lush! Let's keep it growing! 🌱💨


Likes
22
Share


@CenturionGrower
Follow
26/07/20 (Sunday)
Plants were starting to exhibit signs of light burn so I switched back to the 75W bulb. SVG never seemed to recover from having it's cotyledon damaged so I decided to take a risk and fed all of the seedlings 20-20-20 nutrients except the D.R. which I thought would've suffered shock, so I just watered it.
27/07/20
Decided to mist the plants with a homemade pesticide mix today because they're readying to be introduced as full time outdoor plants in a week or two so their sun basks are getting longer.
28/07/20
Noticed what looks like new growth from the first true leaves of the SVG, fingers crossed it's making progress.
29/07/20
The new growth from the SVG has split into two on both sides leading me to theorize that it's abandoned it's main stem (for now at least) and started two new stems. All other plants are working on new nodes and are showing a steady growth of .5cm a day. I've decided to revert to the 100W bulb because I believe I've misdiagnosed the light burn.
30/07/20
Today I left them outside for their longest sunbask to this point; 7 of their 18 total hours was provided by sunlight. The SVG now has two new 3-leaf true leaves on each new stem confirming my theory. Also starting to see signs of a minor mite problem on one of the leaves of my TT plant (Though it's new growth that wasn't sprayed with my homemade concoction.)
31/07/20
New growth has already begun sprouting from between the new true leaves of the SVG with no visible progress on the 'abandoned' main stem. Also had a power outage for 2 of the plants 18 hours.
01/08/20
Today the plants again stayed out in the sun for longer than previously making 8 hours in direct sunlight. I've decided to keep them in the grow tent for a further week because when I went to retrieve them the Jam was blown down flat by winds and had started to grow bent towards the light, so I doubt it's stem is ready for that daily beating. I raised the soil level and massaged it back into shape and it seems to be back on track. The D.R. is slowly beginning to bounce back from being stunted in the seedling tray and from it's third node (from the bottom up) of 3 leaf true leaves has turned into 5 leaf leaves. The SVG has made a major recovery and seems to be on it's way to even surpassing the others by the end of the week. The TT is officially the sturdiest of the younger seedlings and it's growing right behind the Jam in terms of node development. All in all this week was an overall success growth wise and I'm looking forward even more to week 3.
Likes
2
Share


Likes
5
Share

@ThatsmyGrow
Follow
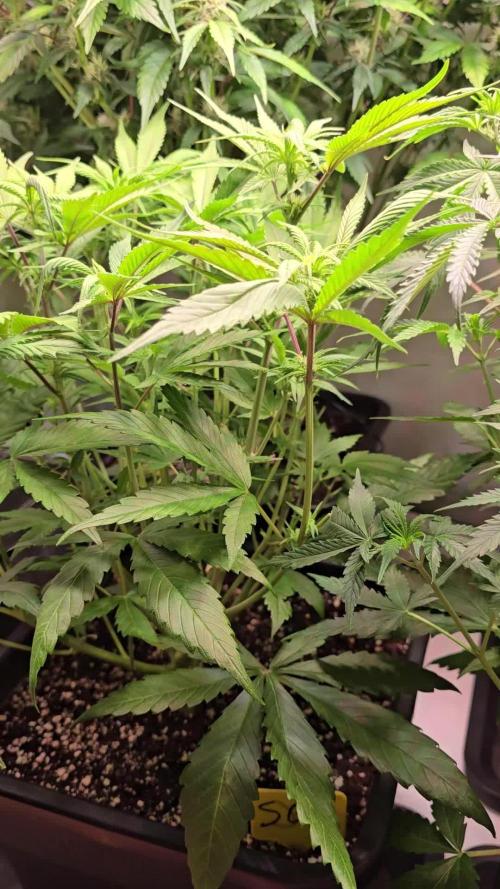
She's actually not using as much water as I'm used to with other plants. I went a good week without watering her, and she didn't show any signs of needing more. So, after almost 10 days, I fertilized her again.
Likes
14
Share


@Fat_Olsh_Farms
Follow
Day 35. Minor defoliation and supercropped a few branches.
Day 37. Starting to flower nicely, some frost Starting to appear on buds.
Day 41. Strong smell of strawberry bubblegum when manipulating plant.
Likes
16
Share


@GrowerGaz
Follow
First day of week three so topped today and gave them a half dose of Hesi TNT . Looking good so far so I'm happy. Light running at lowest setting.


Likes
6
Share


@Loserofthemonth
Follow
Prepared 9 , 5 gallon fabric pots. Started presoak of beans at noon on August 31st. About 4 hrs then switch to pure water for 8 more hours. Around midnight switch to paper towel and plates. Set heat pad @86°. Prep solo cups with Light Warrior ff, on the 2nd of September check tails and plant in solos. Wet solos the day before and start heating them up on the mat in domes. After seeds pop in solos wet the center of 5gal pots until runoff and start heating main tent with the big pots in it. Transplant seedlingson or around September 7th. I'll try to remember to post a germination pic. I use rain water with 5ml calmag per gal with a ph 6.0-6.5 no adjustment to the ph is needed. That's how I water throughout the grow, unless I see a deficiency that needs immediate attention. Soil is a mixture of Fox Farm soils , I added pumice, perlite, peat, moss, ewc, compost, guano, langbeinite, dietamacieous earth and dry fertilizers like Dr EARTH Bud and Bloom, or Pennington tomato. Installing bamboo frames for LST. I'll LST and top once usually. Manifolding is fun but takes an extra 2 weeks for me so I have started to avoid tall strains. I've grown Wedding Cake a few times, also Chemdog and Gelato, but the N. Lights and Peyote WiFi are gonna be a new experience. No idea what PW will be, they were freebies won in the Seedsman 4-20 contest 2021. Pretty sure the Northern lights will be similar in size to wedding cake. It will all get sorted out over the next 7 weeks. Ill move them around until a conopy looks good. That 2x4 tent is mainly for germinating seedlings and drying harvest but can also be useful for overfolw or quarantine. The 4x4 is taller plants. The 3x5 with that vioer spectra 480w light is bad ass but does have limits on total plant height, really really strong light.Alright that's it, I'm back with no name or gender changes, had some success and failure here before, I expect that trend to continue.I'll be checking your darlings out. 8/2 added a few more beans to the paper towels. These old beans from GOG seem to be bad, probably due to the factory seed pack. They are blister packs with plain card board backing, the plastic is heavy butvonly on the top for protection from crushing. Obviously not good for storage , so much for trying to maintain humidity.
Added six more chemdog millionaire and 4 more Northern Lights beans to the paper towel for germination last night so far all these chemdogs and northern lights haven't germinated. The wedding cakes spouted then died before the tails were a quarter inch long. I've never had so many fail. This is gonna take a while but I'll eventually find some beans that aren't full of dust. Garden of Green love ya but this is bad. Update September 7th I've added- 3 Black Sugars, 6 White Widows, 5 Hellfire OG, all failed they are just dry husk that sink and stay on the bottom of a glass with water. Out of 60 or so seeds I think 6 germinated and 4 actually became seedlings. Stating over with. 5 Seedsman Gelat OG feminized and 5 Seedsman Amnesia FAST feminized pre soaked last night then started paper towel method at 5am today. Still have 5 of 9 pots that are empty. What a fucking ordeal.im just gonna continue with what is up already and say day 1 was Sept 12. That's close enough for this mess.


Likes
72
Share

@tantrumrage
Follow
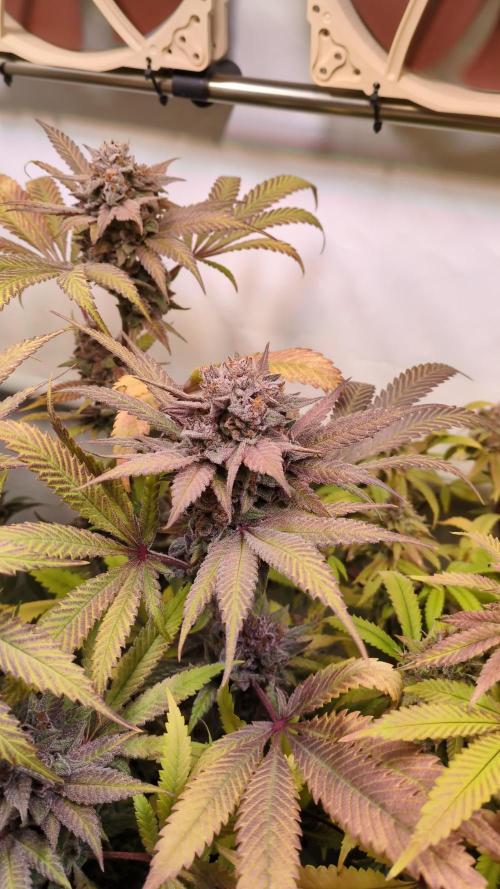
23/03/26 -29/03/26: this will probably be the last entry for the blueberries as they're close to harvest. Cloudy trichomes with some amber, will probably give them another 2-3 days.
Vanilla Créme Pie and Chicken n' Wafflez also have a couple of amber trichomes but they'll need a bit more time. My guesstimate is 7-14 days.
So I guess we're nearing the end of this diary, always a happy-sad moment. You take care of them for months and then the tent is empty. But not for long 🙌🏻
Thanks for stopping by and see you next week!

Likes
10
Share


@The_Chef_420
Follow
Well looks like my yield is going to be substantial. Noticed accelerated growth in the last 3-4 days. Been using cinnamon (anti-fungal) and perlite to top their substrate. Also been using a foliar spray twice daily (dusk/dawn). Lighting is supplemented with waterproof C.O.B. led's which run 20hrs on 4 off besides on exceptionally sunny afternoons where I then turn them off til shade casts again. Total growers but not showers. No strong calyx formation yet, maybe into first week of flower.

Likes
7
Share


@Mett420
Follow
Come potete vedere il sacchetto di co2 messo l’ultima volta ha implementato notevolmente la fotosintesi delle piante facendole più che raddoppiate in una sola settimana.


Likes
4
Share


@GrapevineGrower2
Follow
3x3 Tent (Variety of Clones) - Day 42 incredibly strong smells coming from tent, so checked tricomes for first time and found 90% cloudy, 15-20% amber, so decided to harvest the four plants. Black Cherry Gas could have waited another week or so before Harvest, but decided to pull along with the joining four b/c tent is doubling for drying (space issue).
2x4 Tent - Heading into week five of flower. Noticed the French Macaron had a taco effect on leaves. Decided to adjust LED lighting down to 60% to see if that helps. Ph still coming in at between 6.5 and 7. For soil this is an acceptable range, IMO. Continuing to Ph water along with weekly soil program regimen. French Macaron seem to respond to lower PPFD readings. Later in week adjusted LED from 60 to about 70% intensity. PPFD readings between 500-700.
2x2 Tent - Defoliated the one Afgooey Auto plant in the 2x2 tent with Ph/soil program watering. Applied small amount of soil program watering to clones, since they're slightly moist from previous watering. Clones continue to reveg and are showing positive signs of growth.


Processing
Likes
8
Share


@eldruida_lamota
Follow
Esa familia, de vuelta vamos a actualizar esta tercera semana de floración de estas candy caramelo de Zambezaseeds.
Son fast flowering, así que veremos que tal se rápidas son en su floración, hasta ahora se están comportando muy bien, tienen 0 bloqueos alimenticios, esta vez no se nos va de la mano con el producto 😂.
En resumen color verde, vigorosas, bastante estables hasta ahora, sigo regulando ph , humedad y temperatura.
Gracias al led ts-600 que me a facilitado marshydro es posible cultivar en interior 365 días al año .
Www.mars-hydro.com
web: http://bit.ly/2uJAjgy
ts600: http://bit.ly/3cnv0Ev
code: an420
Macetas de 7L en sustrato all mix de plagron, hasta ahora esto es todo un saludo y buenos humos gente 💨💨💨

Likes
4
Share


@Ieiogrow94
Follow
Eccoci qui...
Tutto va per il meglio, questa settimana non ho applicato stress alla piccola, ma ho guardato l'evoluzione che ha avuto dando i nutrienti.
Ora ha un odore davvero intenso ed uno strat di resina pauroso, vediamo come si riprende dalla defogliazione che ho fatto settimana scorsa.
La mia preferita del ciclo come forma delle cime, sono molto curioso del risultato finale.
Seguiranno aggiornamenti, grazie a tutti per il supporto🔥🌲❤️


Likes
28
Share


@TheGreenQueen420
Follow
Two of the smaller plants I will not be creating 12 colas. The remaining ones I have trained the same. Removing the second and third nodes off each arm. And topping the end of each arm. Creating 6 on each side.
They are very slow to recover. But will be vegging longer this time. And this time not using nutes every water which I think has been my problem in the past even though biobizz state they can be given every watering.

Likes
25
Share


@TickleToast
Follow
Signs of swelling, & smell is picking up.
Unhappy gal is still putting out pistils / and no sign of continuous deficiencies.
-Need to start bringing up my defoliations / canopy a little bit. More bottom larf than preferred, and it just forces me to pull them later anyway.
~~~~~~~~~~
Questions & Feedback are welcomed, feel free to message me!
Thanks for stopping by growmies! 🤙🤙🤙🙏🙏🙏

Likes
21
Share


@Sweetspot88
Follow
So I did a late top I know right? Not a perfect thing to be doing I’m allowing for another week of vegging though maybe 2.
Photos this week are a bit shitty due to high pressure lighting I will try getting some better mid to late week ones though so here is the ladies this week so far
