
Likes
Comments
Share

@AkatsukiVirtue
Follow
Another week of things going well!
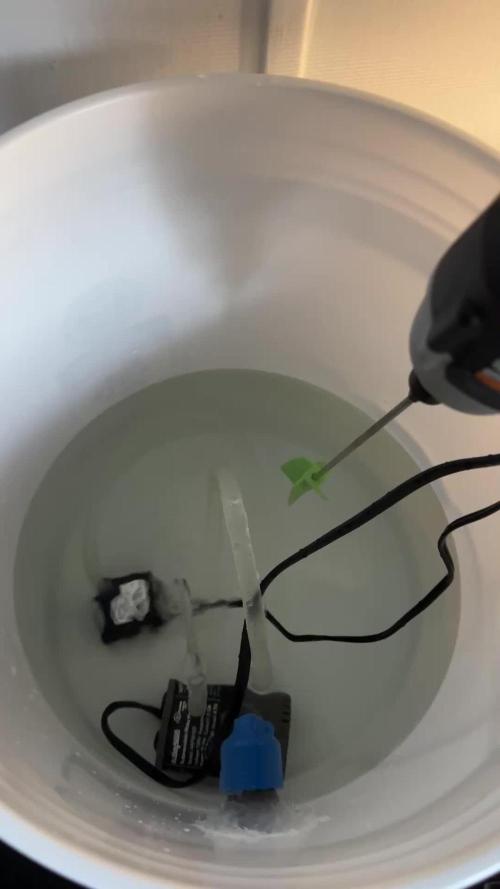
I dialed in my automated watering system by sealing the port where the 1/2in tube connects with the output outlet with an FDA approved silicone gel. Wanted to get the FDA sealant since anything else would leak chemicals into the watering reservoir.
Tested and no leaks detected!
I also found out that there are these sweet quick connectors you can get from Amazon. The nice thing about this is that it makes my watering system modular. I can disconnect the tube feeding into the tent by pushing the quick connect tab and addressing the bucket without dealing with tedious connects and disconnects. All I need to do when I’m ready to reconnect the bucket, I just push the line from the bucket into the quick connector.
Additionally, I started using .25 ml (25%) of compost tea along with .25ml (25%) of silica. I think I will need to up the dose next week to 50% strength for both.
I will do a transfer to the 1 gal pot in 2 weeks!

Likes
24
Share


@Jays_Not_Here_Man
Follow
Another week has flown by! The girls are doing great, cruise control this week as I have just been monitoring RH and temps. Trying to keep them as low as possible, I’ve been getting as low as 74 during the day and 68 at night.
I finally took a look a look at the trichomes with my jewellers loop, lots of cloudy, and a few amber around the leaves and top colas, but still lot’s of clear trichomes. I’ve ordered myself a wireless/usb digital microscope to assist with the process, and looks like it will be here just in time to determine harvest day. 😎🎄
I started by eliminating the nutrients at the beginning of the week. I typically allow for 3-4 pure water feeds before I harvest, and at the rate they have been drinking, this should be enough to get through the 7-12 days they have before harvest. I don’t flush, but rather “rinse” with normal water amounts, allowing the plant to use up the remaining nutrients in the soil. This also allows me to recover most of the soil from my grows and reuse ♻️ with other soil mix.
There has been great debate and a great deal of bro science out there for many years, but the recent studies suggest there is no difference in end result when it comes to flushing or using nutrients right until the end, if a proper dry and cure is performed. What do you think? What do you prefer to do? Thanks for reading this far, leave me a comment with your preferred method 👊🇨🇦❤️


Likes
17
Share


@HowtoBubatz
Follow
We’re officially in the first week of flowering, and the stretch has already started! 🌿
The plant without LST has shot up quickly, growing tall and strong.
However, I noticed a few rusty spots on the leaves, which might be a calcium or magnesium deficiency. To help, I’ve slightly increased the CalMag and Bloom nutrients for that plant. 🌱
Other than that, everything seems to be going well, and I’m happy with the overall progress. It’s exciting to see them enter this new phase, and I can’t wait to see how the buds begin to form! 😁✨

Likes
18
Share


@GERGrowDesigns
Follow
Dear Growers ,
Welcome to Veg Week 3 Day 19-28 of Sweet Seeds Diablo's Delight's Xl Auto.
Whether you're a beginner or an expert, you are warmly invited to join, ask questions, and share your own experiences along the way!
Project Setup & Conditions:
• Brand/Manufacturer: Sweet Seeds
• Tent: 222cmx150cmx150cm
• Light: 2x 720 Watt Full Spectrum
• Humidity: 50%
• Soil: Narcos Organix Mix
• Nutrients: Narcos Products
• pH Value: 6
Big Love to Sweet Seeds for theyre Outstanding Strains and Genetics .
If you want Germinitation results like mine , check out Kannabia Seeds with my link [https://www.kannabia.com/de?ref=61966] and grab the germination device or theyre amazing strains . Trust me – it’s worth it for sure ! Code GGD at Checkout for another 20% Discount
Stay curious and keep up Growing —we look forward to welcoming you back for the next chapter soon!

Likes
17
Share


@mrbigbong
Follow
todo va bien, cogollos dulces perfumados, nada más que añadir. buen cultivo a
🍁🍁🍁🍁👽🍁🍁🍁🍁
Likes
33
Share


@Mrs_Larimar
Follow
2020-10-21
I had so much fun with FREAKSHOW,
from Day one they were looking sooooooooo Funny and freaky
Plants smelled quite early, in early vgetation they started. with lovely scents
They were growing very tall Like 160 cm, and then they developed Buds like Cotton Blooms
absloutely Eyecatching ( and the smell!!!!!!) wohoo😱
Plant itself dont needs much, out of good waterings and Love. very less fertiliser
I cut 2 clones of her , to have always some " Freakshow" at home.

Likes
7
Share


@Lickey
Follow
I plan to scrog her again so trying to tie down and get many tops.
Girls are growing vigorously but not too fast, thanks to my crappy light set up
Likes
4
Share


@Kiqogrowing
Follow
repottet the plants in to their final 11L Fabric Pot with bio bizz All Mix. I put them more on the side of the pots, so that i can bend them over with LST and get an even canopy


Likes
26
Share


@420DeepGrow
Follow
Gracias al equipo de FastBuds y XpertNutrients sin ellos esto no sería posible.
💐🍁 Gorilla Punch (Auto):
Niveles fulminantes de THC. Testado en laboratorio con un 25,695 % en cannabinoides.
Perfil rico en terpenos. Los complejos y sabrosos terpenos de esta variedad son codiciados tanto por los extractores como por los fabricantes de hachís.
Rendimientos impresionantes. Los cultivadores pueden esperar hasta 550 g/m² de flores deliciosas y aromáticas, rebosantes de THC y otros jugosos cannabinoides.
Prueba de excelencia. Dos premios al primer puesto en menos de dos años dejan claro que esta cepa es una auténtica campeona.
🌻🚀 Consigue aqui tus semillas:
https://2fast4buds.com/es/seeds/gorilla-punch-auto
⛽ XpertNutrients: es una empresa especializada en la producción y comercialización de fertilizantes líquidos 🍶y sustratos🐛, que garantizan los mejores resultados y cosechas de la más alta calidad. A través de una cuidadosa selección de materias primas y un proceso de producción avanzado, sus productos son sinónimo de resultados confiables.
🛒 Consigue aqui tus fertilizantes:
https://xpertnutrients.com/es/sobre-nosotros/#:~:text=Xpert%20Nutrients%20es%20una%20empresa,de%20la%20m%C3%A1s%20alta%20calidad.
📆 Semana 9:
Gran semana, la planta parece que ha terminado de crecer y centra toda su energía en desarrollar los futuros cogollos, los erizos 🦔 son apreciables.
@xpertnutrients está haciendo un buen trabajo, ella consume algo de sus recursos lentamente como a mi me gusta .
Vienen lluvias 😡
Likes
16
Share


@NoopGrow
Follow
The plants have been receiving around 1300 µmol of light for more than a week.
The osmosis water is enriched with fertiliser up to 1.9 ms
This value is not expected to rise any further as the plants have become very dark green. There may only be water for a few days.
The development up to this point in the 4th week of flowering is very satisfactory.
Both genetics have obviously been thoroughly selected.


Likes
18
Share


@Chubbs
Follow
420Fastbuds-Week10
GelatoAuto
What up grow fam. Weekly update on these 3 gorgeous girls. Did a defoliation taking off almost all the fan leafs. Getting about a 70/30 to cloudy to amber trichs so they'll be getting the chop this week. All in all very Happy Growing
Likes
120
Share


@TheBudWhisperer
Follow
Week 22 of our painful result on the mothers. Reveg. Is full on and the plants are all trying desperately to figure out how to flower again. A couple days ago I was resolved to the fact that this cycle of mothers was not going to be anywhere near our acceptable standards for a high quality bud harvest. We lamented and cried a little…. Then we got ridiculously high to numb the pain…. And then I had a brilliant thought! The whole purpose has been to pollinate clones this whole time. Now that our stable of clones are well into rooting and reveg. We can simply use the mothers for breeding instead and salvage a harvest of high quality buds with the clones! It’s not an ideal situation and will result in less smokable buds but that said (and as per the outdoor photos), quantity won’t be a problem this year as usual😉. I figure a week or two to see what happens with em and we’ll commence the sperm spray😎.
We’ve also taken some additional steps and commenced with impregnating the Spliff strawberry on a couple of select branches. This plant is proving a beauty as expected - even despite a little fasciation she’s a monster🤩🤩.
Method
- we placed some pollen into a brown paper bag (both some SOG in one and some 707 in another.
- we marked 2 branches with zip ties to keep track of which pollen is where.
- we wrapped the branches in each bag and twisty tied it closed to the stem base for about 12 hours.
- after remove the bags and to prevent further pollination on the rest of the plant we sprayed down the pollinated branches and then the entire plant with a light mist of water.
When ur outdoors this isn’t perfect science and there will be some additional seed that pops out elsewhere. Regardless, it’s a guarantee the 707 is viable but I’m none too sure about the Skywalker stuff. It may have been subjected to moisture while in storage and could be inert at this point. No telln for a few weeks🤞.
The dutchy system, despite significant time to set up has been better than expected - all the plants are happy, added a Skywalker clone to the mix for flowering as well. They seem to be taking to the Druid nutes just fine. Great system and she’s pretty much on cruise control right now👌.
All told - the pollen chuck is not yet a complete failure. We’re definitely gonna have some cross beans - they only question that remains is how many different strains. Thanks again for hanging with the longest grow ever👍👊.
Background/Repetitive Nonsense
These plants will be the two mothers this growing season that will be utilized for stage 2 of the pollen chucking project. We’ll be taking clones and stressing the genetics for some fem. pollen using colloidal silver.
Instead of trying to reinvent the wheel with landrace genetics, we’re effectively skipping initial hybrid crossing and stabilization, going straight to the polyhybrid mix. I call it the shotgun approach to selective, unvetted and amateur breeding on a micro scale😉.
These 2 parent strains will form the basis for 8-10 different F1 polyhybrid combinations and a further S1 back cross of each of the mothers. Not only should we be able to preserve the genetics for both mothers in feminized form but we’ll also be running an entire family of new hybrids after seeding out clones from each on the initial lineup of this summers photoperiods.
Method is pretty simple here; once we’ve got our pollen off the two mothers we’ll be clipp’n clones on 4 select strains that have proven results from various respected breeders. We’ll be using those for pollination purposes in what is expected to be a 10 plant recirculating Dutch bucket hydro system.
***Update***
The feminization process didn’t take at all with the strawberry or the Skywalker so it’ll be reg. Seed crosses with only Skywalker and some other 707 Headband that we have in the vault.
*********
Strain details:
Parent strains for self pollination
- Skywalker Kush by Reserva Privada
Classic kush effects and earthy aroma. The strong kush element of this cultivar will compliment any cross.
- Spliffs Strawberry by Spliff Seeds
Incredible mix of flavourful terpenes and hard hitting high THC. She’s got some Herer as well as some Diesel in ‘er so an obvious choice for any cross as well.
***UPDATE***
The strawberry had to come out of this breeding run to wait for a better mother that hasn’t been attacked by aphids. It’s been a tough battle this season and we’ve had to make a couple of heartbreaking sacrifices already.
Parent Strains for cross pollination
***UPDATE***
We added another 2 strains to the mix just in case we need to spot swap for some more variety.
- Ghost Train by AMS Seeds
A cross of Alien OG x Ghost Train Haze. Never tried the strain but I’ve heard only good things. This one might be worth mixing with the Strawberry so we’ll see how it goes.
***UPDATE***
Sadly - the ghost train turned out to be an auto so cloning her out as part of the breeding project is a no-go. Really disappointed about this but at least we still have a ready backup strain on the lost coast og to take her place.
- Boogie Nights by AMS Seeds
A cross of Kalijah, aka afghani/skunk/diesel/blue heaven X Juanita, aka NYC Diesel/Reina Madre). No idea here so naturally I’m interested😉.
**************
- Lost Coast OG by Emerald Triangle
Pakistani Kush x Lemon Thai x Chemdawg #4. Essentially a classic, west coast combo of landrace kush genetics that Cali is famous for, mixed with hard hitting Chemdawg #4.
***UPDATE***
The Lost Coast is a winner of a plant. Still outdoors and in veg. Looks like it’s recovered from the aphid attack. Might consider trying to take another cut of this and just rooting it in a pot for pollination. At this point, what the hell and if we could salvage anything it would be a positive.
*****
- Spliffs Blueberry by Spliff Seeds
(Chocolate Thai x Afghani #1 x Highland Oaxaca) x Northern Lighhts Special. Only 1 bean of this left and the whole purpose is to blend the best of Spliffs Berry strains as a tribute. Awesome breeder and they’ve been very kind to us over the years.
- Northern Light by Royal Queen Seeds
NL means nuff said. A combo of 11 unknown strains believed to originate from the west coast of North America. This cultivar is a great take on these classic genetics and a perfect compliment to just about any cross. A biased fave of ours.👍
- White Widow by Seedsman
Brazilian Sativa x South Indian Indica. This classic strain has been unluckily elusive for us the last couple years. We know the quality of seedsmans version of this cultivar having grown it in the past. Sadly, a very strong performer that never made it to harvest due to an uncontrollable aphid infestation.
And we’re only at step 1.... still gonna need an assist with pheno hunting all of the crosses so if anyone’s interested in running the testers (when we finally get to that point) just let me know👍😎.
Gonna be a Dope ass summer project and can’t wait to see it in full swing🤟. Thanks for stopp’n in y’all👊


Likes
32
Share


@AsNoriu
Follow
Day 82. First one from Mimosas is ready ! Mini of all mini trim jail's ;))))))
Day 89. First in jars !
Day 92. Trim jail .... One will be great producer, other waste of time a bit ...
Day 102. All job done with them.
Happy Growing !!!
Likes
19
Share


@CannabisAprendiz
Follow
Bueno , este es el segundo cultivo que realizó del la cepa "Waka" , el anterior lo tengo igualmente documentado en otro diario .
en esta ocasión cultivamos los clones que habíamos recolectado del cultivo pasado , guardando los fenotipos que nos gustaron más y los clones restantes los pasamos a floración que fueron los que se le hizo seguimiento en este diario.
El crecimiento fue bastante explosivo y reaccionaron muy bien a cada trasplante realizado .
pude observar que los clones de cada fenotipo seleccionado se desarrolló con mucha similitud al de sus madres .
El olor en vegetación es bastante discreto y en floración se pone un más intenso
El desarrollo en floración fue explosivo generando bastante resina y se vieron muy hambientras .
Al fumar se puede sentir un rico toque cítrico en las N° 4 se siente un fuerte sabor a limón en algunas flores mucho mas marcado que en otras,
N° 3 y 13 un agradable toque a naranjas muy rico de sentir en el paladar , La N° 8 con pizcas dulces bastante interesantes.
El humo al fumar es muy suave lo que permite sentir mejor el sabor de cada fenotipo.-
saludos y buenos humos😉
Al momento de cosechar se cortaron los clone y se dejo secando en oscuridad a temperatura ambiente por cerca de 16 días posterior a eso se pasó a curar en frascos

Likes
18
Share


@GreenCasual
Follow
Started flushing. Buds are getting tough, most pistils are turning brown and some trichromes are already amber.
I harvested the two bigger stems on Wednesday (because their sugar leaves were getting yellow and crispy) ; will harvest the rest of the plant on Saturday !
Likes
14
Share


@Kreewl
Follow
Bienvenidos de nuevo! Esta semana he seguido regando con agua hasta el corte, no he dejado que las hojas se pongan más amarillas porque los tricomas habían llegado al punto de madurez que más me gusta. Se nota que cyco tiene productos muy buenos por el simple echo de que después de dos semanas de agua siguen bastante verdes.
Actualizo la semana como semana de floracion simplemente porque no tomo pesos en húmedo, después de un par de días colgadas pasaré a manicurarlas, y para cuando seque subiré pesos.
Creía que sacaría flores extrañas por el calor, o que tendría algún problema más serio a la hora de cultivar en esta época,todavía falta secarla bien, pero a simple vista creo que me acerco al peso de la anterior cosecha, ojalá.
Subiré más fotos en cuanto tenga la manicura echa, un saludo!
Likes
2
Share


@NoProbation4Weed
Follow
the weather conditions are getting better and she loves it.
Not many Bugs on the Plant. Salt Stones protect the Pot from Snails.
Likes
3
Share


@The_Lonely_Farmer
Follow
This diary will be solely too showcase as I go along also too help me keep track here and there when needed.
Not all will be correct or down too perfection but is still a journey you can join along with 🌱
Gifted these great beans from across the water and glad to finally see them pop through the soil 💚
