Likes
Comments
Share
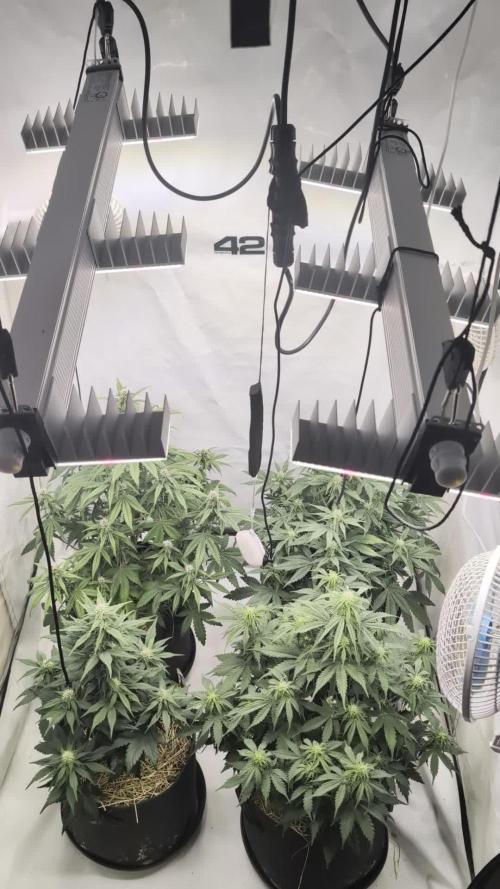
Die Lemon Cherry Cookies wird innen so lila, richtig schön anzusehen, leichter Magnesium Mangel den wir aber beheben können, die anderen entwickeln sich prächtig morgen wird entlaubt The Lemon Cherry Cookies are turning a lovely purple color inside, really beautiful to look at. They have a slight magnesium deficiency, but we can correct that. The others are developing splendidly; they'll be defoliated tomorrow.
Likes
49
Share
@smzzz
Follow
Not a lot of picture this week, it's also more and more difficult to take picture of the plants ! I can't get them out anymore Only biogrow for this week ! Merry christmas to everyone
Likes
14
Share
@Kakui
Follow
Exotic Genetix: Event Horizon (x3) y Toasted Toffee(x3). Thug pug Genetics: Peanut Butter sunset(x3). Una ves sean transplantadas a su macetero definitivo(5 litros) se comenzará con riego automático, drip to waste, y protocolo Crop Steering. 20 Octubre(15:30): 9 semillas en remojo, solución de 2 partes de agua de ósmosis + 1 parte de peróxido de hidrógeno 3%, 5.8pH, 0.6EC, 28°C~30°C. Antes ser puestas a remojar se lijaron las semillas para favorecer la absorción del agua. 21:30: puestas en toalla de papel con la misma agua de remojo, dentro de un contenedor de vidrio hermético y sobre una alfombra de calor a 28°C~30°C, para aumentar la actividad metabólica. 21 Octubre: Pre carga del coco, con solución de nutrientes Athena en 2.0EC y 5.7pH, saturación hasta lograr drenaje, el drenaje fue de 1.5EC y 5.6pH. 21:50: Todas las semillas presentan radicula de distintos tamaños(1cm aprox) son inmediatamente pasadas al sustrato. 22 Octubre: 21:10, se aprecian todas ya brotando, se mantiene el ambiente en 26°C~28°C y 70%+ de humedad. 23 Octubre: 9/9 semillas brotadas, se ven algunos Cotiledones. 24 Octubre: (9:30)8/9 cotiledones abiertos, altura entre 3cm~5cm, etapa de plantula iniciada. Toffee n3 se atrofió por mala manipulación, espero que crezca aunque sea lento, si no, tendré que seguir solo con 8 plantas. 25 Octubre: Toffee n3 está viva!!! Estuve a punto de quitarla, y está mañana apareció sin su capucha, cotiledones afuera. Yujuuuu!! 26 Octubre: hoy tuvieron su primer riego con nutrientes Athena, 2.0EC y 5.8pH. Se regó hasta alcanzar drenaje, el drenaje fue de 1.9EC y 5.7pH. 27 Octubre: Se desarrollan a buen ritmo, algunas han estirado más que otras, alturas entre 4cm~7cm. 31 Octubre: Segundo riego, 120ml casa una, 2.0EC y 5.8pH, runoff de 2.3EC y 5.7pH. 2 Noviembre: Creciendo a buen ritmo, alturas entre 5cm y 9cm. 4 Noviembre: Riego 180ml cada una, 2.0EC y 5.8pH, runoff 2.8EC y 5.8pH, desde ahora se regarán más seguido, removí las primeras hojas, solo por comodidad para regar, de igual manera los primeros nodos y esas hojas se terminan podando pronto. 8 Noviembre: Riego 2.0EC, 5.8pH, 240ml cada una para aumentar el runoff, valores de runoff de 3.0EC y 6.0pH. Alturas entre 9cm y 14cm.
Processing
Likes
25
Share
The plants finally made it out to the garden. They don't look the greatest because of the stress from getting them out there and transplanted, but it's finally done! I made a video to go over almost everything, but I do want to say I didn't mention that I also mixed about 5-10% Biochar in with the Fox Farm potting soil. Also, the Agribon row cover will protect against pests as well.
Likes
7
Share
Definitely getting big I flipped her last week put em into 40 hrs. Of darkness then now it's the 12 and 12 ride for this healthy gal🍒
Likes
6
Share
Our Critical Cheese Automatic #1 from Zamnesia Seeds is ready and is a pure spectacle of nature. It's truly grown with love. I really liked how I cleaned up the lower parts of the plant, eliminating unnecessary growth but giving the top buds plenty of strength, which turned out really well, aligned, and very uniform. The main cola is truly large and majestic. Maturity Levels - The resin content is excellent. The trichomes are mostly white and milky, with some clear and quite amber hues. Some very beautiful red-headed trichomes are quite common. The pistils are almost all red. The overall shape of the plant is truly beautiful. Techniques Chosen: As mentioned, here we only did pruning, lollipopping, and defoliation. Basically, we just cleaned up the lower parts, which, as mentioned, helps us achieve better results at the top. We have another plant processed using LST, which you can find in recent diaries. We're 100% organic and 1000% Plagron, as always. The soil we've chosen is the recently launched Plagron Bio LightMix, which will allow us to start with smoother and more reliable watering, without the sudden changes that liquid fertilizers can cause. A week's worth of soil is enough, so don't overdo it. Choose your preferred style and calculate your results on the website: www.plagron.com Visit the new Growshop area on the Zamnesia website: Z - https://www.zamnesia.io/it/531-growshop A fantastic strain, not too tall but very bushy! Give it a try! Z - https://www.zamnesia.io/en/3329-zamnesia-seeds-critical-automatic-feminized.html Z - Not happy with what they already had in their hands, the expert breeders at Zamnesia Seeds wanted to embark on a journey into the world of autoflowering genetics, aiming to improve a great British classic... the Cheese cannabis strain. They crossed Critical with a high-quality Cheese specimen, enriched with a significant amount of Ruderalis. The result is an extremely potent, therapeutic, and easy-to-grow autoflowering version. This new improved strain has been named Critical Cheese Automatic. Critical Cheese Automatic embodies everything that made the original Cheese so famous, acclaimed, and beloved around the world. We're talking, of course, about the skunky flavors and pungent aromas this strain unleashes, not to mention the overwhelming effects it induces. Lovers of the original Cheese will surely appreciate this feminized reincarnation. Smoking Critical Cheese Automatic produces exceptionally powerful sensations for an autoflowering strain. Its effects are quite strong and highly physical, both in intensity and duration. With these properties (or "body") in mind, it's no wonder so many medical users are the first to want to get their hands on this "skunky" plant. Those suffering from chronic pain, inflammation, stress, anxiety, and migraines (to name just a few of the ailments it can alleviate) will notice their symptoms diminish, if not disappear completely, thanks to this strain's potency. With this autoflowering "upgrade" of Cheese, even novice growers can achieve excellent results. It's a vigorous plant, incredibly easy to grow, and requires little maintenance. Commercial growers looking to generate income will appreciate Critical Cheese Automatic primarily for its life cycle: from germination to harvest in just 10 weeks. When grown correctly, it can produce harvests of 120-150g per plant. In addition to its excellent yields, Critical Cheese Automatic reaches a rather compact size (1 m), making it highly suitable for any type of grow. That said, Critical Cheese Automatic only thrives when grown outdoors in warm climates (like those of Spain or Italy). So, in conclusion, whether you're a beginner, veteran, or commercial grower, Critical Cheese Automatic offers great satisfaction to everyone. You know it, but I recommend it. You'll find so much beauty here, essentially "the best nature has to offer." Z - www.zamnesia.com Music // www.radionula.com + Feng Shui Music + Frequency 432Hz
Likes
2
Share
She is B-E-A-UTIFUL, she has a very nice smell to her. Small burns from nut. But plenty bud sites and biggest of the bunch.
Likes
43
Share
Bonjour a tous les padawans et les maîtres jedis Pour cette semaine 4 je surveille comme à mon habitude hygrométrie et arrosage. Je peaufine mon LST en stressant ma plante le moins possible. Je combine mon LST avec un pincage d'Apex cela me permettra d'avoir une canopé plus homogène donc une meilleure pénétration lumineuse et par conséquent un meilleur rendement. Petit rappel sur le pincage d'Apex: Le pinçage des plantes de cannabis Proche de la taille d’apex sur le principe, cette technique possède cependant plusieurs avantages, le principal étant de conserver le gros bud central de la plante, d’une production et qualité maximale. Pinçage des plantes de cannabis Le pinçage d’apex (tête de la plante) consiste simplement à pincer délicatement la tige du dernier étage de la plante, entre le pouce et l’index, jusqu’à sentir la fibre s’écraser sous les doigts avec un petit bruit critch caractéristique. Si l’espace disponible sur la tige du dernier étage ne permet pas d’y placer confortablement ses doigts, il faudra plutôt pincer l’étage du dessous. Le pinçage ralentira fortement la croissance verticale de la plante, tout en stimulant le développement des branches secondaires, donnant ainsi à la plante une forme de buisson. La plante mettra quelques jours à réparer ce pinçage, formant un nœud à cet endroit, et poursuivra ensuite sa croissance de façon normale. Le pinçage peut alors être répété si nécessaire, sur l’étage suivant nouvellement formé, ainsi que sur les éventuelles branches secondaires qui pourraient dépasser l’apex. Le pinçage est donc une excellente technique pour avoir une belle canopée uniforme de type marée verte. En pinçant régulièrement l’apex des plus grandes plantes de votre espace, durant la croissance et en début de floraison (stretch), vous obtiendrez ainsi facilement des plantes de hauteur homogène en pleine floraison, ce qui facilitera la culture et augmentera la production finale, surtout si vous cultivez simultanément de multiples variétés de marijuana. Avec un peu d’habitude le pinçage pourra être réalisé aussi rapidement qu’efficacement. En cas de pinçage trop violent qui se traduirait par un apex arraché, cela produira simplement les mêmes résultats qu’une taille classique de l’apex, ce qui ne sera donc pas dramatique. Que la force soit avec vous💪
Likes
Comments
Share
7/4 she's taking well to the training 7/5 its so hot out here its 105F and 19% 7/7 5ml grow 5ml
Likes
50
Share
well everything is going alright. nothing to complain about. destroyers are getting a lighter shade in the new growth but still pretty much healthy, just a more natural sativa color. maybe around this time i could have thought about topdressing but i’m more inclined to let them go on with straight water just to see how this mix runs till finish with just water and no extra inputs. though who knows i may just decide to topdress tomorrow haha others seem happy and healthy as well. watered the dinachem pot yesterday with about 4l of distilled water and destroyers got 4l each 2 days before that. caribe and cannalope pot is still pretty heavy. see y’all next week edit; yesterday we had a blackout so timers were set back an hour so i guess when i opened the tent today light had just turned on because they were holding a less intense praying pose so just checked back 3 hrs later now and looks fine now. added those photos as well.
Likes
67
Share
Day 21: From day 10 to 21 I couldn't take care of the plants because of private reasons, I asked my friend to take care of the plants and he didn't do a good job! He should had asked me or alerted me when he saw mayor problems, not just saying a little bit of light green or yellow. As you can see, we have alot of yellowing beneeth the plants, different sizes and even got some burnt leafs indicate that he didn't water on time. Did some run-off checks and saw many various values😓 Ph between 6.8-7.5 and EC between 1 to 2. The PH should had been 5.8-6 and EC at this stage 1.8+ since they need alot of nutrients because cocos soil doesn't have any. Because of this shit, they have been underfed, burnt, stress and more. Not ideal for autoflowers. Even the reservoir from humidifier was empty, indicating that it hasn't been filled for days!! Also it didn't got sorted out, there are always spots that get dryer faster or stay more wet. Get more light or less. Therefore it is wise to change spots of your plants all the time, I call it dancing. Your plants will grow more equally. If you look at the bigger plants, this should had been the size of all the plants sadly. They now look like they are in end of week 2 instead of week 3 and the bad plants end of week 1 😕 I did some defolation on some plants on the lower area. Roots start to show underneeth the pots, which is really good. I putted the bad plants in left under corner, Lets hope I can still nurse them. I still have 1-2 weeks to fix this before it goes into flowering, lets hope they will still grow double in size, otherwise this will be a lower rewarding grow.
Likes
114
Share
@squalino
Follow
​🌿 Journal de Culture : Cherry Cola (Auto) - Plante #2 ​Date : 20/04/2026 Âge : 88 jours taille: 43 cm Phase : Fin de floraison / Début du rinçage ​⛺ Environnement de la tente ​Température : 25°C constante. ​Humidité : Maintenue à 50% pour éviter tout risque de moisissure sur les têtes denses. ​Éclairage : Pure LED toujours à 100%, maintenue à 60 cm de la canopée. ​📏 État de la plante ​Taille : Elle a pris 1 cm depuis la dernière fois, elle culmine donc à 43 cm. Elle est restée bien compacte sous le filet. ​Nutrition : Aujourd'hui, elle a reçu son dernier apport nutritif : 4 ml de PK dilués dans 1 litre d'eau avec un pH de 6,3. C'est le dernier "boost" avant de passer à l'eau claire. ​Action : J'ai décidé qu'elle partait en rinçage dès maintenant. ​📝 Descriptif et observations ​La plante est toujours aussi magnifique. Visuellement, on sent qu'elle arrive au bout de son voyage : ​Sénescence : Les grandes feuilles nourricières commencent à bien jaunir, signe qu'elle puise dans ses dernières réserves pour gonfler ses fleurs. ​Trichomes et Résine : Elle est littéralement recouverte d'une couche de résine collante et brillante qui lui donne un aspect givré incroyable. ​Têtes : Les buds sont bien formés et compacts. Les pistils ont bien bruni sur l'ensemble de la canopée. ​Odeur : C'est maintenant très puissant dans la tente. On sent une odeur forte, à la fois très sucrée et épicée. C'est beaucoup plus complexe que la première plante. ​Le choix de passer au rinçage maintenant est judicieux. Avec le jaunissement prononcé des feuilles et la maturité visible des têtes ( trichomesmajoritairementlaiteux .trèspeux d'ambre), deux semaines à l'eau claire vont lui permettre de bien "se nettoyer" et de sublimer ses arômes sucrés et épicés. Contrairement à la plante #1 qui m'avait un peu déçu en production, celle-ci semble avoir des têtes plus denses et mieux réparties sur la structure. La qualité de la résine sur cette génétique est vraiment son point fort, elle brille énormément sous la LED. ​On patiente maintenant jusqu'au cut final ! merci a tous MUSIQUE DIAPO FAST BUD
Likes
5
Share
Veg Week 3 Day 21 to 27 - 4/17 to 4/23 A lot more to talk about this week. It's topping and transfer week. I started the week off (day 21exactly) by making sure I had at least 5 to 6 nodes of growth and topped P1 down to the 4th node and P2 down to the 2nd node as a test. (typically I top to the 3rd) I also removed all other node branches and fan leaves and usual. I left a large stump in my tops so the nodes can use it to grow around and help support the larger weight of a mature plant. I gave a couple of days of recovery while I hand spread the nodes daily to train the new waterways through the nodes. I changed my schedule and watered a day after and then transferred the plants into their forever pots/top watered in Feed this week was .5gal transfer and top feed at 100ppm total before add-ins. I used 100ppm Veg concentrate mix (recipe week 2) I then also added 1ml/gal of CaliMagic (General Hydroponics 1-0-0) and ph balance this week was for 6.2 Feed plan next week will be a final top feed of .5gallon and then turn the reservoir on. Videos: Topping and Transfer
Likes
55
Share
@w33dhawk
Follow
02.03.21 Anfang der 7 vegi Woche habe heute wieder einmal alles runter gebogen was ging und entblättert hab ja noch knapp 4 Wochen Zeit bis ich den Zyklus wechsle das scrog netz is bis jetzt nur zur Zierde drauf um abzuschätzen wie viel platz ich noch habe um das ganze rechtzeitig ein zu weben und trotzdem noch genug Luft zwischen Topf und netzt zu bekommen
Likes
12
Share
Howdy my fellow grow friends as you can see my poorly plant is still doing poorly and my other plant is still firing on all cylinders the only problem I have now is height in my small grow tent I've had to snap the main cola to make it the same height as the rest of the plant but apart from that all good the only thing is I am still getting to grips with filling out my grow diary I have only just realized I have been putting the height of my planet at one and a half centimeters instead of one and a half meters lol 🤬😂👍
Processing
Likes
31
Share
@NorCal311
Follow
11/11/19 - All is good in the hood. I love comming back from a couple of days away to see how they look. I did dome defoliation last nigh. Took off some lower branches and leaves. Mostly spindly branches. They are loving the feedings. 11/12/19 - I figured out something tonight with my lighting. I think I have it too low since the plants that right under the light are getting a little bleached and are a lighter green then the plants that are not directly under the light. So I moved it up as far as it could go w/o modification. Let's see what happens. 11/13/19 - From the responses to my question that I received from the pros today, I moved the light back down to 24". 11/14/19 - Did a BUNCH of defoliation tonight. With the SOG it was hard to get under everything. I opened the tent all the way and crawled inside to see so many little stragglers. I hope they do not get shocked too much. I also posted a new vid tonight. I need to do some better lighting next time I will try my headlamp. 😀
Processing
Likes
14
Share
The orange sherbet is the smallest of the bunch, but she is doing well. She is younger than the others but not the size they were at her age. I switched the feed to maxibloom this week since the other plants are flowering. Everything is still running smooth. I noticed a couple of the plants start dropping in the evening so I cut the lights back to 18 hours to give them a break. She is starting to pop some pistols so hopefully she will be flowering before the end of next week. I couldn't be happier with the grow so far.
Likes
161
Share
Pow Pow Pow what can i say, i mean even the frogs here were hypnotized with this monstrosity size Mama she is all one can ask and so much more, wen harvesting these cutie pie beast Lady i felt the need to break her in small peaces , or smaller that the them baseball bats collas hihihi OMG them colas OMG . She rested for 2 weeks in the rack with temps and RH at 60/60% and she was ready for trimming, trimming her was super easy since her frutes are compact and dense , end up with great trim that i will do extractions asap, have the felling she will give me great returns <3 <3 <3 A true pleasure and delight all the way from seed to harvest , now will came the big and final test and with it the smoke review hehehe, thank you SSSC for the opportunity and for everything and also big shout out to GD without the platform nothing of this wold have been possible <3 <3 <3 l As always thank you all for stopping by, for the love and for it all , this journey of mine wold just not be the same without you guys, the love and support is very much appreciated and i fell honored and blessed with you all in my life <3 <3 <3 #aptus #aptusplanttech #aptusgang #aptusfamily #aptustrueplantscience #inbalancewithnature #trueplantscience #sssc #monstergirl #dogdoctorofficial #growerslove 
 With true love comes happiness <3 <3 <3 Always believe in your self and always do things expecting nothing and with an open heart , be a giver and the universe will give back to you in ways you could not even imagine so <3 <3 <3 Friendly reminder all you see here is pure research and for educational purposes only <3 <3 <3 Growers Love To you All <3 <3 <3 Strain info : About Auto Purple OG Punch cannabis seeds To create Auto Purple OG Punch we crossed our feminized Purple Punch with an autoflower OG Kush. The original Purple Punch is a cross between Larry OG and Grandaddy Purple, illustrious and stable indica dominant THC-rich heavyweights! The total grow cycle from autoflower seed to harvest is a short 9 weeks. You will be rewarded with a large yield of sticky resinous buds, up to 600g/m2 indoors. If you’re looking to grow a high quality indica auto made with cannabis cup winning genetics you will love Auto Purple OG Punch. THC content is always up-to/around 20%. Auto Purple OG Punch effects are intense, euphoric and relaxed. She also contains around 1% CDB which contributes to the very smooth, chilled smoke. Expect a mouthwatering blend of sweet tasting candy, dark fruit and hints of spice. A real connoisseur cocktail with powerful effects! She normally reaches around 1m tall. But in optimized conditions with LED grow lights you can see occasional monster plants up to 2m tall with XXL yields. Auto Purple OG Punch is easy, potent and heavy yielding indoors. She also delivers well outdoors - such as the balcony or garden. Auto Purple OG Punch is a perfect, powerful strain for a quiet relaxed day. The calming indica body effect is very satisfying and de-stressing
Likes
35
Share
Week 6, quick root flash. All going very well the nutrients are at 2.5ml/l now, vita race weekly, bacillus mix. Plant started to flower properly and the stretch is on its way. Water at ph 6-6.5. I always try to keep the bottom clean so I do multiple clean ups of lower leaves and braches every week. Also doing this focuses the energy of the plant to the top and she doesn't waste time making popcorn buds.
Processing
Likes
8
Share
The tops on these girls are getting so heavy and the smell is crazy lemony and piney so strong it smells like your smoking a joint right at the window all the time even with my carbon filter. I'll be breeding with this lemon skunk strain in my next grow. Stay tuned for new genetics and making my own genetics going to be running chemo,blueberry,m39gdp,gg4 and will be crossing with the lemon skunk pollen fingers crossed 🤞🙏
Likes
59
Share
Lovely lady... but getting a little weird in that I've had to reduce her EC several times... I guess she just doesn't LIKE a whole lot of nutes! It's been a struggle this past week trying to get the pH and EC balanced out so they're both stable... and it ALWAYS happens to me about this time in each grow. Some year, I'll figure it out - until then, I'll remain a bit frustrated! LOL! Toying with the idea of doing more "defoliation" to get rid of what I KNOW will be larfy buds... even though I haven't officially "scrogged" her, I've used LST to essentially produce the same results so I'm planning to do a little lollipopping on her... might as well be today! Sorry I haven't been keeping up this diary in the manner I had been... I've got a lot of idiot things going on in my life. If you ever have questions about what I'm doing or not doing with this grow, just DM me and I'll try to explain.... :-D 03/28 .... ok, she's now officially driving me bonkers. Wild pH swings even while the EC holds steady... I can't figure out what she wants at all but we continue to talk to each other... I'll figure out her language soon enough! She's going through a massive stretch period now which might be the cause of all the drama going on inside the bucket... just SHOOTING up and looking fine even if the numbers aren't what I would call happy. Gave her a pretty decent haircut just before she started stretching and I'm glad I did... so many more buds are now getting full light and I've got the canopy where I want it... Might have to do some more LST down the line if she gets much closer to the lights although I DO still have some room to move them up (thank god I got a taller tent!). She's taking her nap right now so I'll post more pictures when she wakes up.... OK... new pics are up as is a video...