


Likes
Comments
Share

@PapaTerps
Follow
British Delight - Wizard Trees
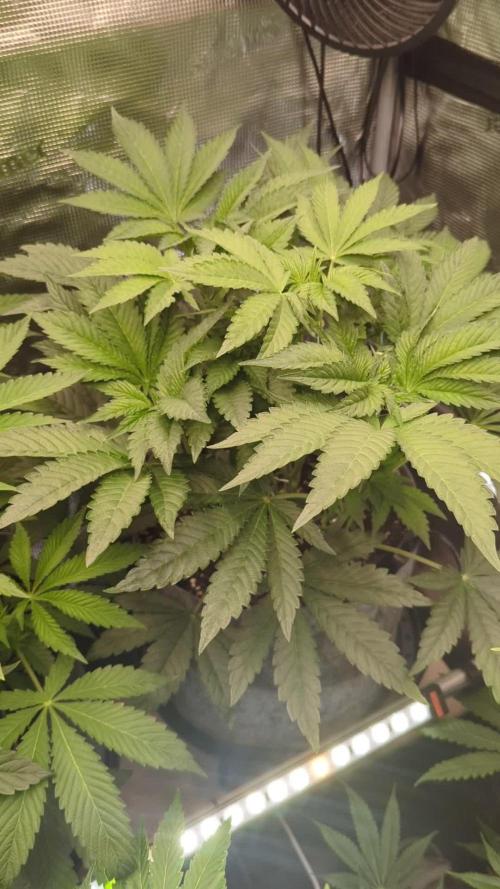
Day 48 - Watered with 2L of RO tap water with nutrients mixed individually and in order, then finally pH'd to 6.3. She is still in her stretching phase, so I haven't done much with her yet. The topping I performed on her a week or so before I put her into flower, has allowed her to grow a nice even canopy with six distinct stems. When she finishes her stretch, I will lollipop her and defoliate to improve both light penetration and airflow 👍🏻

Likes
10
Share


@ArtisticGrown
Follow
Hello, hope all is well! I’m going to be growing this clone that I got off my og kush plant that’s in flower now. I took the clones about 3 weeks ago, recently saw her root growth and transplanted her to a bigger pot for growth In the veg! I really like the genetics of the og kush. Wishing for a good week of root growth and stability! Happy growing


Likes
18
Share


@TheItalianGrower
Follow
Hi guys, this week has been great for plant growth..they are 85cm tall and I think they will grow a little longer. You can see the future buds that will be covered with flowers.
From this growth I am learning that the FIM technique is better because the buds will all be at the same height and look much more (as you can see in plant number 4). Pistils begin to appear and in the next week I hope to see more pistils.
Stay Tuned 🦍

Likes
59
Share


@Neo09
Follow
🌌🛸 hey hou,
just putting in all pics from begging till now, cos im really low with the time,.. behind this project is biggest story of my life, not only grow story, its much more behind.. i wish nobody to get such a grow in way as i do,. actually is nothing possitive there and this project i started, cos i lost everthing what in life importnt is. with this project, once, i wanted to give back just a litle bit of that what i got,.. and it still not eneough,. some things you cant buy, you cant pay,.. and you can get back... peace and stay hard, thing about what you decide, think about twice..
Likes
3
Share

@Lvnsource
Follow
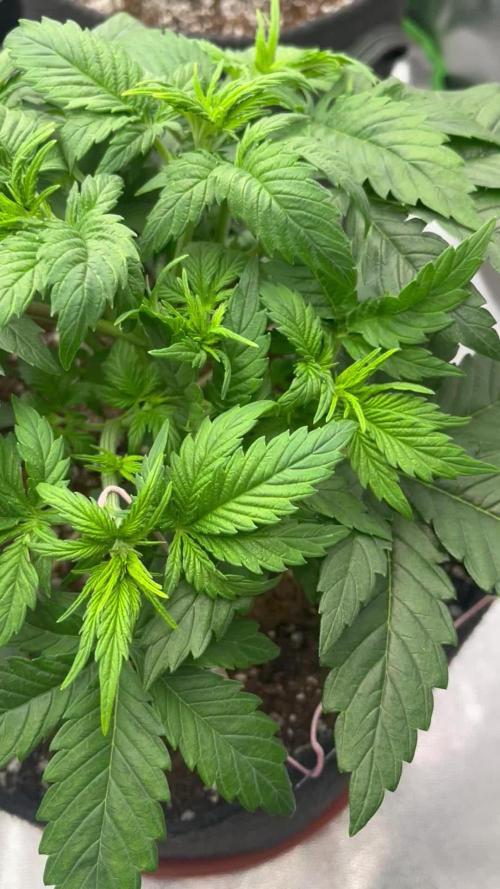
She’s grown up; been doing some light defoliation, I remove 2-4 leaves a day as needed. Otherwise I’m still utilising leaf - tucking ‘ !


Likes
15
Share


@Wizzel420
Follow
Going well 4th set of leaves coming through, have 2 Whiteberry going but just reporting on the best one. Nice green colour, stalk is still purple. No nutes added yet, soil is pretty good so I’ll add when required I think. Watering when required, last water was around 3 days ago, turning out to be about once a week

Likes
5
Share


@cookingwithninja
Follow
This is week 8 day 4 video. I have tried about 30g in testers rapid 1:05 dry. I’m waiting on seeds to finish. Plants are 7ft tall super cropped 3x on some branches and monsters just pop up. I highly don’t recommend super ripping or manipulating breaking stems. You will have jungles and delicious harvest. Some tops were touching doides so lights were raised to maximum tent ceiling. Every day is 2tbsp soluble pk into 5 gal water, 1/2-1tbsp folvic acid, sometimes humid acid, sometimes fishsh!t, sometimes microbial mass. 2 times only I added 1tbsp of magnesium phosphate into5gal. Every watering in 5gal has 2tbsp of carbs, I don’t use black molasses but it’s bluesky organic booster. Buds smell sweet, 2 and 3 are where the terps are but no1 is frosty af. 2 is og. As numbers left to right. Split between the middle bar. Running about 840w. 640is my reg along with 5x 20w blurples and my friends 100w “lm301h” but I beg to differ. My 640w is lm301h. I wish I had more light but I am not a facility. I just have a 4x8x7h. I’m very happy with this grow. Everything is to the max been flushing last week and it’s burning my plants lol. Just 1tbsp ph down. I have not been using ph down in my entire flower because the soluble pk 1-1.5 tbsp per 5gal water is enough to lower and make things happy. Every day is watering and every plant gets 1gal water daily. They could do a lot more but I don’t have the space as you can see ❤️


Likes
2
Share

@GoodTimesOrganics
Follow
Welcome Back!💚
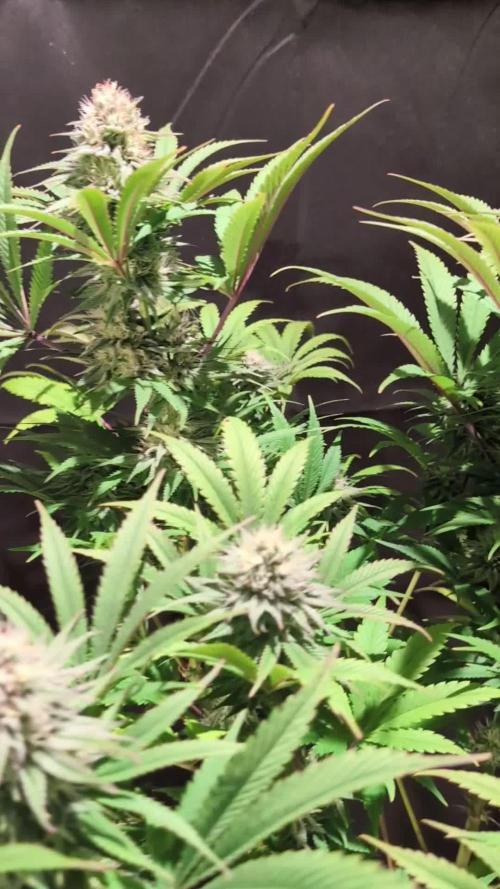
Die fünfte Blütewoche ist vorbei und die Blütenentwicklung ist in vollem Gange.
Es zeichnet sich eine schöne, Dichte Blütenstruktur ab, mit immer weiter ansteigendem Trichom Anteil.
Das Aroma nimmt ständig zu und es sind fruchtige und süßliche Aromen wahrnehmbar.
Die Sonnensegel wurden nochmal ausgedünnt.
Außerdem gab es diese Woche noch einen leckeren PK Komposttee, mit eigenen zusätzen.
Da es aktuell so kalt draußen ist, sind die Werte auch etwas anders. Die Luftfeuchtigkeit ist sehr gering und die Temperatur ging auch etwas runter.
———————
🌞 Temp: 22°C
🌚 Temp: 20 °C
💨 RH: 46%
VPD: 1,21 kPa
😎PPFD: 830 mqm
———————
Stay Tuned! 💚

Likes
69
Share


@DogDoctorOfficial
Follow
🌸 Eternity Cup • Week 4 Flower • Runtz Phenos 1 to 5
Welcome back to the garden, my dear growers! This week, we enter Week 4 of Flower, and the energy is shifting — it’s subtle, like a foggy winter morning where everything is still, but alive with quiet anticipation.
Our beloved Runtz girls — phenos 1 through 5 — are beginning to reveal themselves fully, forming those early floral structures (the “ears,” you know the ones 🌱💚), and each one is expressing her beauty in unique, yet strikingly similar ways. This kind of uniformity only proves how stable and powerful these Zamnesia genetics truly are. They are fulfilling the scrog like queens — compact, bushy, and ready for the next phase.
This week, I noticed a slight decoloration in the leaves — just a whisper of pale green — and it felt like the perfect moment to adjust the feeding to bring out that lush vibrancy again. We’re now running the following dosages in our reservoir:
• Regulator: 0.15 ml/L
• System Clean: 0.25 ml/L
• RO Water Conditioner: 0.8 ml/L
• All-In-One Liquid: 2 ml/L
• Plagron Green Sensation: 1 ml/L
This blend brings us to an EC of 2.225 and a pH of 6.07 — right in the sweet spot. Let’s see these ladies rise up and glow 🌞
Since it’s been a little cold — temps started the week around 16°C and are now slowly climbing up to 23°C, with a humidity of about 50%, this gives us a VPD of around 1.50, which is still looking great considering the lower ambient conditions. CO₂ is sitting at 1000+ ppm, and light intensity is cruising around 550-600 PPFD, which we’ll increase in the coming weeks to match their needs as they bloom.
The Autopots keep our medium at 53% moist like clockwork, but I’ve added a water heater to the reservoir — aiming to gently raise soil temperature by warming the solution. That 16°C in the substrate wasn’t doing us any favors, so let’s bring the roots a little cozy love. Everything we do, we do with intention and care.
Visually, this week feels like a quiet fog has settled — like watching the garden through a soft lens. The atmosphere is calm, with the girls standing strong and steady under the ICL 300s and the Model Ones, which are doing a phenomenal job creating the perfect stage for this show.
Let’s take a moment to thank this beautiful community — the lovers, the learners, the OGs, the curious ones just passing by — your presence means everything 💚
Massive gratitude to Zamnesia for the incredible genetics, Zamnesia, Plagron and to Grow Diaries for hosting this Eternity Grow Cup. And of course, deepest thanks to all the sponsors making this magic possible:
Aptus Holland, Grove Bags, TrolMaster, ThinkGrow LEDs, Promix, Cannakan, FOG and Ziggy Papers — your support grows more than plants, it grows stories, friendships, and futures.
P.S.
Before we wrap it up for the week, I just wanted to add a note about one of the biggest tasks we tackled — the defoliation. It was time. The girls had grown into a dense jungle of love and leaf, and it was clear they needed more room to breathe. More airflow, more light. More photons reaching deep into their hearts. That’s what we aim for.
So, leaf by leaf, gently, carefully — with respect for each one — I went in. Four, maybe five hours of focused silence (with my jam on the back ground), removing what needed to be removed. It was a lot. And as I moved through them, it became clear: the Scrog net, too, had done its part. But now? It was just in the way. These girls are so compact, so thick, so full of presence and power — they can hold themselves.
So, I took the bold move. I freed them. No more net. Just them, as they are, open to the light and thriving on their own terms. It was a beautiful moment — one I wanted to share with you here, just quietly, before we say goodbye for now.
🌬️ Until next week — stay warm, stay growing, and let the fog roll gently through your garden.
Genetics - Runtz https://www.zamnesia.com/6000-zamnesia-seeds-runtz-feminized.html
Nutrients - Plagron https://plagron.com/en/hobby
- Aptus Holland https://aptus-holland.com/
Controls - Trol Master https://www.trolmaster.eu/
LED - https://www.futureofgrow.com/en
LED - https://www.thinkgrowled.com
Soil - https://www.promixgardening.com/en
Germination - Cannakan https://cannakan.com/?srsltid=AfmBOopXr-inLXajXu3QFgKXCXXos4F1oEvScjMKIB5MR5dk8-GJ-F49
DOGDOCTOR 15% off
Smoking Papers - https://ziggioriginal.com/
Terpene saver - https://grovebags.com/
As always thank you all for stopping by, for the love and for it all , this journey of mine wold just not be the same without you guys, the love and support is very much appreciloved and i fell honored with you all in my life
With true love comes happiness Always believe in your self and always do things expecting nothing and with an open heart , be a giver and the universe will give back to you in ways you could not even imagine so
As always, this is shared for educational purposes, aiming to spread understanding and appreciation for this plant. The journey with nature is one of discovery, creativity, and respect. Let’s celebrate it responsibly and continue to learn and grow together!
Growers Love To you All 💚
#EternityGrowCup #RuntzHunt #GrowersLove #CannabisCommunity #AptusHolland #ProMixSoil #TrolMaster #Zamnesia #Plagron #ZiggiPapers #Grovebags


Likes
64
Share


@MadeInGermany
Follow
Hi people :-)
Today the update of the Blue Gelato # 41 🌱.
She looks very healthy and vital 👌.
It has grown very nicely this week.
I only uploaded 2 of the same videos for testing, once in 4 K and once in HD. Since the last videos of the quality were unfortunately not so good when you watched them on the PC.
I hope this bug is now fixed, otherwise it is because of my apps etc.
Tomorrow there will be a few more pictures, because unfortunately I only came to the videos today.
That's a hell of a lot of work that comes with growing, and still work in everyday life 😅.
What you don't do for your passion 😍👍
I wish you all a nice start into the new week, let it grow and stay healthy 🤗🙏🏻🌱🍀

Likes
11
Share


@TerpyTears
Follow
Hi there 💚
The Fat Monkey is doing really well! She is developing splendidly the flowers look great am happy this week there was only water without calmag !Had a few problems with too much calmag so I think I'll start again next week with 0.3ml per liter .
Thanks for your time and see you soon😊✌️
For more just follow and like 😊👍💚

Likes
12
Share


@SwaggyP
Follow
Hallo, ich möchte mir aus ästhetischen Gründen kein Zelt holen und betrachte die Pflanze als „Zimmerpflanze“. Der Geruch stört mich und meinen Mitbewohner auch nicht von daher.
Das ist jetzt mein zweiter Grow mit der kleinen Sansi Growlight, welche ich vorher einfach für Zimmerpflanzen genutzt hatte.
Habe den Samen 48 Stunden in nassem Zewa keimen lassen und dann direkt ins Substrat eingetopft.
Likes
53
Share


@buddha61
Follow
10/14 - A new week of flower begins. Watered today with just short of a gallon of water. Look forward to see what the next couple weeks bring. She is becoming quite the looker already, and can only imagine that a bit more purple/frost will only amplify the look.
10/18 - Watered today, just under a gallon again.
10/20 - Another week is down. I hope to see those newest tufts of pistils from a week or 2 ago start to fade in color, and really hope to find some amber trichomes soon. I would expect somewhere in the 2-3 week range for her, hopefully, fingers crossed.


Likes
Comments
Share

@GreenHobbit
Follow
Psicodelica
Welcome to the Hobbit Castle! 💚
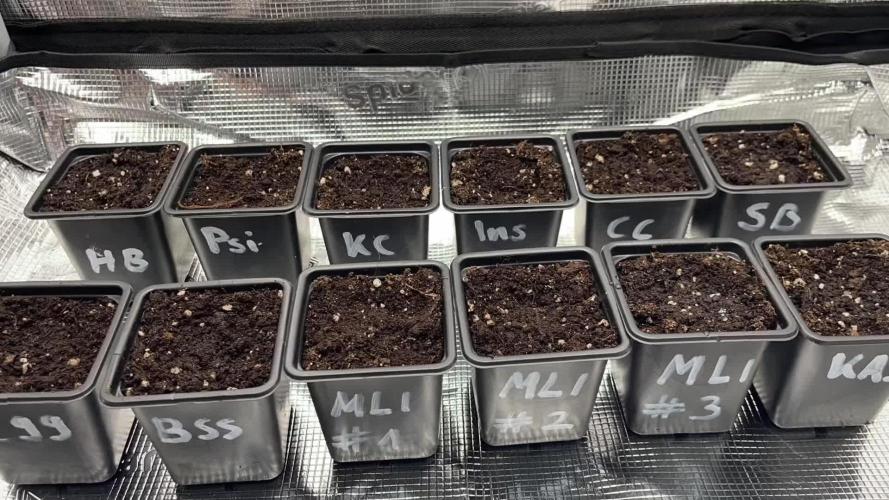
Auch die Psicodelica hat ihre Keimung problemlos geschafft und steht mittlerweile sauber über der Erde.
Der Sämling entwickelt sein erstes echtes Blattpaar und macht insgesamt einen unauffälligen, gesunden Start. Genau so darf es in dieser Phase gerne sein: wachsen, Wurzeln bauen und keinen Unsinn machen. 😅
Jetzt bin ich gespannt, wann sie anfängt, ihren eigenen Charakter zu zeigen.


Likes
57
Share


@Silverback_Guerilla
Follow
11/30 - 12/5:
The bigger Zenzations has the beginnings of a small apex flower. Both Zenzations continue to look great, but the big story is the turn around the Black Jacks have made. They've tripled in height in 2 weeks and have nice, long lower branching. Both Gorilla Girls are stretching well now and have huge fan leaves, so I think they've still got some stretching to do.
I dialed back the lights to 13 hours of daylight on the 4th.
12/6:
I fed them today.
Likes
3
Share

@GREENPHOENIX6262
Follow
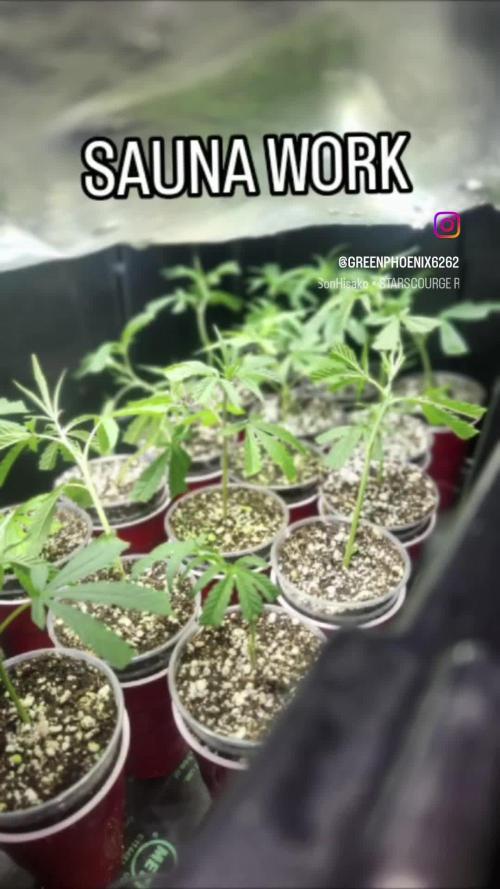
09/03 - Clone cuttings running strong - Chopped the mother - Pulled approximately 17 viable clones - currently in solo cups rooting - Heavy on the humidity prop 80% - Temps 79 (F)
