


Likes
Comments
Share

@Samsationalseeds
Follow
My dwc auto hasn't gone into bloom yet. Once it does , will determine when i flip the fem photos. Alot of the autos in have currently will be donated to my dad , to maximize. Mianly to not run out of herb. Haha me and him smoke a ton everyday. Adhd shiii

Likes
49
Share


@LockDownGrow
Follow
So really packing on weight now and looking the picture of health , nutrients really doing there job and plants are loving them ,
Really excited too get too the end of this grow now ,
Update at the end of week 8 she developed slight leaf tip yellowing after a week on full strength more PK at 2ml per ltr then a second week at a reduced 1ml per ltr the yellowing is only slight and a good sign you are pushing the limits of the feeding ,
Showing signs of ripening now so next week I will begin the flush ,
Likes
21
Share


@AutoCrazy
Follow
Things are really starting to look good. This plant has really stretched a lot for an Indica dominant plant.
The frost is starting to come on now. The tent smells quite nice when I first open it now.
Cooler internals are:
5.9 pH
600 ppm on the 500 scale
1.2 EC
66F solution temp
Can’t wait to see how she fills out over the course of the next week.
Likes
109
Share


@ButtersStotch
Follow
-Sorry I missed a week as I left town for vacation, luckily I had someone to check on them
-I've been feeding once a week about 2 gallons each
-I water whenever the top couple inches is dry but its been raining almost every other day so I've barely watered them
-I've been using straight tap water (municipal) without dechlorinating. I was dechlorinating for 3/4 and using the 4th as a test, it showed no ill effects so I decided to not waste my time and just send it. I'ts been 2 weeks and no negative signs (touch wood) so I'll continue
-I used Promix-HP as my medium, its pretty light and the girls are getting pretty tall. When I got home from my vacation I noticed they were all leaning to one side. I assumed they were leaning towards where they get the most sun so I spun them around. Doing so I noticed that they were leaning because they were top heavy and the medium wasn't dense enough to provide sufficient support. I set up the perimeter wire as you see to provide additional support and tied the stalks up with stakes. They seem pretty sturdy now.
-Been getting some hot and humid days here in Ontario and they keep stretching, I'm curious as to how big they'll get before flower.
-Oh and the Auto White Widow from my previous grow was planted in my flower bed and its still just vegging, hopefully it'll flower with the rest. I'm about to give her another major haircut.

Likes
5
Share


@OntarioAutoGrower
Follow
03.22.23. Start Week 3. Today i started the Low Stress Training on the plants. I first carefully start to bend the plant kinda massaging the plants and making the plants softer and easier to bend down. I then tie the base on one end to keep the plant from snapping, and bend the plant the opposite direction and tie it down. I will continue this daily until flower starts to create a perfect even top canopy.
End of week Review. All 3 plants seem to be reacting well to the nutrients and LST they are getting. Also the few leave trimmings seemed to go well with them all. I have officially named the plants. There names are Megan, Lucille, and Alien. Very excited for these plants to start there flowering stage
Likes
16
Share

@Chucky324
Follow
Hello This is the end of week 15 and the beginning of week 16 of veg.
These plants finally got a full watering last week. I've been trying not to over water them.
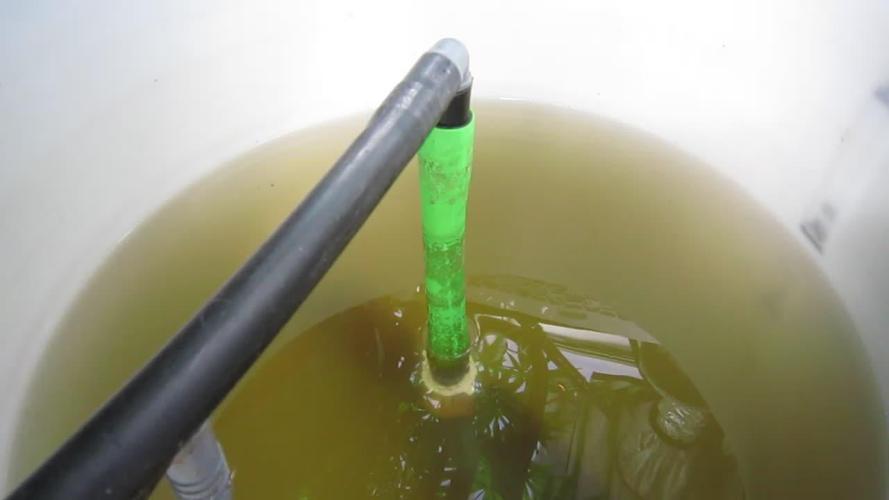
I've got my hydroponics and reservoir hooked up and the plants are getting about 3 minutes of solution each day at 8:45 am.
No, that's not enough to keep the soil moist all the time, so I'll hand water with rainwater when the pots seem dry.
I'll dump in about 2 gallons of rainwater about every 4 or 5 days and I might get some runoff at first.
I think 1 more week of veg and then I'll flip to flowering.
I'll take the lights out and open the light proof tent about 8 am and close it about 8:30 pm
I'm thinking about 10 weeks of flowering, unless I run into a problem like WPM or mites and have to cut down early.
The plants are doing good and looking good. everyone is nice and green and pushing up with the food they have been getting.
I gave a heaping tbsp. of www.wollammo.com powder to each pot and I put it under the hydroponic line into the pot.
The solution will run through it and help the plant. It's got lots of other great minerals in it the plants can use too... Check it out.
OK. Keep Growing Straight.
Chuck.
Likes
1
Share




Likes
44
Share


@Cogollo_eu
Follow
**Encontrarás la traducción a español al final de la descripción**
From/Desde: 10/05/19 || To/Hasta: 16/05/19
From day/Desde día: 78 || To day/Hasta día: 84
You can find the Money Maker Diary here:
** Podéis encontrar el diario de las Money Maker aquí:**
https://growdiaries.com/diaries/25667-gorillamakingmoney-gorilla-vs-money-m
-----IMAGES & VIDEOS-----
5 - HomeMade Organic & Cheap CO2 generator (more info in week summary)
9, 10, 11 & 12: The bud on the right is a Gorilla one, the buds in the left or/and in the middle are Money Maker ones.
15 - Same Gorilla plant buds, one affected by CO2 in the roots and the other not.
-----WEEK SUMMARY-----
The smell is more sweet and intense every day, friends that came home turned them eyes into crystals when they see this little babys. The size isn't awesome, but the high ammount of buds full of crystals plus the strong sweet aroma makes them awesome. Buds are growing and fattenning very very well.
This week i added a boost of HomeMade CO2, i never measured the results of this invention so i can't give CO2 measurements. This method is widely used in home aquariums and there is where it comes from. For those interested i'm going to write here more detailed instructions. The 4 liters i've made will last for about 2 weeks.
---NEEDINGS---
- 250 ml Bottle
- 6~10 l Bottle
- 400 g Sugar / l water
- 1 Envelope of organic baker's yeast / l water (CHEMICAL WILL NOT WORK)
- 3 mid plastic tubes 40~50 cm
- 1 short plastic tube 5~6 cm
- 4 tube adapters
- Hot glue to seal adapters
The process of creating CO2 is simple, mix water, organic yeast and sugar in a bottle, and the sugar will free CO2 in the process of fermenting to alcohol due to the yeast.
1. Make a hole in the center of the big bottle cap, insert an adapter and secure it with hot glue
2. Make 3 holes in the small bottle cap and glue the other 3 adapters
3. Link both caps with one of the mid tubes and insert the other tubes on free adapters
4. Insert a short tube in the bottom of the small cap in the adapter that came from the big cap
5. Watch the Video!!
-----WATERING CALENDAR-----
Plants are beginning to drain the pots a bit faster so from now on i will raise the water ammount on each watering day 0.25 l.
11/05/19 - 1,5 l with All week nutrients -(Nirvana & Blombastic) also Big Bud half dosed @ PH6.4 & 2 E.C.
14/05/19 - 1,5 l with Bud Candy, Big Bud, Nirvana, B52, Bud Factor-X, Sensizym & Blombastic @ PH6.4 & 1.5 E.C.
*****ESPAÑOL*****
-----IMÁGENES Y VÍDEOS-----
5: Generador de CO2 casero, barato y orgánico (más info en el sumario semanal)
9, 10, 11 & 12: El cogollo que sale a la derecha es de una Gorila, el de la izquierda y/o el de en medio son de una Money Maker
15: Dos cogollos de la misma planta, uno afectado por CO2 en las raíces y el otro no
-----SUMARIO SEMANAL-----
El olor es más dulce e intenso día a día, los amigos que vienen a casa a verlas se quedan ojipláticos al verlas. El tamaño no es una maravilla, pero la gran cantidad de cogollos llenos de cristales añadido al aroma que entra por las fosas nasales las hacen increíbles. Los cogollos crecen y engordan de maravilla.
Esta semana he añadido un boost de CO2 casero, nunca he hecho mediciones de los resultados por lo que no puedo darlas. Este método es ampliamente usado en peceras caseras y de ahí saqué la idea. Para aquellos interesados dejo aquí instrucciones más detalladas. Con los 4 litros de agua que he preparado yo da para unas 2 semanas.
---NECESITAMOS---
- Botella de 250 ml
- Botella de 5 a 10 litros
- 400 g de azúcar por litro de agua
- 1 sobre de levadura de postre orgánica (LA QUÍMICA NO FUNCIONARÁ)
- 3 tubos de plástico de tamaño medio 40~50 cm
- 1 tubo de plástico de tamaño pequeño 5~6 cm
- 4 adaptadores para los tubos
- Cola caliente para pegar y sellar los adaptadores
El proceso de generar CO2 es simple, mezcla agua, levadura orgánica y azúcar en una botella, y el azúcar liberará CO2 en el proceso de fermentación a alcohol.
1. Haz un agujero en la tapa de la botella grande, inserta un adaptador y séllalo con cola caliente
2. Haz 3 agujeros en el tapón pequeño y haz lo mismo con los otros 3 adaptadores
3. Conecta los 2 tapones con uno de los tubos y conecta los otros 2 tubos a los adaptadores restantes
4. Conecta el tubo pequeño en la parte libre del adaptador del tapón pequeño que viene del tapón grande
5. Mira el vídeo
-----CALENDARIO DE RIEGO-----
Las platas comienzan a secar los tiestos un poco más rápido, asi que de ahora en adelante incrementaré 250 ml de agua adicionales en cada riego.
11/05/19 - 1,5 l con todos los nutrientes semanales -(Nirvana & Blombastic) BigBud mitad de dosis @ PH6,4 & 2 E.C.
14/05/19 - 1,5 l con Bud Candy, Big Bud, Nirvana, B52, Bud Factor-X, Sensizym y Blombastic @ PH6,4 & 1,5 E.C.

Likes
31
Share


@420DeepGrow
Follow
Gracias al equipo de AnesiaSeeds, Marshydro, XpertNutrients y Trolmaster sin ellos esto no sería posible.
💐🤯 39%Thc Wham Boom:
Sube al ring con WHAM BOOM de Anesia Seeds, donde la energía electrizante de Wham choca con las vibraciones frías de RS54, creando una variedad que es todo equilibrio, potencia y sabor. Este peso pesado feminizado ofrece una mezcla perfecta de 50% Sativa y 50% Indica, proporcionando una experiencia que te hará flotar de euforia mientras tu cuerpo se sumerge en una serena relajación.
WHAM BOOM es una productora prolífica, con rendimientos en interior de 600g/m² y en exterior que alcanzan la asombrosa cifra de 900 - 1200g por planta. Con una floración de entre 65 y 70 días, esta variedad está lista a principios de octubre, lo que la convierte en una competidora ideal para los cultivadores que aspiran a una cosecha de campeonato. Con una imponente presencia de 100-140 cm en interior y 160-220 cm en exterior, WHAM BOOM se alza como testimonio de su destreza genética.
🏠 : Marshydro 1.50 x 1.50 x 1.80, carpa 100% estanca con ventanas laterales para llegar a todos los lugares durante el grow
https://marshydro.eu/products/diy-150x150x200cm-grow-tent-kit
🌬️💨 Marshydro 6inch + filtro carbon para evitar olores indeseables.
https://marshydro.eu/products/ifresh-smart-6inch-filter-kits/
💻 Trolmaster Tent-X TCS-1 como controlador de luz, optimiza tu cultivo con la última tecnología del mercado, desde donde puedes controlar todos los parametros.
https://www.trolmaster.com/Products/Details/TCS-1
🍣🍦🌴 Xpert Nutrients es una empresa especializada en la producción y comercialización de fertilizantes líquidos y tierras, que garantizan excelentes cosechas y un crecimiento activo para sus plantas durante todas las fases de cultivo.
Consigue aqui tus Nutrientes:
https://xpertnutrients.com/es/shop/
📆 Semana 2:
Fantástica semana, estan creciendo de una forma espectacular gracias a la ayuda de @marshydro, @xpertnutrients y @trolmaster.
Se puede apreciar un tercer nudo aunque la aplicación de cola de caballo y el estar en una maceta pequeña ha influido en el tamaño de ella, parece una planta algo sensible,se recupera muy rápido 😁.
Esta semana espero trasplantar a la maceta definitiva.
Potencia de la lámpara: 50%


Likes
13
Share


@Lazuli
Follow
This was grown during cold winter, she drooped at some point in veg and pre flower but still got a good yield.
Processing
Likes
22
Share


@MELs_Garden
Follow
Del 5 al 12 de julio
Buenas a todos otra semana más.
La cosa avanza bien y Esta va a ser la última semana que actualizamos únicamente una vez por semana, volveremos a las actualizaciónes diarias.
Continuamos con nuestro LST diariamente.
8 y 9 de julio
Usamos el quemador de azufre alrededor de unas 5-6h como preventivo ante posibles plagas.
10 de julio
Hoy a tocado poda (bastante severa) podamos algunas hojas y seguimos doblando las ramas. Las dpblamps entre si, por debajo, por arriba... Por todos lados, es una salvaje.
Las temperaturas están siendo muy buenas en comparación a lo que me llegan en cuanto a los indoors de mi alrededor y de otros compañeros.
Tenemos unos 25 - 26°C en On cpn Max de 27.8°C y mínimas en pdf de 23°C.
Preparados porque viene lo bueno.
11 de julio
Regamos vía foliar 1 ml aceite de nem + 10ml spruzit + 1 ml de un producto que nos dieron para probar como preventivo e insecticida. De este mismo liquido inundamos la bandeja unos centímetros para realizar un riego vía absorción.
¿ Por qué ?
Pues porque los trips se alimentan en la superficie pero viven en la tierra, y muchos de estos están en la parte inferior de la maceta por lo que no tendran salida estos bichillos. Mi guerra con ellos ya viene de tiempo atrás y quiero mantenerlos a raya.

Likes
Comments
Share


@Lynx_361
Follow
29.05.2025
Topped Nr.1 the second time today.
30.05.2025
All plant's reserved the second topping now.
03.06.2025
Set the VPD from 0,7 kPa to 0,9 kPa.

Likes
36
Share


@nonick123
Follow
Día 66 (05/08) Cerrado por vacaciones
Día 67 (06/08) Mi amigo viene a casa a hacer un riego con 1 Litro de H2O pH 6,5
Día 68 (07/08) Cerrado por vacaciones
Día 69 (08/08) Vuelta de vacaciones! A ver como están después de 5 días sin verlas... 😱
Riego con 1 litro. OnionOG con 1.5 L
Añado 3 cm de sustrato nuevo porque se ha compactado y se ven las raíces! 😢
Día 70 (09/08) Riego 500 ml H2O pH 6,55
Eliminación de algunas ramas bajas
Día 71 (10/08) OnionOG vuelvo a hacer topping a todas las ramas principales! 💥
Riego 500 ml H2O pH 6,55
Sesión de fotos semanal!
Día 72 (11/08) Riego con 1 Litro de Té Vegetativo de Lurpe Solutions. Preparación: 24 horas con bomba de aire (oxigenación) con ingredientes:
Green Sunrise 8 ml/L + Insect Frass 16 ml/L + Hummus Lombriz 8 ml/L + Melaza 1 ml/L + Kelp Hidrolizado 0,25 g/L
Aplicación foliar Kelp hidrolizado de Lurpe Solutions a 0,25 ml/l
💦Nutrients by Lurpe Solutions - www.lurpenaturalsolutions.com
🌱Substrate PRO-MIX HP BACILLUS + MYCORRHIZAE - www.pthorticulture.com/en/products/pro-mix-hp-biostimulant-plus-mycorrhizae

Likes
5
Share


@Tafari
Follow
Aquí vemos el momento de la felicidad plena, donde la genética y el banco cumplen su palabra y sugerencias, una genética super independiente, con poco cuidado se llevo el premio de la mejor entre las otras plantas que he cultivado este año, aguanto mucho las plagas, con excepción de la ultima semana que entre la humedad y las lluvias, los trips aprovecharon el lavado de los preventivos para atacarla, pero no llegaron a ser un problema, la planta tuvo un crecimiento continuo y parejo, desarrollo muy buena estructura y producción impresionante!!!!!, 820 gramos de cogollos húmedos, muchísima resina, cogollos super compactos y duros, en el día de mañana estaré generando una extracción para probar retorno, color y sabor, muy contento de haber cultivado esta magnifica joya del banco BSF Seeds, mega recomendado.


Likes
58
Share


@Kmikaz420
Follow
Par ou je commence peut être par la facilité et rapidité de cette magnifique plante qui en seulement 8 semaine donne une superbe weed très cristalliser avec une belle odeur sucrée mais (perso je ne sent pas la 🍌 mais plutôt une odeur typique de purple punch à voir peut être à la fumé ;)
La plante ne demande pas trop de nutriment mais on peut lui en donner de bonne dose si on le souhaite perso je dépasse rarement les 1500 ppm.
La trim est facile à faire vue le peut de feuille voilà voilà on se retrouve d ici 10 jours pour la west coast og et par la même occasion je mettrais le poids sec dès 2 plantes ainsi que le poids sec de toutes les plantes de mon dernier grow histoire de clôturer le journal et commencer un tout nouveau journal (spoiler alert mac & crack et pendant se grow je vais faire du pollen à fin de commencer ma propre ligne de graines..
Merci à fast bud et surtout à vous qui me suivez thx
Likes
15
Share


@BushDoctor740
Follow
Day 11 i feel like the girls are getting stronger so I top dressed with 4-4-4 Gaia Green and watered with recharged tea ph to 6.5.
