


Likes
Comments
Share

@JVKdopegrow
Follow
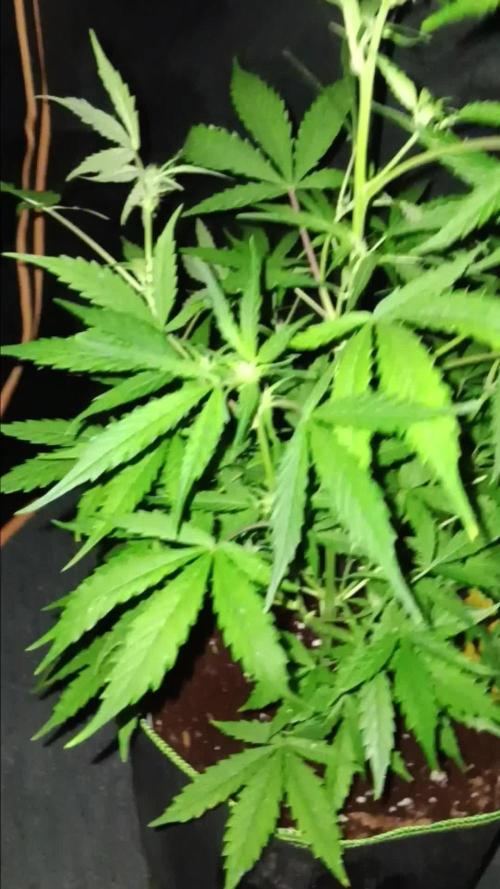
Really big stretch! Doubled in height in a little over a week. Pre flower sites all over as she is getting ready to do her thing. I may have finally duplicated a successful effort.
Likes
5
Share


Likes
18
Share


@Gineken
Follow
Dont have pics, :(. But I really liked it after the few hours of sunlight and all complications.

Likes
4
Share


@civillianwalking420
Follow
Hella great strain , imma go head n start another 2 of these rite away , love the growth , love d buds d high ohmagahdd well done Royal Queen Seeds , will repeat wit yall cheers

Processing
Likes
22
Share


Likes
4
Share


@Bless
Follow
Week 13 Day 91
Started full tilt nutes, 2 more weeks hopefully before chop. Will start full tilt on middle next feeding gave it one more bulky b
Thinking I was feeding too much water (especially using 70/30coco.p) is what turned the leaves yellow to trigger flushing, feeding nutes remainder throughout until flush
Likes
170
Share


@Green_Man_420
Follow
YO!!!! Back to start another diary thanks to Royal Queen Seeds and James. Big thanks for hooking me up again with another fire selection of seeds.
I’m rolling the dice with this grow as the temps are not ideal but I’m running low 😂
Started the germination off today so I’ll come back and update once they have popped there little heads above ground.
Peace to all and again a big shout to James over there at RQS ✌️✌️
All seeds are up and in the tent. Let’s see how they go ✌️
Likes
13
Share


@StoneyMelony
Follow
Overview of my grow:
Tent: Secret Jardin DS120 4 x 4 (120 cm by 120 cm)
Lights: 2 x 120 Watt CTlite c4 clusterled
Climat: Trotec Dehumidifyer 240 watt- 10L/24h
Filter: Prima Klima carbon filter PK2600
fan: 2 x Secret Jardin 20watt osc. fan
Pots: Gronest 4 x 11 liter airpots
Water : automated water system
PH: bluelab
Nutrients: Plagron cocos A + B
Plagron PK 13/14
ATA cal/mag
Epsom salt
Week 9 She grew again another 15 cm this week instead of fattening up. this was not what i was hoping for. But it is a amazing cherry tree and she is different then all the other autos i did before, There is a very nice smell, also very different so we'll she but she is taking her time compared to the others.

Likes
4
Share


@GeminiCQC
Follow
I didn't happen to weigh this one went as I don't do a whole plant dry. I got real impatient, and it was looking decently cloudy with a little bit of amber as well. Still smells like starburst.

Likes
32
Share


@Cultivatelove21
Follow
Ah it has come to an end! A grow for the books for sure! Coming in at 5lbs 3.8oz wet bud, this lady went above and beyond! I cannot say enough good things about this grow, genetics and strain, and will be growing another from her seed packet in a couple cycles! Cultivate love my friends! ✌️🏻

Likes
45
Share


@SensimillaP
Follow
Started the flush last week, these ladies still need some time but contest ends in 18 days. One more week and chop them down.


Processing
Likes
4
Share


@Therbalist
Follow
Went from 450w to 150w blue for a week due to heat and too much height gain. Weather got cold so I put the 450w red back in as they seem to be thickening up. Feminising was very easy on the ones I chose, I chose only three that had thicker faster flowering and more THC but will cross with the more sativa dominant ones.
Likes
7
Share


@DrewbieDoobieNoobie
Follow
Hello again, It is week 2 and we are cruising along, It took about 3 days for the trans plants to get settled in and start spiting out new nodes, looking at the time lapse they really started to take off an the 15th.
Unfortunately I had some old grow data left on the SD card and it did not get the last 4 days, this has been corrected and we should get a full 7 days of time-lapse for week 3
The reboot looks like it is taking off, I hope it will establish its self in the pot this one will be a week behind in VEG so it will not be as big as her sisters, Just Rain water for now PH @ 7.0 leaving the amendments to due their job until week 3 and then I will start with the Emerald Harvest 3 part line at full strength per the feed chart. so far so good. stay safe and Merry Christmas.


Likes
27
Share


@adam_pawloski87
Follow
What a great week it’s been!today is day 65 from seed!! One of the Forbiddin Runtz got it’s last feeding on Friday and will get flushed for 2 weeks and will be ready for dry and cure! The rest will still remain getting same dose of nutes the rest of this week and most likely into the next! This batch felt like it went so quick ! Hope you all enjoy an watch out for next week !


Likes
8
Share


@TommyBVRSA75
Follow
** Edición semana - se ha aportado al sistema 14 litros de agua con las cantidades discriminadas en función del número de litros considerado. Al sistema ya se ha empezado a introducir el Canna Zym y la consideración para el agua a 14 litros, se ha echo para que el día 17/08, se empiece la nutrición de floración y el cambio de ciclo lumínico a 12/12. Las próximas dos semanas corresponderán a un total de 5 semanas de vegetativo y por las tasas de crecimiento, seguramente en dos semanas tendremos la correspondencia a la dimensión final en altura del cultivar. (Mi cuenta a la altura del grow la hago, doblando la dimensión del grow cuando se produce el cambio de ciclo de luces. Así si a un vegetativo de 30 CMS cuando se produce el cambio a 12/12, representará que al final de floración la altura final estará siempre algo más del doble. O sea que si en dos semanas el grow esté sobre los 30/35 cma, al final de floración como máximo tendremos un grow sobre los 70 cms.
Los grows siguen presentando un maravilloso desarrollo y la cepa fast afgana de Sweet Seeds se ha revelado un acierto magnífico para las condiciones de elevada temperatura y baja humedad que llevamos.
Semana 1 1/2 - casi he cortado algo com tres días en total de la presente semana de desarrollo vegetativo y si miráis la entrada del diario anterior a esta, podrá resultar increíble lo cuanto se ha disparado el crecimiento de las "Afghanis" Fast de Sweet Seeds. Un acierto en casi toda la linea...líneas de fenotipo cara a la familia de genes del Hindu Kush. Plantas que reaccionan maravillosamente al calor y ya os había dicho que con una constancia de temperaturas que en luces está con más de 30ºC y que incluso a oscuras, sobre los 26,27ºC y donde la HR se.encuentra siempre entre máximos de 50% y mínimos abajo de 40%, y justo por su "pasado" de las montañas norte de la raya de Afghanistan/Pakistán, es muy claro que la genetica está lista para el calor...o también a frío, en otras cepas de las cuales destacó lo de Mazar-i-Shariff.
Pues hoy la entrada de diario con video (en inglés) y con un nuevo set de fotos pone clara la cosa. Las plántulas pasada de jiffy al sustrato actual sobre el día 20 de julio, hoy 29 de julio - ocho días después, son muy reveladoras de lo que son las virtudes de asociar una de las más sencillas formas de hidroponia (pasiva o de APU, o sea de acción de gravedad) y que permite sin carencia ó exceso que la irrigación por Smart Mat (una forma especial de tejido, que toma la solución de agua y nutrientes desde un tablero/maceta de 10 litros y quedándose además otros 10 litros de solución en una cuba que irá vertiendo hacia el tablero por gravedad según la velocidad de absorción del sistema radicular de las plantas (o sea con gravedad se ponen a circular 20 litros en total del sistema y sobre el preparo de estos 20 litros que son la base para el calculo de PH y EC que los distintos momentos del cultivar,.necesitaran).
Lo más sorprendente pasa por la siguiente análisis: cantidad de agua necesaria y cantidad utilizada, ahorro de nutrientes y cálculo mucho más efectivo en el control de cuestiones que cuando comparadas, por ejemplo, cuando hacemos riego por ejemplo, al echar 1.5 L con nutrientes y regarla cada dia y que conlleva desde temprano momento de desarrollo a aportar más agua y nutrientes que los necesarios y que al final, acostumbran a ser demasiado,.pues los cultivars se acostumbraran a una filosofía de "exceso" y con ello en regla, los flush finales muchas veces tienen que ser muy agresivos de modo a romper los cristales de nutrientes que se formam por exceso de sales en el sistema.
Ya había tenido contacto con cultivars en coco, pero el cultivo en este medio cuando expuesto a las condiciones en que se hace uso racional de la introducción de agua y nutrientes en el sistema, se está revelando casi espectacular, el modo como dia pós dia, el crecimiento de las plantas sea un "espejo" del equilibrio de racionamiento de agua y nutrientes.
Por ejemplo, comparar la anterior entrada antes de esta y ver lo que la estructura de tallo y hojas, su inserción y los cortos espacios internudos, es muy revelador de la principal virtud de los cultivos en coco y hidropónicos por gravedad. Algunos amigos con mayor experiencia, me habían referido que el crecimiento en vegetativo es simplemente, explosivo y lo que nos es enseñado en tan solo cuatro/cinco dias de vegetativo, pondrá el listón de calidad en esta temporada, muy por arriba.
Según los entendidos, este crecimiento explosivo en vegetativo, ocurre por la manera proporcionada como el sistema de raíces que se encuentra junto al Smart Mat, termina siendo la única area mojada del medio de crecimiento
Si comparáis con algunos de otros diarios que aquí presento y donde cultive en suelo, queda muy claro que tan solo en regla sobre la quinta a sexta semana se dá un estirón cualitativo y cuantitativo de los cultivars. En regla y si pensamos el riego normal en suelo y más en verano, lo primero serían las macetas que para suelo serían mayores que las padrones de hidroponia de 11 Litros. 11 litros en macetas de hidroponia corresponden a 23 litros en suelo regular. Después con temperaturas en la linea de las que estamos pasando, corresponderían a riegos de 2 Litros diarios de agua con nutrientes y con la temperatura y la adicción de agua necesarias, para suelo, en estas fechas, el estrés de temperatura y sobre todo el hídrico (por la cantidad de agua aportado) pasarían factura en el crecimiento. A contrário de otras temporadas (de suelo y riego diario), no tenemos, en primer lugar, áreas de suelo en la maceta que se sobrecargan de agua cuando aún no tiene materia radicular. Una de las señales que los grows en suelo y riego directo presentan en verano, suele ser las hojas curvadas hacia bajo y que el set primario de hojas, ya se habría puesto amarillento.
Después uno de los sales más prófugo en bloquear otros sales por su exceso en el sistema, es el nitrógeno. Lo que los riegos diretos en verano crean, pasa por cuando saturan áreas de suelo que aún no tienen raíces, el nitrógeno tiende a quedarse fijado en sales en esas áreas y después si bien habrá muchas veces una cantidad muy larga de nitrógeno, al existir ese exceso, más tarde habrá influencia negativa en otros sales y sobretodo microelementos, que no se agregaran de la mejor manera al cultivar.
Mucha gente no acostumbra a reflexionar sobre la forma como se hace la nutrición de raíces a través del suelo y si hay factores reductores en la integración de sales cuando más necesarios se convierten, eso pasa por ejemplo, por no haber conocimiento que por ejemplo excesos de nitrógeno pueden impedir que Fósforo o Magnésio o elementos como Boro, Hierro, Manganeso o Zinc, se integren al cultivar cuando más necesarios se hacen. En regla, los iniciados no entienden que un "overfert" de nitrógeno, que suele ocurrir más a común que se imagina (esa idea que se está haciendo la nutrición correcta cuando por ejemplo, el iniciado echa un vistazo a su "plantita" y la ve de un verde muy fuerte y lujuriante. En regla la gran mayoría de sobre fertilización ocurre con el aporte de agua. Un iniciado no será muy preocupado con el PH de su agua y con ello, también le dará poca importancia al EC y os dejo un poco esta idea " no es lo mismo preparar todos los días, soluciones de nutrición en base al preparo de 1,5 litro de solución (en base a una botella de agua de las normales) que por ejemplo preparar por ejemplo un botellón de 6 o 7 litros y usar ese botellón para riegos diarios sucesivos. Aún con medidas es muy distinto, que como en el sistema de hidroponia por gravedad que tengo a uso, pues preparó 20 litros de solución que pondré en una cuba, de esta cuba por una manguera con un sistema APU -bloqueo por gravedad- se llenará el tablero/cuba con cerca de 10 litros y en estos 10 litros estarán sumergidas las tiras Smart Mat, que al llenarse hasta el tope conducen el riego solamente en el área donde ya se encuentran formados los sistemas radiculares de la planta. O sea que en el sistema entrará justo el agua y nutriente necesario a lo que las raíces absorben....mientras que cuando haces riego directo sobre suelo, lo normal es que existan una área en proporción mucho mayor donde se satura el medio con agua y nutriente.
Os explicaba que para lo que se puede controlar en PH y EC, hay diferencias muy significativas entre el preparo de 1,5 litros de solución para un día; que un botellón de 6/7 litros para riego a lo largo de 5 o más días ó que el preparo para mi sistema de hidroponia con 20 litros de solución que serán empleados tan solo por la estructura radicular que los absorbe paulatinamente.
A quien en verano, perante el dilema del riego al ver incluso indoor que el suelo se seca rápidamente por la temperatura alta y baja humedad y que con eso puede en una maceta para suelo con 23 litros, llegar a hacer riego al menos dos veces al día con un total de 3/4 litros de agua y donde parte de esa agua con solución de sales será vertido en el suelo, pero en áreas del suelo donde no hay raíces...casi seguro, lo que estamos mirando con estos riegos es que tendremos seguro hojas de un verde muy bello y sin dar importancia a que las hojas se pondrán como gruesas y enrolladas hacia bajo y por el verde "bonito" no entender que la sobre fertilización ya esta en plena marcha y que más tarde en floración, por la presencia excesiva de cantidad de nitrógeno, por ejemplo lo que en floración ocurrirá, será que cuando necesitemos sobradamente de Fósforo y Magnésio, para las funciones de floración, engorda y evolución de terpenos y resinas, incluso para el "rippen", lo que suele pasar hace la alegría de los fabricantes de nutrientes, que se llenan de líneas de incluso 25 productos destinados en parte "a corregir las incorrecciones de formulación con que desarrollamos nuestros productos iniciales y a que decimos a nuestros clientes con menos experiencia, que debemos poner más que la cuenta, para que después necesitemos de otros productos en exceso, para equilibrar autênticas bombas químicas - ya sean biológicas o minerales-.
Pues y sin alongar más el raciocinio, y por las evidencias y más por lo empírico de la cosa, lo que veo al menos para el periodo de verano y con la conjugación de los siguientes factores :FACTOR 1: semilla F1 Fast con genética Hindu Kush tanto por padre como madre y que guardan plantas que son por antonomasia, resistentes perfectas a las condiciones de mucho calor y poca humedad +
FACTOR 2: sistema de hidroponia pasiva por gravedad, cuatro macetas de 11 Litros y responsable por una forma de riego óptima y en la cual la agua con la solución integra agua a partir de tejido Smart Mat y de aquí al sistema radicular que se desarrolla en el contacto del Smart Mat con el medio de cultura +
FACTOR 3: medio de cultura formado por: Coco peat/powder con trichodermas naturales -bloque Ugro Basic 70 litros (75%) - Perlite fina (20%) + Bolas Arcilla Expandida Europebbles Plagron (5%) . A las áreas de colocación de las semillas germinadas en jiffy peat, se aporta como medio de refuerzo de protección mycorrizas Kraken - Glomus iranicus sob. + Tricofor 50 (Trichoderma harzanium) + FACTOR 4 - linea de nutrición CANNA Coco.
Los cuatros factores son la base y eje de lo que de mejor tiene, en mi opinión, el sistema Quadgrow. Como hidroponia sencilla, creo que es muy buena cara a condiciones de verano, pues permiten que los riegos ocurran de modo muy regular. Habrá dudas con condiciones de invierno, pero en invierno a lo mejor habrá que contrarestar la cantidad de solución preparada y en vez a los 20 litros para una media de 12/14 días a lo mejor, será más interesante hacer el preparo de cubas de no más de 12 litros que podrán en máximo prorrogarse por un máximo de 11 dias.
Para ejemplo, queda la enorme dimensión de este comentario y algunos análisis sobre las cuestiones técnicas del grow en hidroponia. Si todo lo técnico es importante, darle a la fé en el buen Dios Jah, para que todo pueda ocurrir en paz, para que los grows se hagan sin contratiempos y para que las miradas y habladurías de vecinos nunca acarreen problemas y eso siempre, por qué la más bella planta del universo, no es para generar una ganancia mayor que le de los amigos disfrutando de buenas películas, buena musica, buena compañía y en eso la mayor virtud de la cannabis como elemento de desarrollo del ser humano hace su hermano humano.
Green greets y os invitó, a que disfruten del vídeo y de las fotos...
Likes
18
Share


@Hashy
Follow
Week 12
Light cycle=12/12
Light Power=130w
Extractor controller settings
High temp= 24c
Low temp= c
Temp step=0c
High Rh= 40%
Low Rh= %
Rh step=0%
Speed max=10
Speed min=1
Smart controller settings (during lights on).
Lights on=10.01-21.59
Radiator on= below 22.0c
Radiator off= above 23.0c
Dehumidifier on= not in use
Dehumidifier off= not in use
Smart controller settings (during lights off).
Lights off=22.00-10.00
Radiator on= below 18c
Radiator off= above 19c
Dehumidifier on= not in use
Dehumidifier off= not in use
Seperate feeding program.
#1 and #2 go onto dragon force.
#3 and #4 stay on schedule.
Fri 8/3/24
💧💧💧💧💧💧💧💧💧💧💧💧💧💧💧💧
Method= automatic
Feed=Bloom nutes.
Neutralise=0.1ml/L
Silicon=1.0ml/L
Calmag=0.5ml/L
Terra Bloom=3.0ml/L
Sumo Boost=2.0ml/L
P/K 9/18=0.5ml/L
Easy Ph down=0.15ml/L
Ec=1.65 PH=6.5/6.5
Time start=12.00pm
Finish time=13.45pm
(11×5 minute runs with 5 minute gaps)
Total flow rate=190ml/min
Flow rate per plant=47ml/min.
Total volume made=8L
Total volume left=3.5L
Total volume used=2.25L
Volume per plant=L (Est)
Runoff.
Total runoff=1.5L
Ec=1.9 PH=6.2/
💧💧💧💧💧💧💧💧💧💧💧💧💧💧💧💧
#3 (Day 78)(Day 40 flower)
📋 Bloom nutes
Sat 9/3/24
#3 (Day 79)(Day 41 flower)
📋
Sun 10/3/34
#3 (Day 80)(Day 42 flower)
📋 Lowered light power from 130w to 120w
Mon 11/3/24
💧💧💧💧💧💧💧💧💧💧💧💧💧💧💧💧
Method= automatic
Feed=water
Neutralise=0.1ml/L
Easy Ph down=0.008ml/L (3 drops total).
Ec=0.2 PH=6.0/6.4
Time start=12.00pm
Finish time=13.45pm
(11×5 minute runs with 5 minute gaps)
Total flow rate=190ml/min
Flow rate per plant=47ml/min.
Total volume made=13L
Total volume left=3L
Total volume used=10L
Volume per plant=2.5L (Est)
Runoff.
Total runoff=2.5L
Ec=2.25 PH=6.1/
💧💧💧💧💧💧💧💧💧💧💧💧💧💧💧💧
#3 (Day 81)(Day 43 flower)
📋
Tue 12/3/24
#3 (Day 82)(Day 44 flower)
📋
Wed 13/3/24
#3 (Day 83)(Day 45 flower)
📋 Lowered light power from 120w to 100w
Thur 14/3/24
💧💧💧💧💧💧💧💧💧💧💧💧💧💧💧💧
Method= automatic
Feed=Bloom nutes.
Neutralise=0.1ml/L
Silicon=1.0ml/L
Calmag=0.25ml/L
Terra Bloom=2.0ml/L
Sumo Boost=1.5ml/L
P/K 9/18=0.5ml/L
Easy Ph down=0.15ml/L
Ec=1.35 PH=6.7/6.8
Time start=12.00pm
Finish time=13.45pm
(11×5 minute runs with 5 minute gaps)
Total flow rate=190ml/min
Flow rate per plant=47ml/min.
Total volume made=8.5L
Total volume left=3L
Total volume used=5.5L
Volume per plant=2.75L (Est)
Runoff.
Total runoff for 2 plants=1.5L
Ec=1.85 PH=6.4/
💧💧💧💧💧💧💧💧💧💧💧💧💧💧💧💧
#3 (Day 84)(Day 46 flower)*****
📋 H=82cm D=20cm DLI=40.0
Small defoliation.
She is going to run a bit longer then the other fast flowers in this run. Looking good she just lacked the light when it was really needed.
Back soon.
Take it easy.
Processing
Likes
39
Share


@InnerCityGardens
Follow
Flush has began, 1st day they were fed 6 hours of Flawless Finish. Now onto just plain water to bring down the PPM of the media. Really trying to push these girls over the line and make the yield worthwhile! After the slow start they are starting to fatten and harden up, their like little golf balls. Next week is flush and that’ll keep going until the trichomes are 50% amber.
🙌🏽💚🇬🇧

Likes
17
Share


@ArnoRoots420
Follow
hello, here I am again, after a few adventures.... I had to withdraw my culture at all, because I had problems with French customs (...) but I was able to save a skunk plant that was left, a week in a box, to hide.... the rest I had to throw it away unfortunately...
I'm 11 weeks since the planting, I'm rinsing with only molasses
the next planting is already on the way, I'm going to make a diary...

Processing
Likes
12
Share


@2Stones1Bird
Follow
Checkout my Instagram @smallbudz to see the Small budget grow setup for indoor use, low watt, low heat, low noise, step by step.
07/12/2019 - Fed her 2l of 6.5PH water with 0,5ml of each Grow, Bloom, Max and Alga-mic, and 1ml of each Heaven and Vera,noticed about 10% run off, also added a green filter to the camera lens. Adjusted the light distance to 55cm again it was toooo close about 32cm.
10/12/2019 - Decided to go back and check the basics, removed led strip to give a proper 'night' time, changing light cycle to 20/4h no more 'exotic' 22/2h, re-checked the light distance every 2 to 3 days to ensure 60-45cm and I can tell all ready she is loving it.
Also added home made Co2 made with 1 tsp of yeast, 3/4 tsp of sugar 700ml of warm water in a 1l bottle with a tiny pin hole on the cap.
11/12/2019 - Fed her 1.5l of 6.5PH water with 0,5ml of each Grow, Bloom, Max and Alga-mic, and 1ml of each Heaven and Vera,noticed about 10% run off.
12/12/2019 - 8 weeks have passed and no flowers I guess I'm flipping to 1212h to see if she reacts.
