


Likes
Comments
Share

@CCSAUTOGROW
Follow
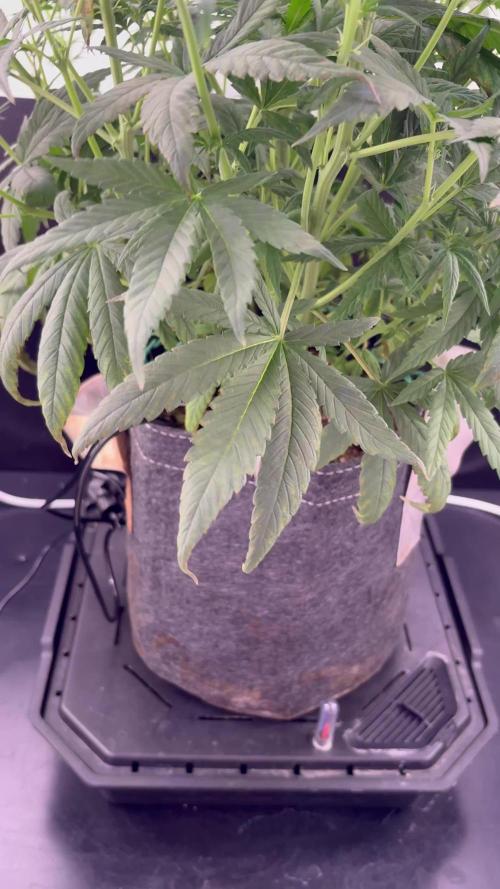
Tangie matic's first week of flower! She has had some good vertical growth this week. Moved her into the larger grow space to flower. She has a nice christmas tree shape 🌲

Likes
8
Share


@GorkedOut
Follow
Continuing to gradually flush with just plain water until harvest.
Video taken on day 66 of flowering, the pics are earlier in week 15

Likes
12
Share


@Meisterwulle
Follow
Hi everyone,
Last week I harvested #2 aswell, #1 is dry already and in fermintation. #3 and #4 just receive pH regulated Water from now, #5 still receives fertilizer. Its still sad that I cant adjust the light properly, due to the height of #4 and #5 Compared to #3. Nevertheless I have to pay more attention on the trichomes and be patient. Maybe I can harvest 3 and 4 at the end of the week, or next week. #5 still needs Its Time, as it is 2 weeks behind. I noticed that the size of the Buds increased slighty cause of the more Watts, the Most impact is on #5. I am very excited about the yield overall, but it is less than I thought itd be (as always).
Have a nice week and happy growing :)
Wulle

Processing
Likes
18
Share


@CanadianFillmore
Follow
Week 5 begins! Divine storm 1 & 2 are doing well, however DS2 is a bit hungrier. I believe that was do to her close location to the fan moving air around the bottom of the canopy.
Increased feeding to 5 liters per plant and did some defoliation of the yellowing leaves. Moved the ladies to the other side of the room for the rest of the grow.
Thanks for stopping by 👽🌳🔥
Likes
Comments
Share

@Oyziphar
Follow
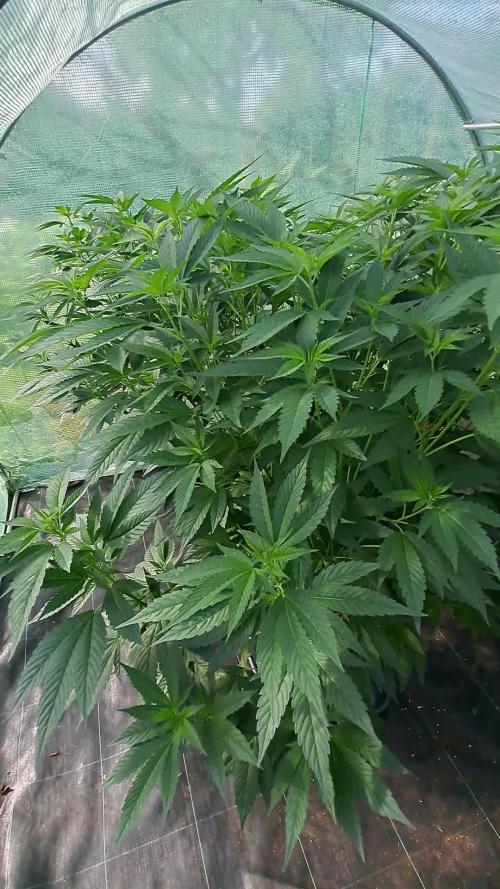
👽 We had an excellent week with high temperatures🌡️, lots of sun 🌞, and rain during the night 🌧️
Once a week I give the plant a liquid booster with OPF 7:2:3 ; Fulvic 25 ; Yuccah ; Biovin liquid ; Earthworm compost extract.
Big Thanks to Luc from Plant Health Solutions / Bioplantenvoeding dot nl 🙏🙏🙏

Likes
202
Share


@CrazyHorse
Follow
Hello folks 😇 💪 🙏
This was very busy week for me, so I'm sorry for not updating my adventures like I was doing it in last two and half months 🙃
Original Cinderella and Bruce Banner are on last step before flush, drinking now only regulated water ph 6.2 😁
Purple Lemonade is already in the jar, this is a real hitter. Putting you in that mellow mode in to the sofa 😇
Have a good night, You Lovely Girls Growers 😇 💪 🙏
Likes
10
Share


@CordersGreen
Follow
👉DIA : 13/12/21👈
Metodo de germinacion: 👉<< VASO DE AGUA >>👈
seleccionamos las cantidades deseadas de semillas y en un pequeño vaso con agua opmotizada insertamos las semillas para nutrirlas durante 12H, situada en un lugar sin luz, apropiadamente tapada con un trapo.😉
__________________________________________________________________________________________________________________________________________________________________________________
👉DIA : 14/12/2021👈
👇👇👇👇👇👇👇👇👇👇👇👇
una vez pasada las 12 H de germinacion en vaso de agua , depositamos las semillas bien colocadas en un recipiente con papel de cocina humedecido con agua y 1ML de estimulador de raices (TOPCROP).
Esperamos de 1 a 2 días a que salga la raiz de la semilla y ser transportada a los Jiffy😉
___________________________________________________________________________________________________________________________________________________________________________________
👉DIA 17/12/2021👈
👇👇👇👇👇👇👇👇👇👇👇👇
Pues pasados los 3 dias de germinacion en el metodo de papel, vemos que ya salieron a luz las raices y con sorpresa😱 NUNCA habia visto una cosa asin!!
An salido GEMELAS, sii sii !!😵 de una misma semilla an salido dos raices una cosa impresinante!
y damos paso a colocarlas en los Jiffy.
👉Instrucciones:👈
- Colocación de los jiffy en un recipiente con 2L de agua y 2ML de enraizantes de top Crop.
- Dejamos actuar durantes varios minutos hasta que el jiffy se extienda.
- Abrimos un pequeño orificio en los Jiffy para introducir la semilla con el cáliz dejandolo hacia afuera.
- Colocamos en un pequeño invernadero para que tengan la suficiente humedad.
- Ayudandonos de unos foco de pocos waltios, le damos a luz necesaria para esta face de germinacion dejandolas 24 horas de luz.
________________________________________________________________________________________________________________________________________________________________
DIA 22/12/2021
Colocacion de Jiffy en Maceta de 3,25L
👇👇👇👇👇👇👇👇👇👇👇👇
👉Instrucciones👈
-Pasados varios dias vemos que el periantio(semilla) ya se rompió y empezo a salir los cotiledones con una hermosa raiz blanca por debajo del jiffy.
-rellenamos macetas de 3,25L con sustrato de top crop(anterior cultivo).
-introducimos los jiffy en las macetas dejando la plantula bien colocada.
-regamos con 3L agua opmotizada y 1ML/L enraizante Voodoo ADVANCED NUTRIENTS
- Permanecemos con las 24 horas de luz con foco led.
_________________________________________________________________________________________________________________________________________________
👉DIA 25/12/2021👈
👇👇👇👇👇👇👇👇👇👇👇👇👇👇👇
pasados 3 dias desde que se plantó en maceta. A dado unas respuestas increibles !!👍
las volvemos a regar y a cambiar las horas de luz que se pasarian a 18H

Likes
111
Share


@DreamIT
Follow
🍋🥧🏎️ LEMON PIE AUTO BY FAST BUDS 🏎️🥧🍋
🍋 19.3 we have reached the first week of flowering, I removed Hesi TNT and add Hesi Bloom and irrigated 2 liters. the situation got a bit out of hand, I certainly exaggerated with the tops without considering too much the size of my vase, tomorrow I'll see how to continue, yeah!
🍋 20.3 ...
🍋 21.3 ...
🍋 22.3 ...
🍋 23.3 ...
🍋 24.3 ...
🍋 25.3 Today 2 liters of fertilized water, tomorrow I try to fix it and adjust the canopy to the same height ... yeah!
____________________________________________________________________________________
❌❓Not sure where to buy your seeds?
😮 Fast buds literally ships all over the world, check out their site!
http://bit.ly/FastBudsgood
__________________________________________________________________________________
📜 A look at the details of what I'm growing 📜
🍋🥧🏎️Lemon Pie Auto 🏎️🥧🍋
⚧ Gender
▪️ Feminised
➰ Genes
▪️ 50% Indica / 50% Sativa
🎄 Genetics
▪️ Lemon Pie X Autoflowering Genetics
🚜Harvest
▪️ 450 - 550 g / m²
🌱Vegetation
▪️30 - 35 days
🌷Flowering
▪️ 30-35 days
✨THC
▪️ 24.0%
✅CBD
▪️ 1.0%
🏡Room Type
▪️ Indoor
🌄Room Type
▪️ Outdoor
🕋Room Type
▪️ Greenhouse
🎂Release Year
▪️ 2020
__________________________________________________________________________
📷🥇 Follow the best photos on Instagram 🥇📷
https://www.instagram.com/dreamit420/
🔻🔻Leave a comment with your opinions if you pass by here🔻🔻
🤟🤗💚Thanks and Enjoy growth 💚🤗🤟
Likes
14
Share


@MG2009
Follow
01/27/2022
Got a couple stragglers in cups but working on getting more pots.
I apologize for rough looking leaves on the plants, I've been spraying neem oil as a preventative, and to also boost immune responses I've been doing aspirin in water regime so leaves can get beaten up being scavenged for extra energy.
(to fight a non existing threat)
At least in my experiences.
02/02/2022
Potted up a Lemon OG into ? gallon self watering pot will top dress with Coast of Maine 5-2-4 and water in for first week or two, then to 12-12 for her

Likes
15
Share


@DRO420
Follow
Switched to my 4x4 tent with 400 watt bloom plus. Also added my first video of this diary. Plants have been repotted into bigger medium. Only the Blue Dream and Blue Haze will stay in this tent because they are both sativa leaning. The blue cheese will go back into my other custom cabinet for flowering. I keep them separate so I can grow bigger plants and Indica flowers for roughly 2 weeks longer than sativa strains .

Likes
16
Share


@GoodTimesOrganics
Follow
Hi liebe Community und Welcome Back! 💚
?🌱🍰Slush Mint Cake von Dutch Passion!
Die fünfte Blütewoche ist vorbei und die Pflanze konzentriert sich nun voll auf die Blütenausbildung.
Die Trichomabdeckung legt nun richtig zu.
Ich bin immer wieder begeistert von Antonio's breedings. Die Herkunft durch die Ice Cream Cake lässt sich auch bei diesem Strain gut erkennen.
Sie verhält sich sehr ähnlich wie die Ice Cream Haze, entwickelt aber schon Mal ein anderes Aroma und die Färbung ist bei ihr auch ausgeprägter!
Ein wunderbar süßes Aroma verteilt sich im Zelt.
Die Pflanze hat nun eine Höhe von 117cm erreicht.
Sie hat eine wunderschöne und homogene Wuchsform.
Das bin ich von Dutch Passion echt gewohnt. Tolle Strains!
Ich habe die Pflanze nun das letzte Mal defoliert und ihr auch die letzte Düngung mit dem PKW Booster 5-8 von Bio Tabs NL gegeben.
Die Bedingungen im Growschrank sind für die Blütephase aktuell ok!
—————
🌞 Temp: 26
🌚 Temp: 18°C bis 19°C
💨 RH: 64%
VPD: 0,7 kPa
💡 ppfd: 830 mpm
—————
Grüne Grüße 💚🌱

Likes
28
Share


@J_diaz420
Follow
Muy contento con el resultado de esta hermosa genética llena de resina , un olor muy rico, agradable al fumar y muy potente, cumple con creces mis expectativas 👍👨🌾🏻🍀

Likes
34
Share


@JUNGLE_B4RNS
Follow
Hello fellow grower
Starting directly under the Mars Hydro FC6500, seedlings are doing very well (see inputs for distance). The dimming is at maximum power. The light footprint might be a bit oversized for only 20 cups. Technically, for a commercial crop you can stick 1.2 sq. meter of seedlings without any problems.
_________________________________________________
Barney’s Farm seeds are as usual, very vigorous ! All the seeds germinated in 24h to 48h. I’m just waiting after the Vanilla Kush to come out from the soil.
_________________________________________________
Cellmax BIO Soil is perfect, you can start seedlings with it without risking to burn them.
_________________________________________________
Seedlings stage tips:
- adding a rotating fan, far enough and on first speed, blowing very gently on the seedlings, will stop them going looney and stretching a long weak stem to reach the light.
- fill up the cup with soil, give it a good watering, then plant the germinated seed in the wet soil.
_________________________________________________
24/08
Cup, Water pH 6.5, LT TB
25/08
Cup, Water pH 6.5, AG Bba K Bad Azz
26/08
Cup, Water pH 6.5, Vanilla


Likes
31
Share


@ELBICNIVNI
Follow
growing this strain was super easy, but for some reason i had 5 seeds and i wanted to germinate another 2 and i followed the germination process 420 fast buds has on the web and unfortunately from 5 seeds just 1 germinated. which you can see in this diary. the buds are not that fat like on the amnezia, some of them are a little airy (i think the reason for that is that i had too many branches and too little air circulation and light penetration - next ones if i will do again this strain is going to be with less branches), but they smell strong and they get you really high lol
Likes
8
Share


@Ninjabuds
Follow
Chop
I wish they didn't make me do this to get a smileI wish they didn't make me do this to get a smileI wish they didn't make me do this to get a smileI wish they didn't make me do this to get a smileI wish they didn't make me do this to get a smileI wish they didn't make me do this to get a smile
Likes
16
Share


@DaddyPrime2
Follow
6/24 this may be the last week. The screen recordings are of both plants (purple octane and rs11) they're both close. I also went back and did some math and the last week of veg, should've been first week of flower. I may let her go for 10 weeks. We will see how she looks throughout this week(trichs)
6/25 looking super close. All cloudy besides maybe 10%
6/29 will get in there with a microscope again. just waiting on her to ripen. can't tell if she's done, or at rhat point where she looks so good that she's done but then that last week the plant explodes. well see and yall will definitely hear about it.


Likes
23
Share


@HideAndFly420
Follow
Day 71👋🌱
I started flushing some days befor. I think I’ve got 20 days left but this lady eat a lot of feeding this last weeks so I give some more flushing. Buds looks full of all
What they needs also if now they need to get fat and fat. :) let’s see what’s happen.
Giving ph controlled water at 6.2/6.5, I check TDS to water owerflowing from pot, bringing it to 50ppm from 400.
Now I’ll start checking trichomes every three days, I’d like a 60% white and 40% amber
Day 72👋🌱🌱
Hi all growers, how is going? 😊
I'm at my first real flush for this Orange, i gave 10 lt of ph controled water and was checking ppm from water coming out. i gave water unitl it reach 400 ppm, my water is 200 ppm, i hope i'll bring it to 50 ppm for next flush in 3 days.
i think bud are going to bloom nice this last days befgore harvest, i can feel it :D
Day 74👋🌱🌱🌱🌱
Soil is already quiet dry, smell is increasing rapidly. Today I’ll give another e 1 lt of water and Sunday I’ll do another flush. I think will go up to 90 days. Bud will get fatter and fatter🏆.
Maybe I could have fertilise two times more, but anyway I’d not a big problem, I’ve been feeding them a lot since the beginning so a more long flush won’t be a problem at all.
Can’t wait to the harvest.
Day 77 🌱🌱🌱🌱🌱🌱🌱
Just posting some trichome pictures, waiting to some changement before publishing some new pic of the lady.
Keep washing it with ph controleed water that looks always cleaner, i think i'll be cutting the most high bud some days before the rest of the plant.
Can't wait anymore
Let’se go! ❤️🌱
Any suggestion is really welcome :)😋🌱🌱


Likes
3
Share


@MrHazeAmaze
Follow
I grew her in a skull, and I made her suffer. Left outside in heat, then cold, dragged back inside, forgotten more often than cared for. Spidermites gnawed at her leaves, yet left the flowers untouched — as if even they sensed something sacred in her final work. When she bloomed, it was not despite the struggle, but because of it. The flower is always a farewell, and every grow is only complete in death.