Check the winners The Grow Awards 2026 🏆 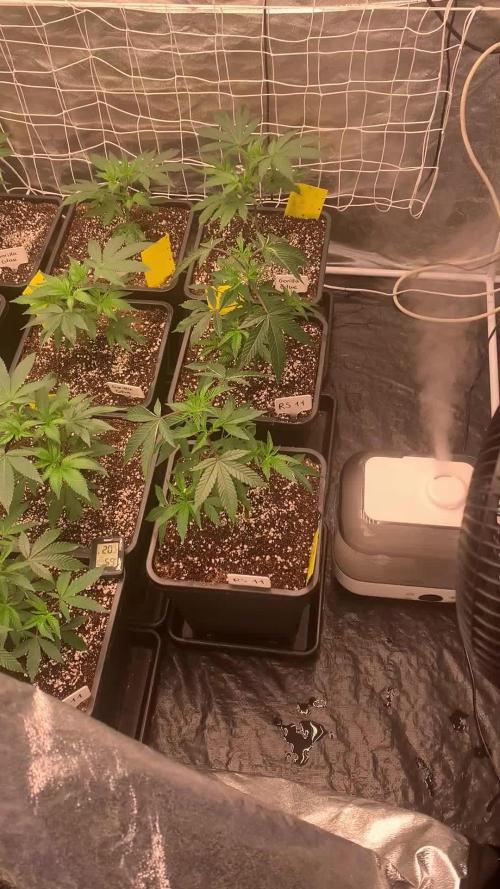











Likes
Comments
Share
@Permanentmarker88
Follow
Heute an Tag 12 der Vegi wurden alle Plants in 11 l coco perlite 70/30 gesetzt.
Mittlerweile wird ein Ec von 2,1 Gefahren mit Athena Blended line nach Zuchtschema.
Alle Pflanzen entwickeln sich super gut und bis dato keinerlei Probleme gehabt .
Nächstes Update ab Woche 3 🏻🏻🏻😎


Likes
77
Share
@Krisis
Follow
03/10/25. Start week 2 flower or day 8
Again…going with these definitely are based off candy and not size.
She’s stretched 8 inches already. Her sister, Mellow yellow, is the same height. As usual she’s still yellow lol.
Both seem to be more shy than their friends about showing some buds. Lots of white hairs sprouting all over. I’m sure they’ll be showing up any time now.
These things are so bushy and leafy they almost look like some kinda big plant that you’d just see near some piece of art in the corner of your house.
Anyhow, they’re drinking a gallon and a half about every 4 days. Usually feed every other water but these were getting a bit of spots around leaf edges.. that I’m thinking is potassium deficiency. So, didn’t skip feeding and actually increasing by going early with green sensation at half dose. The bottle says 4 weeks and up, but if they’re lacking, what can it hurt?
I’ve increased light intensity to about 75% and they’re currently 13 inches from it. Going to raise it up some in the morning, as this seems a bit close for the moment.
That about covers it for now. ✌️✌️

Likes
38
Share
@Cariboo_OG
Follow
Utopia Haze is a rare heavily sativa dominant hybrid (90% sativa/10% indica) strain created through back crossing Brazilian Sativa strains. This tasty little bud took home 1st Place for Best Sativa in the 2008 High Times’ Cannabis Cup and for good reason – with its potent 18-22% average THC level and long lasting cerebral effects, Utopia Haze is one powerhouse smoke. The Utopia Haze high comes on soon after you finish your first toke, hitting you with a strong cerebral lift that infuses you with a sense of hazy relaxation.
Type: Feminised/Photoperiod
Cultivation: Indoor/Outdoor
Flowering Time (days): 70-75
Indoor Yield (g): Up to 650
Feminised Outdoor Harvest Month: October
Feminised Outdoor Harvest Month Week: 3rd-4th week
Aroma: Citrus, Woody, Pungent, Mint
Effect: Cerebral Lift, Hazy Relaxation, Sleepy
Welcome Everyone to the Final Entry of my Utopia Haze Grow !
There is so much to discuss ! I have been extremely busy as of late trying to get this Harvest together, but i am happy to have it here for you now !
I Seriously under estimated the amount of time, help from others, and my own necessary skills to pull this off.. and i still kind of screwed it up lol !
But its worth noting i have never actually done this before and trying to document it during....was extremely hard.
It is next to impossible to work an iPhone with rubber gloves on !
First I want to discuss everything step by step so before you jump straight into the comments on how the end product is so small in "quantity"
Rest assured i am happy with its"quality"...and thats all that matters to me because Life is a journey not a destination! and i have learned so much from this grow that I couldn't be any happy even if i messed some things up :)
But at the very least I hope you read through this entry in its entirety with an open mind and focus more on the process, rather than just the outcome!
I ran out of Ice & i was only able to wash three times..(normally I've heard you should go sometimes 5-6 washes)
Preparation is Key & things will be much better next round :)
Photos 1-22
These are pretty self explanatory but for those of you just tuning in now.. this is what happens to a very happy plant when you don't have the necessary tools to monitor key components of growing cannabis.. Ph, as well as EC levels play a very key role in the outcome of your grow lol that being said I was just able to save this plant by purchasing both tools but that doesn't mean the plant didn't suffer because of the prior events.. This was a Huge reason behind me choosing to turn this harvest into what i would consider
"Solventless Hash Rosin" from "Ice water extracted Bubble hash".
Pictures 23
The idea here is the process of using "fresh Frozen Cannabis" this has been discussed many a time online on such sites as instagram and here on grow diaries as well.. I personally have Never tried the process so i decided to try it out and make a judgement for myself..
Video 24
The Cannabis has now been in the freezer for 72 hours making it very well frozen.. as you can tell i struggled getting it all into the 25u Screen Wash Bag. One thing of note i would do differently is i will de-stem my next batch as i also believe this played a part in the amount of plant matter that escaped through the sieves.
Photo/Video's 25-28
The idea here is "ice water Seiving" & especially with the bags that I am using here that are only have screen material on the bottom portion of the bag it is very important to have spaces in-between the screens to allow the water to pass directly through the screens into the bottom bucket with the least amount of resistance.. because the hash is so extremely temperature dependant if it gets warm on the side of the bag.. it will stick there and not make it to the bottom to become use able product..
29
You do not need to use as much Ice as i used here lol... the idea is to keep everything very cold..i certainly achieved that but at the sacrifice of using so much that i ended up grinding product and producing "contaminants" but in the end they are just plant matter that i would be smoking when i rolled up my joint either way so.. I'm not super disappointed..
But it should be noted that what you want to achieve here is a Layering effect where you have the wash bag between two small layers of ice while the "water current" washes the Trichomes away allowing them to be separated by the screens setup below :)
Before Starting the machine you should allow some time (i.e.;10-12minutes pre soak to allow the product to become saturated) before the first cycle.
By video 32 I have just ran out of ice lol..
Video 33-34
Here I have a tip for you.. to separate the screens that you sieve through.. cut 5 gallon buckets to stretch them across nice and tight.. it'll make scooping your Bubble that much easier ! i learned this from the many "Frenchy" videos I have watched :)
Picture 35
Here in lays the problem for most people.. drying your hash without loosing vast amounts of "Terpenes" whilst also stay ever vigilant against mold !
Thanks to all those videos I've watched on youtube.. id like to think this was one of my most successful parts of this process..
Things to Note; Terpenes start to seriously evaporate at temperatures 68F or 20C
you need to stay as cold as possible whilst bringing the Relative Humidity in the space down into the 40-30% to stay away from that nasty mold !
I used my cold storage room in the basement.. with a dehumidifier running to keep the space at 45% RH & staying at a constant 15c.
All while spreading the hash as thin as possible across parchment paper, on top of the white screens with a fan moving air across both sides of the paper.
Pictures 36-38
These are some macros i took in the middle of my drying session I fell in love with the colour.
Yes i know the black spots are plant material but they will get caught when i bag the hash & squish the oil out.
Thing to Note; at this stage it is important to ensure you 'micro plane" the hash down as fine as you can whilst staying weary of the temperature... any "chunks" will hold pockets of moisture.. that lead to potential problems..ie; mold ...
Picture/Video 39-41
Successfully planed bubble hash ready to be bagged and Squished !
Picture 42
Ive decided to follow Pedro.. from Pedros Grow Room and double bag to be on the safe side so i don't have any blow outs.
So thats One 25u bag inside one 160u bag ! :)
Pictures 43
This is almost 3 grams of the bubble hash from above, already melting in the bag.. this is where i ran into trouble again lol things started getting to warm in the house and i was only able to get one of the three squish's i did on video :( things started getting sticky.
Picture 44
This is basically just a photo of the equipment I'm using; 3x5 LowTemp Cage in the frame I built myself, with a 20Ton bottle jack.
Something to note here is this is an older Lowtemp model with only a single heating zone which is which i have it closed here heating Both sides of the press :)
As well as the importance of having adequate pressure on your plates.. my rig is very overkill for the size of hash bags..lol
Video 45
Here is the lovely press video.. its didn't quite work the way i wanted either lol my directional folding wasn't quite tight enough for a big "drip" :)
&the Press was set to 65°c
Photo's 46-50 are pretty self explanatory :) I had a blow out.. but still managed to pull an 80% return from the hash once squished...& yes it tasted amazing :)
Was it worth it in the end... that could be debated.. for some..i understand..its not your thing, but for those of us that are interested in making our own concentrates.. free from Solvents...
I wouldn't make it any other way :)
If even ONE of you reading this diary finds it helpful to reference for ANYTHING.....even if its "what not to do" ill consider it a success !
Thanks again for tagging along on this garden adventure.. its been one heck of a journey !
Much Love from B.C. Canada,
Until Next time,
Cariboo

Likes
1
Share
@Chubbs
Follow
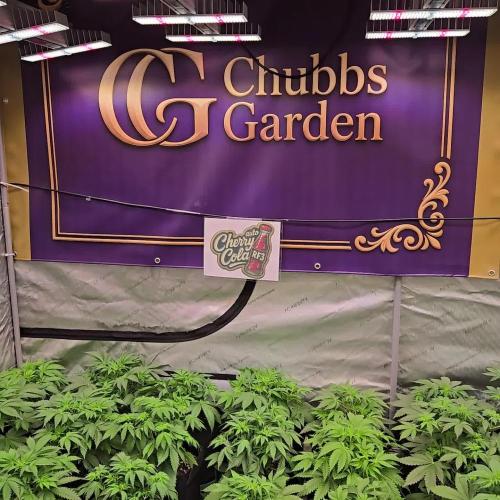
This week's been exciting, they've grown upward a few inches and started to bush out. I did do a mild defoliation taking off a few lower leaves and tucked some of the top bigger fan leaves. I started adding co2 this week and they seem to really be enjoying the added amount.
All in all Happy Growing.

Likes
3
Share
@Tashtegoo
Follow
Summer is finally here and I hope she likes feasting on those sweet, sweet sunbeams.
☀️
28.6. Seems to be done with stretching.
1.7.
Cooled down a lot. Now 18°C outside. I keep her inside the house to be safe.

Likes
3
Share
@Andres2pistilos
Follow
Cursando la segunda semana de floración, todo sigue sobre ruedas... Me mantengo en pH 5.8 y la EC entre 2.0 - 2.1
Ya se siente olor leve a planta, aún no hay olor a flor
Ocupo 20 gramos de calcium y 25 de hybrids para preparar 20 litros de solución de riego, posteriormente ajusto el pH

Likes
15
Share
@Waveform
Follow
Waiting for first signs of life …
While we are, I thought I’d give you a short explanation on the software’s graphics in case you did not follow my first diary.
The one to the upper left, as its headline says, is the temperature graph. Most important line is the red one, showing the leaf temperature measured with an infrared temperature sensor. As there are no leaves yet, it is pointed towards one of the pot’s wall at soil level. Air temperature from a sensor that usually hangs around somewhere around top level is violet, and the grey line is the outside temperature close to the tent, helping the software to determine if a main blower action will effectively lower temperature.
As I learned from the first grow a plant day that corresponds to the natural day can cause enormous gaps both to temperature and humidity, I inverted the plant day now, starting their night at 11 a.m. So after the first day temperature will only vary around 1.5 °C, which is of course due to the low light intensity too.
Humidity graph on the upper right is quite crowded. Main line is the blue one, tent air humidity, which on this first day was between excellent 65 – 70% most of the time. For the moment humidifier is electrically disabled. There is quite some excess humidity on the tent floor and no reason to push this any further. Outside air humidity is grey again and taken from the same outside sensor that reports outside temperature.
The soil humidity sensors are simple analogue capacitive sensors which have their flaws. I am interpolating their measurements to have a somewhat smoother reading, but as you can see from the turquoise humidifier reservoir reading (in legend named as plant soil hum 1), they can get confused when humidity is very high and start to report random numbers for some time.
The most important graph for all growing stages is the lower left one, where the pink line meaning plant VPD should be inside the green optimum range for somewhat perfect conditions. This cannot be attained all of the time – dehumidifying isn’t as easy as humidifying –, but software tries its best to do so. Outside VPD is grey again.
The last graph is more for amusement than anything else. The light intensity sensor is hard to position correctly, and everything you see about illumination and DLI (orange and green, plus grey for the accumulated 24 h DLI) should be taken with some spoonful of salt. Any resemblance to real world professional instrument readings can be considered purely coincidental.
The violet line is the CO2 reading from such a sensor, and you can see that its tiny peaks correspond to even tinier black peaks at the bottom of the graph, reading TVOC values which in this case, once they will be more than possible measurement irregularities, can be interpreted as smell.
-------
End of week 1:
All seeds germinated. I wasn’t at home most of the time, and it turned out using the humidity sensor to monitor the humidifier’s tank wasn’t good for the stability of the system. Arduino crashed, so there are no pictures yet and no graphs to show. I have the feeling light was a bit low as the seedlings grew a bit tall, but with lights now up to 20% I guess this problem is fixed.
More tomorrow when I have some more data to share.
Even more end of week 1 (I extended this week to 9 days as I cannot tell when the seedlings started to show):
Lights are at 40%, meaning 40 W in total. No reason to give them new water until next week. As some flies showed up from the BioBizz soil, I added 2 yellow cards. So far, everything in normal ranges. I’ll switch the control to grow phase soon which will raise the VPD slightly by 0.5 kPa.
It’s interesting to see the CO2 level started to climb by 50% during their last night and has not come down to baseline afterwards. I restarted the app to check if the sensor had lost its calibration, but it still sits at around 660 ppm now.

Likes
Comments
Share


Likes
16
Share
@Northern_Ent
Follow
Aug 17: Auto Overdose is a nice plant but it’s not an auto. I started this one late and only topped it once thinking it was an auto. Other growers have noticed it isn’t an auto too, so I forced it in the dark garage. Flowering has to be started by the end of July here or it won’t finish in the fall.
The flowers are forming quickly and I suspect this is actually Overdose Fast.
So far so good, and good genetics for a Fast plant.
Aug 18: no UV light today unfortunately but it was decently sunny. Scrog net certainly seems like a good idea. This plant is asymmetrical because I broke one of the two main stems a couple weeks after topping. This changed the shape of the plant so it’s become one-sided as if I was growing it up against a wall. Lots of nice lower branches came up so she looks pretty good now.
Likes
15
Share
@Kurow
Follow
Very optimal setup for everything so far. you can really tell the first sprout apart right now because of the second set coming in. Can’t wait to start using nutrients soon!

Processing
Likes
10
Share
@CanadianFillmore
Follow
Start of flowering week 1. This girl is already bigger then her round 1 sister and she's starting to stretch after just a few days of 12/12 light. The only nutrient difference this grow, will be the addition of sensizym, hopefully she helps pack on a few more grams per plant.


Likes
8
Share


Likes
3
Share
@dushi_genetics
Follow
Week 5 Day 7 Flowering Stage.. All plants getting big but got into some stress because one of my AC went off so temperature was a bit high and humidity was also high. But looking nice😊🔥


Processing
Likes
24
Share
@Cogollo_eu
Follow
**Encontrarás la traducción a español al final de la descripción**
If you like this week, please hit a like, it costs you nothing! 👊. Thanks in advance 😉!
From/Desde: 09/09/19 || To/Hasta: 15/09/19
From day/Desde día: 49 || To day/Hasta día: 55
-----IMAGES & VIDEOS-----
V2 - Alice.K. overview on 12/12 switch
P01 - Day 50 (34 cm)
P8 & P9 - EyeFish Lens Shoots 🐡
P10 - Lens shadow in lower left corner 😤😤
P13 - Day 53 (36 cm)
P21 - Day 55 (39 cm)
P25 & P26 - 3D designed & printed branch supports
-----WEEK SUMMARY-----
This is the last week of growing, from Thursday I will be lowering light hours @ 1hr/day and the Sunday 2 hours reaching 12/12. Also on Thursday, I started to give her Bud Ignitor to help Alice.K. with the pre-flowering stage.
From now on i will have very few night shoots as at the end of the week I placed and fixed the SCROG mesh, so I can't move the plant anymore. Later in flora i will try to do some at night inside the tent, I need to make some tests before, and see how she responds, as I don't want to stress her with night light along flowering time.
Finally on Sunday I designed something to support the lower main branches, I only have photos with one branch supported as I taked the photos while the rest of the supports were printed.
-----WATERING CALENDAR-----
11/09/19 (Day 51) - 3,000 ml with all week nutrients -(Bud Candy & Silica Power) & Organic Growth Nutrition only 1.5ml/l @ 1.25 E.C. PH6
15/09/19 (Day 55) - 3,000 ml with all week nutrients -(B-52) @ 2 E.C. PH6.1
*****ESPAÑOL*****
Por favor, si te gusta esta semana dale un like, no te cuesta nada 👊. ¡Gracias por adelantado 😉!
-----IMÁGENES & VÍDEOS-----
V2 - Vista de Alice.K. en el cambio a 12/12
P01 - Día 50 (34 cm)
P8 & P9 - Capturas con ojo de pez 🐡
P10 - Sobra del objetivo en una esquina 😤😤
P13 - Día 53 (36 cm)
P21 - Día 55 (39 cm)
P25 & P26 - Soportes para las ramas inferiores diseñados e impresos en 3d
-----SUMARIO SEMANAL-----
Esta es la última semana de crecimiento, desde el miércoles comenzaré a bajar las horas de luz 1 hora/día y el domingo 2 horas bajando hasta 12/12. También el miércoles empecé a usar Bud Ignitor para ayudar a Alice.K. con su etapa de pre-floración.
A partir de ahora tendré pocos disparos nocturnos. Al final de la semana he fijado la malla de SCROG, y no podré mover más la planta. Más entrada la floración haré unas pruebas nocturnas dentro del armario para ver cómo responde a las fotos nocturnas, ya que no quiero estresarla con luces por la noche durante la floración.
Finalmente el Domingo diseñé e imprimí unos soportes para las ramas inferiores, sólo hay fotos con una de las ramas sujetas, ya que hice las fotos mientras se imprimía el resto de los soportes.
-----CALENDARIO DE RIEGO-----
11/09/19 (Día 51) - 3.000 ml con todos los nutrientes semanales -(Bud Candy y Silica Power) y de Organic Growth Nutrition sólo 1,5ml/l @ 1,25 E.C. PH6
15/09/19 (Día 55) - 3.000 ml con todos los nutrientes semanales -(B-52) @ 2 E.C. PH6,1

Likes
9
Share
@Chubbs
Follow
What up family, weekly update on one of my favorites, these ApricotAutos are growing amazing, they bounced back pretty good after fixing the ph issue I caused. The temps have been in the mid 80's with the light on and because I have to crank my fans the humiditys been around 50% which is lower then I'd prefer. All in all though Happy Growing.
Likes
30
Share
@Drgreenthumb627
Follow
white runtz seems to be holding its own in the center of the tent, really impressed with how well it has responded in flower after such a difficult veg phase


Processing
Likes
5
Share
@Reaper
Follow
the water coming out of the coco is anoying i have to build something to catch the water
6-9 formula

Likes
16
Share
@Prop207
Follow
Week 2 and the girls are flexing and showing out for her flat mates (Frisian Ducks) put a good 4 inches on those girls.
Stretched this week like a sumbitch!!!
Likes
20
Share
@420DeepGrow
Follow
Gracias al equipo de Divine Seeds, Marshydro y XpertNutrients sin ellos esto no seria posible.
💐🍁Fractal:
La semilla de marihuana Fractal es una cepa especialmente psicodélica que Semillas Divinas desarrolló para experiencias esotéricas y místicas, meditación y creatividad. La potente y vívida Skunk#1 fue cruzada con una pegajosa Afghani Indica, y el resultado es ahora conocido como Fractal. Este exótico híbrido es resinoso, picante y productivo. La mejor opción para el cultivo comercial: un compromiso entre mayores rendimientos y maduración rápida.
En interiores se espera una altura de 1,70 m, en exteriores las plantas crecen hasta 2 m. Fractal se adapta a todo tipo de entorno de cultivo: cajas de cultivo, instalaciones hidropónicas o aeropónicas, plantaciones exteriores, balcones, terrazas e invernaderos. Para un mejor rendimiento se recomienda entrenar a las plantas de Fractal para ampliar su estructura y limitar su crecimiento vertical. Usar ScroG o SoG, LST, FIM o topping.
Fractal tiene una inmunidad inherente al moho y a las plagas de insectos, pero como sus colas son gruesas, proteja sus plantas del aire viciado. También durante las semanas de lluvia su plantación puede necesitar ser cubierta. Listo para la cosecha al aire libre en octubre. Grandes y densos cogollos.
Los cogollos de marihuana de la variedad Fractral huelen a hachís y algo a tierra, desprenden cedro y notas afrutadas al romperse. Mida su porción con cuidado: su potencia está por encima de la media. Con Fractal experimentas un apedreamiento general que te hace sentarte o frena tu movimiento. Perfecto para pasar una noche junto a una hoguera. Es mejor consumirlo por la noche.
🚀🌻 Consigue aquí tus semillas:
https://divineseeds.net/es/fractal-fem/
💡FC6500: Eficiencia líder en el mercado: la lámpara de cultivo LED FC-E6500, que ostenta un estatus líder en el mercado, es una solución rentable con un PPE de 2,8 µmol/J y un rendimiento máximo de 2,5 g/vatio. Ofrece un PPF alto de 2026 umol/S y es adecuada para una cobertura de vegetación de 1,50 m x 1,50 m y una cobertura de flores de 1,20 m x 1,20 m.
Iluminación versátil y uniforme.
https://marshydro.eu/products/mars-hydro-fc-e-6500-730w-commercial-led-grow-light/?gad_source=1&gclid=Cj0KCQjw1qO0BhDwARIsANfnkv9IIrYSbmJqz8PqpJOIyWwJfp5bc3SGJgUV68USLQ4tjmXDYwoBuAsaAue3EALw_wcB
🚥 MarsHydro ADLITE UV/IR/RED:
Para lograr un crecimiento óptimo de las plantas y maximizar los rendimientos es un arte simple que depende en gran medida de las condiciones ambientales adecuadas. Reconociendo las limitaciones de la iluminación natural y las soluciones de iluminación tradicionales para satisfacer estas necesidades únicas, lanzamos ADLITE. Estas luces especiales UV, IR y roja están diseñadas para llenar áreas del espectro, proporcionando las altas longitudes de onda que las plantas necesitan para un crecimiento y desarrollo óptimos.
Consigue aqui tu Adlite:
https://marshydro.eu/collections/adlite-supplemental-lights/
🏠 : Marshydro 1.50 x 1.50 x 1.80, carpa 100% estanca con ventanas laterales para llegar a todos los lugares durante el grow
https://marshydro.eu/products/diy-150x150x200cm-grow-tent-kit
🌬️💨 Marshydro 6inch + filtro carbon para evitar olores indeseables.
https://marshydro.eu/products/ifresh-smart-6inch-filter-kits/
🍣🍦🌴 Xpert Nutrients es una empresa especializada en la producción y comercialización de fertilizantes líquidos y tierras, que garantizan excelentes cosechas y un crecimiento activo para sus plantas durante todas las fases de cultivo.
Consigue aqui tus Nutrientes:
https://xpertnutrients.com/es/shop/
📆 Semana 1
Un comienzo explosivo en solo 3 dias que llevan en floracion gracias a la nueva iluminación de mi patrocinador Marshydro, gracias al Adlite y como no a la gran gama de nutrientes de XpertNutrients.
Continuo con las dosis de nutrientes recomendadas por el fabricante, esta vez el olor es penetrante y eso que todavia no tiene desarrollada las flores.
En algunos ejemplares se pueden apreciar lindas preflores hembras.