


Likes
Comments
Share

@BettyFlores
Follow
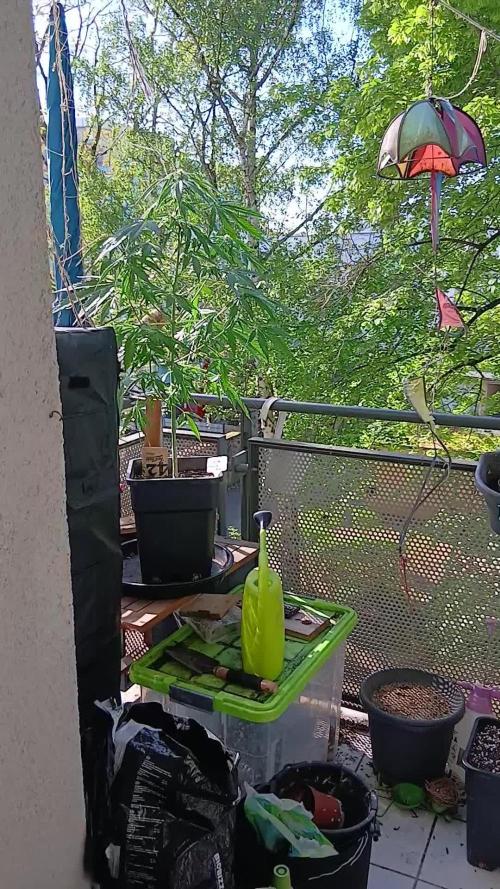
24.04.2026 Ich habe eine wirklich harte Woche hinter mir, aber der Skunk geht es blendend! Sie ist nun schon richtig groß und die Blüten sind in voller Entwicklung. Später werde ich noch ein paar Fotos ergänzen, das Video schon mal vorab. Mittlerweile haben wir prächtiges Wetter, Sonne satt und schön warm, doch nachts rauscht die Temperatur auf fast 0°C ab. Die Skunk scheint es zu mögen 😅.
Happy growing 🌸 💜

Likes
25
Share


@festaOG
Follow
I have checked the plants and one plant is now showing about 10% amber trichomes on old growth. New growth clear.
Starting to see some nice colour changes across the canopy.
Have fed them a weaker feed to start the week but included a microbe tea.

Likes
8
Share


@Tontsekz
Follow
29/10 - Paper towel method, all seeds germinated
30/10 - Planted into their first pots
01/11 - Sprouted
03/11 - Watered with PH 6.2 water
06/11 - Watered with PH 6.2 water and 10ml of Seasol

Processing
Likes
30
Share


@Organic_LarF
Follow
High GD community,
Week 13,
Both girls looking good, but when it get a closer look, there some browning tips on the pistils. Im not pleased with it, bcs im sure its no sign of maturation. There has to be a shoc or drought, lights? I dont know, ive dropt the output a tiny bit. But im not that sure thats the real issue. Ive measured the soil and it seems pretty cold. Like 17.2 and 18.2 celcius for the 1 with infrared heatingmat 5w.
Im using less nutrients now 2, so could this be a reaction. I diddnt go cold turkey on them. But its a changer.
They also start to drink more, and there was 1 day it felt all a bit lighter then normal. But deffenitly not bonedry.
So I got a lot of questions to get some answer to.
This weeks watering💦 was at the usual ph 6.2 and only 1 feeding a week. 4 waterings this week.
Thats it for this week
Grow safe buds and feel free to check out my other ladies.🌿🌿🌿👍
🙏🍀🍀🍀🙏

Likes
10
Share

@DogDoctorOfficial
Follow
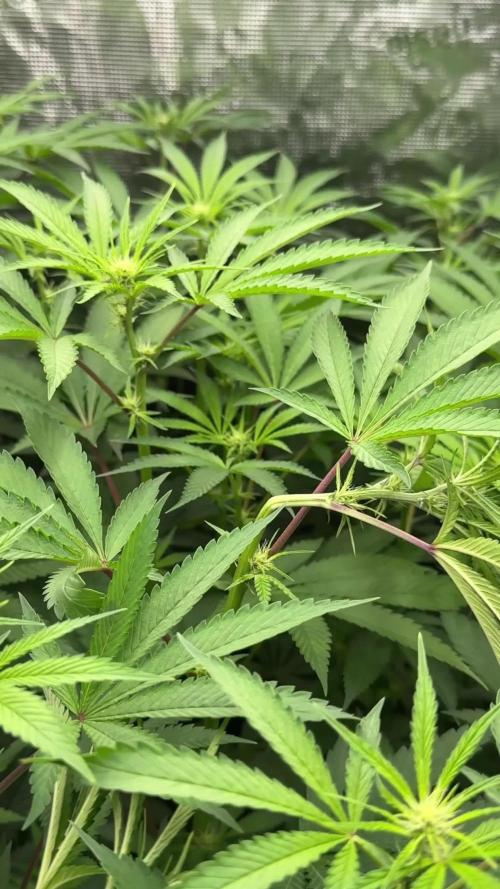
💙 Project Blue Tent – Week 9
Blue Waffle F1 – Pheno A
🌿 Too Much Stretch, Then a Big Reset
Hello everyone, and welcome back to another chapter inside Project Blue Tent! 💙🌱
If you're new here, Project Blue Tent is our little experiment with four individual Blue Waffle F1 plants from Zamnesia, each documented separately from seed to harvest.
All four girls share the same environment, lighting, irrigation, nutrition and general cultivation philosophy.
And yet, as always...
they each have their own personality.
Last week I was wondering just how much these girls were going to stretch after seven weeks of vegetation.
Well...
I got my answer. 😂
They stretched.
A lot.
And this week became one of those weeks where the grower has to stop watching and start acting.
The plants were getting simply too tall.
With the height of the pots and substrate, the drainage system underneath them, and the distance between the canopy and the LED fixtures becoming increasingly limited, some of the tops were getting dangerously close to the lights.
So we made some changes.
A fairly big reset, actually.
And looking at the room now?
I'm very happy with where we landed.
🌿 Pheno A – She Took the Invitation to Stretch Seriously
Plant A is now approximately 145 cm tall.
😂
Yes.
One hundred and forty-five centimetres.
And when you add the height coming from the pots, substrate and drainage arrangement underneath the plants, that number becomes even more relevant when you're working inside a relatively limited vertical space.
Last week she was already moving quickly.
This week she basically said:
"Hold my nutrient solution."
😂💙
The structure she built during those seven weeks of vegetation gave her an enormous amount of material to work with.
The SCROG distributed that growth beautifully.
But once flowering stretch really kicked in, all of that established structure began pushing upward.
And eventually...
we simply ran out of comfortable vertical room.
So rather than fighting the plants continuously, we changed the room around them.
🕸️ The Second SCROG – Because These Girls Are Getting Big
One of the biggest changes this week was the installation of a second SCROG net.
This wasn't done because the first net failed.
Quite the opposite.
The first net did exactly what we wanted during vegetation:
It helped distribute the plants horizontally and build an even canopy.
But now these girls have become much taller.
And as flowering progresses, those branches are going to become heavier.
So the second net is there for something different:
support.
We're essentially creating another layer of structure through the upper portion of the plants.
This gives the flowering branches something to lean against as the flowers develop and gain weight.
And with plants this tall, I would much rather organize that structure now than discover later that a heavy flowering branch has decided to take a dramatic trip toward the floor.
😂
The second net also helps keep the canopy organized after the major defoliation.
And looking at the room now...
I think it was absolutely the right decision.
✂️ The Big Defoliation
And then came the other major event of the week.
Defoliation.
Not a little cleanup.
Not removing three leaves and calling it a day.
We went deep.
The room had become extremely dense, and with the plants stretching this aggressively, we needed to open everything up.
We removed leaves where they were creating unnecessary congestion and took out foliage from stems where appropriate, leaving the productive growth and flowering structure we wanted to carry forward.
This wasn't about making the plants look naked.
It was about making the structure functional again.
And there's an important distinction here.
We're not defoliating because removing leaves magically creates more flowers.
That's not the objective.
Leaves are valuable.
They're part of the plant's photosynthetic machinery.
The objective here was to manage excessive congestion, improve visibility through the canopy, increase air movement through the plant and reduce the amount of unnecessary foliage competing for space around the developing flowers.
We're trying to create a better working environment for the plant.
Not punish the plant.
Not stress it for the sake of stress.
And certainly not remove every leaf we can find.
🌿 What We Expect From This Defoliation
Now comes the interesting part.
After a significant cleanup like this, I don't expect the plants to immediately look like they're growing faster.
Quite the opposite.
There can be a period where they need to settle.
They've lost a considerable amount of leaf area.
We've physically changed their architecture.
So I expect the plants to spend some time adjusting and continuing their transition into flowering.
What I'm hoping to gain is something different:
better structure.
Better airflow.
Better light penetration.
Better access to the flowering sites.
Less congestion.
And a much easier canopy to manage as the flowers continue developing.
Will it completely stop the stretch?
No.
I wouldn't expect that.
The plants are already well into their flowering transition, and genetics, plant maturity and environmental conditions still have a huge influence on how much they stretch.
But by removing excess congestion and adding the second SCROG, we've made the remaining structure considerably easier to manage.
Now we watch.
🔥 A Few LED Burned Tops – And We Caught It
There was another little lesson hidden inside all that stretching.
Some tops had gotten too close to the LEDs.
And we saw a few leaves and flowering tips showing signs of LED stress/burning.
Nothing catastrophic.
Nothing that concerns me at this point.
But definitely something we needed to address.
And honestly?
I'm glad we caught it now.
Because once the plants were getting that close to the lights, we were already running out of room to work with.
So we attacked the problem from several directions.
We moved the ventilation equipment outside the tent.
We raised the LEDs.
We opened the canopy.
We installed another SCROG.
And suddenly...
we gained some valuable vertical breathing room.
That little bit of extra space can make a huge difference inside a tent.
🌬️ Moving the Carbon Filter & Extractor Outside
Another major change was moving the carbon filter and extractor outside the tent.
Previously, having that equipment inside the tent was consuming precious vertical space.
And with these girls reaching toward the lights, every centimetre suddenly became valuable.
So we moved the filter and extractor to the top of the tent.
The system now pulls air from the tent through the carbon filter and extractor and then exhausts it outside.
This gave us the space we desperately needed.
And that allowed us to raise the LED fixtures closer to the top of the tent rather than having the ventilation equipment occupying that valuable ceiling space.
It sounds like a relatively small modification.
But in a tent with plants this tall?
Huge difference.
Sometimes the solution isn't changing the plant.
Sometimes it's changing the room around the plant.
😂💙
💡 More Room for the Lights
And this is one of the most satisfying results of the whole operation.
Once the ventilation equipment was moved outside, we could bring the LEDs higher.
That immediately created more separation between the flowering tops and the fixtures.
The few areas that had experienced LED stress were addressed before things could become serious.
And now we have much more room to work with.
That's exactly what I wanted.
Because I don't want to spend the remainder of flowering constantly fighting the ceiling.
I want these girls to have somewhere to finish.
They already have plenty of height.
Now we need them to put their energy into the flowers.
🌬️ Two Fans – Creating a Vortex
We also added a second Zamnesia clip fan, positioned underneath the canopy.
So now we have:
One fan above.
One fan below.
And the goal isn't simply to make the leaves move.
We're trying to create a more complete circulation pattern through the tent.
With one fan moving air across the upper canopy and another helping move air underneath, the airflow can circulate through different levels of the room rather than leaving the lower portion relatively stagnant.
The idea is to encourage a kind of vortex-style circulation through the canopy.
Air moves.
Circulates.
Changes direction.
And continues moving through the plant structure.
This is particularly important now because we've spent the week opening the canopy and creating space.
There's no point creating all that space if the air simply sits there.
So now we've got airflow working from above and below.
And looking at the room?
It feels considerably more alive.
🌿 The Room After Defoliation
I have to say...
I love the way the room looks now.
Before the defoliation, it was an absolute jungle.
Beautiful.
Healthy.
But incredibly dense.
Now?
You can see the architecture.
You can see the branches.
You can see the flowering sites.
You can see the second SCROG.
You can see the airflow equipment.
And most importantly...
you can see the plants.
😂💙
The room feels organized again.
And that's exactly what we needed.
These girls have been growing extremely aggressively.
Now we're giving them a structure in which that growth can actually be managed.
✂️ A Word About Scissors
I also want to mention something that might seem insignificant but is actually very important to me.
The Zamnesia curved scissors.
I really like these.
For much of my defoliation, I actually use my fingers.
If a leaf can be gently removed without cutting anything else, that's often my preference.
But that's not always possible.
Some leaves are tucked into awkward places.
Some are smaller.
Some are delicate.
Some require a precise cut.
And that's where the scissors come in.
But there is one rule I don't compromise on:
Clean scissors.
Always.
Even when they're brand new, I still like to make sure the scissors are clean before using them.
When you're moving from plant to plant and making multiple cuts, cleanliness matters.
We're working with living tissue.
So there's no reason to introduce unnecessary contamination into the process.
Clean tools.
Gentle hands.
Deliberate cuts.
And don't cut something just because you happen to have scissors in your hand.
😂
💙 Pheno A After the Reset
And now...
let's come back to our girl.
Because despite all the work this week, Pheno A looks fantastic.
She's still one of the larger structures in this tent.
She's tall.
She's vigorous.
She's got plenty of flowering sites.
And after the cleanup, her architecture is much easier to appreciate.
The plant has gone from:
"How the hell are we going to fit all of this in here?"
to:
"Okay. Now we have a plan."
😂💙
The flowers are there.
The structure is there.
The health is there.
And now she has additional support underneath her developing flowering branches.
This is a very good place to be heading into the next stage.
🌸 From Building Plant to Building Flowers
This is the transition I'm most interested in now.
Up until this point, so much of the conversation has been about growth.
Height.
Branches.
SCROG.
Canopy.
Stretch.
But now?
The plant has done enough building.
I want to see her start putting more of that energy into flowering.
The architecture is established.
The second net is installed.
The canopy has been opened.
The lighting has been raised.
The airflow has been improved.
The room has been reorganized.
Now we let her work.
And hopefully...
the next photographs will show us exactly what all that preparation was for.
Beautiful flowers getting bigger.
💧 Nutrition – The Girls Are Hungry
Another important development this week is nutrition.
The girls are absolutely loving the feeding.
So we've increased the Hydro A and Hydro B recipe slightly.
We're now running:
Plagron Hydro A — 2.2 ml/L
Plagron Hydro B — 2.2 ml/L
Plagron Hydro Roots — 1 ml/L
Plagron Power Buds — 1 ml/L
pH adjustment as required
That small increase has brought the EC up accordingly.
Current recorded EC is approximately 2.49 mS/cm.
And again, this wasn't some dramatic change.
It was simply a small progression because the plants are consuming aggressively and showing us that they are ready for it.
They're growing.
They're flowering.
They're drinking.
They're hungry.
So we listen.
And we adjust.
That's the whole philosophy.
Don't feed a number.
Feed the plant.
🌡️ Week 9 Environment
The current recorded conditions are:
🌸 Flowering: Week 9
📏 Height: approximately 145 cm
💡 Light schedule: 12/12
☀️ Day temperature: 27°C
🌙 Night temperature: 27°C
💧 Relative humidity: 67%
⚗️ pH: 6.01
⚡ EC: approximately 2.49 mS/cm
🌡️ Solution temperature: 25.3°C
🌱 Substrate temperature: 24°C
🌬️ CO₂: approximately 666 ppm
? Pot size: 8 L
💦 Watering: approximately 1.6 L per plant / 24h
The environment remains remarkably stable.
And that's especially valuable after a week where we've physically changed so much of the room.
The plants have enough to deal with simply adapting to their new architecture.
I don't want environmental instability adding another variable.
So now...
stability.
Consistency.
Observation.
🔬 Same Room. Same Conditions. Four Different Girls.
One thing that's fascinating about this particular project is how uniform the room remains despite the plants being so vigorous.
The four Blue Waffle F1 girls are remarkably similar.
They all went through the same long vegetative period.
They all experienced the same lighting.
They all received the same irrigation.
They all received the same nutrition.
They all experienced the same environmental conditions.
And now they're all showing that same general flowering transition.
There are individual differences, of course.
That's what we're documenting.
But overall?
They are behaving like sisters.
And that's making this experiment incredibly interesting.
🌿 What I'm Watching Now
After this week's reset, there are several things I'm going to be watching closely.
First:
How quickly does the stretch settle?
Second:
How do the plants respond to the heavy defoliation?
Third:
How does the second SCROG hold the flowering branches as they gain weight?
Fourth:
How does the new airflow pattern perform under a developing flowering canopy?
And finally...
How much of that beautiful vegetative structure is going to turn into flowers?
Those are the questions now.
We've done the work.
Now we observe the results.
🌸 The Big Lesson From This Week
If there's one thing this week reminded me of, it's that a grow isn't always about having a perfect plan.
Sometimes you make the best plan you can.
Then the plant laughs at you.
😂
We knew they might stretch.
We didn't know they'd stretch this much.
So we adapted.
We moved the ventilation equipment.
We raised the LEDs.
We cleaned the canopy.
We installed another SCROG.
We added another fan.
We adjusted the nutrition.
And now?
The room is looking better than it did before the problem appeared.
That's what I consider a successful grow.
Not avoiding every problem.
Recognizing them early and adapting intelligently.
🔭 Looking Ahead – Now We Let Them Flower
And this is where things get exciting.
The girls have been through a major reset.
The canopy is open.
The second SCROG is in place.
The LEDs are higher.
The ventilation system has been moved outside.
Airflow is now working from above and below.
The plants are receiving their updated nutrition.
And Pheno A?
She's standing there at 145 cm, looking at me like none of this was particularly dramatic.
😂💙
Now I want to see what she does with the room we've created for her.
Hopefully the aggressive vertical growth begins to calm down.
Hopefully the flowers start becoming the dominant story.
Hopefully the second SCROG gives us the support we need as those flowers gain weight.
And hopefully those few LED-stressed tops recover without further drama.
I think we caught that issue early enough.
Now we watch.
💙 Final Thoughts – The Room Is Back Under Control
What a week.
Seriously.
😂
We went from:
"They're stretching a little."
to:
"Okay, these girls are going to hit the LEDs."
And then we went to work.
The carbon filter and extractor moved outside the tent.
The LEDs went higher.
The canopy received a serious cleanup.
A second SCROG was installed.
A second Zamnesia clip fan went underneath the canopy.
Airflow now works from above and below.
The nutrition was increased slightly.
A few LED-burned leaves and tops were cleaned up.
And after all of that...
I look at the room and smile.
Because it looks beautiful.
The plants look healthy.
The structure is organized.
The flowering sites are everywhere.
And Pheno A is absolutely shining.
She's tall.
She's vigorous.
She's beautifully developed.
And now she's finally got some breathing room.
🌿💙
The defoliation wasn't about making her smaller.
It wasn't about forcing her to flower.
It wasn't about chasing some magical yield increase.
It was about taking an overly crowded flowering structure and making it more functional.
The second SCROG isn't there because we expect failure.
It's there because these girls have become substantial plants and we want to support them properly.
The second fan isn't there simply to make the leaves dance.
It's there to help create better circulation through the entire canopy.
Moving the ventilation equipment wasn't cosmetic.
It gave us precious vertical space.
And raising the LEDs gave us more room between the fixtures and the flowering tops.
Every change had a reason.
And now...
we wait.
The girls have done their part.
We've done ours.
Now let's see what Blue Waffle F1 Pheno A does with this new chapter.
Because I have a feeling the next few weeks are going to get very interesting.
💙🌸🌿
🙏 A Huge Thank You
A huge thank you once again to Zamnesia for making Project Blue Tent possible and for giving us the opportunity to explore these beautiful Blue Waffle F1 genetics phenotype by phenotype.
Thank you to Plagron for the Hydro nutrient line and everything supporting these girls through this very vigorous cycle.
A massive thank you to Zamnesia for the Phytonaut LED lighting and for the curved scissors and clip fan that have become part of the practical side of this project.
Thank you to Mars Hydro for the irrigation and drainage system that continues keeping these girls supplied while they absolutely demolish their water.
😂💙
And thank you to GrowDiaries for giving us the platform to document all of this craziness and share it with growers around the world.
Most importantly...
thank you to everyone following Project Blue Tent.
This week was definitely one of those chapters where the plants reminded us who's actually in charge.
We planned.
They stretched.
We adapted.
😂
And now the room is ready for the next phase.
Four Blue Waffle F1 girls.
One room.
One environment.
One very ambitious flowering canopy.
And a second SCROG ready to catch whatever these ladies decide to throw at us next.
Let's see how they finish.
Until next week...
More room. More airflow. More support. And hopefully a lot more flowers. 💙🌸🌿
Growers Love, happy growing, and take care everyone! 🌱💙
Likes
22
Share

@Mrs_Larimar
Follow
2026-06-04
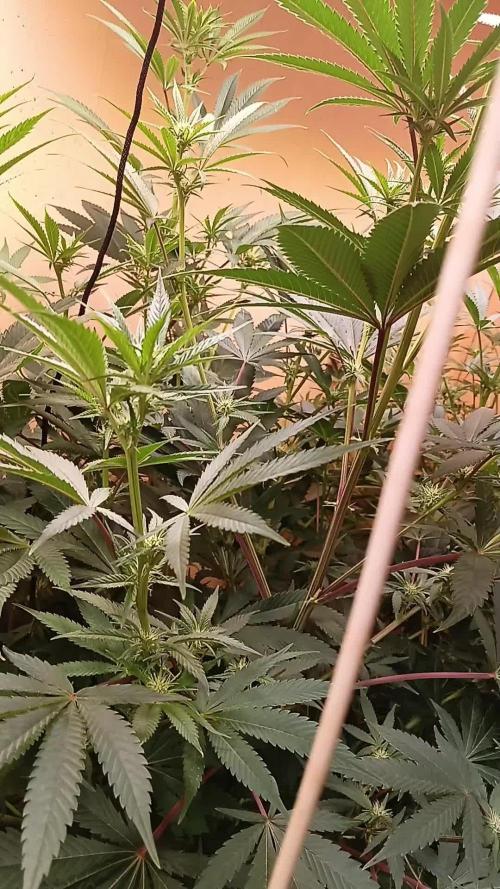
I can barely get into the room, because these ladies are spreading-
so i made a room video
Setup & Method
The plants are growing in an Autopot system using the Biotabs "just add water" strategy.
Setup process:
1. Mix in Startrex
2. Add Silicium Flash
3. Add Biotabs tablets
4. Add Mycotrex
5. Water with Bactrex
This turns any soil into a living, active growing medium. Combined with Autopot, it acts as a cheat code for effortless growth — resulting in large, healthy plants with an excellent and flavorful end product.
Feeding & Maintenance Plan
• Refreshing mycorrhiza and microbes with Mycotrex and Bactrex
• Applying compost tea to all plants
• If any deficiencies appear: top-dress with Silicium Flash
• Continuing the "just add water" strategy otherwise

Likes
24
Share


@Hawkbo
Follow
Autos are just starting to flower the photos are dying for some bigger pots. I've been trying to bring up the overall plant health in general since moving everything to a basement the temps are a little lower than ideal. I had a space heater delivered today and monitored the temps but they only went up to around 78°f I want it to be atleast 82°f ideally 85. The heater uses 1500 watt and only increased it about 2 or 3°. I dont think it's worth the extra cost for such little boost. I'm thinking about returning the heater and throwing a 1000w hps in one of the other tents and see if that will raise it anymore. Especially with LED and co2 higher temps would be very beneficial in veg and early flower but the room is so big its gunna be tough to pull off without killing me on electric costs. Any suggestions are welcome. I know this room does decent in flower but I havnt done much veg work down here and I'll have some autos growing this round so it's important I get it up.


Likes
25
Share


@Kikiwindsurf
Follow
TEMPERATURE ISSUES MADE ME FEEL UNCONFORTABLE BUT THE PLANTS ARE RUNNING SUPER GOOD.
LETS SEE IF THEY CAN GET FATTER WITH THOOSE HIGH TEMPERATURES. CHECKING THE CRYTALS EVERY DAY, NOT READY YET. PROBABLE 1-2 WEEKS FOR THE FLUSH AND 1 MORE FOR HARVEST. MUCH LOVE GROWMIES.
FEEL FREE TO COMMENT YOUR PAST EXPERIENCES OR YOUR TIPS. GROWSHOPS ARE CLOSED AND I LOVE HEARING TO THE GOOD BREADERS, ALWAYS LEARNING.
12/05/2020---> HE REGADO CON TOP BLOOM Y TOP CANDY A LA GORILA LST Y AL LEMON HAZE PORQUE ESTABAN DEMASIADO AMARILLOS Y AUN QUIERO AGUANTARLAS 1-2 SEMANAS MAS
Likes
226
Share


@HighTV
Follow
| 📅 Week 10 | Days 64 - 70
| 💡 750w 📏25' |
| ☔ 38%-50% |
| 🌡️️🌞 72 - 74 |
| 🌡️️🌑 68 - 71 |
1/11 The reservoirs were swapped out with fresh nutrients and topped off at 5.8PH. I will give them another day or two before flushing I think. The smell is currently fantastic
1/12 There really isn't much to do with these girls anymore other than PH every day and make sure their water levels are consistent to maintain their nutrient levels. Tomorrow I will begin the Flushing
1/13 I decided on one more day of nutrients. I Topped off the Reservoirs and adjusted their PH's to 5.8 as usual. I cleaned out the tent today as well. I can't wait to harvest these buds they are looking great.
1/14 Today is Flushing Day! I will flush them for about 6 days which is very fairly long for a typical DWC grow. I will only PH the water from here on out.
1/15-19 I Flushed these plants while maintaining a stable PH and humidity the best I could. The water level is not important during this because without nutrients you don't need to worry about ratios as long as you just keep the PH stable you will be fine. With a longer flush like this one, you should expect to see death in leaves its ok. I only did this for life reasons, I suggest a 3-5 day flush in DWC.
These plant's Trichomes matured fast and harvest time approached quickly. The smell in the tent is very potent and gloves are going to be an absolute must on this chop! I will be hang drying the plants inside the dark grow tent with ventilation to maintain humidity levels. I don't personally have a preference between a slow or fast drying process. This time I will be looking at 3-5 days of hang drying before chopping them into jars for a few weeks of cure using Boveda packs. I'm very pleased with the bud color and smell even though the overall weight will be less than desired I will be growing this strain again immediately. There isn't too much more to add to this week other than the grow is complete and the Dry/Cure process is all that is left. Be sure to look out for the harvest update with the final weight and smoke test!
_______________________________________________________________________
Feel free to leave comments/questions below or give me any feedback to improve my diaries. If you like this Diary follow along and check out my others as well 😎
Likes
9
Share


@DarbGrowDiaries
Follow
This pretty lady filled up the tent beautifuly, she will probably stay under 45 cm until finish so she should be comfortable inside the small VGrow.
She is still looking very healthy and I have to trim a few leafs once every couple of days.
Very excited to see how her buds look like.

Likes
43
Share


@TheCannaProphet
Follow
~ GG4 SHERBET FAST FLOWER by FastBuds ~
Well fam, here we go again with another epic strain from FastBuds Fast Flowering stable. After having such tremendous success growing their Gorilla Cookies Fast Flower outdoors last year, I've decided to run another of their fast flowering strains outdoors this year... GG4 Sherbet Fast Flower!
The best description of this awesome cultivar comes directly from my friends at FastBuds which is as follows:
"Bred from extremely potent and flavorful Gorilla Glue and Orange Sherbet genetics, GG4 Sherbet FF (Fast-Flowering) takes all the best traits to the next level, offering a high-yielding strain that can produce up to 600 g/m2 in a 7-week flowering time. This super resilient Indica-leaning hybrid thrives indoors and outdoors, and in all types of climates while producing mouth-watering sweet, fruity, spicy and earthy terps that translate into a delicious sugary hazelnut aroma. Expect an extremely relaxing and overall happy effect that’ll leave you with a huge smile from ear to ear. It’s the perfect strain for growers of all levels of experience seeking low-maintenance yet highly productive photoperiod varieties that deliver quality and quantity without extra effort.
GG4 Sherbet FF grows chunky buds with long dark orange hairs and spade-shaped calyxes that get encrusted with trichomes by harvest time, giving them a gorgeous silvery-white appearance. This medium-sized photoperiod can reach up to 200 cm in height and yields up to 650 g/m2 while developing that typical hybrid structure. GG4 Sherbet FF grows with a stocky, bushy appearance, developing one sturdy main cola and fat side branches that support huge yields without much effort. This super-fast variety produces distinctive light-green buds with a high bud-to-leaf ratio, making your trimming sessions a breeze. It’s a top-notch resin producer that doesn’t need much maintenance and will thrive in almost every climate, rewarding growers of all levels with extremely flavorful resin that makes for outstanding hash end extracts."
________________________________________________________________________________________________________________________________________________________________________________________________________________________________________________________________________________________________________________________
The Setup:
This is going to be an outdoor grow, but I have started the GG4 Sherbet Fast Flower indoors as our weather is still too cold to put her outside (nighttime temp's dipping regularly into the 30's℉).
The plan is simple... let her grow inside under a 19/5 light schedule until the nighttime temperatures stay above the mid 40's℉, at which point she'll be moved outside and transplanted into the soil which I have already setup and inoculated with beneficial microbes, and then let the fun begin!🤪💚
________________________________________________________________________________________________________________________________________________________________________________________________________________________________________________________________________________________________________________________
Weekly Updates:
8/18- Week 5 of flower's here for the FastBuds GG4 Sherbet Fast Flower and she has transformed into an absolutely gorgeous specimen of this strain, and hopefully it will become a good example of this strains capabilities!
Our weather continues to be cool and dry with nighttime temp's dipping into the upper 50's℉ with daytime highs in the mid to upper 70's℉, and the daylight has dropped to just over 13 hours now.
8/20- I am still watering the GG4 Sherbet FF daily but, with the cooler weather and with the plant at this stage of flower, her water requirements have dropped a bit so I'm only giving approximately 4-5g of well water after the sun goes down to allow it to soak in thoroughly throughout the soil.
8/22- Along with my daily watering, I am also constantly going through the plant and removing any dead or yellowed leaves. I'm also checking over the entire plant including the undersides of leaves looking for early signs of insect infestation or their eggs being laid, as well as looking for signs of deficiencies and as flowering progresses mold and fungus.🤢
8/24- With five weeks of flower behind her now, the FastBuds GG4 Sherbet Fast Flower has passed the halfway point and only has another 2-3 weeks to go! My only hope is that our weather continues to cooperate and at least stay dry to quell any fears of bud rot on her beautiful flowers!
Thank you for checking out my diary, your positive comments and support make it all worthwhile! 💚Growers Love!💚😎🙏
Likes
21
Share


@Smokey89
Follow
Week 2 and the clones are starting to veg nicely. Got some nice roots starting to develop in the nutrient solution so hopefully over the ne t week or so I should see some nice growth. Couple of the older fan leaves that came with the clone were starting to do more damage than good so decided to strip some and I'll do the others over the next few days
Day 10
Uploaded some more pictures of the root system these babies are developing quickly. Next feed/water change is due tomorrow so I'll up the white shark powder to help aid the root growth and I'll also increase the fulvic acid to 2mm per litre of water
Day 11
Added some shogun sumo boost at 1ml per litre and increased the cal mag 3ml per litre and increased the great white rooting powder to one and a half spoonfuls. Ok so now the plants they are looking nice and green the newer leaves have a really healthy smell of chlorophyll the older leaves that came with the clones look a bit worse for ware but are still doing more good than bad so they will stay for now. So I tried some kushman chiropractic techniques to increase strength and nutrient transfer. The first one my stomach was doing flips I was so nervous I thought I might snap the stem completely but all was good the plants dropped a little but have started to recover after only half hour in the tent. I will repeat this process once a week on the new growth
Day 13
Started to use sumo boost foliar spray at 1ml diluted with 1 litre of ph 6.5 water. Cut off some more of the damaged leaves and they are all looking back to good health after the kushman chiropractic treatment
Day 15
Got myself a ppm meter and checked my reservoir as I haven't used one during the grow I was expecting to be around the 450ppm mark but to my surprise it was at a lovely 380ppm. Solution temp is now constant at 22.2c humidity fluctuates between 55%rh and 73%rh
Day 18
so I've added two carbon dioxide bags to the grow room to give these ladies a little extra boost. Nutrients and temps have all stayed the same. Now the plants they are all growing well some better than others but that was to be expected considering I'm using clones that where half dead when I got them. So I stopped the plants and did a little defoliation
Day 20
New spider farmer ts2000 has arrived and what a piece of kit it is currently got it set to 60% will be keeping an eye on them to make sure this is not to intense for my girls. Viper 300 carbon filter kit installed and I'm very happy with the filter and the fan supplied got my intake fan set to about 20% to give a good airflow through the tent all in all very happy with my upgrades. Now the girls as you can see they are getting bigger and have bounced back after the second chiropractic treatment and the topping I did to them. I've moved my two 1000w led lights over to one side of the tent to give the coco experiment a bit more light. Not sure if I mentioned this but my tent I's 8ftx5ftx6ft. Please feel free to give me any feedback. Happy growing guys


Likes
17
Share


@Paflucy
Follow
Heeloo everybody :)
After huge problems on veg, finally we start blooming :) First day after older ladies break into flowering. Right now they are on 12/12 lighting cycle and they just get the final boost of nitrogen.
When the girls were at 10 level I cut them down into 5, 4 and 3 level or 4 and 3 level. I had also erased all the bottom levels. After removing top level I waited 3 days and removed the lower one. The stem had maybe 3 cm but I decided to try and make a clone off it, just as an experiment. I was super suprised when I saw some roots after only 10 days :)
Grow Medium - Biobizz light mix + with acid humus + dolomite + perlit + Great White Shark ( when transplanting)
On the bottom and top Plagron Coco 60 - Peebles 40
Check the lamp, it's something really innovation in my opinion.
https://bilberry.pl/en/home-page/


Likes
12
Share


@Targona
Follow
Strain: Bruce Banner Auto®️
Breeder: Sweet Seeds
Indica: 41.1%
Sativa: 58.7%
Ruderalis: 0.2%
THC: 18-25%
CBD: 0.1%
Indoor yield: 400-500 g/m²
Outdoor yield: 50-150 g/plant
Indoor flowering time: 9 weeks from germination
Height: 50-110 cm
Effects: Happiness, Stimulation, Creativity
Taste: Sweet, Fruity, Earthy, Diesel, Floral
For cultivation I used:
Growing area: 60x60x160
1x circulation fan: 15W
LED lighting: Mars Hydro TS 600 - 100W - vegetation and flowering
Exhaust: fan into the duct - RAMTT100
Odor filter: PRO-ECO HF carbon filter 160-240m3 / h - 100mm - maximum air flow up to 240m3 / h
4x textile flowerpots 11l
Biobizz Light Mix substrate + perlite + coco
Thank you to all the friends who support me in cultivation, who advise me - @Happy_Rakosnicek, thank you to the friends from Grow Diaries for like, advice and support 😍❤️❤️
Many thanks to the Sweet Seeds team, especially Tommy, Jaypp and Apolo for providing sponsor seeds 😍
Thank you for the likes and you can follow me on Twitter 🐦: @ Targona666
Likes
7
Share


@DrewbieDoobieNoobie
Follow
When you don't get what you want you get experience, This was a lack luster grow in that I was really expecting a huge yield with the scrog. but the facts are, it was my first time with this strain and sativa dominate as well, the light died the over feeding in late flower and not letting the plant tell me when it was done and in my opinion chopping to early made the perfect storm 3 LBS. wet they dried for 10 days at 70F and 50% RF and all that water weight went with it,
SI#1 1lbs 4 oz wet
SI#1 56gm buds
50gm larffy trim
SI#2 1lbs 2 oz wet
SI#2 26gm buds
41gm larffy trim
SI#3 1lbs 3oz wet
SI#3
20gm buds 42gm larffy trim
TOTAL 3 lbs 9oz wet
TOTAL 102 gm buds 133gm larffy buds


Likes
2
Share


@Bulbizorus
Follow
Day 38
The plant's are growing well and are very watered. I can start seeing the roots coming out of the 7L pots. I am thinking I about getting bigger ones in 2 -3 weeks.
Other than that, I cropped the top of three of them and I start seeing great results. I can't wait to share the pictures of the evolution.
Next week I will get them more space and start LST,.
Plan ahead:
Week 5-6: continue the vegetation stage. Starting of ventilation and Calmag
week 7: I will replace the pots to 20L
Week 8 start the flowering for 2 months

Likes
69
Share


@nonick123
Follow
Día 44 (15/07) Wow! No hay shock de trasplante! 😍💥😁
Todas las ramas se han estirado hacia arriba tras el ajuste de LST y se están formando nuevos nodos rápidamente
Esta combinación de nutrientes de Lurpe + substrato de PRO-MIX HP es una maravilla 😍
Día 45 (16/07) Ayer tuvimos ola de calor (37 ºC) y han aguantado muy bien!
A última hora de la tarde (cuando ya no había sol directo) les apliqué H2O en spray foliarmente para refrescar los estomas
Hoy parece que vuelven las temperaturas estándar para esta época del año: 29 - 30 ºC en las horas centrales del día
Riego con 1 litro de H20 pH 6,5
Día 46 (17/07) Pequeños ajustes de LST
Hay algunas ramas inferiores que no se han formado / estirado mucho
Lo más probable es que haga una buena limpieza este domingo, 7 días después del trasplante, para dejar solo los brotes por encima del 4º nudo
Día 47 (18/07) Riego con 0,5 litro de H20 pH 6,5
Este domingo (día 50) haré limpieza de partes bajas y tal vez también de nuevo topping en las 4-6 ramas principales 😁
Día 48 (19/07) Día de muchísimo calor con 37 ºC. A ver como lo llevan!
Riego con 0,5 litro de H20 pH 6,5
Día 49 (20/07) Para ayudarles a llevar mejor el calor de las horas centrales del día, coloca una malla de sombreo (70%) sobre el invernadero
Lo cierto es que se nota que baja mucho la temperatura debajo de la malla! Van a estar más fresquitas! 😍
Riego con 0,5 litro de H20 pH 6,5
Día 50 (21/07) Training session!
Hago limpieza del tercio inferior de la planta, de todas las ramas y nudos que no superan la línea del dosel marcada por el 4º nudo (1er topping)
También hago topping (2º) a todas las ramas principales
La idea es tener 12 ó 14 colas principales para que no se hagan muy altas
De paso saco unos cuantos clones de las ramas inferiores eliminadas 😁💥
Para superar el estrés, hago las siguientes aplicaciones y riego:
- Riego con 1 Litro de Té Vegetativo de Lurpe Solutions. Preparación: 24 horas con bomba de aire (oxigenación) con ingredientes:
Green Sunrise 8 ml/L + Insect Frass 16 ml/L + Hummus Lombriz 8 ml/L + Melaza 1 ml/L + Kelp Hidrolizado 0,25 g/L
- Aplicación foliar Kelp hidrolizado de Lurpe Solutions a 0,25 ml/l
💦Nutrients by Lurpe Solutions - www.lurpenaturalsolutions.com
🌱Substrate PRO-MIX HP BACILLUS + MYCORRHIZAE - www.pthorticulture.com/en/products/pro-mix-hp-biostimulant-plus-mycorrhizae
Likes
4
Share

@PurpleBeen
Follow
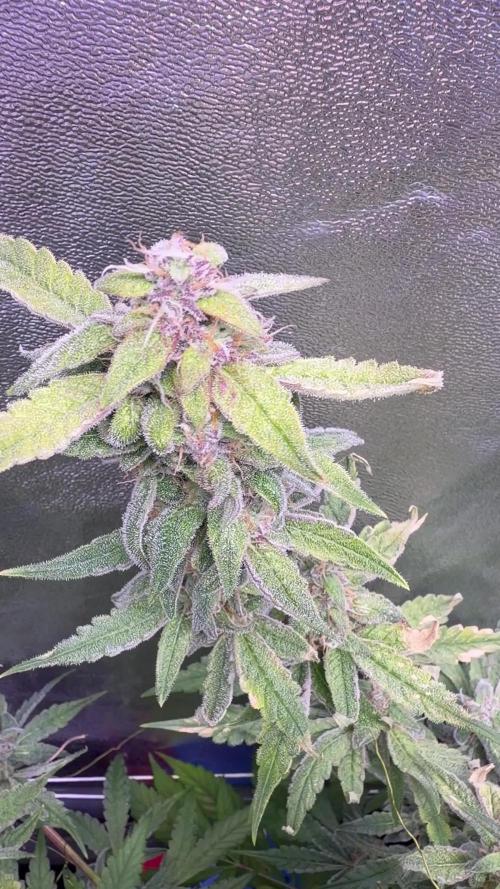
Week 7– flowering stage
Dwc:
ppm= 0-900 / ph: 5,8-6,2
420 hydroponics bloomshort base : no
/ monster pk 52-34 booster : no
/ph perfect powder 20g + Ph up
Soil in top for more information ≈ 1,5-2l per plants last feed !
Left Gmo Cookie / Right Random
Environment:
Light intensity: 85-100%, distance: 55–75 cm
Temperature: 26–28°C🌞/ 23-24°c🌙
Humidity: 45%
The buds are smelling and growing good !! dwc solutions is changed now go ppm down during this week and last week full water ,i cute white burn in top of i wish this will help the flower to grow 🚀❤️

Likes
20
Share


@KallGrower
Follow
30 días para las 16 Frutangie de @barbaseeds
El día 26 se cambió a macetas de 7L
En los próximos días ya nos vamos a flora 😁