
Likes
Comments
Share

@Borberad
Follow
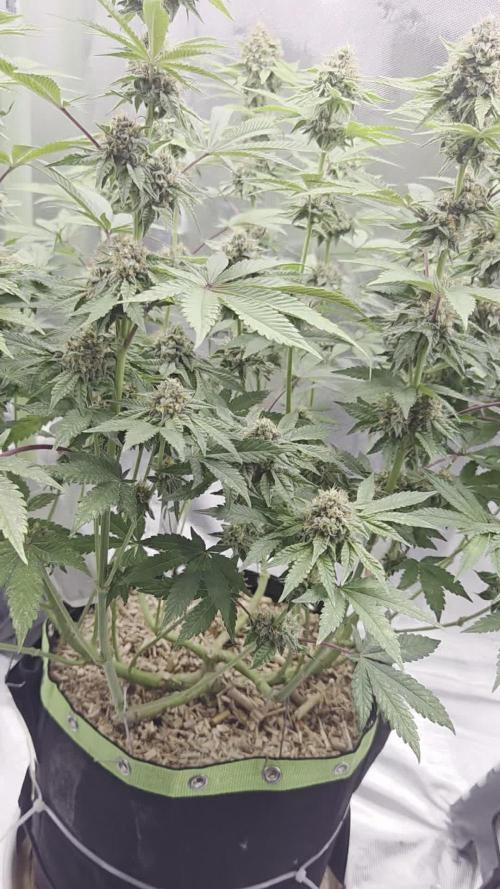
Woche 13
Die Pflanze ist für diese Zeit schon weit entwickelt, es wird voraussichtlich die letzte Woche in der dem Gießwasser noch Nährstoffe zugesetzt werden.
Tag 87 Sie hat noch ordentlich Durst, die Blüten werden dicker und dicker evt. benötigt sie doch noch ein paar Tage länger zusatzlich etwas Dünger.

Likes
42
Share


@Ganjagrandaddy
Follow
Day 14 Flowering: hi all. We have had another very happy week growing with these ladies from Zamnesia. The size and shapes that they are now formed into look so like cabbages with nice thick , green and bushy branching in all of the pots now. Training has been a battle with them pulling the legs overnight and needing re staking further out to keep them flatter. The canopy itself is forming up nice now with the strongest tips being the ones hitting the top now. Once stretch has done, I will be defoliating to feed the lowers that are dying to get involved with the thick supporting secondary branches everywhere.
All 3 of the Amnesia haze are thick leaved, monster fanned and chunky stemmed beasts. I am glad I trained them lower as the growth could have easily become a concern in heights for sure. The huge cabbages that have been created now are perfect for a strip out soon to get light to the stems as much as possible
#1 Amnesia haze f.i.m girl is by far the thickest Bush. She does have a really nice crown on her too with some serious side growth fighting out of the shadows and creating their own mini plants it seems. It will be good to get to what is her actual contenders as she is so thick with growth , it is hard to tell how many mains will be joining the fun.
#2 Is also a great size to work with and will produce some nice yield
#3 is a similar size to #1 and has been easy to work with too they have been lifting the pegs easily as they grow each day now so I will be using wire soon to secure them for the final push.
Both of the Girl scouts cookies are very productive with growing tips. #1 is a slightly different pheno i think and has a slight darker green to her too. Growing in a nice thicket so far but has been pegged along the way too. Her sister #2 is totally different in her structure with an absolute flurry of bud sites dude to the training out of her throughout. She is like a mini manifold of sorts with all that usual popcorn rubbish being able to share more light. I dont expect huge colas with this and from her general limb thickness but i think she will be filled with decent medium sized nugs. They do both need a defol soon to really give all the nodes a chance go shine. I am planning to do some this week and the last bits at around 21 f. All told they are really looking like a great yield already so with a little more training before I let them get on with it , could be the best run yet !!
UPDATE######
Day 15 and i did a defol today. This will allow all those growing tips to find the light. Next few days will be interesting as they recover and get busy.

Likes
16
Share


@Kmikaz420
Follow
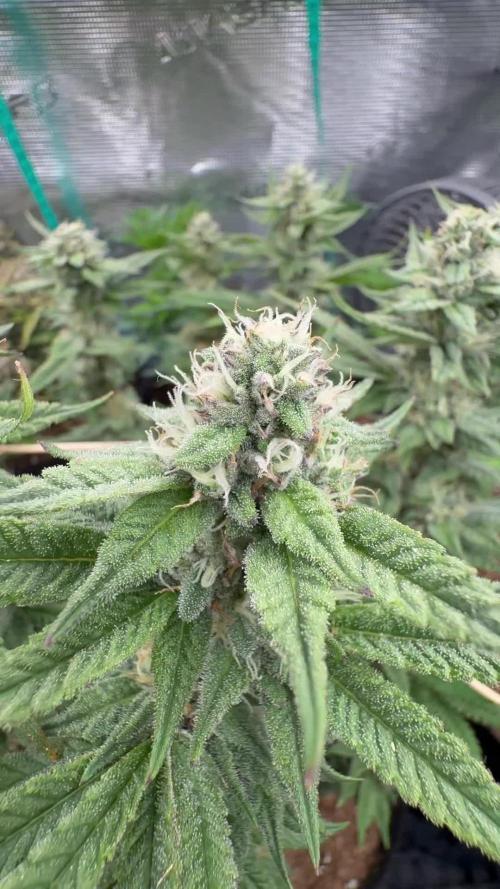
Alors la on tien quelque chose de juste magnifique !!! Fast bud à réussi à faire une plante rapide qui fait des bourgeons à faire pâlir les photoperiodique !!! Et ils ont en plus réussi à faire en sorte que y a presque aucun entretien (très peu de feuille ,branche solide ) et avec une production de trichome une dinguerie!!!
La dame termine sont flusch et je repasse terminer le journal

Likes
54
Share


@Mr_Horse
Follow
Grow was strong. Had some concerns regarding the autos and thier timing as far as switching into flower and not being 100% in sync with one another. It's just the nature of the genetics sometimes. Very happy with my seed supplier North Atlantic Seed Co, and equally happy with my Fastbuds seeds. Thanks for stopping in. Stay tuned for more harvest and weight info. Stay Frosty Friends!


Likes
15
Share


@BushDoctor740
Follow
Day 28 I’ve been training the girls branches this week and they are filling out nicely.Watered with recharge and ph 6.5 they still are not drinking heavy but watering when pots are dry.I increased the light intensity to 50 percent power and they are taking it well.Ive noticed signs of flower development so i will top dress with 50/50 Gaia green power bloom/gaia green 4,4,4 and water with recharge.
Likes
165
Share


@SlowpokeFuegobud
Follow
🐟 🐠 🐙 🐡 🐟 🐠 🐙 🐡 🐟 🐠 🐙 🐡 🐟 🐠 🐙 🐡
Welcome to week 9, dear fish lovers! 💙
The fish is doing great for her age, haha! 🐟
I can't water as often as needed, and I start getting a bit worn out. We are going to chop the little sweetheart soon! 🙏 I had such a great time! 😍
You can see all kinds of problems on the leaves, but the buds swell and smell. 🍪 🍍 🍎 🍊
I will flush and get some nice weed out of this grow! Woohooo!!! 🎉
Thanks, growmies, for checking in! 💚 💚 💚 😘
Always remember, we are not our thoughts, nor are we our emotions, or experiences, we are limitless, immortal and divine souls making a 3D experience. 🙏 ❇️
____________________________________________________________________
Strain info:
Tropicana Cookies Auto is the perfect variety for growers of all levels, especially beginners as this strain performs very well outdoors and indoors, and can produce up to 500gr/m2 in 56-63 days without needing extra maintenance. Reaching up to 110cm, this strain grows fairly tall with medium-sized branching, showing its mixed heritage. Definitely the right choice for those with a high tolerance looking to get their hands on the strongest autoflowers out there. Thanks to the 27% THC, you can expect an extremely powerful and long-lasting high that’ll boost your mood and give you that extra push you need to start your days on the right foot. This variety offers the whole range of citrusy and woody flavors with a strong candy-sweet background that will keep you coming back for more and more.
Bud description
Tropicana Cookies Auto produces gorgeous dark purple flowers, so expect really dark buds with gorgeous hues of pink, purple and blue, and thick dark-orange hairs that get completely covered in resin by harvest time, giving them an almost shiny-white appearance.
This variety develops a typical Indica-like structure and very few sugar leaves that will make your trimming sessions a breeze. But make sure to store your trimmings as the gorgeous flowers reek of a mouth-watering blend of lemon peels, orange juice, and sandalwood that gives it almost a citrus candy-like flavor that makes for the most aromatic hash and extractions.
Smoke report
Thanks to the 27% THC, Tropicana Cookies Auto’s effect starts with an energizing head rush that gets your mind up and running while leaving you in a nice calm state. As the Indica-dominant side kicks in, the powerful cerebral effect gradually moves downwards and hits your whole body with a deep relaxation that leaves you with a joyful stoney sensation that alleviates chronic pain while leaving you in an overall happy and positive state of mind.
It’s the perfect daytime and nighttime strain as it can boost your mood and enhance a night out with friends but can also quiet your mind as you get ready for a good night of sleep. No matter the scenario, expect a powerful high that lasts for hours on end.
Plant appearance
Tropicana Cookies Auto reaches up to 110cm and develops a tall main cola with shorter side branches, typical of hybrid strains. You can expect a stocky yet tall main cola with medium-sized side branches and thin fan leaves that fade into a yellowish hue with a beautiful dark purple tint. Thanks to the excellent selection, this variety develops a short internodal spacing that makes the medium-sized flowers look like they’re growing stacked on top of each other. It’s the ideal choice for growers who want to get big yields without having to deal with huge plants, as this monster yielder can produce up to 150g per plant while growing relatively short.
Grow tips
This variety grows super dense buds so make sure to space out the branches by tying them down, this way you improve airflow which helps prevent mold and other pests. Tropicana Cookies auto reek of a delicious sweet and sour smell so make sure to flush thoroughly to enhance the aromas even more. This terpene heavyweight finishes with lots of resinous sugar leaves that make for fantastic hash and extractions so remember to have your trim bucket ready!
Flavor
Tropicana Cookies Auto boasts remarkably sweet flavors that resemble a blend of lemon peels and fresh orange juice, with subtle floral undertones that make it the perfect choice for extractors looking for unique terpene profiles.
Expect an overall citrusy zest that’ll coat your whole mouth and leave a delicious tropical candy-like flavor aftertaste. The sweet and sour flavors get balanced out with a herbal background that gets stronger as you exhale and gradually opens up, bringing out the whole range of woody, floral, and spicy flavors, making it the perfect choice for the most flavorful extracts.
https://2fast4buds.com/seeds/tropicana-cookies-auto
_________________________________________________________________________________
SETUP:
80x80x180 cm Zelsius
240W Full Spectrum LED IR UV dimmable
DW240H-A6-HS
Heatsink color red
LED Chips:
512pcs SAMSUNG LM301H + 24pcs Osram 660nm + 8pcs Osram IR 730nm + 8pcs UV 385nm
Color mix: 2700K + 4000K
2,8umol/J
Driver HLG-240H-C2100B
Coverage: veg 5x3ft / flower 4x2ft
Product size: 628x205x68mm
Green Buzz Nutrients
Shouts go out to my sponsors @GreenBuzzNutrients, thanks so much for your support! ❤️
If anyone would like to try their amazing organic products, use code GD42025 for generous 25% discount (for orders of minimum 75€) ✨
https://greenbuzznutrients.com/
Mills Nutrients
Biobizz Lightmix
custom exhaust fan 320/270cm³/h
Carbon Active Granulate 240cm³/h
tab water pH 8 - EC 0,25 with Calmag to 0,5
Advanced Hydroponics pH minus Grow + Bloom to pH 6.2
🐟 🐠 🐙 🐡 🐟 🐠 🐙 🐡 🐟 🐠 🐙 🐡 🐟 🐠 🐙 🐡
Likes
91
Share


@Greenwolvesfarmer
Follow
Me encantó la cepa y su facilidad de cultivo ! Aun que tuve muchos problemas ambientales y climáticos . Me atrasé unas 3 a 5 semanas con estas nenas , pero nos recuperamos bien ! Usamos malla scrog chilena #kanovicultivo , lo mejor que he usado en malla scrog , no se le comparan , su espacio preciso! .
Las 4 comenzaron en pequeños vasos , luego de 1 a 2 semanas , trasplanté a macetero de 5.8lts , finalizaron 3 en maceteros textil 19lts y 1 en macetero de 20lts AirPot !
Comencé a brindarle 20hrs de luz / 4 hrs oscuridad , a la 3era semana 19hrs de luz y a la 5ta semana bajé hasta el 18 / 6 .
Usé un panel QB de 480w regulables , chips marca Samsung de 3500k , chips epistar UV 660nm iR , el mix completo gracias a mi bro MKleds chile ! Se pasó ! De todas maneras recomiendo una potencia mínima de 600w ( QB LED ) para espacio de 120x ..
Usé un bio estimulante chileno , que a mi parecer fue uno de los mejores que he visto y usado ! El grande #trichomemania , te cuento que este producto activa un mecanismo de defensa en la planta (SAR) , haciendo que reaccione y se trate de defender con mayor producción de resina , terpenos y tricomas ! Es increíble ! A los 24hrs tienes resultados , un saludo grande a los hermanos ! El mejor producto 10000000%....
Grande eva seed , buenisima esta cepa , me dí cuenta que si se deja madurar un poco más , su sabor es más frutal candy , exquisita cepa !....
Estamos probando con un papel de blunt organico 100% libre de tabaco marca *jamaican buzz*...al fumarla su efecto es notorio , enseguida viene el efecto psicoactivo y cerebral , se viene a la vista un tanto distorsionado el entorno ...la vision un poco más brillante , y a la vez relajado ..
Hoy 18 de agosto estamos probando con un papel de celulosa organico marca lion rolling circus ( foto al final del album ) , quema bastante bien , al parecer ya está casi en su totalidad secado , combustión lenta , buen sabor afrutado citrico con toques candy diesel ...uuff efecto despues de 3 quemadas ya por los cielos , totalmente cerebral y estimulante , un gusto charlar con amigos !
Al manipular su fruto , la planta expele un olor afrutado con limon maduro y skunk , con finales de candy terra , una delicia , muy buena cepa , ahora mientras escribo me siento un tanto "mareado" con esa mitad de blunt ! Buenisinaaa!...
____
La verdad cuando comencé a cortar cada planta era como llenar "infinitamente" el armario donde dejaría secandola , se llenó casi la mitad y un poco más sólo con 1 planta cortada ! Increíble producción , yo estimo unos 90g por planta aprox , ya he consumido un buen peso además ...veremos en estos días que esté por completo su secado ! Esta riquísima , sus efectos fuertísimos ...100% ...
___
Una cosecha buenísima, muy parecido como obtengo resultados en comparación con el sodio , todo bien me gustó la experiencia !....
Además tuve la oportunidad de hacer extracción en seco de su materia vegetal . Obtuvimos entre un 18 a 20% de retorno ! Para mi primera vez , geniaaaal ! Su utilizó prensa de 12 toneladas , de apretó a 80°C por 4 minutos .
.
.
Usen lemon king ! Una delicia .

Likes
15
Share


@I_Identify_As_A_Dan
Follow
Week 23 for Peyote Zkittlez by seedsman,
Not too much to report shes drinking a hell of a lot of water.. I do think she would have been in a bigger pot at this point you aren't even able to scratch the soil surface because its just roots.. 😂
So im hoping that doesn't effect her too badly can already tell that shes a little light on the nitrogen... May feed some FPJ to boost that up a little otherwise she may fade too early.

Likes
2
Share

@hassehujasse
Follow
Transformation de la chica a la mujer. Disfruta lo conmigo
Strong begining of the week, looking forward to give her all my love


Likes
12
Share


@artems
Follow
Thats a new experience for me. To grow and share the result. Im really like it. It's helpful, inspiring and have a great community! Thank for support, keep in touch for new grows!

Likes
5
Share

@AestheticGenetix
Follow
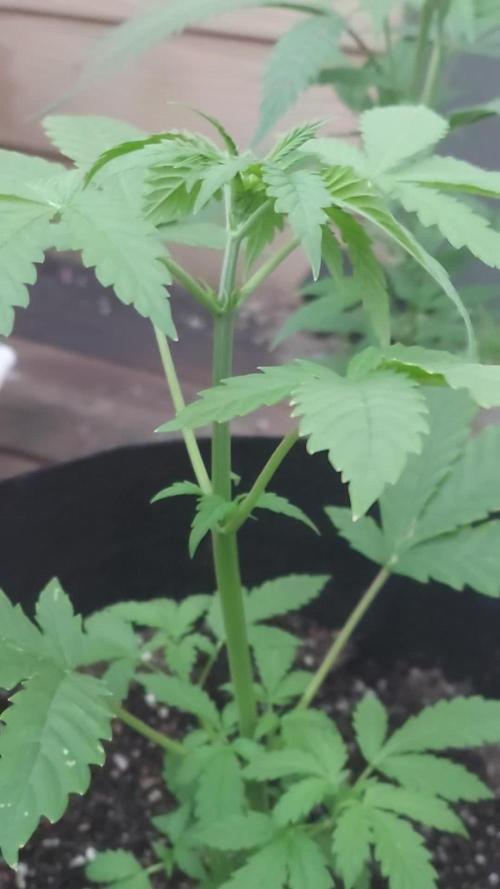
7/5/25 plant is stretching. Not sure if its preflowering or just being outside in a bigger pot. Im just going to let her grow naturally and see how it turns out. I may end up with just one diary of each strain at the moment. But im also not sure whether im going to be doing indoor or outdoor based on personal circumstances.

Likes
9
Share


@MaxMo8
Follow
Hello friends, this week is interesting, busy and even enthusiastic. I put compost tea for all of them, wish you happy days🤗

Likes
15
Share


@Mcdiggley420
Follow
Girlscout is doing great looks and smells perfect I reckon I can get another few days in before flush updates of others will be up later


Likes
10
Share


@Cronic
Follow
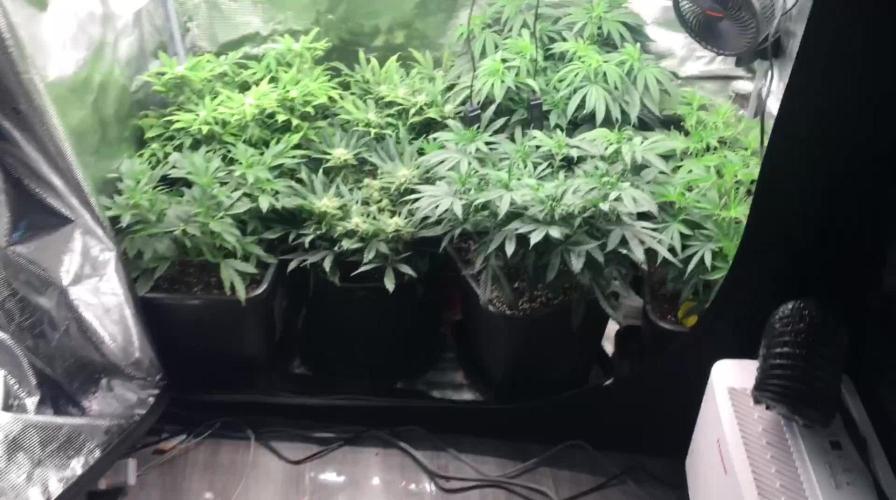
Week 6
I'll start first with the Purple Lemonades. PL2 unfortunately is a lost cause; she's just wasting time and resources. Time to go, RIP PL2 🙏 PL1 is super stunted but seems to be fattening up nicely. The nodes are so tightly packed together she may turn into one big nug however, that makes tasks like defoliation difficult to perform. I so badly what to see this girl through she looks amazing but that's nothing compared to her smell which is INCREDIBLE!! At distance there's chocolaty notes but up close, she smells like Skittles with more of a tang, i've never smelled anything like it. To say i'm really looking forward to smoking it is an understatment.
The Pineapple's are continuing to develope very well. They both have slowed growing in height and are now busy packing on those buds. They're both nuggin up nicely. Water intake has now gone upto 3 Ltrs for the pineapples which seems to last them a few days.
There has been a few unseasonal days of 30° + this week so i've had to offer a little respite from the high UV. Going into week 6 I just need to keep on controlling those pests. Miguel seems to have moved on so i'll need to keep an extra eye out. I'm also hoping for a flowering stretch in the lemonade to give those buds a bit of breathing space.
Likes
105
Share


@Natrona
Follow
Frostbanger Plants 1-6
Week 9 May 18– 24
FLOWER 5
Nutrients : 3 gal
GH Micro 20 ml
GH Gro 10 ml
GH Bloom 30ml
CalMag 15 ml
Recharge 10ml
Green sensation 15ml
Power buds 7.5 ml
5/18 PH 6.67, PPM 935, temp 68.5 1 ltr each
5/20 PH 6.67, PPM 1330, temp 68.5 2ltr each
5/23 PH 6.6, PPM 1570, temp 68.5 2ltr each
5/24 pics & vid
Since all 6 gals are getting frosty, I did some trichome pics. The statistics on Frostbanger indicate 50-day flower. Pics show mostly clear and milky.
There are a few with amber trichs and many orange pistils indicating maturation. At least 3 more weeks for maturity on these gals.
I continue manual control of the environment and using 3 circulating fans and the 4” exhaust vent from my 3x3.
I have the AC pushing air in and the exhaust pulling air out. This creates a neutral pressure tent environment-neither positive nor negative.
It looks like growth has stopped and plant height has been reached. Now is the time for buds to fatten and frost up. All 6 of them are short remaining less than 3 ft. They range from 15 to 31 inches. #4, 5 &6 are showing some fade, particularly #4.
Upon opening the tent, a melon smell comes off the buds if I get close, and more stickiness was observed during the process of defoliation. They are living up to the new strain’s name. #5 is the frostiest followed by #2. Wow week 3 of flower and that much frost already. Before FastBuds announced the strain name and characteristics, I was disappointed that FBA2502 could be an indica sleepy strain but the universe provides what you need at the time. The new strain profile indicates a whopping 29%THC with mainly sativa uplifting, euphoric, social effects with sweet fruity flavors which I love and enjoy. In addition, I recently bought a dap press and this strain is frosty and resinous. She will be great to press for live rosin.
FBA2502 is FROSTBANGER. Meet Frostbanger Auto, an autoflowering and Indica-leaning hybrid packing a staggeringly high THC content averaging 29%, making this one of the most potent strains on the market. It was created by Fast Buds through crossbreeding Gorilla Glue and Chemdawg, two equally iconic strains. Growers must know that these difficult-to-grow plants will pose specific challenges in terms of environmental control and nutrition, making them best suited for cultivators with some experience under their belt. The flowering cycle is short, averaging only 50 days, and yields are usually around 300g/m². The Frostbanger Auto flavor and aroma are both mouthwatering with a delightful combination of sweet, fruity, and flowery notes. The high is mainly Sativa-driven with uplifting and happiness-inducing effects that lead to euphoria and a general sense of well-being. You might feel sociable and talkative, but too spacey to say something. Following this surge of energy comes a deepening sense of relaxation, leaving you sedated and completely at ease with the world. Due to its potency and these long-lasting effects, medical patients hail Frostbanger Auto for treating chronic pain, stress, and even depression.
Measurements:
#1 15”
#2 20”
#3 17”
#4 30”
#5 31”
#6 24”
P.S I added a no churn ice cream recipe in week 4 of Natronas recipes. It is easy 3 ingredients. I bought Mango puree instead of fresh and reduced that to reduce water content. Try it. 😋
Your likes and comments are appreciated. Thanks for stopping by.
Growers love 💚🌿
💫Natrona💫
Likes
62
Share


@Tubington9
Follow
Overall I’m happy with how the Blue Dream from Crop Kings came out, despite losing one plant to some odd characteristics likely brought on by being a new grower, but upon receiving input from others, the genetics of that particular plant may have been a little off. I picked a small bud 1 week prior to harvest, and let it dry for 5 days, the wife and I smoked it while camping and thoroughly enjoyed the high it produced.
Obviously the on the scale weight is way off at 1338 G, lots of moisture and tons of stem weight. Will update with a total next week when drying is complete.
After drying for a week I have now jarred and weighed the final result, and the final tally is 140.77 g or 4.969oz.
A very energetic and long lasting high.

Likes
50
Share


@SuggaShane
Follow
Taking it day by day. I think the power going out for the few days it did messed with her. Bucket is getting smelly and looks like the roots are getting root rot... but hopefully I can combat it. Maybe need to get a bigger airstone.. hopefully the one I ordered from Amazon actually shows up.. Ac Infinity tent and in-line fan will be in today! 😬Thanks for stopping by. 🙏🏼🙏🏼