


Likes
Comments
Share


Likes
Comments
Share

@Growitworldwide
Follow
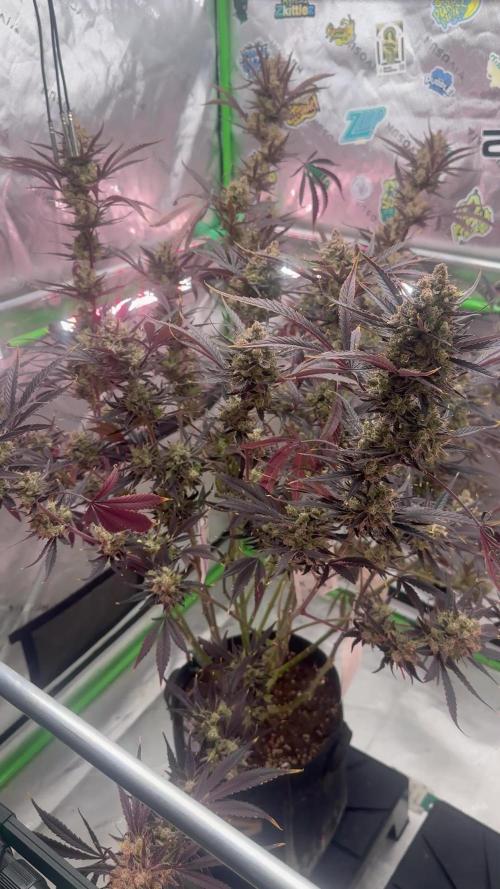
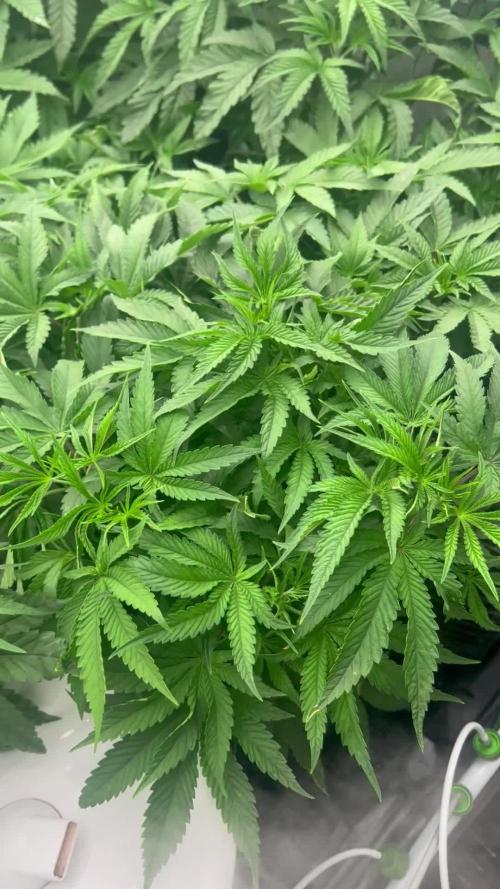
They are huge. I think I will start doing defoliation 2 times per week.
PH 5,5 - 5,7
EC 2,50 - 2,75
See you next week guys!

Likes
55
Share


@Amaya
Follow
Оборвала веерные листья основного стебля чтобы дать больше воздухопроницаемости.
Текущий NPK профиль такой:
N90:P67:K149:Ca37,5:Mg45
Перевожу на цветение через пару дней.

Likes
4
Share


@CentralCoastGenetic
Follow
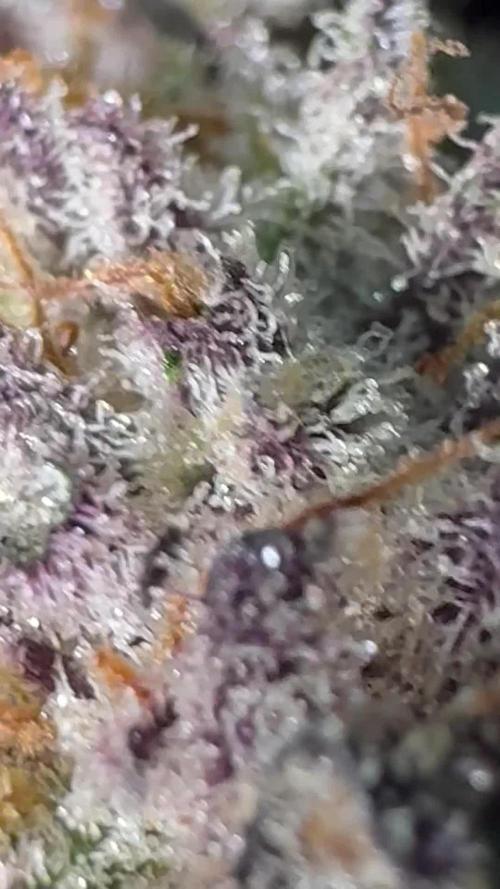
Unfortunately all of them turned out to be males was going to keep one to breed but not that kind of party lol looking for that female so we could show how her potential. Definitely a stinker from the Kush , turns purple just wish I had a fem lol probably need to look into the FEM process… I planted two more so let’s see was up




Likes
30
Share

@All_our_small_plants
Follow
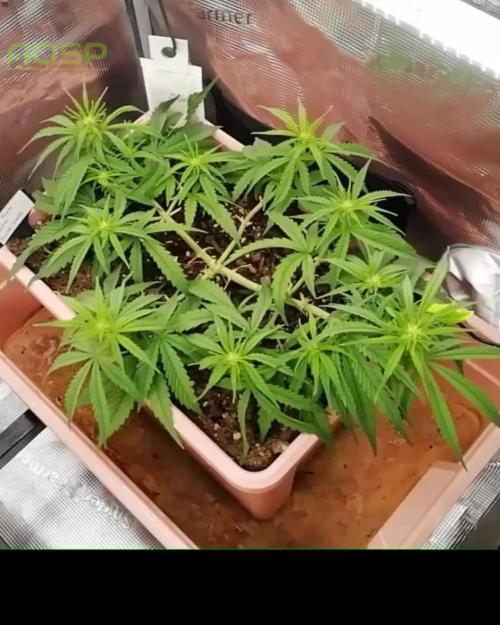
Bewässerung: 2000 ml jeden 2 Tag in der achten Woche
pH-Wert: 6,3
EC-Wert: 1,9 mS/cm
Temperatur: 30ºC
Luftfeuchtigkeit: 55%
Schädlingsbekämpfung: im Moment haben wir keine Anzeichen das es was zu bekämpfen gibt, sobald die ersten Anzeichen da sind werden wir handeln :), aber zur Sicherheit haben wir wieder ein paar Raubmilben an die Pflanzen gehenkt.
PPFD: 600 µmol/m²/s
DLI: 38 mol/m²/Tag
Düngemittel: Sie bekommt CalMag von BioBizz zu Prävention. Ab Tag 44 haben wir angefangen sie mit einem Mineralischen NPK Dünger (NPK 3,5-6-6) zu Gießen, Plagron wurde auch hinzugefügt.
Besonderheiten:
-Tag 44 heute wurde sie gegossen und wir haben den Dünger angepasst
-Tag 46 sie war beim Friseur 😛
-Tag 48 die Blumen werden langsam dicker 😍

Likes
16
Share


@Ashbash
Follow
Holy. Shit. This is most likely gonna be my best plant up to this point
Smell is unreal and hard to describe. Sweet and earthy but still different somehow. I think judging by the trichomes that it is largely ready to be pulled, so im going to do that over the next day or two.
If anybody recommends I leave it please do say haha.

Likes
4
Share


@pzwags420
Follow
On day 1 I changed out my reservoir. I lowered my nutes to 650 ppm(25% reduction). I adjusted the PH down to 6.1. My left plant has some burnt tips from either PH shift or over fertilization. My hope is that the lower ppm will help to resolve the issue before it spreads.
On day 2 I adjusted the reservoirs PH from 6.3 to 5.9.
On day 3 the reservoirs PH is 6.0. I installed my new 200 watt HLG Rspec. I adjusted PPFD readings to 700-1300 PPFD on all tops.
On day 4 I adjusted the reservoirs PH from 5.8 to 6.2.
On day 5 I adjusted the reservoirs PH from 6.4 to 6.0. I diluted my nutrients in my reservoir by removing one gallon of nutrients from the rez and and adding 2 gallons of straight tap water to the rez. This brought the nute concentration from 770 ppm to 540 ppm as the plants will be entering the ripening stage in a few days and they have too much nitrogen judging by the extremely dark green leaves and burnt leaf tips on some branches of the left side plant. The buds seem slightly smaller then my last run which may be due to an excess of nitrogen and maybe not enough light as some of my tops are taller then the others making proper PPFD challenging. All in all the girls are coming along nice and I look forward to the final weeks of flowering 😀
On day 6 I adjusted the reservoirs PH from 5.9 to 6.2. I think I have halted the nute burn as I haven't seen it progressing any more on the leaves. I will continue to monitor closely during these final weeks. The trichome production is increasing with some trichs on top of colas starting to go cloudy. The pistils are turning brown with roughly 40-50% are turning brown all signs I'm getting closer to the harvest window 😆. I dimmed my light to give 600-1000 PPFD to tops.
On day 7 I reduced my temps to 75 during the day and 68 at night. I adjusted the PH of the reservoir from 6.6 to 6.1. My reservoirs ppm was too high so I diluted the rez with 2 gal of tap water. This brought it down to 480ppm. The average ppfd to all 14 tops is 604 with no top receiving more than 1000 ppfd
Likes
15
Share


@Fan2Grow
Follow
I really glad to see difference between phenotype, everything going so well, thx 4 U support , and happy grow everyone . 🤩🤩
Likes
119
Share


@DogDoctorOfficial
Follow
Salutations, fellow cultivators and botanical enthusiasts! Welcome to the First Week of Flowering Report for our beloved Jealousy in the Power Buds competition. The journey thus far has been nothing short of spectacular, and now, as we transition into the flowering phase, the excitement is reaching new heights.
To kick off this week, I decided to don my horticultural surgeon's hat and perform a series of strategic maneuvers on our green queen. The week began with a daring move – a couple of toppings to encourage a more bushy and compact growth structure. It's like giving Jealousy a little green haircut, shaping her into a voluptuous, floral masterpiece.
But that's not all, my friends! A defoliation extravaganza ensued, where I carefully removed some of the larger fan leaves. Now, I can almost hear you asking, "Why on earth would you do that?" Well, it's all about optimizing light penetration and airflow, ensuring that each bud site receives its fair share of sunshine and fresh air. It's like orchestrating a botanical ballet, where every dancer gets their moment in the spotlight.
Now, brace yourselves for the grand finale – taking some cuts. I know, I know, typically, we'd ease into these practices, but time is of the essence, and I wanted to put Jealousy's genetics to the ultimate test. The cuts were taken with the precision of a master sculptor, each one destined to become a clone, a green offspring preserving the essence of our marvelous Jealousy.
And let's not forget the star of this green show – Jealousy herself. She's embracing these changes with open leaves, responding to the toppings and defoliation like a botanical maestro. It's like watching a symphony unfold, where each note played by nature results in a crescendo of growth and vitality.
As we navigate this first week of flowering, let's tip our virtual hats to Zamnesia and Plagron for paving the way for this thrilling Power Buds adventure. Their contributions are the backbone of our horticultural success.
A round of applause to the Grow Diaries community – your shared wisdom and green camaraderie elevate our collective knowledge.
To my fellow contestants and growers, may your flowering phase be abundant with resinous wonders, and may the fragrance of success linger in your grow rooms. Here's to a week of strategic moves, green transformations, and the anticipation of a blooming spectacle. Stay green, stay inspired, and keep cultivating those dreams!
As always, thank you all for stopping by, for the love and for it all. This journey of mine would just not be the same without you guys. The love and support are very much appreciated, and I feel honored and blessed with you all in my life !!!
With true love comes happiness. Always believe in yourself and always do things expecting nothing in return, with an open heart. Be a giver, and the universe will respond in ways you can’t even dream of .
Friendly reminder: all you see here is pure research and for educational purposes only.
Genetics - Jelousy @Zamnesia
Nutrients @Plagron
Light - @viparspectra P2000
Room size - 3x3 - 0,9x0,9

Likes
37
Share


@420DeepGrow
Follow
La segunda semana fue bien, a las plantas que estiraban más les causé Low Stress para mantener una altura igualada.
De las 3 variedades que tengo, es la que antes ha mostrado las preflores.
Un error vuelvo a repetir ha sido no tener medidor de EC-PH y otro ha sido el haberme excedido con los s riegos.
Conecto pronto el CO2 a 630ppm par ver si así logro obtener un buen estiramiento esta semana.
📅 Día 15: 🔹 Cambio de lugar al haber quitado algún macho de otra variedad.
📅 Día 16: 🔹 Riego según la tabla de nutrientes. Conecto CO2 a 700ppm.
📅 Día 17 : 🔹 Low Stress para que dé más luz a las ramas bajas y tengan más espacio para desarrollar. No quito hojas ya que creo que les quitas los paneles que las alimenta. El riego de ayer las sentó muy bien y están bebiendo el agua rápido por fin.
📅 Día 18:🔹 Descanso, puntualizar que he activado el CO2 a 730ppm y decir que se han bebido todo el agua, mañana toca riego.
📅 Día 19: 🔹Riego según la tabla de nutrientes. La EC me dio 2000 y el pH 6.3

Likes
10
Share


@BruWeed
Follow
Esta planta fue facil de cultivar, no tuve ningun problema con ella. Se encuentra muy resinosa, es la primera vez que tengo unos resultados muy buenos. En humedo pesa 195g, ahora estan en etapa de secado, en unos dias subire mas imagenes de como viene.
Podes seguirme en Instagram como @bruweed_arg

Likes
5
Share


@Ensign420
Follow
Greetings fellow growers 🖖 and welcome to my first grow ever. This adventure actually started several months ago when I decided to stop buying flower from dispensaries and just grow my own bud. How hard can it be!?
This is actually my second seed of this strain. The first bean sadly died due to over watering (sorry girl, RIP). I was literally watering the cube to the point where water was dripping from the bottom, then heavily sprayed the humidity dome and tray with the vents completely closed. Everyday. Multiple times. I never let the dome or try dry out. So after about 8 days of not sprouting, there was a funky smell of rot. So that was that.
Later I learned that rockwool retains a lot of water and can easily drown seeds. So a wet/dry cycle is best for rockwool germination.
So even after hours of researching and digging through forums and tutorial videos, I was still under prepared for this journey. Did not consider how delicate the germination phase is. Oh well. Lesson learned. Reset and try again!
I hope everyone is safe and stoned during this corona crisis. Just like everyone else in the world, I want this pandemic to be over with. But in the meantime, let's grow some weed! 🖖
[START OF WEEK 01]
Day 01 - Monday - 08/03/20 - Total Days: 001
-----------------------------------
- [0830]: Light Schedule: 24Hrs/0
--- Soaked cube in 5.5 PH water for 10 min. Did not shake water out.
--- NO NUTES! Only PH'd down to control the PH levels.
--- Did not use the default hole (way too deep).
--- Flipped cube upside down and made a shallow hole for the seed (less than 0.25" deep).
--- Placed seed in and pinched hole close. No additional water added.
--- Sprayed the tray and dome with straight water (5.5 PH).
--- Vents are cracked opened a for ventilation (about 1/4 opened each).
--- Distance between the light and tray was 53"
--- AC was set to 80 °F
--- Exhaust fan was set to 86 °F
--- Room average temp was at 85 °F
--- Dome humidity was at 85-99% when sprayed.
--- Allowing to completely dry before respraying.
- [2200]: Dome and tray were completely dry! Sprayed only tray and dome with more water.
Day 02 - Tuesday - 08/04/20 - Total Days: 002
-----------------------------------
- [0845]: Sprayed dome and tray in the morning. Everything was dry.
--- Hoping for the best!
- [2130]: Everything was dry again, so sprayed dome and tray at night along with a light spray on the cube.
Day 03 - Wednesday - 08/05/20 - Total Days: 003
-----------------------------------
- [0830]: Everything was dry again. Resprayed dome and tray. Slightly sprayed cube.
- [2125]: Hooo damn!! She popped! Am little stub is visible! Resprayed dome and tray again.
--- Still going 24/0 for lights.
- [+0033]: Just checked up on her and I swear she grew a bit taller! Getting excited!
Day 04 - Thursday - 08/06/20 - Total Days: 004
-----------------------------------
- [0845]: Wow! Went from a little stub to fully sprouted overnight! Everything was pretty dry again so resprayed dome and tray.
- [2200]: Tap root is visible! Over 1" long too! Just resprayed dome and tray again.
-- Going to prep for hydroton transplant tomorrow!
Day 05 - Friday - 08/07/20 - Total Days: 005
-----------------------------------
- [0930]: She keeps growing!
-- Added a bit of CalMag to the spray bottle (8 drops to 650ml of distilled water). Resprayed dome and tray. Water was at a 5.4 PH with 141 PPM.
- [1045]: Prepped the bubble bucket with 4.5gal of water. Water is high enough to reach about 0.25" above the bottom of the net pot.
--- Added 3 drops of Superthrive
--- Added 3.5ml of CaliMagic
--- Added 2ml Hydroguard
--- Then PH'd down to 5.6
--- Solution Strengh: 120 PPM
--- Water chiller is set to 20 °C
- [1100]: Transplant time!
--- Filled the net basket 1/3 with hydroton. When placed in the bucket, air bubbles are not visible, but are slightly below the surface (slight digging will reveal the water/bubbles below).
--- Removed plastic on rockwool cube and placed in basket, then filled around and covered with hydroton. Making sure to block any light from passing through the net pot and into the nutrient solution.
--- Covered with a half-bottle dome sprayed with the CalMag water from earlier.
--- Hoping for the best!
- [1300]: Raised Bucket 5" higher. Now light distance is 48" to top of bucket.
- [1820]: Lowered tent exhaust temp to 76 °F
--- Lowered AC to 75 °F
--- Raised bucket even higher so light distance is 30" to top of bucket.
- [2300]: Looking good!
--- Sprayed dome and surrounding hydroton with more CalMag water.
--- Attached timer to light! So new 18 Hrs On/6 Hrs Off light schedule.
--- Lights On: [1600] (4pm)
--- Lights Off: [+1000] (10am the next day)
--- Decided to go with lights on during the evening/night and off during the later mornings/afternoon (the hottest part of the day) to see if temps can be controlled better.
--- Please survive girl!
Day 06 - Saturday - 08/08/20 - Total Days: 006
-----------------------------------
- [0800]: Everything was dry. Resprayed hydroton and dome.
- [2000]: Here first night cycle seemed to go well! Get'n taller!
--- Dry again. Removed the dome.
--- PH went up to 6.5 so PH'd down to 5.7
--- Ran the top feed drip ring for a bout a minute to wet the hydroton and rockwool with the nutient solution.
---Too scared to leave the top feed on 24hrs (I don't want over water her and cause dampening-off). Will let dry before re-watering.
- [2100]: After closer inspection, I think she's looking a bit yellow.
--- Decided to add a bit of grow nutes to the bubbler solution.
--- Added 2ml of Sensi Grow A
--- Added 2ml of Sensi Grow B
--- Solution strength after adding more nutes: 176 PPM
--- PH went up to 6
--- I hope that the extra chelating properties of the 'PH Perfect' solution is enough of a buffer for proper nutrient uptake.
Day 07 - Sunday - 08/09/20 - Total Days: 007
-----------------------------------
- [0800]: Water dropped a bit (mostly due to evaporation) so solution strength was at 190.
--- Checked PH again. Was still at 6, so PH'd down to 5.4
--- Ran the top feed for a minute to wet the hydroton a bit.
- [0915]: Since she's looking perky but still a bit yellow. So decided to up the nutrient concentration even more before lights out.
--- Added 2ml more of Sensi Grow A
--- Added 2ml more of Sensi Grow B
--- Solution strength after adding more nutes: 199 PPM
--- PH went up to 5.8
- [1700]: Checked nutrients.
--- PH: 5.9
--- Solution strength: 202 PPM
--- Added 4ml of Voodoo Juice
--- Added 4ml of B-52
--- PH after adding more nutes: 5.9
--- Solution strength after adding more nutes: 238 PPM
- [2130]: Decided to make a new foliar spray to address the continued yellowing.
--- Started with 500ml of distilled water.
--- Added 3 drops of CaliMagic
--- Added 3 drops of Sensi Grow A
--- Added 3 drops of Sensi Grow B
--- Added 3 drops of B-52
--- Added 1 drop of Superthrive
--- Solution strength: 164 PPM
--- PH was at 5.9 and did not adjust.
--- Gave her one spray.
--- Also sprayed the surrounding hydroton.
[END OF WEEK 01]

Likes
27
Share


@Ganjagrandaddy
Follow
Hi Growmies. Here we are at the beginning of the end for the expert seeds grow .
The Glueberry was taken out at day 60 and spent 48 in the dark before I trimmed her up for her slow dry. As I expected, I had a lot of undercut that won't be much use for bud weight but will go into some nice ice hash with the other trim. The main buds are a nice size and density with a very strong diesel and fruit hit coming from them too. They have a nice oily feel with a tacky after touch so should be nice and crunchy on drying after the cure. I have her in a cardboard box with cool 10°c air exchanging . This will hopefully slow the dry down and allow for the conversion of any stored chlorophyll into more usable thc and oils. Her trichs had enough Amber's to feel ready for harvesting her too. Now the waiting game .lol
Mimosa Lemon is only now showing signs of and ending soon . Her hips have remained loose and sadly very open which is going to be a dissapointment on the yield front for sure. Her potency will no doubt be bang on from the sample I dried of a lower popcorn branch. She has a very strong lemon scent any where close to her now and I think she would be great for extractions. I am not looking forward to how to trim her now.. lol She began so well too but her bud growth has been a sad dissapointment . I am hoping her final effects will save her reputation. Another week will hopefully show some clues to this.
Until next time growmies. Be Healthy.


Likes
10
Share


@InnerCityGardens
Follow
Week 10, transitioned nicely into flower. Had her first and last spray with some Moonshine Sunshine Spray. Stay tuned to see what see ends up like
Likes
27
Share


@Diips
Follow
day 50 - 1/1/2026.
happy new years!
finally fixed the setup, so we stabelized rh to 45%. time to get good!


Likes
54
Share


@Mr_Pgrow
Follow
Good week, no issues popping up.
Just watered when needed.
WCC
she is packing on weight, with buds stacked on buds and smells amazing.
C4
Very strong girl, nothing has fazed her from the beginning. Beautiful purple plant and the smell is floral. And packing some nice looking buds.
Gelato
Pretty much the same as C4, very strong, looking amazing and the smell is delicious. Bud sites aplenty.
SBP
Small bud sites are developing with a few white hairs. More just growing her on as a little experiment really she how she turns out. Not expecting much, but we'll see
Likes
278
Share


@Metatronix
Follow
A big hello to all the cannabis growing gardeners...and all the other visitors that came across my grow journal.
This week was very relaxing, i add only PH+ (again ;), Calmag and PowerZyme.
----------------------------------------------------------------------------------
Now cannabis smell is overpowering in my grow room I can finally write something about Spider Farmers 6-Inch Inline Fan with Smart Controller and Carbon Filter :)
As my grow room gets really stinky at times i always invest in a top shelf carbon filter almost twice the size of the one provided by Spider Farmer, to my shock Spider Farmer carbon filter absorbs the smells wonderfully well.
No smell leaks and that just when the fan is running at 5 out of 10 levels of output. The smart controller is something completely new to me, and had a lot of fun experimenting with it during the veg and early flower, when the smell began i needed it to run full time at level 4 or 5 to rid the fragnance.
All in all the whole combo is a great deal. If you are not as keen on technology the set without the controller is awesome on it's own. But to have some extra options open, the controller at the device throws at you a ton of settings you can use to optemiase you grow enviornment.
The SE 7000 is hanged at 28 cm. over the canopy and runs at 550W.
This whole grow's main sponsor is Spider Farmer. You can easily obtain all the great grow equipment we use at: spider-farmer.com
A big thank you to Jessie and the whole Spider Farmer crew for supporting me with the newest technological advancements in horticulture. Thanks to them what i do here is possible.
Thank you SeedsMafia for giving me the opportunity to try out your stock.
seedsmafia.com/en/feminized-cannabis-seeds/moby-dick-feminized.html
Plagron did send us their Contest package for the Power Buds competition .
Thank you for your visit, please leave a like and hope to see you beck here in about a week.

Processing
Likes
7
Share


@burningbush
Follow
This is starting 9th wk. Not going to flip unit wk 12. Hoping seedinds will get bigger. Autos showing sex, but no buding. I got 2 plants from fastbuds going. I think may some of the genetics are a Little old. Run them before my GG4 Isnt growing like the first one did. Just waiting. Any advice would be well appreciated.