
Likes
Comments
Share


@Brookillinit
Follow
I started the week super cropping. Each of these babies is looking great now.


Likes
37
Share


@D33jW
Follow
ritical Purple Kush was harvested on day 65 of flowering.
This plant was a joy to grow, with no major issues throughout the cycle.
The buds are dense, beautifully colored, and carry a delightful sweet,
earthy aroma with citrus undertones.
Can't wait to see how it cures—it promises to be an exceptional smoke!


Likes
4
Share


@Smokiebear_og
Follow
Hello people, we are here with another update day 34 for all these lady's. We currently have two shorty's and 2 tall girls. I'll be doing plain water with carboload from from now till the end of flowering
Peace and love ✌️✌️

Likes
15
Share


@TheGreenThumb
Follow
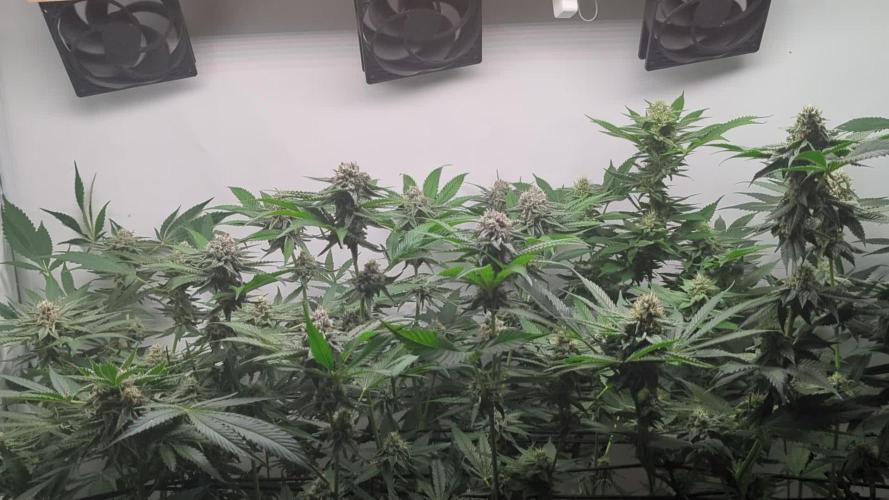
Everything is looking great 👍
The top buds getting more and more wonderful colours and man they are dense at hell!!!
The overall size of the buds is not the best but in the next 1-2 weeks (maybe 3) I expect that they will get finally fat like a kid in the Hershey’s factory.
I just ordered a better fan which will come in the upcoming days. I hope that will help with the bud rot prevention.
Let’s hope for the best and happy growing
Likes
2
Share


@Aleks555
Follow
Everything is going great! On the 48th day of vegetation, we switched the light cycle to 12/12, and for the second week now, our beautiful Golden Sands - 1 has started flowering. She’s been growing rapidly and noticeably increasing in height. We continue to feed her with fertilizers from Xpert Nutrients, and the results are impressive.
A huge thank you to Xpert Nutrients for their high-quality fertilizer, which is not only effective but also very easy to use. With such a reliable product, we’re confident that everything will turn out perfectly!
Processing
Likes
34
Share


@Mr_Motalovah
Follow
Hello growers and tokers! 👋 👩🌾 🧑🌾.🔥💨
Hows everyone doing? Hope things are great.
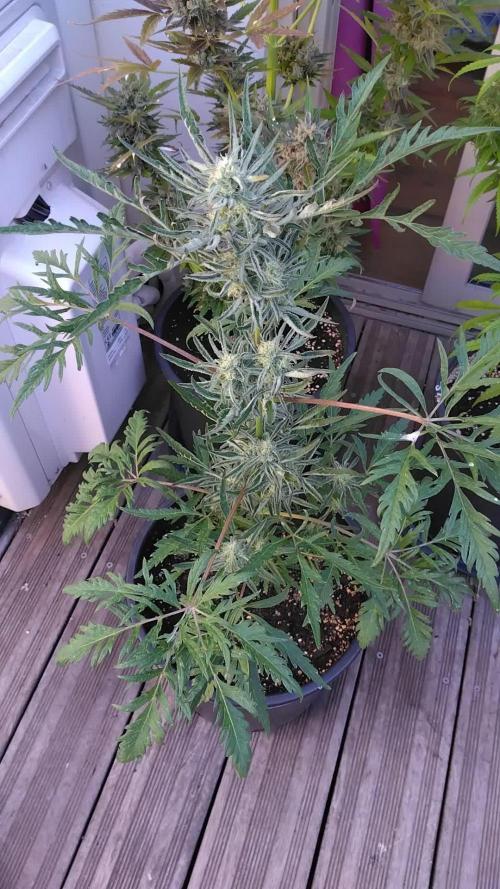
Another week of flower for this balcony girl.
Since week 8 of flower she's been stretching 10 cm a week.
This past week she only grew 5cm so I'm sure the flower stretch is over and she'll start focusing her energy on growing those buds.
I'm feeding every other day still and the same amount.
Only feeding bloom nutrients and in a week or so I'll start adding an organic PK booster.
She got stressed again this week, the weather has been really sketchy lately.. sunny, cloudy, stormy, windy... all that in the same day 😂
So I'm doing my best to make her feel comfortable in the midst of all this weather.
Some nights I mover inside in case it suddenly starts raining..
There's also less direct sunlight.
Other than that things are fine, she's starting to get trichomes on some bud sites and starting to give off a nice little smell.
Have to keep her save for these final and key weeks!
Take care and stay safe!
One love! ✌️🏽


Likes
53
Share


@DogDoctorOfficial
Follow
Hello, my amazing green-thumbed friends! Welcome to the Week 1 flower report for our beloved P.C.R.s. The transition from veg to flower is a magical time, and our plants are already showing signs of their future glory. Let’s dive into the exciting details of this week!
Entering the Flower Stage
Our P.C.R.s have officially entered the flowering stage, and the transformation is already visible. The stretch has begun, and you can see the plants reaching up, preparing to produce those beautiful buds we’re all waiting for. This stage is all about supporting their growth and ensuring they have everything they need to thrive.
NutriSpray Magic
This week, we’ve been diligently spraying Aptus Holland NutriSpray, and the results are phenomenal. NutriSpray is like a spa treatment for our plants, providing essential micronutrients directly to the leaves. It helps with nutrient uptake, reduces stress, and boosts overall plant health. Our P.C.R.s are absolutely loving it, standing tall and proud with their leaves praying to the light.
Nutrient Transition
With the start of the flowering stage, we’ve made some important adjustments to our nutrient regimen. We’ve stopped using StartBooster and replaced it with TopBooster, which promotes flowering and bud formation. Additionally, we’ve introduced P-Boost, a phosphorus booster that enhances root development and flower production.
TopBooster: Encourages larger and more abundant flowers.
P-Boost: Provides essential phosphorus for robust root and flower development.
NutriSpray: Continues to support overall plant health and stress reduction.
Optimal Conditions
Maintaining the perfect environment is crucial as we move into the flowering stage. Our TDS is now at 360, with a pH of 5.9 and a temperature of 21°C for watering. These conditions are optimal for nutrient uptake and overall plant health, ensuring our P.C.R.s have everything they need to produce those beautiful, resinous buds.
Care and Attention
Paying close attention to our plants during this stage is key. Regularly inspecting for any signs of stress or nutrient deficiencies and adjusting care as needed ensures our plants stay happy and healthy. The love and care we put into this process are reflected in the vibrant health of our plants.
In Conclusion
Week 1 of flowering has been all about setting the stage for a bountiful harvest. With the help of Aptus Holland NutriSpray, TopBooster, and P-Boost, along with our careful attention, our P.C.R.s are off to a fantastic start. The excitement is building, and I can’t wait to see how they develop in the coming weeks.
Shout Outs
A huge shout out to @aptusholland, our main sponsor, for their incredible products that keep our plants thriving. Another big thank you to @artgenetix for creating the phenomenal P.C.R. strain. And to the wonderful community at Grow Diaries and all our followers, your support and enthusiasm keep us going. Let's continue to grow together!
Until next time, happy growing, and may your gardens be full with love and green!
Genetics - P.C.R. @Art_Genetix_Team https://artgenetix.world/
Nutricion @aptusholland https://aptus-holland.com/
LED Power @Lumatek and @viparspectra
As always thank you all for stopping by , for the love and for it all, i fell blessed to have you all with me for one more love journey Thank you Thank you Thank you , you guys are great and have been amazing , thank you for everything !
#aptus #aptusplanttech #aptusgang #aptusfamily #aptustrueplantscience #inbalancewithnature #trueplantscience #dogdoctorofficial #growerslove
With true love comes happiness , Always believe in your self and always do things expecting nothing and with an open heart , be a giver and the universe will give back to you in ways you could not even imagine so !
Growers love to you all

Likes
5
Share


@MadeInGermany
Follow
Flowering day 22
since time change
to 12/12 h.
Hey guys :-)
Another great week that is over.
They all develop exactly as it should be 💚.
Since the last leaf and substrate application against tripse, I finally haven't seen any of the little biters 👍.
Watering was done twice this week with 1.3 l each time (see table above for nutrients).
The lowest shoots were removed so that the energy is not wasted in the lower part :-) .
Otherwise, as always, everything was cleaned and checked.
Fresh osmosis water was filled with stale tap water in a 100 L tank for the coming week 👍.
Have fun and stay healthy 💚🙏🏻
👇🏼👇🏼👇🏼👇🏼👇🏼👇🏼👇🏼👇🏼👇🏼👇🏼👇🏼👇🏼
You can buy this Nutrients at :
https://greenbuzzliquids.com/en/shop/
With the discount code: Made_in_Germany you get a discount of 15% on all products from an order value of 100 euros.
👇🏼👇🏼👇🏼👇🏼👇🏼👇🏼👇🏼👇🏼👇🏼👇🏼👇🏼👇🏼
You can buy this strain at :
https://gardenofgreenseedbank.com/candyland/
Water 💧 💧💧
Osmosis water mixed with normal water (24 hours stale that the chlorine evaporates) to 0.2 EC. Add Cal / Mag to 0.4 Ec Ph with Organic Ph - to 5.8 - 6.5
MadeInGermany


Likes
6
Share


@1Prinz
Follow
25.07 Watering with 200 - 400 - 400 - 400
Used only 4ml/L TOP-Max (honestly I forgot about the fact, that I have to use the BioBizz Products only once in a week and I already added 4ml before I realized it…)
26.07 my neighbor complained about the smell one store under my balcony (told me he can smell it on the street 50 meters behind my balcony)
28.07 watering 400 - 400

Likes
17
Share


@EuphoriaGardening
Follow
Pandemic “Third Wave” hit. Looking forward to share my Next attempt.
🐈🐟🌱Aquaponic Grow🐟🌱🐈
#Germination
🗓️19 Jul 2021
Germination was simple. Just added some seeds in plant cups. Tank setup is as follow:
Tank 40 liter
Air Pump 2.5w SHANDA SD-900 Mini Aquarium
Water Pump Small
2 Air Stone
Grow medium mostly consist of small sea shells and rocks washed and packed.
Fish: Gold Fish named Ed, Edd, Eddie
After the wash of the grow media and Tank water fill I let the system run for a week. This allows the water condition to stabilize. Used spring water. The fish were placed in tank still in bag for water temp reasons. Opened the bang and kept the fish in tank for a week before planting seeds. Micro Bacteria to form in grow medium.
Will be adding a Root Conditioner soon. Looking for on thats not harmful to the fish.
🌱New Posts Ever Monday🌱
Follow and like my instagram: https://www.instagram.com/p/CPRd1WeA4WP/?utm_medium=copy_link
Thanks for Reading
Joe & Pop-Corn🐈
Likes
1
Share


@RKGENETX
Follow
overall was great to grow and for it being my second grow I'm so glad how well it turned out some of the frostiest buds I've seen or smoked.

Likes
29
Share


@XiggYgreen
Follow
Hi all growers 🌱
She is like she was never in growbox. Beautifully she grows also on balcony..
I will just give her some but little bloom nutrients and watter her when she wants to 🌱 Regulary but I will watch over she
Happy growing I wish for all 🙏💚🌱
Likes
4
Share


@TwinExotics
Follow
Lemon Cherry Pops are in it’s own 4x4 along with the Smile now Cry Laterz x 1
FX3 is in its own 3x3 now. Topped


Likes
19
Share


@adam_pawloski87
Follow
Let’s Go Day 81!!!! This week went real great 2 Ogreberrys are hanging to dry and also the Bruce Banner is too after there 48 hr of darkness! The 3 other Ogreberrys began flush on Monday so finish out this week of flush and one more week of flush after that an they will get the chop too! But stay stunned for next week , we’re not done yet so keep them eyes peeled!! Y’all have an amazing productive day as well as a great week ! Peace love an positive vibes to everybody Cheers 😶🌫️💨💨💨💨💨🤙🏻

Likes
11
Share

@gentlegiantgrows
Follow
Just cruising at this point. Got them all on the same moisture level again. Slight infestation with gnats, but nothing to worry about at this stage. Will start giving a bit less water soon and have a big last defol in a week or so.
They got their mix of mycos, trichs, bacteria and molasses again, seem to love it.
Slight discoloration on the top OGT buds, but they're the tallest and receive 1100 ppfd, so I won't adjust anything.


Likes
18
Share


@Dunk_Junk
Follow
She's doing her thing this week.
Watching pistils and trichomes.
I want plenty of amber trichomes before harvesting her.
Likes
22
Share


@CampExotic
Follow
So my 5 plants have been split up. My first two chopped are now curing up. Preparing to chop the rest. Smells like nothing or gassy. Don’t overshock your plants people! 7 days of drying and stems were snapping. 3 in the pink isn’t quite ready yet.


Likes
17
Share


Likes
13
Share

@LandraceCBDLover
Follow
ça murit tranquillement par ici !
Les 2 Mazar sont magnifiques, elle arrivent au bout !
La récolte est dans les jours à venir, en fonction de l'évolution des trichomes. Je surveille chaque jour au microscope.
Actuellement il y a environs 5% d'ambrés ? J'attends +/- 20%, pour avoir davantage de stone et de relaxant.
L'Afghani va suivre avec 1 semaines de plus.
Il reste encore quelques semaines à la Libainaise et la Sinaï, qui sont très belles aussi ! 😍


