


Likes
Comments
Share

@Mr2toke
Follow
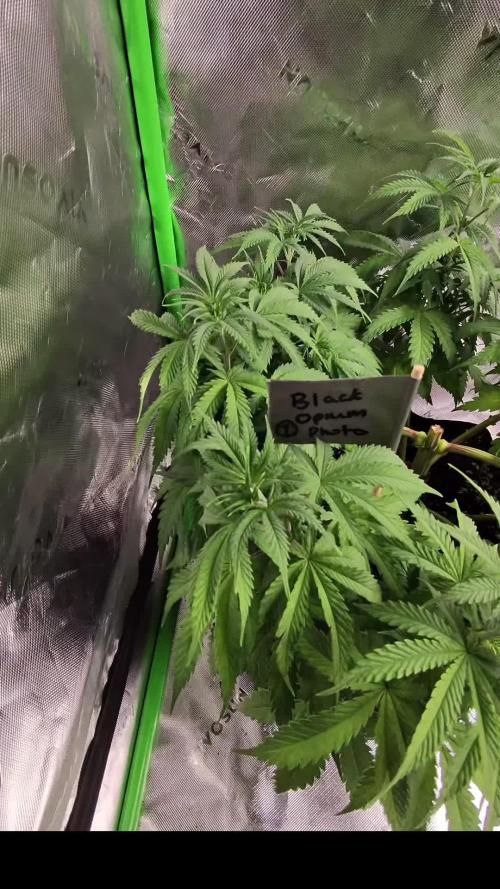
Week 8 - 11/05/26
She got a well needed stripping and had her branches readjusted.
Improved light penetration, improved airflow. she needs to get some more height on her.
3 more weeks left in veg i think, then she'll be ready.

Likes
60
Share


@SooSan
Follow
13 jours de 12/12
OK il y a du changement !
Dans la partie du scrog vertical le stretch n’a pas été assez fort
J'ai donc abandonné la culture verticale pour cette fois
J'ai donc fusionné le bas de la tente pour avoir un espace de 90x60x90
Le ts1000 a été retiré pour laisser la place aux barres du FC-E 4800
Et bien sur gros LST pour gagner en surface et gagner 20 à 30cm de hauteur
Vu qu’il y a 16 plantes mais que sur growdiaries on ne peut mettre que 8 variétés j'ai divisé en 2 diaries pour le bas de la tente
1️⃣
🏠 90x60x90
☀️ FC-E 4800 => puissance a 20%
🍁
1x Black Bomb / Philosopher Seed
2x Amnesia Lemon / PEV Seeds
1x Blueberry / PEV Seeds
1x Blueberry / 00 Seeds
1x Wappa / Paradise Seed
1x Dark Phoenix / Green House Seed
1x Quick Sherbet / Exotic Seeds
1x Mango Cream / Exotic Seeds
1x Banana Frosting / Sensi Seed
1x Hindu Kush / Sensi Seed
4x Fast Mix / Sweet Seed
📎 https://growdiaries.com/diaries/122084-grow-journal-by-soosan
📎https://growdiaries.com/diaries/124052-grow-journal-by-soosan
2️⃣
🏠 30x60x50
☀️TS1000 => puissance a 50%
🍁 4x Quick Sherbet - Exotic Seed
📎 https://growdiaries.com/diaries/122080-grow-journal-by-soosan


Likes
36
Share


@nonick123
Follow
Día 37 (08/07) Ajustes de LST en todas las plantas! 🚀
Día 38 (09/07) Ajustes de LST en todas las plantas. Las ramas inferiores están creciendo como un cohete! 🚀😍
Riego con 250 ml H2O pH 6,5
Día 39 (10/07) Las plantas se muestran sedientas! Creo que el cepellón está lleno de raíces y piden el trasplante!
El crecimiento no se ha visto afectado de momento
Riego con 500 ml H20 pH 6,5
Día 40 (11/07) Paso a regar con 500 ml / día, ya que hace mucho calor (30 ºC) y efectivamente las plantas ya han copado la maceta de raíces
Las ramas de nodo inferior se han quedado enanas tras el entrenamiento, de modo que las elimino y aplico canela en polvo en los cortes
Riego con 500 ml H20 pH 6,5
Día 41 (12/07) Riego con 500 ml H20 pH 6,5
Clones! Mi experimento vuelve a demostrar que NO necesitas complejos productos de clonación ni sistemas para obtener clones!
Hace 15 días puse 2 clones con el tallo sumergido en miel durante 5 minutos en una maceta de 400 ml con PRO-MIX HP BACILLUS + MYCORRHIZAE
He mantenido la humedad alta con una cúpula de humedad casera hecha con una botella de agua PET de 5 litros cortada por la mitad y pulverizando a diario.
Han estado los 15 días en mi terraza con luz indirecta, y temperaturas que rondan los 30 - 32ºC durante las horas centrales del día
Hoy los he trasplantado a una maceta de 1 litro porque ya habían formado raíces y empezaban a formar nuevas hojas!
🐥🐥🚀🐥🐥
Día 42 (13/07) Riego con 500 ml H20 pH 6,5
Día 43 (14/07) Trasplante a maceta definitiva de 21 litros de ROOTPLUS Pot de GSKOREA GLOBAL!
Estas macetas son una maravilla!
Proceso de trasplante:
Se prepara con 17,85 Litros (85%) de sustrato PRO-MIX HP BACILLUS+MYCORRHIZAE + 1,05 Litros de Humus de Lombriz (5%) + 2,01 Litros de Insect Frass (10%) + 210 gramos de Earth Vibes Super Soil (10 g/L substrato)
Se llena la maceta de sustrato con las manos (limpias) y rompiendo los trozos más gruesos, para que el sustrato esté aireado y esponjoso, sin presionar
Se coloca una maceta vacía de 6,5L para que quede la forma perfecta de la maceta donde están actualmente
Se espolvorea la parte proporcional de la probeta de microorganismos sobre el agujero de trasplante
Se saca la planta de su maceta actual (bonitas raíces 😍) y se coloca en la maceta final
Se riega muy lentamente hasta percolación profunda con H2O EC 0,5 pH 6,5
Una vez asentada, complemento con un riego de 500 ml con 25 ml/L de Humus de Lombriz Liquido
Se coloca mulch (acolchado) de paja para evitar traspiración excesiva y cuidar a los microorganismos del suelo
A ver como reacciona al trasplante!
Aplicación foliar Kelp hidrolizado de Lurpe Solutions a 0.25 ml/l
Realizo ajustes de LST aprovechando el trasplante a la nueva maceta. De momento tienen una canopia muy bien formada!
💦Nutrients by Lurpe Solutions - www.lurpenaturalsolutions.com
🌱Substrate PRO-MIX HP BACILLUS + MYCORRHIZAE - www.pthorticulture.com/en/products/pro-mix-hp-biostimulant-plus-mycorrhizae


Likes
10
Share


@Troy_Farms
Follow
I pollinated a side bud of this girl and her seeds are developing quickly. Which is exciting for the sake of future grows. Other then that the buds are not super big at all but look super quality so I am happy with how things are progressing. As the week comes to an end the trichromes are really coming in and she is starting to smell very nice. I think one more week of flowering to fatten up a little more and then I will flush to finish. I learned that I started to feed flowering nutes to early and so my first two autos did not get super tall as a result.
Learning a lot with my first indoor grow and first time with autos, I read a really solid breakdown of Autoflowers lifecycle that was super informative. I'll leave here, and post it with my final harvest post here. Knowledge is power 😎
LIFECYCLE OF AN AUTO
A common question I see is when to switch autos from veg to bloom. Many people are under the impression that as soon as they see the first flowers it's time to switch. Perhaps a little explanation of the life cycle of autos will help to clarify this.
Weeks 1 - 3. Once you've started your seeds and they break the surface of the soil, they are in their seedling stage. The first set of leaves to appear will usually single fingered, followed by a second set that may still be single fingered or perhaps 3 fingered. Once that second set appears growth will start to accelerate as the new leaves provide more photosynthesis. This process will continue, more new leaves, faster growth. Depending on the type of soil in use, mild vegetative nutes can be introduced at week 2. By week 3 most plants will start to show their sex. Males will start to produce pollen sacks and females will display pistils.
Weeks 4 - 6. The plants are now entering a pre flowering stage. During this time the plants should exhibit explosive growth, often as much as a new set of nodes and 1" vertical growth a day. This is the time when they will gain most of their vertical height. Many people make the mistake of switching from vegetative to flowering nutrients at this point, assuming that since they see flowers it must be the proper time. This is incorrect. If the switch to flowering nutes is made at this time the vertical growth will stop and the plant will put it's energy into producing buds. If you need to keep your plants small, or want them to finish earlier, they by all means switch nutes at this point. But if you want to get the most out of your plants continue feeding vegetative nutes until you see the vertical growth slow and stop. Depending on the strain that will usually be sometime during week 5 or 6.
Weeks 7 - 9. By now vertical growth has stopped and the switch to flowering nutrients has been made. The buds will start to fill out and put on weight, becoming hard and tight. Pistols will start to change from white to brown, orange, red, etc. By now the plants will also have developed a strong smell. Toward the end of this phase the large primary and smaller secondary fan leaves will begin to turn yellow. This is an indication that the plant is moving toward the end of it's life.
Weeks 10 - 11. At this time flowering nutes should be discontinued and only plain pHed water fed to flush the remaining nutrients from the soil and improve the taste. Yellowing of the fan leaves will continue as the plant draws the stored energy from them. Eventually they will die and fall off. By the time that the smaller leaves that come from out of the buds will also start to turn yellow. Then it's time to harvest.
I know that many of you are thinking that the seed bank said the plants will finish in 8-9 weeks, so why are you saying they take 10-11? The claims made by the seed banks are somewhat deceptive. If you switch to flowering nutes at week 3 or 4 the plants can finish in the times the seed banks say but they will remain small and not reach their full potential yield. Years of growing by myself and others has shown that autos do best if you follow this time line.
Of course, there will always be variations depending on the strain, the environment, nutrients, etc. This information is meant to only serve as a general guideline.


Likes
18
Share


@KushAllDayLong
Follow
Hey Growmies, I apologize for the lame diary this week. I've been sick on and off the last two months and it's really taking a toll on my body and heart condition. Please forgive me as I'm trying to heal up. I'll do the best I can at updating this as I go along. I'm not giving up!
The girls look great, despite not giving them as much attention as id like and they deserve.
Great week of growth. I let her do her thing. I did minor LST and some hst on the other girls that I haven't made a diary for yet but will.
Day 19 of flower.. week 3 of flower is about to wrap up which is nearing the end of the stretch phase. I was pleasantly surprised with the growth on the Watermelon Zkittelz, I've been putting the most work into her as the technique I'm using requires a lot of attention. Next run I will use tie downs and I'll most likely add a trellis here soon too help hold the heavy colas.. but we will see how it plays out. Looking forward to seeing her buds start to stack before my eyes! Thank you to everyone who has helped me through this journey!
I've been really sick lately and my girls help keep me going!
Day 20 of flower
Today went well, I reorganized the tent and cleaned it a bit, I try to clean it once a week or so. I've been hand "drip feeding" one of the girls the last few days. Just an expierment and the plant seems to love it so I'm going to start hand "drip feeding" all of them. I think the Watermelon Zkittelz is going to love some extra food every day! I know us humans do but it's important to make sure the girls aren't stressed and isnt in a nutrient lock out or something. I think it's best when she's running prime! At the end of day 20 of flower I took a video of all the new growth and it was after I reorganized the tent and I feel so much better after doing this. I also turned off all the lights and turned on each light individually so I could see how each light was casting on each plant. This way I know the plants are getting enough light coverage as that is a huge disadvantage of using these budget lights.
Excited for the 3rd week to come to an end!! Adding new nutrients next week!!
Day 21 of flower ( end of week 3 of flower, 11 weeks from seed )
Grow is going great!!
Have a good day!
Likes
92
Share


@Roberts
Follow
Apple Fritter is looking pretty neat. Plus the mutation cola dead center is a new one for me. I am not sure what that is called. Still neat! She is in a New Level Hydro bucket, under a Spider Farmer SE5000 light. Thank you Spider Farmer, New Level Hydro, and Amsterdam Marijuana Seeds 💪❄️🌱
Thank you grow diaries community for the 👇likes👇, follows, comments, and subscriptions on my YouTube channel👇. ❄️🌱🍻 Happy Growing 🌱🌱🌱
https://youtube.com/channel/UCAhN7yRzWLpcaRHhMIQ7X4g
Www.amsterdammarijuanaseeds.com
SE5000
https://amzn.to/3qFpAML
Spider Farmer Official Website Links:
US&Worldwide: https://www.spider-farmer.com
UK: https://spiderfarmer.co.uk
CA: https://spiderfarmer.ca
EU: https://spiderfarmer.eu
AU: https://spiderfarmer.com.au
Coupon Code: saveurcash
Www.newlevelhydro.com
Www.hygrozyme.com

Likes
34
Share


@420DeepGrow
Follow
La primera semana a ido bien, destacar que la próxima vez, estresaré lo mínimo posible a las plantas, ya que si quieres una cosecha rápida y saludable lo mejor creo es no estresar a las plantas, nada de los stress ni mierdas, dejarla desarrollar como si estuviera solita.
📅 Día 8: 🔹Pulverizo las hojas con Rootbastic de Atami a 0,15 ml/litro.
🔹Aparición primeras preflores.
📅 Día 9:🔹 Última pulverización con Acti Vera y Alg-A-Mic a 1 ml/litro respectivamente. A partir del día 11 no se le aplicarán más abonos vía foliar para controlar la humedad en el cuarto de cultivo y así evitar que se disparen estos niveles de humedad.
📅 Día 10🔹Última pulverización con Special THC PLUS.
📅 Día 11🔹Riego según la tabla de nutrientes y bajo la dosis de agua ya que me he pasado con el riego. Aplico 350ml e iré subiendo cuando note que no dura 24h mojado.
🔹Cambio los platos de las macetas por una bandeja de 80 x 80para así poder hacer un mejor riego y no molestar a las plantas, ha entrado justa. La pongo sobre una mesa de metal de 60 x 60 cm.
📅Día 12:🔹 Low Stress
📅 Día 13:🔹Riego según la tabla de abonos BioBizz.
📅 Día 14:🔹 Conecto el CO2 a 630 ppm para ver si estiran un poco más.

Likes
62
Share


@Tuki3
Follow
Hola gente, como va?
Bueno, gracias a que estoy cada una hora o dos mirando la planta, me di cuenta que una de las puntas estaba blanca pero "rara". La saque afuera para que aproveche el sol y le de mas viento, y ahi vi el hongo como se puede apreciar en el video.
Gracias a dios fue en solo esa punta, ni siquiera en la rama entera, asi que me fije hasta donde lo habia "tomado" y corte. Un amigo que estudia quimica, medicina y le gusta mucho la biologia me dijo que el Botrytis no es un hongo patogeno (o algo asi) y que con calor ya es posible matarlo, no es tan perjudicial como muchos dicen/piensan. Cuestion que para "matar" el hongo prendimos el horno a una temperatura que pudieramos meter la mano y no quemarnos, lo apagamos y en una fuente pusimos el cogollo con el hongo, y dejamos hasta que se enfrie solo. Repeti el proceso 2 veces mas (siempre calentando antes de meter el cogollo) y quedaron hechos una piedra, no cedieron en ningun momento cosa que a pesar de perder una cabeza, me puse contento por no ceder en tamaño.
Cuestion que una parte se salvo sin hongo, y no tuvimos otro remedio que fumarla jajaja
Realmente es una locura muy intensa, como que te deja con la cabeza la parte frontal (atras de la frente) como vibrando, te deja muy loco, pero si te pones a hablar, no te perdes, enganchas todos los temas que quieras, todo esto sin secar bien y sin curar!
Conclusion: Para el proximo cultivo voy a agregar otro ventilador, uno para extraccion y otro para intraccion asi no me vuelve a aparecer el hongo.
Saludos!!


Likes
3
Share


@herbalistssword
Follow
So those dying branches are what root rot looks like :s She is still growing ok, I'm smoking the branches that die.
I've added Great White for some bacteria as i read that can help with root rot, hopefully it slows it down so at least buds grow.
Likes
47
Share


@GrowGuy97
Follow
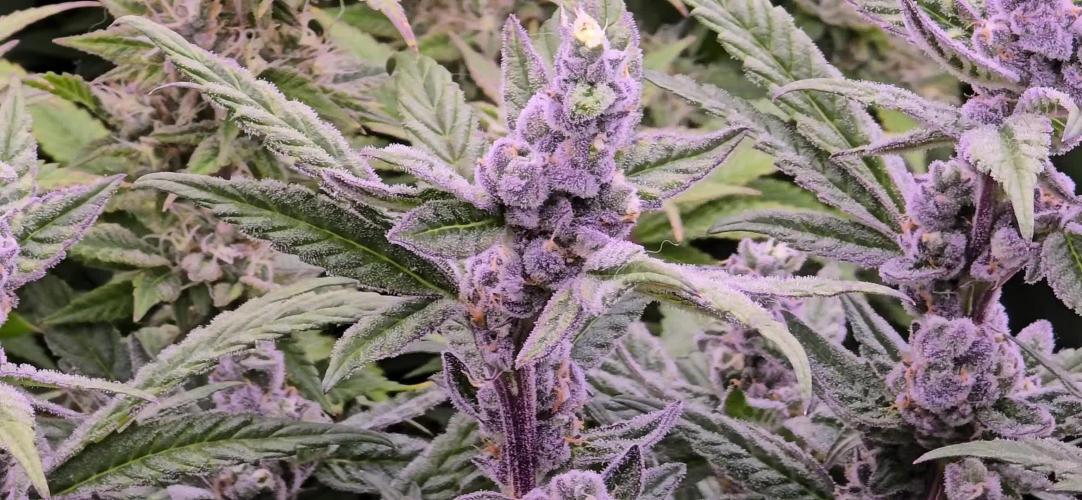
Day 63 - Niagara got cut down today, she has a very strong smell & right buds can’t waif to see how she smokes! Will be doing a harvest post once she is dry! I also decided to let the Rock Machine & Doctors choice #1 go another week or two




Likes
2
Share


@A_Aron
Follow
Day 57:
Forgot to get pics when watering. So some pics the next day.
Water/Feed day. Each plant got 1 gallon with:
5mL per gallon Alaska 5-1-1
15mL per gallon Alaska 0-10-10
7.5mL GrowMore Seaweed Extract
15mL Blackstrap Molasses
Plant 2 also got 1.25mL per gallon of AGT-50
Plant 3 also got 15mL per gallon of Liquid Culture Microbes
Plant 4 got both and at the same amounts.
I scratched into the soil of each pot 1/2 cup of Happy Frog Fruit and Flower
Day 58:
Took pictures. Plants are looking good. You can really see the difference in plant 1 compared to the other 3. Very few tops really pushed their way up on plant 1.
Day 59:
Water/Feed day. Again I didn't get pictures on this day.
Each plant got 1 gallon with:
5mL per gallon Alaska 5-1-1
15mL per gallon Alaska 0-10-10
7.5mL GrowMore Seaweed Extract
15mL Blackstrap Molasses
Day 61:
This time I got some pics. You can really tell that the plants are in flower. They are developing a good smell and you can see trichomes starting as well.
Water/Feed day.
Each plant got 1 gallon with:
5mL per gallon Alaska 5-1-1
15mL per gallon Alaska 0-10-10
7.5mL GrowMore Seaweed Extract
15mL Blackstrap Molasses
Likes
16
Share


@Bigbombbudz
Follow
The 4 Blueberry Hill were grown with 2 Banana Pudding all from Herbiesheadshop...Love all there seeds they have to offer...these were Herbiesseeds..the Banana Pudding came in the desert mix and the Blueberry Hill came in there female pack...I was happy with the grow they are not the biggest producer's, ( I've had way bigger) but all together the taste and the buzz are all there on both.....Seeing these came from Herbies line and never grew any from them, I was happy....No problems throughout besides some bananas popping out on one of the Banana Pudding plants...go figure.....But it did no harm do to the girls almost being done and not enough time for that to hurt the plants....
The total bud time from the time I changed the light cycle...was 52 days for the first Blueberry Hill, then 53 for a Banana Pudding, then 54 and 55...Then the last plant I waited and let ripen up which she didn't come down until day 68 with all kinds of amber on her.
The total amounts on the 4 Blueberry Hill dried, Jared, and burped.....I don't weigh wet weed....was 24 ounces. 2 plants produced a little over 7 oz a piece....1 plant produced 6 oz and the smallest one that is first in the video produced a little over 4 oz....Not a bad little grow..
Until next time, smoke a fatty, help out your fellow grower.


Likes
17
Share


@OGBestBudz
Follow
Banana purple punch and Strawberry gorilla autoflowers now soaking in water