


Likes
Comments
Share

@DogDoctorOfficial
Follow
Skywalker OG — Harvest / Trim / Cure
Part 2 — More Giants Enter The Galaxy
First of all, once again, apologies for dividing this Skywalker OG harvest series into multiple parts.
But honestly…
there is simply too much happening here to compress everything into one single report without losing the individuality of these plants.
This is not just one harvest.
This is:
* multiple giant plants
* multiple phenotypic expressions
* hundreds of photos
* countless observations
* trimming sessions
* drying progression
* resin collection
* and eventually smoke reviews still to come
So instead of rushing through it, we decided to properly catalogue this run the way it deserves.
And honestly?
These girls earned that respect.
⸻
Quick Recap — The 12/12 Galaxy
This entire project was grown:
12/12 from seed
with very little intervention.
No heavy training.
No aggressive shaping.
No topping.
Mostly:
* gentle canopy opening
* leaf tucking
* minor defoliation
* and allowing the plants themselves to naturally decide their structure
And once again, this run keeps proving something fascinating:
12/12 from seed does not necessarily create huge tall plants…
…but it can create incredibly efficient plants.
Compact.
Dense.
Heavy.
Productive.
The only true giant-height exception in the room was the Ghost Train Haze that nearly reached two meters.
But these Skywalker OG girls?
They stayed more compact vertically while transforming themselves into absolute flower-producing machines.
And honestly?
That efficiency became ridiculous toward the end.
⸻
Heavy Enough To Collapse
At this stage, all three plants reached the point where their own flower weight became difficult to manage.
The branches simply cannot support themselves anymore.
Support or no support…
these girls are collapsing under pure mass.
And honestly?
That’s the kind of “problem” growers love having.
Huge swollen colas.
Dense flower stacking.
Rock-solid buds.
Resin everywhere.
Exactly the type of structure that makes trimming both exciting and slightly terrifying at the same time.
Because you already know:
these are going to become extremely dense once fully dried.
⸻
Frost, Density & Structure
One thing that keeps standing out over and over again with these Skywalker OG plants is the combination of:
* density
* frost
* and sheer flower volume
The flowers are not only big…
they are compact.
Very compact.
The kind of buds where simply pressing lightly already tells you:
“This is going to dry into rock-solid flower.”
And visually?
Absolutely beautiful.
Bright swollen calyxes.
Heavy trichome coverage.
Long sugar leaves curling outward.
Beautiful late-flower fading tones appearing everywhere.
Every branch feels loaded.
Top flowers.
Middle flowers.
Lower flowers.
No wasted space.
⸻
Perspective & Scale
We also wanted people to properly understand the actual size of these plants.
Because sometimes photos alone can be deceptive.
So throughout this session we kept including:
* hands beside colas
* Mr. Baggy appearances
* hats
* studio comparisons
* and even the JBL speaker for scale references
And honestly…
some of these flowers make normal objects look small.
These are serious colas.
Not exaggerated internet “looks big in the photo” flowers.
Actually big.
Actually heavy.
Actually difficult to hold comfortably after a while.
⸻
Mr. Baggy Continues His Internship
Of course…
Mr. Baggy stayed with us through the entire process again.
At this point he’s basically part of the harvest crew.
Always supervising.
Always present.
Always emotionally supporting the trimming sessions.
And honestly?
The studio moments with:
* giant plants
* giant colas
* cameras
* lights
* resin-covered gloves
* and Mr. Baggy sitting there in the middle of the chaos…
became part of the memory of this run itself.
⸻
Charas — Living Resin
One thing we absolutely loved once again during harvest was the amount of resin immediately collecting onto the gloves while handling fresh flowers.
The moment fan leaves started coming off:
* resin buildup started
* fingers became sticky
* gloves became greasy
* and naturally…
charas started forming again.
And honestly, we really enjoy talking about charas because many people still don’t fully understand what it is.
Charas
is one of the oldest forms of cannabis resin collection in the world.
Traditionally associated especially with regions of India and Nepal, charas is made by gently rubbing fresh living or freshly harvested cannabis flowers between the hands to collect the resin directly.
Historically and spiritually, charas has deep connections with:
* traditional medicine
* spiritual rituals
* Himalayan culture
* and even Lord Shiva himself in many traditions.
And honestly?
There’s something incredibly beautiful about it.
Because unlike dry sift or cured trimming resin…
this is living resin.
Fresh resin.
Still full of life, moisture, oils, and volatile aromatic compounds.
That’s why we personally separate this experience mentally from the later finger hash collected during dry trimming.
Both are beautiful.
But fresh charas feels:
* softer
* richer
* oilier
* more alive
* and incredibly expressive terpene-wise
This Skywalker OG produced amazing charas too.
Dark.
Greasy.
Sticky.
Easy to collect.
The kind of resin that instantly tells you:
“These plants are loaded.”
⸻
Full Plant Drying
Just like the first plant, these girls are now drying whole.
Entire plants hanging intact.
We personally love this drying style because it slows the process slightly and helps preserve:
* terpenes
* moisture balance
* aroma
* and overall cure quality
The drying conditions remain:
First couple of days:
* ~45% RH
to help remove the heavier surface moisture from these extremely dense flowers.
Then afterward:
Remaining drying phase:
* ~60% RH
* 18–20°C
for roughly:
7–10 days
depending on how these massive flowers release moisture internally.
Because honestly…
with buds this dense, patience becomes extremely important.
⸻
Looking Ahead — Trimming Begins Soon
The next reports will most likely focus heavily on:
trimming
And honestly?
We already know these sessions are going to be intense.
Because these plants are absolutely packed with:
* dense flowers
* resin
* swollen calyxes
* and heavy branching
So yes…
this series may realistically become:
four parts
or maybe even five.
And honestly?
That’s okay.
These girls deserve the spotlight.
⸻
Gratitude
And once again…
huge thanks to everybody following this journey.
To the growers.
To the silent viewers.
To the curious minds.
To the supporters.
To the OG followers.
To the new followers arriving now.
To the skeptics.
To the lovers.
To the people simply stopping by for a few seconds.
To Zamnesia for the genetics behind these beautiful Skywalker OG plants.
To Plagron for the nutrients helping drive this run.
To Future Of Grow and Lumiflora for the LEDs illuminating this jungle every single day.
To everybody building the tools, tents, gear, cameras, and spaces allowing growers to continue sharing knowledge openly.
And honestly…
personally, we feel extremely fortunate to even witness plants like this growing in front of our eyes.
There’s something deeply humbling about watching a seed become this.
These truly became:
Legends of the 12/12 Galaxy.
And their story is still not finished.
From grower to growers.📡 DELETED @ 1K Please stay tuned.we never quit https://www.youtube.com/@TheDogDoctorOfficial NEW 🙏 Thank you for your patience and continued support.
FOR DISCOUNT CODES AND MORE JUST FOLLOW THE LINK https://website.beacons.ai/dogdoctorofficial
📲 Don’t forget to Subscribe and follow me on Instagram and YouTube @DogDoctorOfficial for exclusive content, real-time updates, and behind-the-scenes magic. We’ve got so much more coming, including transplanting and all the amazing techniques that go along with it. You won’t want to miss it.
GrowDiaries Journal: https://growdiaries.com/grower/dogdoctorofficial
Instagram: https://www.instagram.com/dogdoctorofficial/
YouTube: https://www.youtube.com/@dogdoctorofficial Deleted by Youtube - https://www.youtube.com/@TheDogDoctorOfficial NEW
Vimeo : https://vimeo.com/dogdoctorofficial Under construction stay tuned ⸻
Explore the Gear that Powers My Grow
If you’re curious about the tech I’m using, check out these links:
🔆 Lighting & Environmental Control
• Future of Grow — Advanced LED lighting technology
https://www.futureofgrow.com/
DISCOUNT CODE: DOG20
• Lumiflora — Under-canopy LED lighting
https://lumiflorade.com/
• TrollMaster — Environmental controllers and automation gear (past collaboration)
⸻
Genetics
• Zamnesia Seeds — Genetics used in this project
https://www.zamnesia.com/
⸻
🌱 Soil, Substrates, Boosters & Root Support
• Plagron — Substrates, bio mixes, and supportive products
https://plagron.com/en/
⸻
🎒 Storage, Curing & Preservation
• Grove Bags — Curing and storage solutions
https://grovebags.com/
⸻
📸 Photography Equipment & Tools
(Not sponsors, but part of my creative toolkit)
• Sony A6700
• Sony full-frame macro lens + few more
• Stacking photography workflow - learning
• iPhone (for behind-the-scenes shots)
We’ve got much more coming as we move through the grow cycles. Trust me, you won’t want to miss the next steps, let’s push the boundaries of indoor horticulture together!
As always, this is shared for educational purposes, aiming to spread understanding and appreciation for this plant. Let’s celebrate it responsibly and continue to learn and grow together.
With true love comes happiness. Always believe in yourself, and always do things expecting nothing and with an open heart. Be a giver, and the universe will give back in ways you could never imagine.
💚 Growers love to all 💚
📸 P.S. – The Eye Behind the Lens
All photos in this diary (for now — except for the ones showing the camera, which I took with an iPhone) are taken with a Sony A6700 paired with a Sony full-frame macro lens and a few more.
Photography is part of the story — it’s how we share the fine textures, the glow, and the quiet details that words can’t always capture.
I’ve also started experimenting with photo stacking — a technique where multiple images, each taken at a slightly different focus point, are layered together to create one perfectly sharp image from front to back.
It’s not digital enhancement or AI; it’s pure photography — a way to reveal the plant’s beauty in microscopic depth, from trichome to petal.
You’ll even see a few shots of "ghost me" capturing the shots — camera, lens, setup — because every grow deserves not just to be cultivated, but documented like art.
FOR DISCOUNT CODES AND MORE JUST FOLLOW THE LINK https://website.beacons.ai/dogdoctorofficial
NEW DISCORD - Official Server Invite Link : https://discord.gg/ksjAkA5T74



Likes
5
Share


@Skinnytalls420
Follow
Day 1-12/12/21 seed is in water for 24hours! Day 2-13/12/21 seed has been placed on paper towel! Day 4-15/12/21 seed is in soil and tent!!! Day 6-17/12/21 seed has popped out the soil !!!!


Likes
39
Share


@Roberts
Follow
Bubba OG Gum autoflower has been growing great. Just keeping up on her training and letting her spread out. She is due for a solution change soon. Everything has been going well for her. Thank you Spider Farmer, Athena, and Ganja Farmer. 🤜🏻🤛🏻🌱🌱🌱
Thank you grow diaries community for the 👇likes👇, follows, comments, and subscriptions on my YouTube channel👇. ❄️🌱🍻
Happy Growing 🌱🌱🌱
https://youtube.com/channel/UCAhN7yRzWLpcaRHhMIQ7X4g

Likes
25
Share


@pifflestikkz
Follow
Day 37
06/08/24 Tuesday
De-chlorinated tap water pH 6 today with calmag only.
Pre flower stretch initiated, pre flower female sex pistils forming 😍
She is shown in video next to her stunted sister, she is in with my other diary 2L GreenHouse Run.
Day 39
08/08/24 Thursday
Feed today using de-chlorinated tap water pH 6 with Plagron PK13-14.
Showing her pre stretch 😍
Day 41
10/08/24 Saturday
De-chlorinated tap water pH 6 today again with calmag.
400ml with run off now.
Day 42
11/08/24 Sunday
End of week
De-chlorinated tap water pH 6 today again with calmag.
400ml with little run off this time
Pistils on pistils now 😁
Starting to see the beginning of bud formations 💚

Likes
32
Share


@Esoteric_growing
Follow
Applied the scrog net, two layers so far so top layer mainly for repositioning and support.
Trying to fill 1.5m2 (5x5) is a big task but seems to be going well so far.
Had some slight magnesium deficiency but correcting it over the next few feeds.

Likes
26
Share


@ButterfliesLittleFarm
Follow
Hello Diary.
The second week of flowering is behind us. I did a little defoliation this week, I honestly didn’t dare remove more leaves and branches, I didn’t know how they would react to it. Maybe I needed more?
The temperature is still high, sometimes rising to 29, 30 degrees, but mostly around 28. Humidity in the air is an average of about 55% but sometimes rises to 60%. The problem is frequent rains this summer which creates high humidity in the air and this affects the humidity in the box as well.
The flowers are developing nicely, and they have started to smell as well, but let the pictures speak for themselves.
The plants are big for my conditions, the 120 x 60 box size is perhaps too small for three plants (two Hulkberries and one Green Gelato), so the real jungle is in the box.
It’s already a challenge to take them out every week for a photo shoot, but I try to be as careful with them as possible.
The Hulkberry has reached a height of 113 cm which is on the verge of acceptability. If it continues another ten cm, I’ll be in trouble because the lights can’t lift more than this.
18/07/2020. - Day 30.
Defoliation. I removed the leaves at the very bottom of the plant to make it easier for me to water them, after that I watered the plants but this time I didn’t put BioBizz, I just watered them with clean water.
21/07/2020. - Day 33.
Watering. This time I gave them BioBizz, on schedule for the second week of flowering. I also added CalMag 1.5ml / L, preventively. While they don’t show they’re missing anything, I’ll keep adding CalMag.
23/07/2020. - Day 35.
Photography and height measurement.
Hulkberry Auto # 1 - Day 35. - 97cm
Hulkberry Auto # 2 - Day 35. - 113cm
That’s all for this week, see you soon.
Likes
13
Share


@FlavoursUk
Follow
So, eventful week.
Prior to putting my seeds into my system, my light and rdwc system was left on as I was dialling in the growing environment before placing the seeds as a final home. My only issue was I had a light leak BEFORE putting the foil top covers on the clay pebbles. Long story short, I got algae which ended up turning to root rot.
I spotted it very swiftly and did a res change adding beneficial bacteria to the system along with the base products of remo nutrients. A few days later new growth and recovery is taking place.
Day 16- Fully back on track, new roots shooting out into the water and the growth rate has picked up as it should.
Foliar feeding twice a day for a little boost until the root system establishes a bit more. Huge changes in just a day. Can't wait to see what a week's growth looks like.
Really loving the sunset/sunrise feature on the trolmaster, something I got to experience watching recently!
Watching by closely to make sure everything stays in track.
Stay tuned for the next one 😉

Likes
3
Share


@stonedkoala
Follow
- First round of veg nutes; keeping it light & mild ~
- Bucket is filled with 4.5 gal of water to reach roots; will lower amount of water as the plant and roots get bigger

Likes
24
Share


@Basementganja
Follow
Harvested the Clones!
I'm stoked how #4 grew out, I think she's the winner!
With limited space in my grow, I'm only going to be able to bloom out the rest of the phenos clones to week 3-4.. The show must go on..
It's the price I must pay for using non-ideal cloning methods... Next round of phenohunting will have 100% cloning success, using my new aeroponics cloning machine.


Likes
8
Share


@Prshwdp
Follow
Not much happen during this week. Plants look healthy and on a good track. They drink roughly 2l a day

Likes
14
Share

@majklsoft
Follow
Week 13 | Days 85–91: September 21 – September 27
I’m leaving for vacation soon and time is running out, so starting last week I decided to change the light schedule from 20/4 to 24/0, as I’d heard it might speed up ripening.
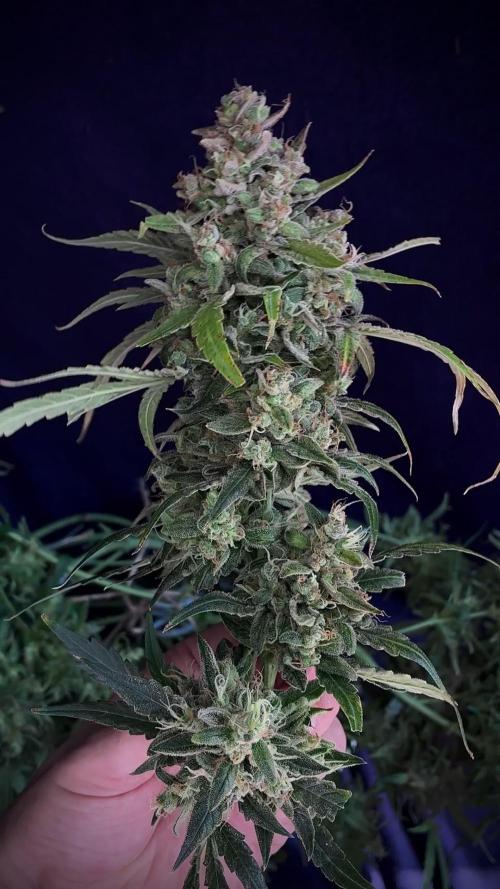
On Day 87, I harvested the nine top colas, leaving the torso - lower buds on the plant for another week to ripen further.
Attached are some photos taken just before the harvest.
Seeing that monster outside the tiny tent, leaning in every possible direction, I’m still amazed by what’s possible under a 54W LED with the help of a self-watering base.

Likes
22
Share


@PrairieFrostGrow
Follow
Week 9 .......... Flower Week.........June 6 to 12, 2020 ........ Days 57 to 63 from germination
The two girl are sure opposites of each other in how this grow is turning out😂😂👍 GSC2 didn’t get a good transplant and she has really suffered for it........add in that both of them were battling high pH in first weeks and thus the reason for the transplant from the fabric pots into plastic.......she is actually hanging in there and this week progressed well. GSC on the other hand I just have to put into her own tent!!!! She is too freaking big!!!!! I can’t fit her in with the other flowering girls and have any success at the grow👍💪👊😉 The environment is not where it needs to be though for flower so added another humidity controller and smaller full spectrum light to bump up to 300 watt range in the veg/flower tent now. Had limited choice with a limited budget and needed it now. I could go through more fooling around for only roughly 3 more weeks before others are done and could combine the plants.......good excuse though to have increased flexibility going forward😉😉😉👍
Feed amount have been as expected with GSC taking 4L most days while GSC2 is more of 2.5L range when feeding. Have noticed they are taking more water in the taller 3 gallon plastic pots. That is a lot of bottles listed but they are never fed that all at once. That is just a full list of products used this week and the dosage in that feed. I have been holding the feed numbers around 1000 ppm the last week and I think she can take more so have bumped that up to 1300 range for the next week. Expect to see some tip burn as pushing them but very little so far.
GSC is now 36” and 36” wide but her bud sites are not very big in my opinion. I have replaced G.P. Massive with A.N.Big Bud for now as I don’t need her getting any taller......just grow BIG BUD😃😃 GSC2 is being fed the same schedule as GSC and the same feed so all numbers are the same. GSC2 is only 17” tall though and 24” wide.
GSC Environment has been hovering at 80 degrees and 50 percent humidity most of the days.
(Another Humidity controller and light arrive this week.)
GSC2 Environment has been hovering at 79 degrees and 61 percent humidity for most of the week. Yeast and sugar CO2 in use.
Fast Buds strain is solid👊💪👍😍 as is evident in GSC......all issues are grower related to pH problems in first three weeks of their life.
Little more detail:
June 6, Day 57
- 8L mixture with BigBud @ 2ml, VeloKelp, Rezin, liquid Wt, Vitathrive, Dual Fuel @ 1.5ml, CalMag @ 1ml = 1275ppm and 6.1pH
- GSC took 5L and GSC took 3L.
- turning lights down yesterday helped. Both girls leaves are standing up more now,
June 7, Day 58
- debated on feed but mixed 8L with BigBud @ 2ml, Rhinoskin, VeloKelp, Rezin, liquid Wt @ 1.5ml, Dual Fuel @ 1ml = 1015ppm and 5.6pH
- GSC took 6L and GSC2 2L.......good run off from GSC but none from GSC2
- GSC tent needs more humidity in it......working on it
- GSC2 is not looking all that great with her long fan leaves.
June 8, Day 59
- dry out day
- GSC is doing very well and looking big.
- GSC2 is doing better since in the flower tent and under the T5 light.
June 9, Day 60
- mixed 8L water with Massive and Terpinator @ 3ml, Sensizyme, Rezin, Vitathrive @ 2ml, Liquid Wt @ 1.5ml, Dual Fuel @ 1ml = 1050ppm and 5.6pH
- GSC given 5L and GSC2 was 3L.
- Full strength feed as things are going okay overall.
- GSC2 is getting taller and lower branches standing up more now.
- GSC is happy by herself😀
June 10, Day 61
- 6L mixture with BigBud, Rezin @ 2ml, Liquid Wt @ 1.5ml = 475ppm
- 4L for GSC and 2L for GSC2 - fair bit of runoff
- GSC2 still has lots of leaves but they are not touching the pot anymore, she is getting taller.
- GSC is really happy with her leaves way up. Buds are getting bigger as well......slowly😳
June 11, Day 62
- Dry out day today.
- left them alone.
- GSC will remain by herself. Need to get the humidity up over the 53% though. Temp is fine at 79 degrees.
June 12, Day 63
- 8L mixture with Terpinator @ 3ml, BigBud, Rezin, Vitathrive @ 2ml, Sensyzime, Liquid Wt, Dual Fuel @ 1.5ml, CalMag @ 1ml = 1350ppm and pH to 5.6
- GSC took 5L and GSC2 was 3L.......good runoff amounts from both.
- GSC2 taken off the milk crate today. Stripped more leaves as well.
Looking better at the end of the week👍

Likes
15
Share


@Colo420
Follow
Planta de buena ramificación, tallos un poco debiles.
Cogollos compactos y redondeados en la punta

Likes
14
Share


@Chedderbob112
Follow
Av had a good week been busy dunno exactly wot a want tae dae hear feel like a constantly want mere paitience is the key Rome essential built in a day




Likes
8
Share


@Shellshocked
Follow
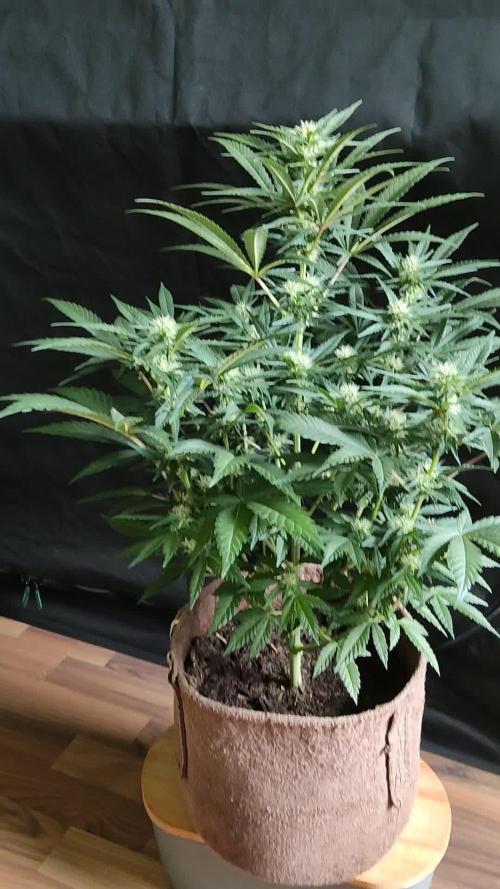
Well looked at the trics and I seen about 40% ambers so I put her in dark for 2 days before I harvested her pulled her out or the dark checked the trics. again and seen zero ambers while I was confused I knew she was not ready so I had a space in my veg. Tent so I threw her in there for her last week or 2. She looks so bad as I let her dry out big time and with the ph issues I had earlier in the grow there's not a leaf on her that's not got part of it dying off. Hopefully this is last week of flower as it's week start of week 10 and I really wanna try her out although most will go to concentrates as this grow was not ideal and the frost is minimal compared to other gg4 I got flowering right now.
