
Likes
Comments
Share


@MountainFlowers
Follow
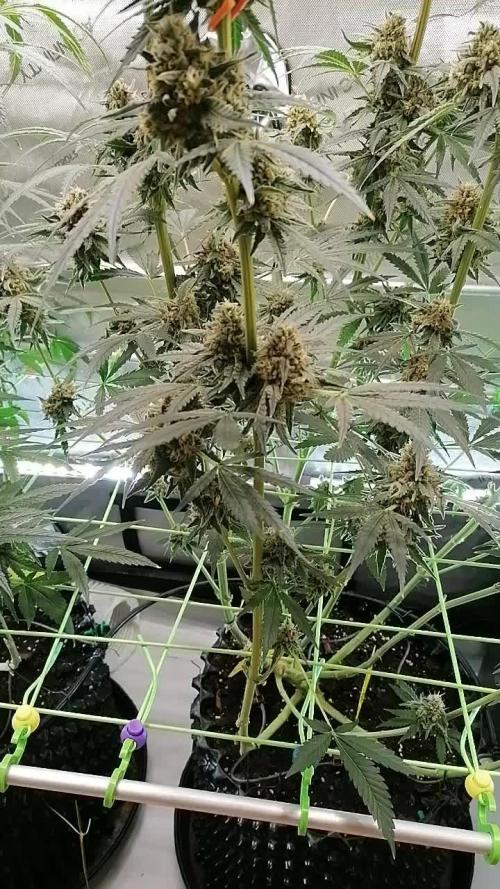
Final Report:
Grow:
The plants has grown very beautiful and healty without pests and diseases. They grown bushy and with medium height during the vegetative stage.
I had try to use LST in third veg week but i did't made correctly and after that i dicided to return to grown normally without any particolar tecnique.
I used a littel more fertilizer then mine usual and that made the plants grown fast without any problem.
In the first two weeks of flowering stage the plants started grow taller and the number of the branches increase, in this phase i only defoliated when the fan leaves turn yellow in late stage.
Form the start to the end the flowers grown dense and bigger every day and this time i waited until almost all of them were mature before harvest the plants.
I changed the plants from one grow room to another(in the sixth week) when they became too high and they couldn't stay more in the smaller grow box(nothing changed in the enviroment between the two boxes).
Equipment and grow box:
The enviorment of grow box has been optimized every stage with the right temperature, umidity and air flow.
Vegetative temp/umidity --> 23-29 °C/45-55%
Flowering temp/umidity --> 20-26 °C/40-50%
The air flow was created by two pc fans and one big fan.
Harvest:
This time i harvest a big numeber of beautifull dense buds and i just discarde only few fluffy buds in the lower branches.
The result of this grow is amezing compared to my old expiriences.
I harvested the flower and i made a fast curing process after i washed the crop and i let them to dry with a fan on it.
After five days a take the branches which were to dry and i did the final trimmig before put all the harvest in a open jar for finishing to dry.
I collected all the leaves, fluffy buds and trimming scraps in a bag and i let them dry.
Later i put the bag in the freezer and when i collect and dried all the scraps from OG Kush and Dandoverde Haze i did some Ice-O-Lator hash.
I used 250g of trimming stuff and i made 11.50 g of hash, I had use a set of 5 bag and i take the resin from the 160µ - 120µ - 73µ- 25µ bags.
I pressed all the resin in a great block of tasty strong hash.
Always better every time 😊💪
Total harvest ---> 90g only of dense buds and 11.50g of hash.

Likes
29
Share


@nonick123
Follow
Día 13 (06/05) Nos acercamos al final de la fase plántula. A ver si ahora empiezan a crecer de forma explosiva!
He sido muy estricto con los riegos, dejando que el top hasta el nudillo se seque completamente!
Día 14 (07/05) Hago una mejora en la tienda. Hasta ahora tenia intracción pasiva, pero ahora he instalado una turbina para que impulse aire fresco dentro de la tienda
Día 15 (08/05) Con el calor que hace me sorprende que las macetas sigan aguantando la humedad, pero al hundir el nudillo sigue húmeda. Mañana haré un riego de nuevo
Día 16 (09/05) Relleno el top con sustrato para compensar la compactación y dar mas soporte a las plantas
Riego con 300 ml solo H20 - pH 6,2
Día 17 (10/05) Baño de sol de dos horas.
Día 18 (11/05) Baño de sol de dos horas
Día 19 (12/05) Riego 750 ml H2O + Regulator 0,15 ml/l + CaMg-Boost 0,25 ml/l + Startbooster 0,25 ml/l - pH 6.2
💦Nutrients by Aptus Holland - www.aptus-holland.com
🌱Substrate PRO-MIX HP BACILLUS + MYCORRHIZAE - www.pthorticulture.com/en/products/pro-mix-hp-biostimulant-plus-mycorrhizae

Likes
82
Share


@WhiteEdge
Follow
26.03.2024
Continue into week 4
Update firmware on TrolMaster Tent-X (3.6)
Replace all filters, remove and clean drain buckets and tubing.
Mix new batch with 56ml AN connoisseur AB + 4.5g Big Bud Powder + 7.5ml Silica - total 30l @ 1.34EC. NPK Ratio is 1-2-3 , Cal/Mg ratio is 4-1.5
Target EC for this week is 1.2 start and end week with 1.3. Checking plants will determine timing of strength
Donne one pass off long misting (3min) with diluted solution @ 0.84@C
Set Day/Night misting cycle @ 60s ON time
Finally have time for managing canopy, pull down taller branches and position all tops to fit under screen without touching. Try ro spread them evenly across the net, top per square of net
Defoliating all girls, remove all fan leaves and prune lots of smaller branches from middle. Lot of foliage is removed!
After stripping humidity drop significantly (41%) , need to install humidifier again to keep RH @ 50-52%
Set dehumidifier thermostat to work @ 50% RH. Reduced light intensity for this day, let girls recover from stress
PAR map 1150max/650min PPFD, VPD -1.2-1.3, DRH 50-54%, NRH 45-49%, NT-20-21c, DT-24/25.5c, Leaf temperature 22-23c, Light distance 45-55cm, CO2 700+ppm
HLG Scorpion Diablo @ 65-75% - 45-55cm distance
60s ON time 20min OFF time @ Day Time
60s Off time 30min OFF time @ Night Time
NT-Nutrient Tank - PH -5.90-, EC -1.32, Temp-20-21
27-28.03.2024
All girl looking great after defoliation,)
Clean benches and floor in box
Replace all filters
Set dehumidifier thermostat to work @ 47% during night times, 50% @ day. Humidifier is also connected and set @ 49% Day and 45% @ night, if needed
Inkbird humidity controller stop executing's automation for day/night settings. Start manually to change day/night values for now
Next several days, until weekend, temperatures outside will be high , 29c max. Hope it will not raise temperature in box to much.
Light is set on TrolMaster Tent-X controller to dimmed at 28c
AC Infinity fans are set to AUTO mode with height temp set at 26c and high RH set at 54%
Top up tank with 25ml AN connoisseur AB + 4.5g Big Bud Powder + 7.5ml Silica - total 75l @ 1.34EC
PAR map 1180max/680min PPFD, VPD -1.2-1.3, DRH 50-52%, NRH 45-48%, NT-21-22c, DT-24/25.5c, Leaf temperature 22-23c, Light distance 45-55cm, CO2 700+ppm
HLG Scorpion Diablo @ 80% - 45-55cm distance
60s ON time 20min OFF time @ Day Time
60s Off time 30min OFF time @ Night Time
NT-Nutrient Tank - PH -5.90-, EC -1.26, Temp-21-22
29-30.03.2024
Refilled the tanks with 20l of fresh mixture. 25ml AN connoisseur A+B + 3g Big Bud Powder + 7.5ml Silica - total 20l @ 1.21EC
Refilling is done in two passes, one time before light up, and second time early in morning, two hours before night time.
This give additional nutrient cooling without running water chillier. Refill solution is @ 18c
Checking EC and PH 2-3 times a day. The electroconductivity values are around 1.24EC.
I maintain the strength until it drops or rises. For now, I’ve caught the perfect strength, the liquid is almost static with very small oscillations in electroconductivity and PH.
Replaced all filters in the system, replaced on washing… Every other day is enough, during daily cleaning there is no dirt on the filters.
The girls are handling the environment well, leaves are raised as they should be, they seem like very happy plants.
Formation and enlargement of flowers can be noticed with the naked eye.
The wave of warm weather continues all this week. Expected temperatures for the next seven days range from 25-29c. Need to pay attention to that
Raise light 10cm, top of canopy now is around 50-55cm
PAR map 1180max/650min PPFD, VPD -1.2-1.3, DRH 50-52%, NRH 45-48%, NT-21-22c, DT-24/25.5c, Leaf temperature 22-23c, Light distance 50-55cm, CO2 700+ppm
HLG Scorpion Diablo @ 80% - 50-55cm distance
60s ON time 20min OFF time @ Day Time
60s Off time 30min OFF time @ Night Time
NT-Nutrient Tank - PH -5.95-, EC -1.24, Temp-21-22
31.03.2024
Girls totally recovered from defoliation. Almost all gig leaves grow again on all girls.
Tropicana Cookies have most apparent bud development, in size as well
Purple Lemonade is going to be a biggest in height in this grow . They already around 85+cm with SCROG branches.
Tropical condition continue. Temperatures going from 26-29c, night temperatures still colder and stay around 16c
Outside temperatures affected water temp in nutrient tank, will se if i need for a water chiller or i will cool with adding cooler nutrient solution.
Lower wattage on light , set Diablo @ 75%
Replaced all filters in the system, replaced on washing…
Refilled the tanks with 15l of fresh mixture. 25ml AN connoisseur A+B + 3g Big Bud Powder + 7.5ml Silica - total 15l @ 1.21EC
PAR map 1180max/680min PPFD, VPD -1.2-1.3, DRH 48-52%, NRH 42-48%, NT-22c, DT-25/25.5c, Leaf temperature 22-23c, Light distance 50-55cm, CO2 700+ppm
HLG Scorpion Diablo @ 80% - 50-55cm distance
60s ON time 20min OFF time @ Day Time
60s Off time 30min OFF time @ Night Time
NT-Nutrient Tank - PH -5.95-, EC -1.21, Temp-22-24
01 04.2024
Outdoor Climate: It’s hotter outside. I’ve set the Diablo at 73% to maintain temperatures in the box within the 25-26°C range.
Humidity: After defoliation, the humidity is low, which is great! The dehumidifier hardly worked this week.
Misting Routine: I start the day with a 3-minute misting session; this will be the routine for now.
Nutrient Solution Temperature: I’m keeping the nutrient solution temperature between 20-23°C. I refill the tank twice a day to cool down the solution.
Light Parameters:
PAR Map: Maximum PPFD is 1080, minimum PPFD is 650.
VPD: Ranges from -1.2 to -1.3.
Daytime Temperature (DT): 25-26°C.
Nighttime Temperature (NT): 22°C.
Leaf Temperature: 22-23°C.
Light Distance: 50-55 cm from the plants.
CO2 Levels: 700+ ppm.
HLG Scorpion Diablo: Set at 73%, positioned at a 50-55 cm distance.
Lighting Schedule:
Daytime: ON for 60 seconds, followed by 20 minutes OFF.
Nighttime: OFF for 60 seconds, followed by 30 minutes OFF.
Nutrient Tank (NT):
pH: Maintained between 5.9 and 6.1.
EC: 1.18.
Temperature: 20-23°C.
Week 4 off Flowering in Summary
120 litter off RO water,
210ml+210ml AN connoisseur A+B, 18g Big Bud Powder, 45ml Growth Technology Liquid Silica
70kW electricity in total for light, Pumps and AC Infinity Fans. 63kW for Light + 2kW Dehumidification + AC Infinity ventilation
Week start @ 1.31EC, nutrient strength., keep strength @ 1.24 till the end of the week
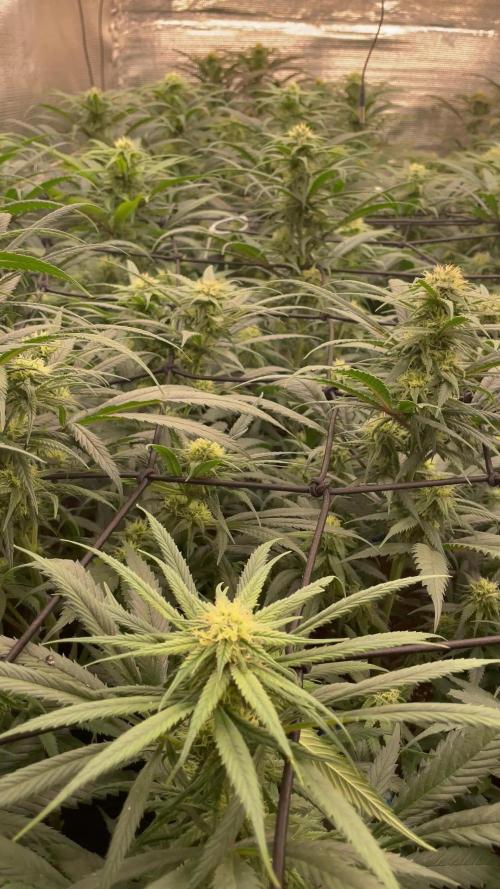
Girls look superb all time, Wedding Cheesecake have two pheno, realy like buds on one girl
Tropicana Cookies fill bud sites this week a lot, Purple Lemonade is going to be talles from all three stains. Nice bud formation also.
PH was stabile and move from 5.90 min to 6.2 max.
Light distance for this week - 50-55cm from tallest top , PPFD levels around 1100 in center, trough whole week. Lowest reading 680 @ corner
Temperature are from 23c at start off day to 26c max at some points. AC Infinity T6 extracting fan program in AUTO to kick in @ 26c
Night temps around 21-23c, dehumidifier work less this week. Outside humidity is low this week
Water temperatures in middle off week start to rise, reffiling solution is cooled to bring temp back from 23-24 to 20c
Defoliate girls on first day off ths week, pruning off smaler branches, lots off foliage is removed
After defoliation humidity drop inmediately in box. Need to bring back humidifier for couple of days. RH was low trough whole week
Day RH is moved from 45% to 50% max, at night times drop to 40-45%
Next week outside temperatures continue above average for this time of the year.
Continue in next week, starting probably with one more light defoliation, bigger fan leaves only
Likes
31
Share


@IndicaVibeMe
Follow
Shogun is taking the lead, in terms of size AND smell!!! Seriously she has not even started preflower, no white hairs and YET her aroma is amazing!!! Seriously I can't WAIT to smoke these buds. Shogun is the Ninja warrior, her genetics are Gorilla Glue #4 & Amesia Haze from RQS.
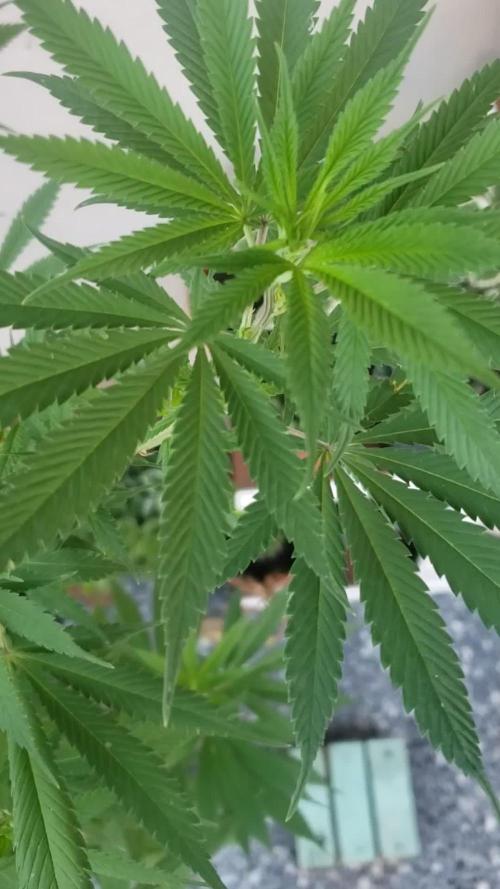
The 2nd plang in the lead is Itty Bitty who's tripled in size the last week. All my girls seem to like the environment I've made for them & are loving Life. 😎

Likes
13
Share


@cookingwithninja
Follow
Week 9 day 1 video pheno.
Gonna chop this week
Week 9 day 7 well chop this weekend so on week 10 Day 1-2. Just waiting on a light to reveg one.
Everything is magic
Likes
32
Share


@BB_UK
Follow
Everything is about to change for these girlies as I have a new light on arrival to cover the whole tent area. TSW2000 courtesy of my mars hydro sponsors! The lights clearly make a huge difference in growths among others I’ve seen on the market! I’m glad I’m a loyal Martian 😎 👾 👽 I’ll continue as I have until then!

Likes
22
Share

@Brujha77
Follow
Start 9. Blütewoche
Endspurt🥀🥀
Trichome sind langsam alle milchig💪
Denke mal ich werde noch bis nächstes Wochenende warten, dann sollten die beiden es geschafft haben.
Bin da wirklich gespannt. Guter Trichombesatz und riecht wirklich komplett nach Zitrus mit Papaya 😍😍
Tag59 Blüte
Heute wurde der Tank abgedreht.
Likes
19
Share


@Oldmanbud__50
Follow
Shud I flush peeps. Only 2.so this grow will be 3 harvests.. 2 on flush 1 a little longer. And haze god only knows lol. Ty
Processing
Likes
12
Share


@Therbalist
Follow
Around 25g off no.3 pulled early due to spider mite making a comeback!
No.1 started to rot at the top overdid the STS spray.
No.2 is an absolute beast, lovely smell coming off it really impressed.
Will not be doing el natural ever again definitely get alot more off topped and trained plants. Enormous bud though was what I was aiming for!
Likes
321
Share


@Tropicannibis_Todd
Follow
🤔🤔🤔🤔🤔 HAPPY GROWING 🤔🤔🤔🤔🤔
Looks like I've can upload short videos 👉 so I will do what I can my friends
We are now 42 Days in and everything is going great 👍 👈 We are now streching really good and the pistols are all over 👌
👍 decided to showcase the Mini BigBand , was a extra seed that germed so I kept it as a Mini Me 😊
Except for some watering it's been pretty smooth I've done a little maintenance and manipulation of the canopy 👈
Might do a slight defolation later in the week 🤔
👉Soil Medium Provided by ProMix.ca
👉Nutrients Provided by Agrogardens
👉Lighting Provided by MarsHydro.ca
I would like to thank the many growmies for support throughout the years 🙏 So Let's Do This 👊👊👊 Happy Growing


Likes
14
Share


@ConspiracyFly
Follow
Week 10
Gorilla Cookies Auto (Fast Buds)
Keep getting fatter
Week 10....5 week of flowering (73 days)
It has 64 centimeters
16L
This Week - Defoliation-
Godzilla Cookies (Herbies)
Keep getting fatter
Week 9 Week 3 week of flowering (63 days)
It has 71 centimeters
15L
This Week - Defoliation
Gorilla Glue Auto (Herbies)
It has 25 centimeters
6 Week...1 Week of flowering (38 days)
This Week - LST - Defoliation


Likes
15
Share


@Bluemels
Follow
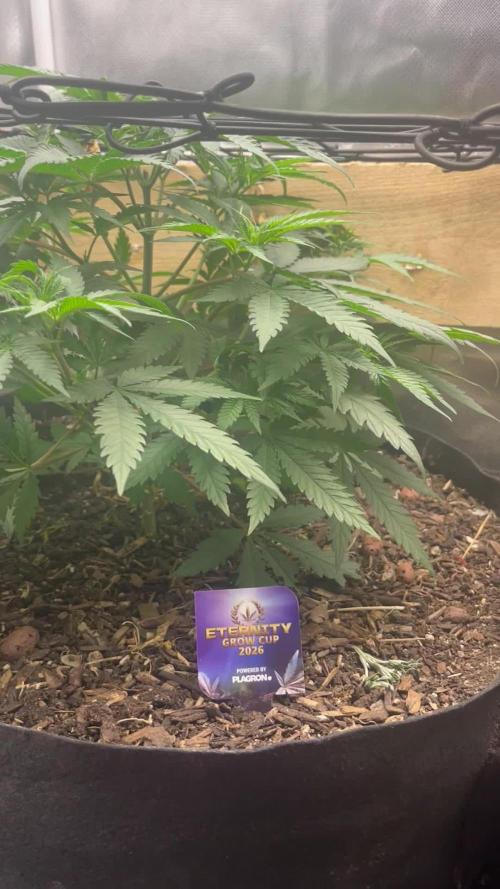
Tag 91: Nur noch 3 Wochen bis zur Ernte! Die Triple G entwickelt sich prächtig, ein richtiger Urwald ist sie geworden 😁
Bin gespannt wieviel es am Ende wird, so wirklich erahnen lässt sich das nämlich noch nicht 😶
Likes
21
Share


@cadur
Follow
Coalas are now so fattened up they are toppling over. Not had this before so have just propped them up.
Have trimmed a few leaves to get a bit more light in and some of the top leaves have started to die off so not long to go now. However, still no amber trichomes so patient I must be.
Likes
4
Share

@The_Doctor_Green
Follow
Hola a todos!! Esta laughing buda va creciendo bien, ha soportado todo el entrenamiento que le he dado😅😅.
Ya comenzó a mostrar las preflores, asique estoy muy emocionado,
La he regado con fertilizantes 1 dia, el resto de la semana solo lo he hecho con agua, con un ph entre 6.2 y 6.4
Creo que debería ponerla en una maceta más grande pero no tengo😒🤭😅.
Porque la riego todos los días y la maceta parece que no le hecho agua..
Realice una defoliacion en todas las ramas bajas, y también he sacado algunas ramas para dejarme unos esquejes😁. Espero que funcionen🙏😃.

Processing
Likes
7
Share


@SybDarret
Follow
They are 45 and 50 cm
Both of them look pretty, each one is different from the other but they are beautiful 😍
Taller still being fat, her leaves are turning darker and i like it.
The smaller have more branches, so i think in the end they both will yield about the same, or maybe smaller yields more. Let's see.
Both plants don't look like other diaries i've been following 😯
They have a strong fruity sweet smell, But not as strong as PE.
Watered yesterday with nutrients, i'm not sure if keep feeding them or not. I guess if i give them one more week (maybe cut them on feb 11) their colas may gain some weight, specially lower buds.
Added a video of each plant, i hope you enjoy 😺


Likes
23
Share


@MistaOC
Follow
28.01. Day 3
Just relax and get an eye on the vpd!
In my case looking for 0,6.
But temp. Is very cold with 19 degrees
——————————————————————
30.01. Day 5
Same
—————————————————————
Likes
6
Share


@Kendoda
Follow
It’s the second week of flower and I’ve got her spread across the net.
I’m going to do a foliage feed of fish mix and alg a mic in a around 4 days as well as another 4 ml of alg a mic in 2L.

Likes
3
Share

@PlantMike
Follow
Nothing new to report with sticky broccoli. She got a topping and a light defoliation of some of the megs fan leaves so she could clear lateral growth. Growth is steady and with these established pots there isn't much need for intervention by me while in veg. Flipped to flower 2/17. Here we go for flower!
Likes
10
Share

@carlitoshaze44
Follow
Buenas a todo compañer@s,otra semana más de cultivo.
Amnesia haze
Hoy día 3
Finalizamos la semana 5 de floración.
Cambiamos a la semana 6
Aumento de la EC hasta los máximos valores que acepte la variedad,proabado este fenotipo de amnesia haze en varios cultivos con una EC2600 en sustratos.
Una semana bastante jodida de agua,muchas lluvias,con lo que conlleva alta humedad en el exterior y con ello más alta en el cultivo.
Pero seguimos luchando!
Dia 5
Todo bien ,exceptuando una de las niñas que parece tener alguna deficiencia,magnesio pensé en primera estancia,pero otros compañeros me dijeron que podría ser que el magnesio bloqueó el potasio en unos riegos atrás.
Le reduciré el magnesio,y le seguiré dando la misma dosis de potasio que le doy a todas las demás..
El riego es por goteo y no queda otra, a esa pequeña le añado lo que pida de más con una pequeña pistola de agua por debajo.
Va afinando el cultivo con respecto a los olores.