


Likes
Comments
Share

@Nickeluring
Follow
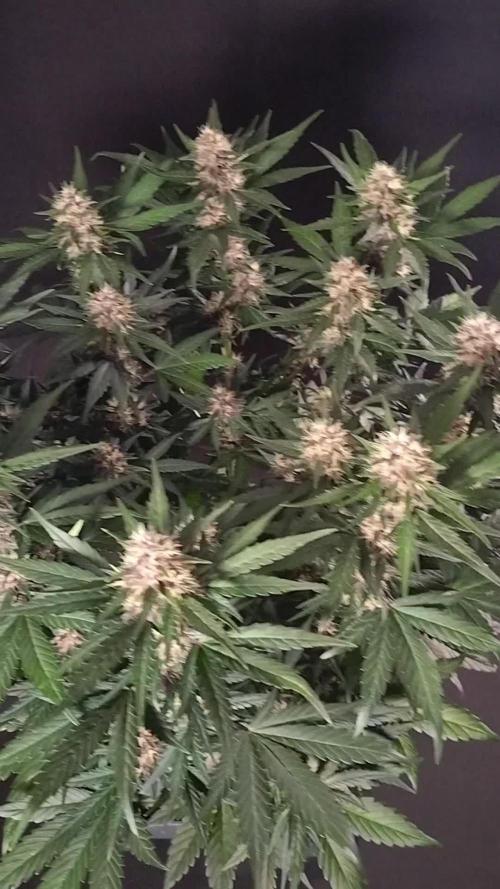
This week I've just been feeding, watering and defoliated the girls.

Likes
2
Share

@Simba732
Follow
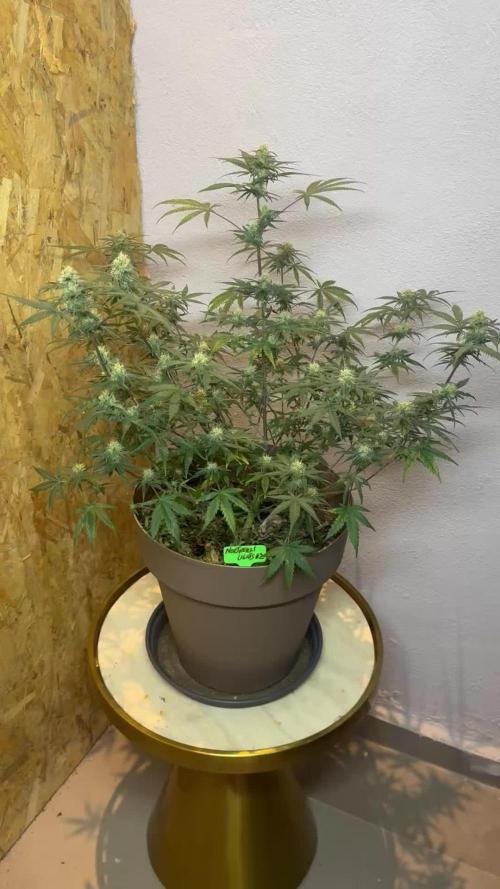
❇️ Another week officially checked off the list
❇️ Stretch phase: completed ✅ She’s done reaching and now locking in on flower power.
❇️ Loaded with bud sites and honestly, that’s a view I never get tired of 👀🔥
❇️ Citrus notes are starting to come through the nose knows 🍋✨
❇️ She’s growing very differently from her sister. looks genetic. No panic mode activated here 😌
❇️ Regular feed, quick pH adjustments, and we’re cruising
❇️ Week 10… let’s get it 🚀

Likes
12
Share


@GREENPHOENIX6262
Follow
Starting week 2 Veg - See below for specs
Nutrient feeds remain the system
Height - 2 inches (Not much progress in height) Width has definitely grown out
Water feeds continue to be everyday - Have a gallon+Nutes
Light Intensity - 100%
*Mid-week review - 8/18*
Introduced Cal-Mag (4 ml/Gal)
Plants grown approximately .5 inches in height - 2.5 -3.0 inches in width
Light Intensity 100%
*End of week recap* (08/20)
Both have grown about 1 - 1.5 inches in height and 2 - 2.5 inches in width.
Fan leafs deep lushes green
Bud sites topped
Thus far all is running smoothly.
Likes
121
Share


@BudBoutique
Follow
Welcome to Bud Boutique Grow Diary - really appreciate all your love and support :)
Dont forget to check out my other current grows!
🗓️ This Week:
- bud developing is going further
- really a lot of trichs already on buds and on the sugar leaves itself - see night picture
- in general plants looking a little hungry so gonna increase Plagron Bloom from 4ml/l to 5ml/l and see if further adjustment needed
- started Plagron CalMag (5-5-0) for all
- stopped with Power Buds + Sugar Royal because of their high N to compensate the CalMag
___________________________________________
--- 🌱 Strain ---
🏷️ CALIFORNIAN GOLD by Paradise Seeds
https://www.paradise-seeds.com/feminized-cannabis-seeds/californian-gold
---💡 Lighting ---
💡LUMATEK ZEUS PRO 600
https://lumatek-lighting.com/zeus-600w-pro-29/
--- 🥗 Nutrients and Feeding
* 🍸 PLAGRON Algae Baseline grow/bloom + Additives: Power Roots, Sugar Royal, Pure Enzym, Silic Rock, Power Buds, Green Sensation
* 📅💪 baseline grow/bloow: 4ml/l & additives: 1ml/l each
https://plagron.com/de/hobby/produkte
--- 🏭 Grow Setup ---
* 🏠🌿 Indoor: Homebox 120x120x200cm (4x4)
* 📐🌀 PrimaKlima exhausting Fan 1180m3/h (running on 60-80%) & Can Light Filter 800m3/h & 1x Fanbox 1x Dyson fan for Air circulation
https://primaklima.com/de/shop/ventilatoren-de/ec-ventilatoren/pk160ec-tc/
https://canfilters.com/products/filters/
All Likes and comments are highly appreciated!!!
don't forget to check out my Instagram: budboutiquee <3
- Bud Boutique

Likes
39
Share


@Randyb4
Follow
Day 49 I super cropped all the plants for the first time on the first day of the week. They had all recovered by the next morning. I've been doing some hand bending down too to keep them short as possible. No wires at all. Still havnt watered since day 46.
Day 51. I watered and feed this morning with the nutrients listed in the diary. They took 4 gal of water untill they had runoff. Ph was 6.1 @ 71°F. Also defoliated plants B and D a tiny bit for the first time. I came back to the tent around 4pm and noticed plant B was 22 inches from the light again. (I raise the light about every 3 days to maintain 24" above canopy) So instead of raising the light again I supercroped plant B to match the hight of the other 3 plants. Later in the evening I checked on them and plant B had bent back up towards the light, mostly even with the rest of the plants now.
Day 52. Plants looks good. Plant B recovered well again from the HST but plant C (the strongest plant so far) is starting to curl up on the edges of the leaves. I'm pretty sure it's over watering. I'll keep an eye on it.
Day 53 Plants look really good so I tired the light up 5 more percent to 35% still lat 24", above canopy. Tonight I put the trellis net down on them and spreaded them out more.
Day 55 Plants were starting to droop so I watered Plants A and C with just water and molasses pHed to 6.0 @ 71°F, and watered Plants B and D with half strength general hydroponics (late veg). Let the runoff sit in the pans for 3 hrs or so then I vacuumed the runoff out. While I was watering I defoliated plants A and C at the base ( leaves wernt getting any light).

Likes
11
Share


@Skunkiest_bender39
Follow
Ende von Woche 4 ist zu sehen, die Mädels wurden geFIMt allerdings mit einer Rasierklinge.
Die beiden krumble brauchten dringend Dünger, der verbrauch steigt deutlich an. Habe von 5 auf 7 ml/L erhöhen müssen auch bei den Zake.


Likes
30
Share


@Sticky_fingaz
Follow
BIG BIG apologies to Heather from fast buds & to Growdiaries & anyone who follows.
The past few months have been a massive struggle, not just with temperatures & growing weed but on a personal level.
My wife has been very poorly & with covid and everything going on, it's put a massive strain on us all!!
I've tries to maintain an active presence on Instagram but that's about all I've physically had time for.
I've put this update together today, so far into the grow now it almost seems pointless.
I lost my original Mimosa due to high temps & high RH. Moving into the attic at that time of year was a mistake. It has cost me a small fortune to keep things alive. I've had to purchase an air con unit, more fans & just more of everything to be honest.
My purple punch is almost ready to harvest, any time within the next couple of days, followed shortly by Bruce Banner & Kosher cake.
I wont be winning any awards for this Diary & I feel bad as I was supposed to be show casing what 420 Fast buds has to offer & I've failed...miserably.
I hope you can make sense of all the pictures I've included....just a mass photo frenzy over the past few weeks.
Thanks to everyone & all your comments.
Wishing you all the best.
One Love ❤️
Likes
21
Share

@Borberad
Follow
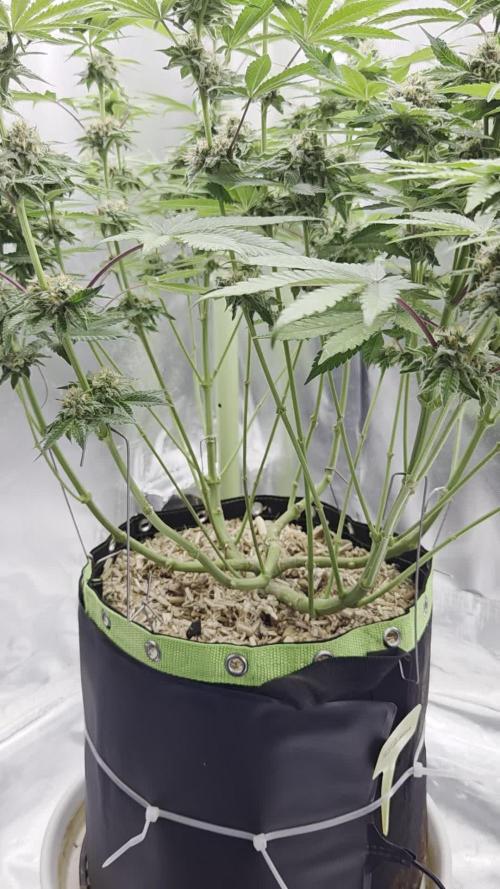
Woche 12
Solangsam wird sie bunt und es es deutet sich an das sie aus dem Soil nicht mehr viel rausholt. Da sie noch gut 20 bis 30 Tage stehen soll gibt es zur Unterstützung etwas Hesi Boost und ab und an etwas Plagron Green Sensation.

Likes
11
Share


@VagueReaper
Follow
I'm very happy with how my plants turned out and can't wait to get going again. They're now hanging in my tent so hopefully dried and ready to trim by Christmas day at the latest.
I will update on weight when dried and on the smoke when cured.
Likes
77
Share


@BipolarHellas
Follow
Hello everyone, 🇬🇷
this is my diary for the GHSC Contest...package received on 21st April...I will be growing Banana Crumble in this diary...It's a cross between Banana Punch and OG Kush, from Green House Seeds...
I wish everyone Good Luck!!!!!Let's Do It.
WEEK 1:"COME OUT AND PLAY"
☠️Day 0...seeds are placed in a bowl with wet paper towels,on a heat mat...
...after 48 hours... they need more time...
☠️Day 000..after 56 hours 3 were ready to be planted,the other two seeds need more time...I planted them in coco coir.My earth is called "Coco Humus", it's a Greek product and it consists of coir, perlite and organic matter...I covered them with baggies for extra humidity...They are now under a 50 W Led light...Fingers crossed...
☠️Day 1...24/04/20...the babies have popped their first tiny leaves...their cotyledons are different than usual,they are a bit longer...the are under a 50W Led inside a cupboard..I have removed the baggies...they are still fragile and small
☠️Day 4...the babies are growing very slowly but they are OK
☠️Day 6...so they are growing very slowly...they have just popped their second pair of true leaves but they are still tiny...Our journey has begun...
See u all next week...
Likes
7
Share


@dober151
Follow
Plants seem to be doing good and haven’t gotten stressed so I decide they’re good to top. Just took them off with my fingertips but I missed on a couple so that was cool to see the difference between FIM and topping. Please make sure your humidity is good everyone and don’t overwater. It started to obviously affect the growth of the plants from this point on imo
Likes
96
Share


@OutForReal
Follow
Song of the week : The Beatnuts - Watch Out Now
-------
Day 33 - Recovered nice from last week topping , she's pushing secondary stems 🌱. I tried a supercroping so let's see how she react. Still watered with tap water , the pre-fertilized soil provide enough nutrients until her next and final transplant to a 15L pot.

Likes
1
Share


@Ninjabuds
Follow
It’s day 33’from seed. All of the plants are really healthy. The plants have a really great root system at this point… I am currently slowly moving the light intensity up to the veg area. Now that are in a groove they are about to explode… I’m hoping I can flip the plants to flower in 1 weeks but I’m thinking I will wait to weeks and let them get a little larger. The plants are just now starting to look visually different next weeks update I will be ababoe to go into the visual differences, they are just not that extreme yet to really talk to much about.
Likes
5
Share


@MrFriday
Follow
22.09.2025
DAY 27/DAY 8VEG
RH DAY 60-63%
RH NIGHT 60-63%
Room temperature day 26-27C
Room temperature night 23-25C
EC 490
pH 5.9
Water temperature 18.5-19.5
PPFD 420
Light cicle 20/4
VPD 1.2-1.3
I'm increasing the EC to 0.48 by the Athena feeding program. A little bit of defoliation in order for the side branches to reach better light. I usually don't go in to a heavy deforestation I just occasionally remove some of the big fan leaves in order to have better light penetration. So far the roots are going great not even a slight sign of bacteria or problems in the root zone. We have nice white roots and so far is all going great. Ill probably move them in a separate buckets in week 4. I'm not sure that I'll even have 4 weeks of vegetation becose some of them are starting to show the gender signs, so probably it will be like 3 weeks veg at maximum.
DAY 28/DAY 9VEG
RH DAY 60-63%
RH NIGHT 60-63%
Room temperature day 26-27C
Room temperature night 23-25C
EC 520
pH 5.8
Water temperature 18.5-19.5
PPFD 420
Light cicle 20/4
VPD 1.2-1.3
I sense a little bit of deficiency maybe is Mn or Fe not sure but I added a little bit of CaMg and a bit more Grow A+B in order to fight it. I have heard that Athena usually are thirsty for CaMg so basically you have to add more. Plus I lower the pH to 5.8 and now the game is ON. I'll see in a couple of days but if I'm not satisfied probably I'll raise the EC to 600 with a little bit of higher CaMg for base.
DAY 29/ DAY 10VEG
RH DAY 60-63%
RH NIGHT 60-63%
Room temperature day 26-27C
Room temperature night 23-25C
EC 485
pH 6.1
Water temperature 18.5-19.5
PPFD 420
Light cicle 20/4
VPD 1.2-1.3
I realized they this problem with the leaf burn is from the Foliar feeding. NEVER PH YPUT FOLIAR FEEDING AND NEVER LEFT THE FAN WORKING🤣🤣🤣 Anyway it's all good now besides the few burned leafs. This strain is branching a lot, so basically I don't plan to use LST. I don't even think that is possible to use LST effectively becose my plants are hard and woody and only possible way for me to deal with them is through scrogging.
DAY 30/ DAY 11VEG
RH DAY 60-63%
RH NIGHT 60-63%
Room temperature day 26-27C
Room temperature night 23-25C
EC 450
pH 6.1
Water temperature 18.5-19.5
PPFD 550
Light cicle 20/4
VPD 1.3-1.4
So far I decided to use the full spectrum. The idea of the first few weeks under cold White was to preserve them a little bit and keep them short but since today we have full spectrum plus far red. Lets see what is going to happen tomorrow. I'm a little bit afraid of the temperature swing becose this will Spike higher temperature, but whatever I'll deap with it.
DAY 31/DAY 12 VEG
RH DAY 60-63%
RH NIGHT 60-63%
Room temperature day 26-27C
Room temperature night 23-25C
EC 380
pH 5.8
Water temperature 18.5-19.5
PPFD 550
Light cicle 20/4
VPD 1.3-1.4
Brutal development only for one night. I know it's hard to be seen on a picture but on live it looks amazing. The little ladies have during pretty much 2 liters of water and so far the AC is going down straight forward so they eat a lot. I had to put a little bit more of fertilizer just to keep them well fed. The Voyager is crushing it and it's only 40% on Chanel 1 and Chanel 2. In fact im not going to experiment with cold light anymore full spectrum is the deal. So far I'm not touching the EC I'm waiting for the week to pass and to jump on even higher.
DAY 32/DAY 13 VEG
RH DAY 60-63%
RH NIGHT 60-63%
Room temperature day 24-25C
Room temperature night 21-24C
EC 500
pH 5.8
Water temperature 18.5-19.5
PPFD 550
Light cicle 24/0
VPD 1.0-1.2
I couldn't wait more time for the new week to come and to increase the AC. My current AC for today was 300 and I have started to see manganese deficiency so I had to add nutrients. Tomorrow is the last day of the week after that I'll rise the EC to 670. Somehow and in my opinion Athena needs a little bit more EC Dan the recommend dose in the manual. So far that's the first fertilizer I see that needs more dan the recommendation on the label 🤣🤣🤣 Interesting fact is that now I can clearly see the reproductive organs of the plant. It's female but it's still in week two VEG. I'm curious em I going to see more dan 3 weeks VEG before we go in to Flowering ☠️😜
DAY 33/DAY 14VEG
RH DAY 65-67%
RH NIGHT 65-67%
Room temperature day 24-25C
Room temperature night 21-24C
EC 350
pH 6.1
Water temperature 18.5-19.5
PPFD 350
Light cicle 24/0
VPD 1.0-1.1
Finally I solve the problem with the leaves. It turned out that my clip fan was blowing the humidifier mist toward my flowers. I notisec that only two of the plants have this types of burbs and those are the once right next to the fan. I have changed the fan position and the dehumidifier positions and now I hope all will be fine. I have defoliated a little bit of big fan leaves and I hope in the end of the next week I'll have time to move the RDWC buckets becose I'm a little bit busy does days. I have lower the PPFD becose it seems that this is a bit to much for the flowers.


Likes
4
Share


@Rangaku
Follow
Love this orange cookies strain , she’s everything you could want ; chunky , fruity , sweet and by the pound . Same same next week

Likes
23
Share

@SwabianMadness
Follow
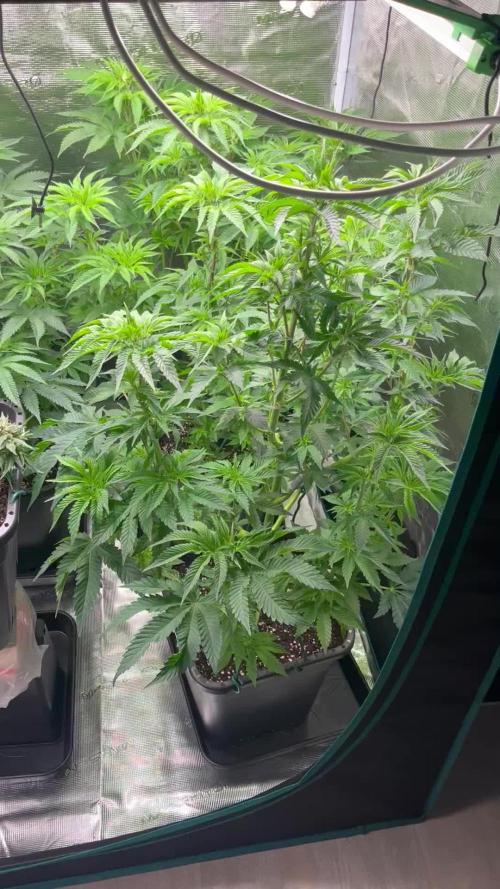
Was little bit nervous when i see them after the 5 Days. The Tent looks so empty because the Leafs hang down. I gave them 1,5 Liter of Water with Calmag. And next morning everything looks fine again 😊
The Stems where i cropped them are healed almost. Just two needs some Days more
It’s done with the vegetative Stage. They get to big if i wait longer. Gave them yesterday a Top Dressing with Mega Worm. And 15ml of Orgatrex in 6 Litre of Water. After one Litre the Pots are full. The other one i give them today
One thing i learned this Time is that you better don’t run IR Light on Vegi because the Nodes stretch to much. But the Photosynthesis Rate had a big Push..
Hope i can get the Ladies under Control

Likes
10
Share

@Leprechauns_Garden
Follow
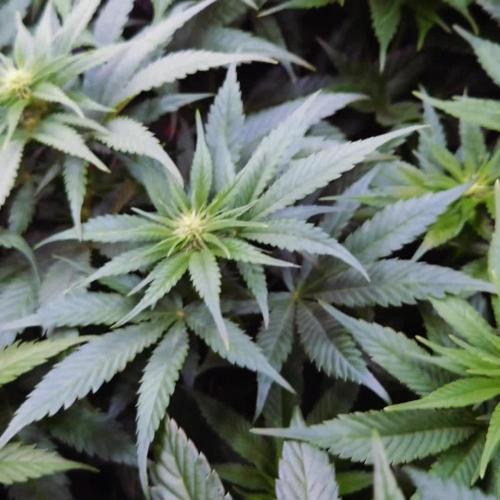
Weekly Update!!! Bzw... 2 Tage zu spät, schon wieder 🙈
Habe einfach gerade zuviel zu tun.
Die Ladys waren wieder beim Friseur, allerdings nur unten rum 😉 ... ✂️🍃🍂
Sie fanden es wie immer sehr gut und streckten sich noch ein ganzes Stück.
Wir sind jetzt Anfang der 3. Woche Blüte und der Stretch geht allmählich zu Ende.
Am Sonntag wird nochmal ordentlich entlaubt und radikal ge-lollipoppt!
Bis dahin fahre ich einen guten Dünger Plan, danke @Plagron !
Es sieht alles gut aus, keine besonderen Vorkommnisse 🤞🤞🤞
Nach dem Ende dieser Woche heißt es abwarten und gut verwalten. Ich stecke trotzdem noch eine Prise Liebe 💚mehr rein, damit sie sich alle wohl fühlen!
Bis dahin...
Let IT grow 🌱 🌿 💚
@Patricia_Zamnesia eure Panamas sind der Hammer 🔨

Likes
141
Share


@Tropicannibis_Todd
Follow
💩Holy Crap Growmies We Are Back💩
Well growmies we are almost there , she got flushed so her days are numbered💀💀💀
👉 Shes a short chunky little plant,😉
Lights being readjusted and chart updated .........👍 Even with early major issues due to the soil/medium she's come a long way 👈
👉I used NutriNPK for nutrients for my grows and welcome anyone to give them a try .👈
👉 www.nutrinpk.com 👈
NutriNPK Cal MAG 14-0-14
NutriNPK Grow 28-14-14
NutriNPK Bloom 8-20-30
NutriNPK Bloom Booster 0-52-34
I GOT MULTIPLE DIARIES ON THE GO 😱 please check them out 😎
👉THANKS FOR TAKING THE TIME TO GO OVER MY DIARIES 👈
Likes
361
Share


@Ju_Bps
Follow
Hello my friendly growmies 👩🌾👨🌾🌲🌲,
Nothing special this week, the cute ladies continue their maturation, and start to be completely purple 💜😍
I'll be so sad when I'll chop them 😞 , but probably happy when I'll try this beauty 🙂🙂🙂😋😋😋.
Smeel fruity and frosty 😋 ❄️ 🍌
💦 2 watering this week 2.75l/plant
Water + Cannazym + Sugar Royal
Water + RQS Bio Flowering Booster
@PH6
RQS Bio Flowering Booster - Week 7
THICKER 1. 2 ml/l
BIGGER FLOWERS 1 ml/l
SWEETER FLOWER 0.8 ml/l
Probably the last nutes watering.
The RQS liquid kit, look doing the job, not overfert or deficiency sign for the moment.
Trichromes look milky, end probably in one or 2 week,
Next watering will be flush.
Lamp @100% and start to be really close to the plant, but not burning sign for the moment.
Thanks community for follow, likes, comments, always a pleasure 👩🌾👨🌾❤️🌲
Merry Xmas to the community 💜👨🌾👩🌾🎅
Mars Hydro - TS1000 💡💡
https://www.mars-hydro.com/ts-1000-led-grow-light
Mars Hydro - FC3000 💡💡
https://www.mars-hydro.com/fc-3000-samsung-lm301b-led-grow-light
RQS - Fat Banana Auto 🍌🍌🌲🌲
https://www.royalqueenseeds.com/autoflowering-cannabis-seeds/487-fat-banana-automatic.html
