


Likes
Comments
Share

@Solitude
Follow
Week 2 Flowering (16/06/26 – 20/06/26)
16/06/26 (Day 10)
Water: 130 L
Silica: 150 ml
CalMag: 70 ml
Bloom: 730 ml
Core: 500 ml
pH: 5.8–5.9
EC: 2.6
Small defoliation to improve airflow and light penetration.
20/06/26 (Day 14)
End of stretch approaching.
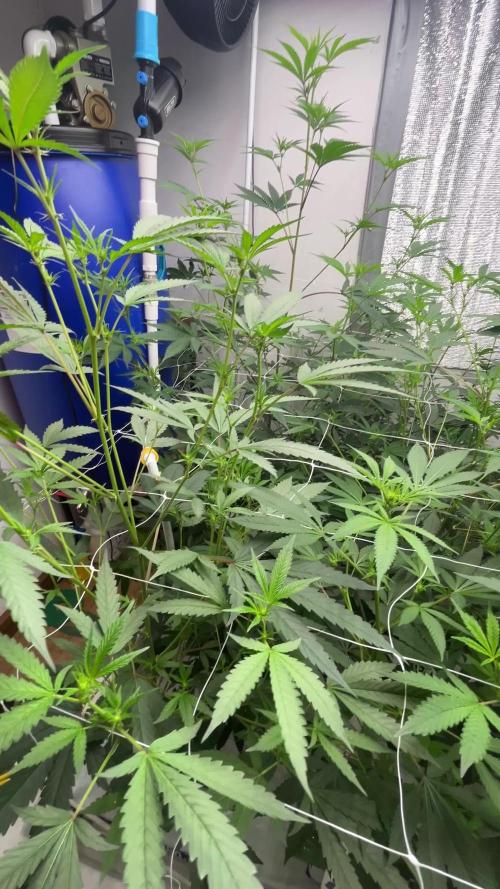
Canopy filled evenly across all tables.
Strong lateral branching with healthy green foliage.
Early flower sites developing with visible pistils.
Maintained irrigation and environmental parameters.
Preparing to transition toward generative steering for Week 3.
Observations
Healthy, vigorous growth.
Uniform canopy with good plant structure.
No visible nutrient deficiencies or pest issues.
Ready for flower bulking phase in the following week.

Likes
13
Share


@nijuana
Follow
From the beginning to the end this genetics was absolutely strong , she wins against very big thrips attacks, 100% well finished , true African sativa power my friends here ♥️♥️♥️♥️♥️

Likes
5
Share


@Nemessis
Follow
N deficiency I think. I just went into bloom today. My next soup will be much more loaded with nutrients to counter the deficiency. Otherwise the plants grow well, stretch and flowering begins.




Likes
1
Share


@Growedbypepper
Follow
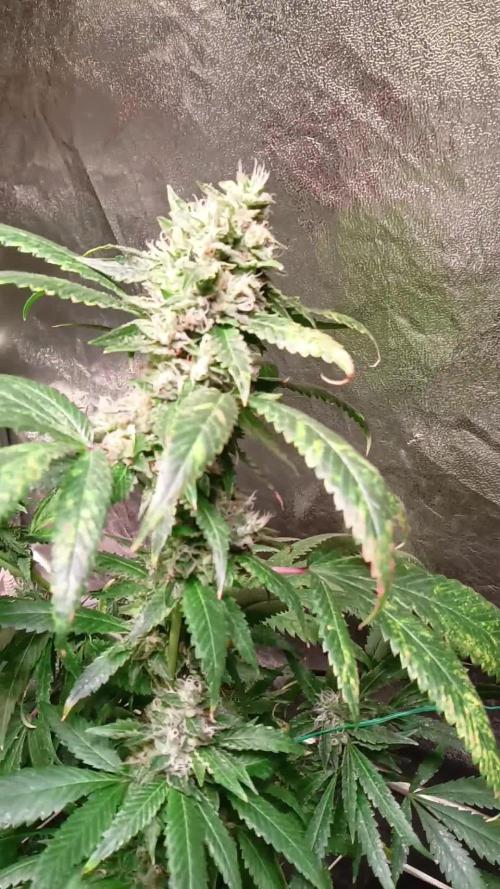
Hasta ahora muy bien mis planta aunque muy resistente presenta unos cuantos acaro aunque ya no puedo aplicar preventivos en el punto de floración en el que se encuentra ya solo qued a mirar el desarrollo de la planta

Likes
11
Share


@ChitownCannaChica
Follow
So this plant was a slow grower from the beginning. Just grew one big chunky bud. Good trichome development and fantastic tropical terps. This is a nice smoker, just not a looker as a plant

Likes
10
Share


@Fonzo412
Follow
For the germination process I ,First put the seeds in distilled water ph 6.5 for 24 hours . Let them float for the first 12 hours in a warm (dark) place . I used my grow tent temperature inside was 75 degrees and 50%humidity through out the entire process .
After first 12 hours I poked the seed to the bottom of the cup and let them set for the finale 12 hours .
After the full 24 hours was up . I placed the seed’s on a plate with paper towel first and second I added water to the paper towel (moist not wet) and placed a seeds on top with another moist paper towel and let go back in the tent for 2 more days
After two days the tap roots appeared for each seed so I potted 2-3 into there finale medium . Didn’t have enough soil for all 3.
Once potted. Plants 🌱 are given 18 hours of light 💡

Likes
Comments
Share


@Barzenegger
Follow
The overfeeding on the center plant becomes apparent, but it still takes me a while to realize it and I kept feeding it the tomato fertilizer.


Likes
26
Share


@Young_agronomist
Follow
23.09.23- и так мы на 85 дне жизни )
Сильных изменений не замечено . Ветки стали немного толще , цветы развиваются , но вверх она не вытягивается .
Имхо может и лучше )
28.09.23- 90 дней жизни !
За последние пару дней она прибавила в росте и зеленой массе . Она очень кустиста и я принял решение провести несколько щадящих дефолиаций с подрезкой пасынков ,чтобы освободить пространство для света и воздуха . В остальном она здорова , а шишки продолжают набирать .
Это очень красивое растение


Likes
25
Share

@DogDoctorOfficial
Follow
Ghost Train Haze — Harvest / Trim / Cure
Part 2 — Trimming, Resin & First Cure
First of all, once again, sorry for dividing this harvest into three different parts. But honestly… there was just no way to fit this entire experience into one single update without rushing it.
This run became something special for us.
So instead of throwing everything into one giant report, we wanted to slow things down and give each phase the attention it deserves.
Part 1 was about harvest day itself — especially the frozen plant and the preparation for the future ice water hash runs.
Now in Part 2, we focus on the monster of the room.
The big Ghost Train Haze girl.
The giant.
And damn… she was beautiful.
⸻
The Giant Finally Ready
After drying slowly and patiently, she finally reached that moment every grower waits for:
the stem click.
Not bending anymore.
Not soft anymore.
That perfect dry snap telling us she was finally ready for trimming.
And honestly, seeing this massive plant hanging there fully dried was already rewarding by itself.
Huge flowers. Dense structure. Long spears everywhere. Frost absolutely covering the plant from top to bottom.
At this point, we brought out the Trim Bin, got comfortable, and of course…
Mr. Baggy joined the session too.
Because trimming alone is trimming.
But trimming with the homies becomes part of the memory.
⸻
Trimming This Beast
Once we started separating the branches and working through the flowers properly, one thing became immediately obvious:
This plant was ridiculously frosty.
And I mean ridiculously.
Possibly the frostiest plant in the entire room.
Every touch released resin.
Every nug felt sticky.
Scissors getting glued together constantly.
Gloves turning darker and shinier minute after minute.
The flowers themselves came out incredibly dense and compact too. Heavy in the hand. Proper weight to them. Not airy at all despite the sativa influence from Ghost Train Haze.
And visually?
Beautiful.
Silver-covered calyxes.
Orange hairs fading perfectly into the resin layer.
Chunky flowers with that classic “don’t squeeze too hard or you’ll ruin the trichomes” feeling.
This girl truly felt like a reward after the full cycle.
⸻
The Trim Bin Surprise
One thing we absolutely loved during this trimming session was watching how much resin naturally collected inside the Trim Bin.
By the end of the session, the amount of loose trichome heads sitting underneath the screen was honestly crazy.
No dry sift machine.
No mechanical shaker.
Just trimming.
And still…
A beautiful golden layer of resin waiting for us underneath.
Of course, finger hash also started building up naturally while trimming. Sticky gloves. Sticky fingers. Sticky scissors. The classic signs of a happy trimming session.
Then came one of our favorite moments of the day.
⸻
Playing The Drums — Moroccan Style
At the end, we decided to have some fun with the trim itself.
Using the dry material almost like traditional Moroccan drum-sifting techniques, we gently worked the trim leaves and remaining material to knock off even more trichomes.
Simple. Relaxed. Traditional-inspired.
And honestly?
It worked beautifully.
What we collected afterward turned into a gorgeous little hash bar that looked and smelled incredible.
We didn’t even bother weighing it.
Sometimes not everything needs numbers.
Some things are simply for the experience.
For the ritual.
For the future session.
For curiosity.
For enjoyment.
And this one definitely earned its place for later tasting sessions.
⸻
Final Dry Weight
After everything was trimmed, cleaned, and separated, the final dry flower weight from this single plant came to:
294.9 grams dry
Honestly?
We’re extremely happy with that.
Almost 300 grams from a single plant in this run is something we can absolutely appreciate.
Especially considering this entire project was:
* 12/12 from seed
* Minimal training
* Minimal intervention
* Natural structure
* Mostly observation and guidance
Just letting the plant express herself while giving her the right environment.
And she rewarded us massively.
⸻
Storage & Cure — Different Approaches
Once trimming was done, we started organizing the curing process using different storage methods.
This time we decided to split the flower between:
* Glass jars
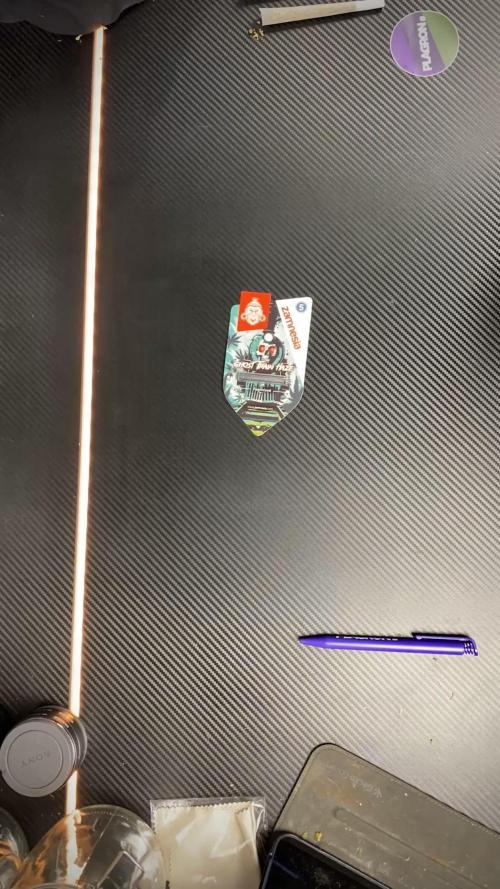
* Metal Zamnesia containers
* Grove Bags
Each one has its own purpose and philosophy.
Glass Jars
The classic.
Simple, reliable, proven for decades.
Perfect for manual burping and personally controlling the curing environment yourself. They also allow us to visually inspect the flowers easily during cure.
⸻
Metal Containers
The Zamnesia metal containers feel more protective physically and also help reduce light exposure completely.
They feel solid. Clean. Almost laboratory-like.
A very nice option for preserving flower while keeping things discreet and protected.
⸻
Grove Bags
These are probably the most modern approach we tested in this run.
The idea behind Grove Bags is that their “TerpLoc” technology supposedly regulates humidity internally while allowing gas exchange in a controlled way.
The theory is that they naturally maintain flower within the ideal curing range around:
58–62% RH
without constant burping.
So now we’re extremely curious to compare all three methods later during the smoke review phase:
* Does one preserve terpenes better?
* Does one keep the flower softer?
* Does aroma evolve differently?
* Does cure quality actually change?
We’ll definitely revisit this in Part 3.
⸻
The Frozen Plant — Flower Comparison
After finishing the main giant plant, we also trimmed and cured the material that came from the frozen/hash-focused plant from Part 1.
This was important for us because we wanted to compare:
* Flower from the “normal dried” plant
vs
* Flower from the plant intended mainly for extraction
And surprisingly?
The terpene profiles feel extremely similar.
Same family. Same identity. Same Ghost Train Haze soul.
Maybe slight differences in intensity or texture, but overall the profile remained very recognizable between both plants.
Which honestly gives us a very good feeling about the future hash quality too.
The frozen plant itself ended up giving:
58.5 grams dry
Plus whatever was already separated and reserved through the frozen material process itself.
So overall, absolutely worth it.
⸻
Macro Photography & Focus Stacking
During all this, we also continued working on our macro photography experiments.
Some of the photos shared in this update were actually focus-stacked images made from:
* 112 photos
* 96 photos
* 33 photos
For people unfamiliar with focus stacking:
Macro photography has extremely shallow depth of field. When you photograph trichomes closely, only tiny portions stay in focus at once.
So instead, we take dozens — sometimes over a hundred — separate images with different focus points and merge them together afterward in software.
The result is a final image where the entire flower or trichome field becomes sharp at the same time.
It takes time.
It takes patience.
But honestly, we love the process.
Because cannabis truly deserves to be appreciated up close.
⸻
Trimming Timelapses
We also recorded trimming timelapses so people can better see the workflow behind everything.
Not just the glamorous final nug shots.
But the actual process:
* separating branches
* cleaning flowers
* resin building up
* trim collecting
* the mess
* the rhythm
* the work itself
Because behind every beautiful cured flower, there are hours of patience nobody usually sees.
⸻
What Comes Next — Part 3
The next and final report will focus on:
* Full smoke review
* Cure evolution
* Drying process explained deeper
* Flavor profile
* Terpene expression
* Effects
* Overall experience with Ghost Train Haze
* Personal reflections after living with this cultivar
That final report will close the entire Ghost Train Haze journey properly.
⸻
Thank You
And as always…
Huge thanks to everybody who stopped by this journey.
To the breeders behind these genetics.
To the companies making nutrients, LEDs, gear, and tools possible.
To the platforms that allow growers to share their passion openly.
To the community members constantly supporting each other.
To the OG followers.
To the new followers.
To the silent viewers.
To the growers.
To the curious people.
To the skeptics.
To the lovers.
To the haters too.
If this grow made somebody stop scrolling for even a few seconds and appreciate the plant differently…
that already means something to us.
From grower to growers.
See you all in Part 3.
📡 DELETED @ 1K Please stay tuned.we never quit https://www.youtube.com/@TheDogDoctorOfficial NEW 🙏 Thank you for your patience and continued support.
FOR DISCOUNT CODES AND MORE JUST FOLLOW THE LINK https://website.beacons.ai/dogdoctorofficial
📲 Don’t forget to Subscribe and follow me on Instagram and YouTube @DogDoctorOfficial for exclusive content, real-time updates, and behind-the-scenes magic. We’ve got so much more coming, including transplanting and all the amazing techniques that go along with it. You won’t want to miss it.
GrowDiaries Journal: https://growdiaries.com/grower/dogdoctorofficial
Instagram: https://www.instagram.com/dogdoctorofficial/
YouTube: https://www.youtube.com/@dogdoctorofficial Deleted by Youtube - https://www.youtube.com/@TheDogDoctorOfficial NEW
Vimeo : https://vimeo.com/dogdoctorofficial Under construction stay tuned ⸻
Explore the Gear that Powers My Grow
If you’re curious about the tech I’m using, check out these links:
🔆 Lighting & Environmental Control
• Future of Grow — Advanced LED lighting technology
https://www.futureofgrow.com/
DISCOUNT CODE: DOG20
• Lumiflora — Under-canopy LED lighting
https://lumiflorade.com/
• TrollMaster — Environmental controllers and automation gear (past collaboration)
⸻
Genetics
• Zamnesia Seeds — Genetics used in this project
https://www.zamnesia.com/
⸻
🌱 Soil, Substrates, Boosters & Root Support
• Plagron — Substrates, bio mixes, and supportive products
https://plagron.com/en/
⸻
🎒 Storage, Curing & Preservation
• Grove Bags — Curing and storage solutions
https://grovebags.com/
⸻
📸 Photography Equipment & Tools
(Not sponsors, but part of my creative toolkit)
• Sony A6700
• Sony full-frame macro lens + few more
• Stacking photography workflow - learning
• iPhone (for behind-the-scenes shots)
We’ve got much more coming as we move through the grow cycles. Trust me, you won’t want to miss the next steps, let’s push the boundaries of indoor horticulture together!
As always, this is shared for educational purposes, aiming to spread understanding and appreciation for this plant. Let’s celebrate it responsibly and continue to learn and grow together.
With true love comes happiness. Always believe in yourself, and always do things expecting nothing and with an open heart. Be a giver, and the universe will give back in ways you could never imagine.
💚 Growers love to all 💚
📸 P.S. – The Eye Behind the Lens
All photos in this diary (for now — except for the ones showing the camera, which I took with an iPhone) are taken with a Sony A6700 paired with a Sony full-frame macro lens and a few more.
Photography is part of the story — it’s how we share the fine textures, the glow, and the quiet details that words can’t always capture.
I’ve also started experimenting with photo stacking — a technique where multiple images, each taken at a slightly different focus point, are layered together to create one perfectly sharp image from front to back.
It’s not digital enhancement or AI; it’s pure photography — a way to reveal the plant’s beauty in microscopic depth, from trichome to petal.
You’ll even see a few shots of "ghost me" capturing the shots — camera, lens, setup — because every grow deserves not just to be cultivated, but documented like art.
FOR DISCOUNT CODES AND MORE JUST FOLLOW THE LINK https://website.beacons.ai/dogdoctorofficial
NEW DISCORD - Official Server Invite Link : https://discord.gg/ksjAkA5T74
Likes
42
Share


@Gabarram
Follow
The Dr. has been vegging for full 8 weeks and on the 9th I switch to 12/12 . In the next few weeks she'll be stretching even more I guess. If she happens to stretch that wild as I have read, I'll have to struggle trying to stop her taking over my reduced grow room and I don't like to apply serious pruning after she has grown. Besides, my hypothesis is that as I chose a big pot, she might be growing aerially for a long time until the roots tell to stop.
Regarding fertigation, I apply once a day a solution 1.3-1.4 mS/cm EC (inflow) using Grow fertilizer alternating with Bloom fertilizer. I'm applying from today on a foliar spray to activate growth at this stage (this week and the two coming next).
Day 54 (05/11) fertigation Bloom fert 0.3 g/L, CalMax 1.3 mL/L, VitaMax 1mL/L, pH 6.1, EC 1345 uS/cm and Foliar spray. Iturned on the lights manually as I got up and saw the lights were out. She will have 4 additional dark hours today, but I wouldn't worry.
Day 55 today I did some work on rebel shoots and that's all!
Day 56 I fertigated with a Bloom fertilizer solution 1.3 EC inflow and 0.9 EC units run/off, I can increase the EC a bit higher until I reach 1300 uS/cm in the roots but as I see her growing fine and without deficiencies, I'll stick to this amount for precaution. Later I sprayed leaves with Foliar fertilizer just when the lights had gone off.
Day 57 Today Friday is vegetative fertilizer's day!
Day 58 happy Saturday to everyone be it autoflowering or photoperiodic! Thank God for your blessings. Today I had to replace one of the 50 W cob led but fortunately, lights are all shining now. She's been very shiny this morning too.
Day 59 I'll put her under 13,5 hours darkness a day.
Likes
26
Share

@MARCTAKAHASHI
Follow
Semana 2 de floración — Día 9
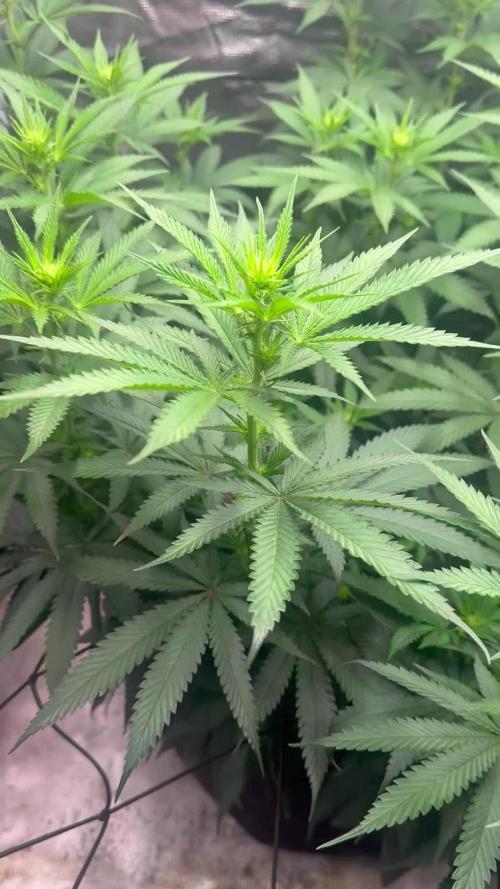
La Super Boof continúa avanzando con fuerza después del cambio a 12/12. El stretch sigue activo y la canopia ya ocupa prácticamente todo el armario de 1×1 m, con numerosas puntas principales bien distribuidas.
En las apicales ya se observan botones florales y pistilos claramente visibles. Los puntos florales laterales de las mismas ramas todavía van algo más retrasados, algo normal en esta fase temprana de floración.
La planta mantiene buen color general, hojas firmes y crecimiento nuevo activo, sin signos claros de exceso de fertilización. Durante esta semana se ha mantenido una alimentación moderada con Terra Max, ATA XL y CalMag, ajustando el pH alrededor de 6,4. También se ha introducido una dosis muy suave de PK 13-14 como apoyo nutricional, sin aumentar demasiado la EC.
De momento no se ha utilizado Bloombastic, ya que se reservará para una fase más avanzada, cuando la formación floral esté más desarrollada también en los nudos laterales.
Objetivo para los próximos días: controlar el stretch, mantener una buena ventilación dentro de la canopia y seguir observando la expansión de los puntos florales antes de aumentar la alimentación de floración.

Likes
2
Share

@Lvnsource
Follow
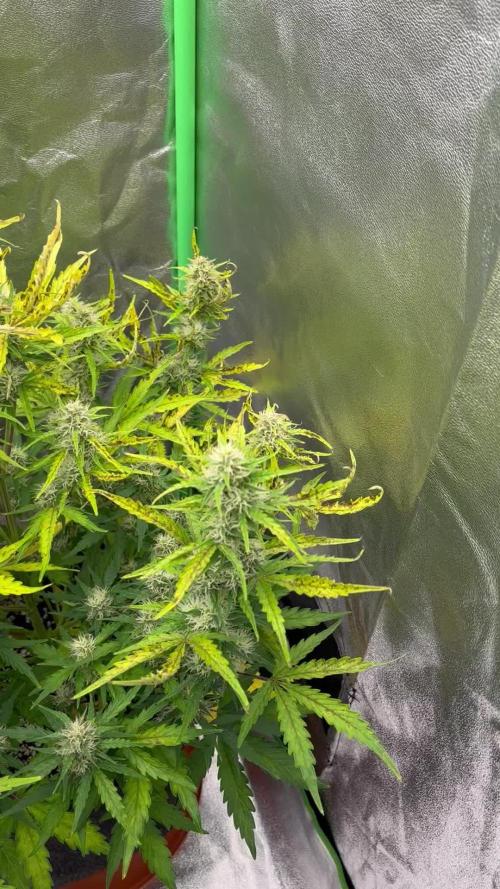
All I’m going to say is ooouff, it’s been a rough one this run and the plants took a beating especially the younger sister who’s got necrosis all over because of one fatal mistake I made; I didn’t use the correct calcium to magnesium ratio , the result ? Calcium lockout. I’m happy to say that I have managed to halt it though! Although I’m way too late , I think #2 is going to finish just fine, it’s not going to be 10/10 yield wise but there’ll be something :) As for #1 she is in a much better spot , the crown and few tops here and there are a lighter shade of green (which looks yellowish under the lights) but in actual ambient light they’re a shade darker. Well lesson learned, respect the calmag ratios! 😅

Likes
11
Share


@Blunt_trauma416
Follow
The pics are a day old and allot has changed since then.. theres allot more yellowing (fading of leaves).. and the trichomes just look big and swollen.. you can see the kinda mushroom like shape easily.. the smell has gotten really nice.. starting to get that really dank pink smell. I cant find my 420 scope.. but it doesnt take a rocket scientist to know she's almost there.. I will chop her down on friday. And start drying it out.
Likes
13
Share


@SkunkyDog420
Follow
Hallo zusammen 🤙.
Das war es für sie.
Wir sehen uns in 2 Wochen mit dem Erntebericht.
Bis später 🤙
Sie bekommen 20 % Rabatt bei Zamnesia und der Code lautet GROWITGD.
Sie erhalten 25 Prozent Rabatt in unserem Shop
Mindestbestellwert beträgt 75 Euro
https://greenbuzzliquids.com/en/shop/
Code: GD42025
Likes
19
Share


@RFarm21
Follow
Olá growmies.
Regada dia 17 Dezembro, nutrientes misturadas em 2l de água. Runoff pH: 6.5/ EC: 2.09


Likes
8
Share


@Philippovic
Follow
Diese Woche gab es nur Wasser für die Girls. Sie entwickelt sich gut allerdings ist es relativ kalt nachts circa 17° tagsüber um die 20° noch eine Woche dann müssten Sie soweit sein.
