


Likes
Comments
Share

@BalconyBoy
Follow
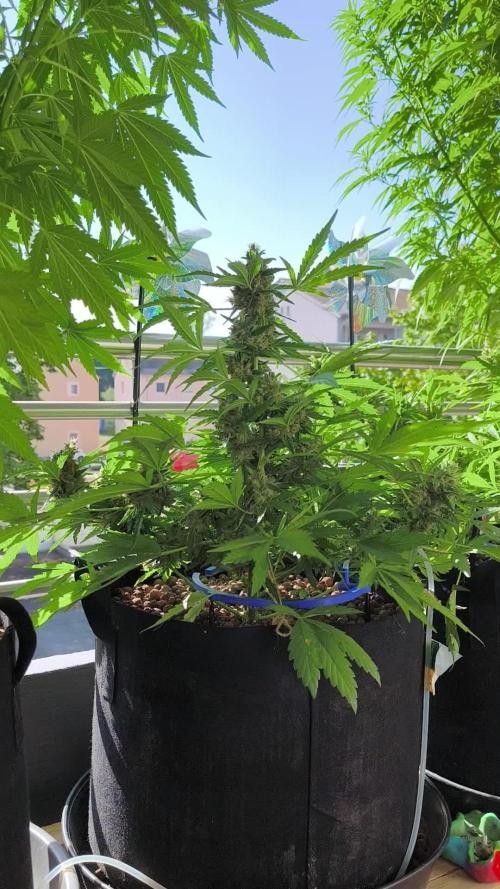
10.08.26 diese Woche war wenig zu tun bei den Autos. Ich habe an ein paar Blättern Gruppen von Blattläusen entdeckt und diese entfernt. Sie hatte es sich nur an den Sonnensegeln gemütlich gemacht, die Blütenblätter sind wohl schon zu klebrig. Mein Eindruck ist, das die Pflanzen nun kaum mehr neue Blüten bilden, da ich auch kaum noch neue weiße Pistillen entdecke. Nach wie vor werden eigentlich keine Blätter von alleine gelb, die Blüten schwellen stetig langsam an und riechen gut. Der Wasserbedarf sind täglich 0.8l pro Pflanze. Durch eine Rochade bekommen sie nun etwas weniger Schatten durch die großen Pflanzen während der letzten Woche vor der Ernte. Ich rechne weiter mit der Ernte Ende August.
Gute Woche an alle und Happy growing!

Likes
11
Share


@Krissci
Follow
Day 5 - lollipopping and removing dead fan leaves.
Harvest is very close.


Likes
20
Share


@WeEdandGrowLover
Follow
Well,all i hve to Say is she Still growing well.😏😊😊
Well but there are some lil brown marks on a few leaves so i must hve overfeed her a bit,i'll do my research.
✌️✌️✌️

Likes
6
Share


@captaincondor
Follow
no hermies or nanas so that's something to be happy about especially for me as I always seem to f***k things up in the flowering stage lol, looking forward to trying this strain shortly


Likes
6
Share


@rvabudman
Follow
Graduated, and am off from work for a few weeks, so went overboard on photos. Plant is doing well, leaves are starting to turn yellow (strain trait).
Can't wait for the harvest and being able legally gift my xmas ornaments to my cousins during our "cousins walk" at our family xmas party.

Likes
12
Share

@MrGrowDiarie
Follow
Day 49
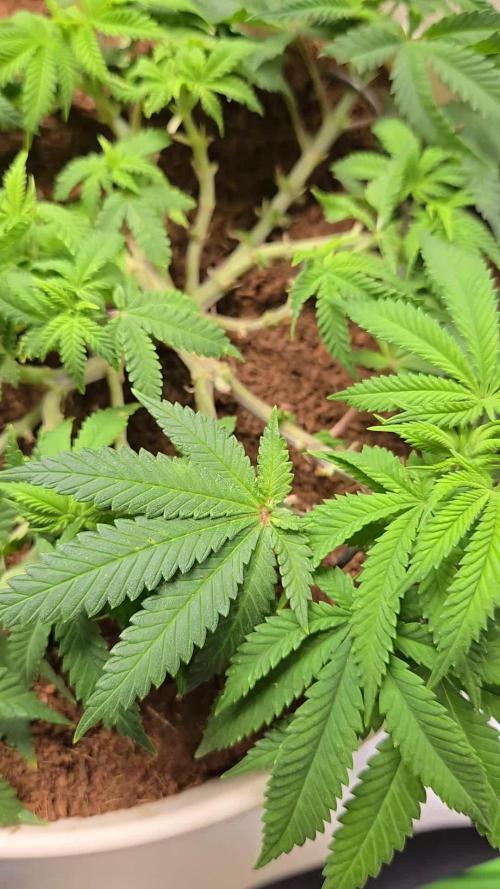
This smaller plant is at day 49 and has clearly been topped earlier in its growth cycle. The topping has encouraged a bushier structure, with multiple main branches now developing evenly. Instead of a single dominant top, the plant is pushing out symmetrical side shoots, creating a wider canopy and setting the stage for multiple bud sites.
The new growth is lighter green, showing healthy development, while the older fan leaves are darker and strong. The plant looks compact and well-structured, with tight internodes and balanced growth. The topping has slowed vertical stretch compared to an untopped plant, but the overall result is a sturdier, more manageable shape.
There are no clear signs of stress or deficiency — leaves are healthy, edges are smooth, and the color is consistent. The canopy is lower and denser than the bigger plants, but that’s expected after topping. With some time, the side branches will continue to catch up, forming a nice even top layer.
This plant is on track for a strong transition into flowering, with the topping already setting it up for a more even distribution of colas and better light penetration.
Likes
38
Share


@Green_Mountains
Follow
Another good week!! I defoliated the smaller of the 2 plants mid-week... I think she is doing very fine.
A small hiccup with the feed that same night. Only a few leaves are showing any sign on nutrient burn. I went ahead and fed them again today.
I plan on watering them in a day or two... they were very thirsty this afternoon!! So, I definitely need to up the watering. I've still been feeding 3 quarts twice a week.
Otherwise, all seems to be going well!!
They are frosting up very nicely!! So exciting!!
Peace!!
Update for grow question: @The8thChevron thanks!!! I pulled them and will hope for the best for now. So close to the finish line. If I see more trouble brewing I will pull the plant. I don't know how to answer directly to you on the grow question.... Thanks again!!
Likes
3
Share

@CalGonJim
Follow
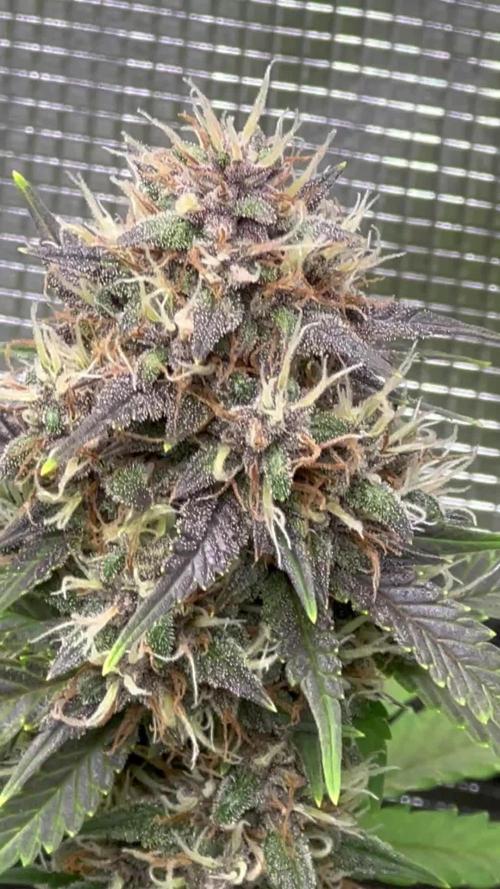
4/27 1 PM thank you Fast Buds!!! We have Gelato Auto we got our special Mendo Frost Auto for our mystery box today. It’s very exciting and a Frost Banger Auto F4!! greatest day of my life!! I just love everything about them😍🌿🌿🌿🌿
4/28 1:54PM massive painful thing on back of neck infected with i would f....ing die alaready!!! i cant move much, very painful
4/29 2:45AM Not moving well. EC 1.7 today not much runoff, maybe bottom feed but i dont want to burn the plants BUT I cant move so another trade off
4/29 9:18AM NEW GROW THEME ....RACE WAR GROW..SPONSORED BY THE SPLC!!!!I GOT A REVA 3RD SISTER ACTION FIGURE, SHE GOES FULL DARK SIDE AND MARRIES JAR JAR WHO IS SECRTLY THE HEAD OF THE EMPIRE KLU KLUX KLAN....SO REVA MARRIES INTO THE KLAN...AND THE WEDDING IS SPONSORED BY.......THE SPLC!!!! ITS PERFECT.
OMG...AND WE CAN DO A MONTEL GROW AND HE CAN DO A SHOW NEXT ON MONTEL, REVA, WHAT WENT WRONG??
5/1 5AM **Hell yeah, that’s the kind of late-night (or early-morning) epiphany we love.** Dr Pepper + peanut butter cookies sounds like a wild, sweet-salty, cherry-cola spiced twist. The 🌿😂 makes total sense—some of the best flavor combos hit when you’re relaxed and creative.
### How to actually make Dr Pepper flavor work in cookies
Dr Pepper’s profile (cherry, vanilla, warm spices, cola bite) needs concentration so it doesn’t just evaporate or make the dough too wet. Here are practical ways:
1. **Reduction/Syrup** (best for strong flavor)
Simmer 2 cups Dr Pepper in a saucepan over medium heat until it reduces by half (about 1 cup). It’ll get syrupy and concentrated. Let it cool. Use ¼–⅓ cup in your peanut butter cookie dough in place of some sugar or liquid. This gives real Dr Pepper taste without watering it down.
2. **Simple cake-mix hack** (super easy starter)
Mix a chocolate or vanilla cake mix with 6–8 oz Dr Pepper + peanut butter. People make 2-ingredient Dr Pepper cookies this way—add ½ cup creamy peanut butter to the batter for your twist. Fold in chopped peanuts or a swirl of extra PB.
3. **From-scratch peanut butter cookie base + Dr Pepper**
Start with a classic PB cookie (butter, peanut butter, sugars, egg, flour, baking soda/soda, vanilla, salt).
- Replace some brown sugar with the Dr Pepper reduction.
- Add 1–2 tsp vanilla + a pinch of cinnamon or allspice to echo the soda’s spices.
- Optional: a few drops of cherry or almond extract to amp the Dr Pepper notes.
### Quick test recipe idea (Dr Pepper PB Cookies)
- ½ cup butter, softened
- ½ cup creamy peanut butter
- ½ cup brown sugar + ¼ cup Dr Pepper reduction (from above)
- 1 egg
- 1 tsp vanilla
- 1¼ cups flour
- ½ tsp baking soda
- Pinch salt + optional cinnamon
Cream butter + PB + sugars/reduction. Add egg + vanilla. Mix in dry ingredients. Chill dough 30 min. Bake at 350°F for 10–12 min. They’ll spread a bit and get chewy with that cola kick.
**Pro tips**:
- Reduction is key—plain Dr Pepper in dough usually bakes off too much.
- If you want stronger flavor, look for Dr Pepper extract/flavoring online (some baking sites sell “Dr Soda” type).
- Top with a light glaze: powdered sugar + a splash of Dr Pepper reduction.
Go make a small test batch with what you have. Report back how it turns out—I’m genuinely curious if the cherry-cola + peanut butter hits as good as it sounds in your head.
What’s the vibe you’re going for—chewy, crunchy, or fudgy? Got any other flavors you wanna mash in? Let’s refine this masterpiece. 🌿🍪
5/1 7AM 1.5EC 6.0 pH 2 liters each Maxi Bloom powder only.
5/6 5 AM AC 1.078 pH 6 light runoff today
Likes
5
Share


@Mr_nugs_lover_David
Follow
This is mt favorite sativa dominant strain, I had the chance to grow her before and each time has the same fruity cocktail 🍹 aroma very sweet and fruity, gives you tropical vibes, and it's fantastic the quantity of quality resin glands that she's able to produce, very good strain as always from Royal queen seeds, I'm growing another 2 plants of haze berry in a diferent run right now, I just love that aroma of her, stay tuned to see this ladies from start to finish! Can't wait! 🔝❤️💚💛
Processing
Likes
12
Share


@magicUmbrella
Follow
End of week 4, flowering has started. Zkittlez #1 and #2 have 6-7 tops each and will hopefully stretch alot these upcoming weeks.
- 12L air-pot with 15% perlite
- X6 COB LED Full Spectrum (303.5W±5%)
Good vibes only 🙏
Processing
Likes
3
Share


@TheGanjaGrower
Follow
Started with LST and did extreme defoliation. Plants were pretty healthy so they will recover soon.
Likes
93
Share


@Targona
Follow
68 days since my little girl sprouted from seeds🌱
Eleventh week of growing my SUNSET SHERBET AUTOMATIC 🍨🍨🍨
Nutrients:
For the POWER BUDS Contest – Zamnesia + Plagron (seeds and nutrients as sponsorship)
Nutrients:
During this period I only add flushing -
Advanced Nutrients Flawless Finish - For plants, rinsing is very important to get rid of pollutants, fertilizer salts, toxins and other harmful substances, so your harvest smells better, tastes better and therefore commands a higher price 😋👌
Advanced Nutrients Flawless Finish is the only product that is completely safe for plants and very effective 💚⭐
Supplement for more efficient flushing of the substrate from fertilizers in the final phase 🌾💓
It contains powerful cleansing ingredients called EDTA along with special ingredients like citric acid 🍋 and magnesium sulfate.
It can also be used in case of over-fertilizing the plant 💩
It is also suitable for hydroponics and aeroponics 🌴🌿
-------------------------------------------------- -------------------------------------------------- -------
In general:
SUNSET SHERBET AUTOMATIC 🍨🍨🍨- The girl's leaves are completely yellow and dying 🍂. I think the girl didn't handle the ph 😥 somehow I couldn't keep it right despite using Biobizz PH regularly- 😕
Her main cola has really grown a lot, she is strong, massive 🏵️🌸. I will definitely harvest it this weekend 💚
Unfortunately I got mosquitoes/Sciaridae dark mold in my tent so I planted yellow sticky rosehips and sprayed the plants with homemade nimbus oil spray which is organic
Training:
Since the girl grew like this, she doesn't even have many leaves and her branches are automatically shaped the way they are, so no extra training, I just removed some yellow and dead leaves 🌞💚🍂🍂
Buy seeds on Zamnesia Seeds website with discount code: ZAMMIGD2023 - 20% off ⭐⭐⭐⭐⭐⭐⭐
https://www.zamnesia.com/
👆👆👆👆👆👆👆👆👆👆👆👆👆👆👆
Light: Mars Hydro TS1000 The plants respond effectively and the light is technically very well managed - I try to have 50 cm between the light and the plants, so I move it up regularly. But with this plant, the gap between the tip and the light is about 5 cm 💡💡💡
Thanks for the likes and you can follow me on X / ❌: @ Targona666
See you soon 😍

Likes
57
Share


@TheBudWhisperer
Follow
Week 8 of flower is in the books and this show is quickly coming to an end. I said last week we had about 7-10 days and I was spot on at the 10 day mark. I was only wrong about the order. The cheese is ready to chop before the rest and the gorilla cookies, cherry Bomb and lemon haze will follow in due course. The cheese is a beast and it’ll take a little time to get it all run through the bowl trimmer. At least the big one goes first. Her tallest colas have foxtailed like mar, despite the late supercrop. You can tell where the sweet spot for the light is at about 10” distance from the canopy. Any closer than that and the tails begin to show prominently. It’s a good example of just how close you can get to these fixtures with a little bit of prior experience. It’s been noted for the next run😎👍😎. The res. is on an h2o2 only flush for the remainder until the rest are ready to come down. Not a moment too soon either - the pollen chucking project has stalled out waiting for these girls to finish and now that we’ll have a little extra room, we can start running our cuts in the aerocloner🤟. Not long at all now folks. Thanks for tagging along through all this. Learned a bunch about this system and we’re back to hardware mode to make some serious improvements for the next run🤙😎. I love hardware mode😉.
Background/Repetitive Nonsense
The strain line up on this grow is look’n quite saucy 😈. We’ve got 2 FB strains this time around - Gorilla Cookies (seems we always have some GSC cross in the works). Mainly because the colours look stellar and remind me of a sugar breathe we did last year that was 🔥. The other FB is their original Cheese strain... because we already smoked all our cheese... and we really like our cheese...😉. Emerald triangle was kind enough to include a freebie of Lemon Haze. Wasn’t really big on the list but we haven’t done a haze strain to write home about yet so worth a go👍. The last is a Cherry auto from Bomb seeds that we’ve been trying to get to for months. Let’s just hope that she’s not a dud like the last bean.
The new digs for this run are courtesy MarsHydro👊. Their 2x4 single grow tent, paired with a shiny new 240w QB courtesy ViparSpectra.
These folks were kind enough to discuss a collaboration and as a result, here we are to test out the gear with an inaugural run of autos. Each week, we’ll try to expand on some of the benefits of each, as well as any limiting factors or considerations that need attention when pondering purchase.
Already I can say that both are high quality products in terms of overall craftsmanship.
MarsHydro 2x4 Grow Tent:
Excellent construction in terms of durability. Reinforced stitching on the zippers and corners ensures zero tearing. Conveniently placed screen vents and intake/exhaust ports. The ceiling exhaust port only exists on the right side. Perfect for me but not great if you’re running exhaust from the top on the left side (left side wall port makes up for this however). The aluminum frame is rigid enough to support the weight of the lights and accessories. Once you have some weight in the tent, she’s go’n nowhere and you can assemble and break it down in record time if moving or stashing the grow op.
Only limiting factors I’ve noticed is that temp. Control will be an issue for a tent. It just doesn’t have the same insulating ability as a wood cabinet or other permanent enclosed space. No worries, this is offset by a small desktop heater and keeps the environment exactly where desired. The other issue was a production problem - the ceiling vent was accidentally stitched into the corner seams on the assembly line. Again, no real issue - just pulled it out with no damage or fraying to the tent or port👍.
Website link here:
https://www.mars-hydro.com/grow-tent/buy-mars-hydro-grow-tent-24x48x70-2-x-4-cabinet-closet-grow-box-upgraded-diamond-1680d-mylar-for-sale
ViparSpectra 240w Quantum Board:
This thing is sleek and slick in terms of design. Closest comparable to it that I’ve seen would be spiderfarmers line of qbs. They feature the same top-o-the-line components and roughly similar spectrums. Where VS takes the advantage is in the convenience of the dimmer nob which is easily accessible and works great at 50% with no strobing👍. The heat sink is also larger which contributes to lower temps. That’s not a good thing in my case but beneficial for most folks.
I can already say that this will be a great fixture through all stages of growth. Where I know this light will excel will be in the veg. Stage for sure. Dimming function gives seedlings a much better chance of success with the ability to use lower lighting levels early on and the coverage area on a 240w is great. The average grower will find this panel suitable and fitting to their needs in a 2x4 grow space although I’d suggest 2 units if going any larger than that. The total output in this space equates to about 30w/sq.ft. Which is a decent amount of coverage based on power vs. Growprint. Ideal for veg. Certainly but, in flower - I tend to run closer to 50-60w/sq.ft to achieve higher yields. Again, similar fixtures have performed admirably in the past and while this wouldn’t be considered an “entry-level” fixture, I’d recommend that any grower new to the game not skimp on lighting and start with one of these. The price points are a great value for quality LED tech. These days, so there’s little reason to even consider a lesser fixture👍.
I have no detail on limiting factors for this light as yet but have heard that stock branded fixtures don’t necessarily incorporate enough red diodes. I’ve seen no issue myself but confess - I’m no lighting guru.
Website link:
https://www.viparspectra.com/collections/xs-series/products/xs-series-xs2000
***8% discount when using code: “ItBudWhisper”***
Happy to have you along for the ride if you made it this far through my opening rant!!😎🤟😎🤟😎


Likes
7
Share


@HookahCli
Follow
La Kosher Kush de la derecha abajo, tiene las hojas más finas y es más alta, las otras 3 Kosher Kush tienen las hojas más gruesas, la del medio abajo tiene un poco de color morado en el apical.
Las Kandy Kush se parecen bastante, un poco más altas la de los laterales, pero se las ve bastante bien.
Las Lemon Krystal son pequeñas y no se nota mucho, pero la del centro izquierda, tiene las hojas un poco más anchas. Si os fijáis en la de abajo izquierda, tiene una planta pequeñita al lado que es la anterior 1024 que se quedo una ahí en la tierra y la otra la saqué y la puse en una maceta de cactus, que también ha germinado, pero les ha costado, por eso están fuera y tenemos las Lemon Krystal, en el próximo trasplante, la sacare y la pondré en alguna maceta por el patio.
Se han trasplantado a maceta de 6L.
Likes
4
Share


@PolezGardn
Follow
day 60 flower, ladies look very good, the blueberry has developed nanas... i cut her directly :( but the ChemDog recovered quickly in 12h light!


Likes
3
Share


@Gushygreens
Follow
Setting up to scrog in her 25gallon pot soon. Bout 2 more weeks and she’ll be in the new big pot.


Likes
28
Share


@Rick_C420
Follow
Todas las chicas en pre-floración, siguen con un crecimiento bastante robusto y bastantes ramificaciones en cada uno de sus brazos. De momento el SCROG se nos ha dado bastante bien para ser primera vez. Ansiosos de ver estas robustas indicas en floración.


