


Likes
Comments
Share

@GoodTimesOrganics
Follow
Hi liebe Community und Welcome Back! 💚
Slush Mint Cake von Dutch Passion!
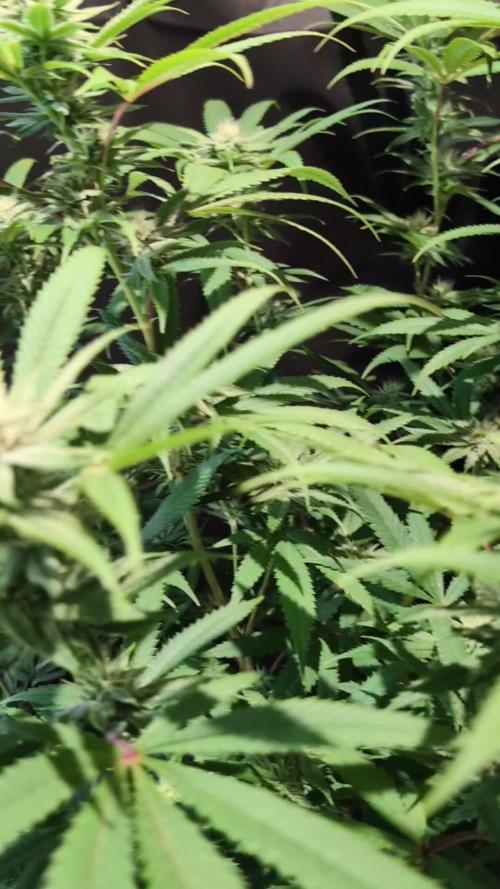
Die dritte Blütewoche ist vorbei und die Pflanze hat im Stretch bisher nochmal 4cm zugelegt, daher wird in der Höhe nun nicht mehr viel passieren.
Das heißt auch ihr Stretch ist insgesamt sehr moderat und super handelbar!
Die Pflanze hat nun eine Höhe von 115cm erreicht.
Sie hat eine wunderschöne und homogene Wuchsform.
Die Stimmen bilden sich nun langsam aus und es sind schöne und immer mehr glänzende Trichome erkennbar.
Das untere Drittel der Pflanze habe ich nochmal ein bisschen ausgedünnt und die Triebe rausgeschnitten.
Die Bedingungen im Growschrank sind für die Blütephase aktuell Top!
Die Lichtintensität wurde nun auch auf dass Maximum hochgefahren.
—————
🌞 Temp: 26
🌚 Temp: 18°C bis 19°C
💨 RH: 54%
VPD: 1,17 kPa
💡 ppfd: 830 mpm
—————

Likes
30
Share


@Stick
Follow
This was an easy and productive run. The 2 plants grew up in an overcrowded environment, and as a result, they did stretch a lot. Nodes were spaced but this wasn't a real issue since they both produced a decent weight. Fun/Strange fact: the TOPped one produced 77 grams and the FIMmed one produced 84 grams, very close results with two different methods. I took a clone of the FIMmed one, and it's already 50cm tall, almost ready to flower. The buds are compact and solid as a rock, the earthy taste is hard to describe but 100% unique and yummy. I'm totally in love with this strain!

Likes
7
Share


@Skull
Follow
Flipped them to flower approximately 6-7dsys throwing hairs shitty camera on my phone never grown Auto before but these two ladies are performing more like photo period the older they get. Gave up on them automatically going to flower switch to 18/6 six days ago finally seeing signs of flowering from the research I've done I believe because I'm growing DWC format which atones to there size any comments would be appreciated

Likes
16
Share


@Elogrower
Follow
17 weeks now and I'll give one more week for my Dwarf to see how the trichomes will being. About the Northern Lights, I don't know if I'll wait for her to get the point that I'd like. I'm having problems drying my two Jacks because I don't have a proper space to do it so I had to improve. So, maybe I'll cut both together using the Dwarf as reference...cuz she's going big, maybe the biggest yield among them. As a first attempt to growing, I'm quite excited.
Processing
Likes
9
Share


@HollowSource
Follow
Just like the Goriila Zskittles this girls roots started to show at the base of the pots so I've moved her into her penultimate pot now. Next stop the smart pot.
Her stem is firming up lovely and she's starting to show some lateral growth.
I was slightly concerned because her growth slowed down quite a bit but from looking at her roots compared to the the skittles it's clear she's been busy down below.
Overall she looks really healthy. Once the other seedlings catch up a bit ill start to ramp up the light.
LST will start soon!

Likes
57
Share


@BigDaddyK
Follow
I see purple
KEEP AN EYE ON ph !!!
Updated daily
Complete reservoir change Thursday 12/12/19


Likes
10
Share


@Hempcules
Follow
WEEK 9A
This week, not much really happened. I'm always waiting to have enough space for repotting.
Other than that, the two are making a very good impression. They're getting a bit too much light at the moment, but I'm trying to keep it under control.
Likes
10
Share

@DogDoctorOfficial
Follow
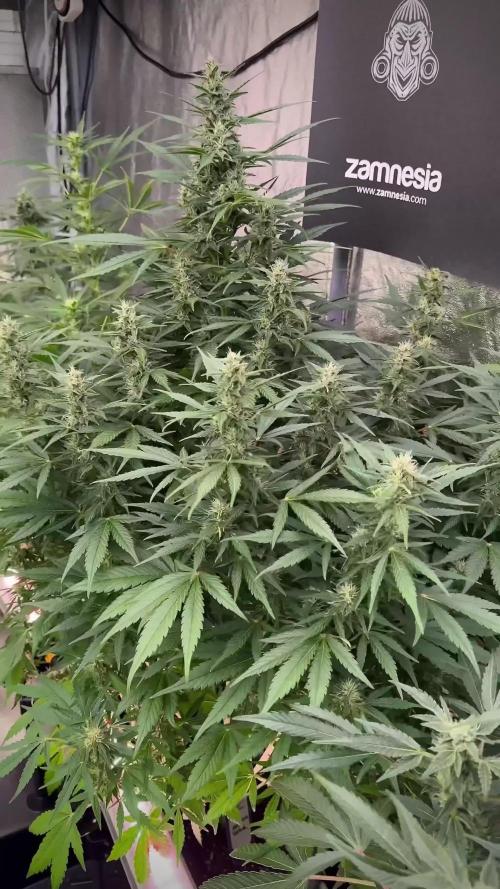
🌱 Skywalker OG — Week 10 From Seed (Week 5 Flower)
“From Expansion to Expression”
⸻
🔁 Quick Recap — How We Got Here
This run followed the same philosophy from the start:
• 12/12 from seed
• No early intervention
• Let the plants express their natural structure
For the first weeks, we did almost nothing:
• No defoliation
• No aggressive canopy control
• Just environmental dialing and observation
Why?
👉 Because structure is built early
👉 And once it’s there, you can shape it — not before
Now we’re seeing the result:
• Strong branching
• Even canopy spread
• Multiple dominant tops
⸻
🌿 Current State — Full Flower Mode
At this stage, the plants have clearly transitioned:
👉 Vertical growth has slowed or stopped
👉 Energy is now redirected into bud development
You can see it everywhere:
• Bud sites swelling
• White pistils exploding across the canopy
• Trichomes starting to cover sugar leaves
This is no longer about growing bigger —
this is about building flowers.
⸻
✂️ Defoliation — Why Now
This week, we made a move.
A proper defoliation, and yes — we went deep.
• Removed fan leaves with long stems
• Opened internal structure
• Cleared pathways for light and airflow
Why now and not before?
Earlier:
• Leaves = energy factories
• Needed for structure development
Now:
• Structure is set
• Bud sites are defined
👉 Removing leaves now:
• Redirects energy to flowers
• Improves light penetration
• Enhances airflow
• Reduces microclimate risks
This is not stress —
this is guidance at the right moment.
⸻
💡 Light & Canopy Management
With the canopy opened:
• Light now penetrates deeper
• Lower bud sites receive usable PPFD
• Top buds remain dominant but not exclusive
This creates:
👉 More uniform development
👉 Better quality across the whole plant
We’re no longer just growing tops —
We’re building a complete plant.
⸻
🌡️ Environment & Leaf VPD
• Temperature: 26°C
• Humidity: 60%
Some might question this in flower —
but the plants are answering clearly.
👉 Leaves are active
👉 Transpiration is strong
👉 No signs of stress
This tells us:
Leaf VPD is within a functional range
Because:
• Healthy stomatal activity
• Constant water movement
• Balanced evaporation
The room isn’t static —
it’s breathing.
⸻
💨 Airflow — Now More Important Than Ever
After defoliation, airflow becomes even more effective:
• Air can move through the canopy
• Moisture doesn’t get trapped
• CO₂ distribution improves
At this stage:
👉 Airflow = yield protection
👉 Airflow = quality insurance
⸻
Feeding Strategy — Full Spectrum Approach
This run is using a combined organic + mineral program:
• CalMag Pro
• Terra Bloom
• Power Buds
• Sugar Royal
• Pure Zym
• Green Sensation
Why this combination?
👉 Minerals:
• Immediate nutrient availability
• Precision feeding
👉 Organics:
• Support microbial processes
• Enhance terpene complexity
• Improve overall plant expression
👉 Enzymes (Pure Zym):
• Break down organic matter
• Keep root zone clean and active
👉 Green Sensation:
• PK boost + metabolic push during flowering
This creates:
Control + Complexity + Expression
⸻
⚡ Current Parameters
• EC: 2.0
• pH: 6.5
Balanced, efficient, and stable.
⸻
❄️ Trichomes & Flower Development
This is where things get beautiful.
We are entering the phase of:
👉 Rapid trichome production
👉 Pistil explosion
👉 Early terpene expression
What this means:
• The plant is protecting its flowers
• Resin production is ramping up
• Final quality is being defined now
Those white hairs?
👉 Signals of active flower sites
👉 Indicators of ongoing development
And the frost…
👉 Just the beginning.
⸻
🌬️ Stomata & Plant Behavior
With these conditions:
• Stomata are open and active
• Gas exchange is efficient
• CO₂ uptake is optimized
This leads to:
👉 Strong photosynthesis
👉 Consistent growth without stress
Again — the plants confirm everything.
⸻
🔮 What to Expect Next Week
• Bud stacking will accelerate
• Trichome density will increase significantly
• Aromas will become louder and more defined
• Nutrient demand will stabilize
• Slight leaf fading may begin
This is the phase where:
👉 Structure turns into mass
👉 Potential turns into quality
⸻
🙏 Gratitude — Always
To everyone walking this journey with us:
• The OGs
• The new growers
• The skeptics
• The silent supporters
• The ones who comment and share
• The platform
• The community
• The sponsors
• The genetics
• The tools
• The lessons
Everything matters.
Everything connects.
From grower to growers — we move together.
📡 DELETED @ 1K Please stay tuned.we never quit https://www.youtube.com/@TheDogDoctorOfficial NEW 🙏 Thank you for your patience and continued support.FOR DISCOUNT CODES AND MORE JUST FOLLOW THE LINK https://website.beacons.ai/dogdoctorofficial
📲 Don’t forget to Subscribe and follow me on Instagram and YouTube @DogDoctorOfficial for exclusive content, real-time updates, and behind-the-scenes magic. We’ve got so much more coming, including transplanting and all the amazing techniques that go along with it. You won’t want to miss it.
GrowDiaries Journal: https://growdiaries.com/grower/dogdoctorofficial
Instagram: https://www.instagram.com/dogdoctorofficial/
YouTube: https://www.youtube.com/@dogdoctorofficial Deleted by Youtube - https://www.youtube.com/@TheDogDoctorOfficial NEW
Vimeo : https://vimeo.com/dogdoctorofficial Under construction stay tuned ⸻
Explore the Gear that Powers My Grow
If you’re curious about the tech I’m using, check out these links:
🔆 Lighting & Environmental Control
• Future of Grow — Advanced LED lighting technology
https://www.futureofgrow.com/
DISCOUNT CODE: DOG20
• Lumiflora — Under-canopy LED lighting
https://lumiflorade.com/
• TrollMaster — Environmental controllers and automation gear (past collaboration)
⸻
Genetics
• Zamnesia Seeds — Genetics used in this project
https://www.zamnesia.com/
⸻
🌱 Soil, Substrates, Boosters & Root Support
• Plagron — Substrates, bio mixes, and supportive products
https://plagron.com/en/
⸻
🎒 Storage, Curing & Preservation
• Grove Bags — Curing and storage solutions
https://grovebags.com/
⸻
📸 Photography Equipment & Tools
(Not sponsors, but part of my creative toolkit)
• Sony A6700
• Sony full-frame macro lens + few more
• Stacking photography workflow - learning
• iPhone (for behind-the-scenes shots)
We’ve got much more coming as we move through the grow cycles. Trust me, you won’t want to miss the next steps, let’s push the boundaries of indoor horticulture together!
As always, this is shared for educational purposes, aiming to spread understanding and appreciation for this plant. Let’s celebrate it responsibly and continue to learn and grow together.
With true love comes happiness. Always believe in yourself, and always do things expecting nothing and with an open heart. Be a giver, and the universe will give back in ways you could never imagine.
💚 Growers love to all 💚
📸 P.S. – The Eye Behind the Lens
All photos in this diary (for now — except for the ones showing the camera, which I took with an iPhone) are taken with a Sony A6700 paired with a Sony full-frame macro lens and a few more.
Photography is part of the story — it’s how we share the fine textures, the glow, and the quiet details that words can’t always capture.
I’ve also started experimenting with photo stacking — a technique where multiple images, each taken at a slightly different focus point, are layered together to create one perfectly sharp image from front to back.
It’s not digital enhancement or AI; it’s pure photography — a way to reveal the plant’s beauty in microscopic depth, from trichome to petal.
You’ll even see a few shots of "ghost me" capturing the shots — camera, lens, setup — because every grow deserves not just to be cultivated, but documented like art.
FOR DISCOUNT CODES AND MORE JUST FOLLOW THE LINK https://website.beacons.ai/dogdoctorofficial
NEW DISCORD - Official Server Invite Link : https://discord.gg/ksjAkA5T74

Likes
13
Share

@GERGrowDesigns
Follow
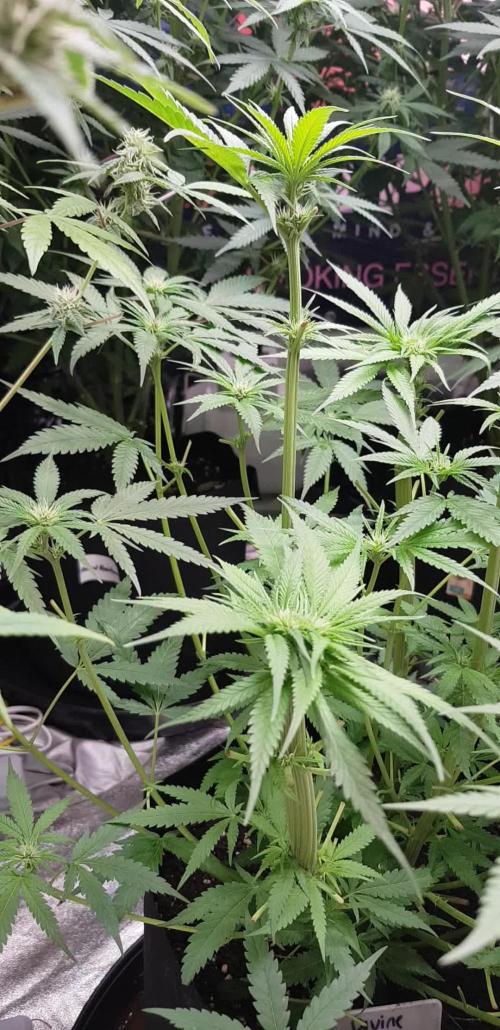
Welcome to Flower Week 2 of Divine Seeds Divine Rapier
I'm excited to share my grow journey with you from my
Sensi Seeds Project . It's going to be an incredible ride, full of learning, growing, and connecting with fellow growers from all around the world!
For this Project , I’ve chosen the Feminized Photo Strain Divine Rapier:
Here’s what I’m working with:
• 🌱 Tent: 120x60x80
• 🧑🌾 Breeder Company: Divine Seeds
• 💧Strain Info : 29%
• ⏳ Flowering Time: 6-7weeks

Likes
4
Share


@Lucidite
Follow
For 30th April: The aroma in the tent is ramping up. It is pure correlation, but it seemed to have increased as soon as the UV light was installed. The white widows all have a delicate perfumed lemon mango smell. The gorilla glue is spice and pine.
Ph is good at 6-7 in all four pots. Still fighting the deficiencies in one of the widows. The brown spots didn’t seem to slow down my last widow grow. But it also has very pointy leaves, where the other two younger widows have fat dark leaves. She’s bigger, older and hungrier than the other two. She might just need more feed. I need to keep the calmag going. I have been sporadic with it but I’ll make it a regular feed addition from now on.

Likes
38
Share


@Cariboo_OG
Follow
Utopia Haze is a rare heavily sativa dominant hybrid (90% sativa/10% indica) strain created through back crossing Brazilian Sativa strains. This tasty little bud took home 1st Place for Best Sativa in the 2008 High Times’ Cannabis Cup and for good reason – with its potent 18-22% average THC level and long lasting cerebral effects, Utopia Haze is one powerhouse smoke. The Utopia Haze high comes on soon after you finish your first toke, hitting you with a strong cerebral lift that infuses you with a sense of hazy relaxation.
Type: Feminised/Photoperiod
Cultivation: Indoor/Outdoor
Flowering Time (days): 70-75
Indoor Yield (g): Up to 650
Feminised Outdoor Harvest Month: October
Feminised Outdoor Harvest Month Week: 3rd-4th week
Aroma: Citrus, Woody, Pungent, Mint
Effect: Cerebral Lift, Hazy Relaxation, Sleepy
Welcome Everyone to the Final Entry of my Utopia Haze Grow !
There is so much to discuss ! I have been extremely busy as of late trying to get this Harvest together, but i am happy to have it here for you now !
I Seriously under estimated the amount of time, help from others, and my own necessary skills to pull this off.. and i still kind of screwed it up lol !
But its worth noting i have never actually done this before and trying to document it during....was extremely hard.
It is next to impossible to work an iPhone with rubber gloves on !
First I want to discuss everything step by step so before you jump straight into the comments on how the end product is so small in "quantity"
Rest assured i am happy with its"quality"...and thats all that matters to me because Life is a journey not a destination! and i have learned so much from this grow that I couldn't be any happy even if i messed some things up :)
But at the very least I hope you read through this entry in its entirety with an open mind and focus more on the process, rather than just the outcome!
I ran out of Ice & i was only able to wash three times..(normally I've heard you should go sometimes 5-6 washes)
Preparation is Key & things will be much better next round :)
Photos 1-22
These are pretty self explanatory but for those of you just tuning in now.. this is what happens to a very happy plant when you don't have the necessary tools to monitor key components of growing cannabis.. Ph, as well as EC levels play a very key role in the outcome of your grow lol that being said I was just able to save this plant by purchasing both tools but that doesn't mean the plant didn't suffer because of the prior events.. This was a Huge reason behind me choosing to turn this harvest into what i would consider
"Solventless Hash Rosin" from "Ice water extracted Bubble hash".
Pictures 23
The idea here is the process of using "fresh Frozen Cannabis" this has been discussed many a time online on such sites as instagram and here on grow diaries as well.. I personally have Never tried the process so i decided to try it out and make a judgement for myself..
Video 24
The Cannabis has now been in the freezer for 72 hours making it very well frozen.. as you can tell i struggled getting it all into the 25u Screen Wash Bag. One thing of note i would do differently is i will de-stem my next batch as i also believe this played a part in the amount of plant matter that escaped through the sieves.
Photo/Video's 25-28
The idea here is "ice water Seiving" & especially with the bags that I am using here that are only have screen material on the bottom portion of the bag it is very important to have spaces in-between the screens to allow the water to pass directly through the screens into the bottom bucket with the least amount of resistance.. because the hash is so extremely temperature dependant if it gets warm on the side of the bag.. it will stick there and not make it to the bottom to become use able product..
29
You do not need to use as much Ice as i used here lol... the idea is to keep everything very cold..i certainly achieved that but at the sacrifice of using so much that i ended up grinding product and producing "contaminants" but in the end they are just plant matter that i would be smoking when i rolled up my joint either way so.. I'm not super disappointed..
But it should be noted that what you want to achieve here is a Layering effect where you have the wash bag between two small layers of ice while the "water current" washes the Trichomes away allowing them to be separated by the screens setup below :)
Before Starting the machine you should allow some time (i.e.;10-12minutes pre soak to allow the product to become saturated) before the first cycle.
By video 32 I have just ran out of ice lol..
Video 33-34
Here I have a tip for you.. to separate the screens that you sieve through.. cut 5 gallon buckets to stretch them across nice and tight.. it'll make scooping your Bubble that much easier ! i learned this from the many "Frenchy" videos I have watched :)
Picture 35
Here in lays the problem for most people.. drying your hash without loosing vast amounts of "Terpenes" whilst also stay ever vigilant against mold !
Thanks to all those videos I've watched on youtube.. id like to think this was one of my most successful parts of this process..
Things to Note; Terpenes start to seriously evaporate at temperatures 68F or 20C
you need to stay as cold as possible whilst bringing the Relative Humidity in the space down into the 40-30% to stay away from that nasty mold !
I used my cold storage room in the basement.. with a dehumidifier running to keep the space at 45% RH & staying at a constant 15c.
All while spreading the hash as thin as possible across parchment paper, on top of the white screens with a fan moving air across both sides of the paper.
Pictures 36-38
These are some macros i took in the middle of my drying session I fell in love with the colour.
Yes i know the black spots are plant material but they will get caught when i bag the hash & squish the oil out.
Thing to Note; at this stage it is important to ensure you 'micro plane" the hash down as fine as you can whilst staying weary of the temperature... any "chunks" will hold pockets of moisture.. that lead to potential problems..ie; mold ...
Picture/Video 39-41
Successfully planed bubble hash ready to be bagged and Squished !
Picture 42
Ive decided to follow Pedro.. from Pedros Grow Room and double bag to be on the safe side so i don't have any blow outs.
So thats One 25u bag inside one 160u bag ! :)
Pictures 43
This is almost 3 grams of the bubble hash from above, already melting in the bag.. this is where i ran into trouble again lol things started getting to warm in the house and i was only able to get one of the three squish's i did on video :( things started getting sticky.
Picture 44
This is basically just a photo of the equipment I'm using; 3x5 LowTemp Cage in the frame I built myself, with a 20Ton bottle jack.
Something to note here is this is an older Lowtemp model with only a single heating zone which is which i have it closed here heating Both sides of the press :)
As well as the importance of having adequate pressure on your plates.. my rig is very overkill for the size of hash bags..lol
Video 45
Here is the lovely press video.. its didn't quite work the way i wanted either lol my directional folding wasn't quite tight enough for a big "drip" :)
&the Press was set to 65°c
Photo's 46-50 are pretty self explanatory :) I had a blow out.. but still managed to pull an 80% return from the hash once squished...& yes it tasted amazing :)
Was it worth it in the end... that could be debated.. for some..i understand..its not your thing, but for those of us that are interested in making our own concentrates.. free from Solvents...
I wouldn't make it any other way :)
If even ONE of you reading this diary finds it helpful to reference for ANYTHING.....even if its "what not to do" ill consider it a success !
Thanks again for tagging along on this garden adventure.. its been one heck of a journey !
Much Love from B.C. Canada,
Until Next time,
Cariboo

Likes
38
Share

@Brujha77
Follow
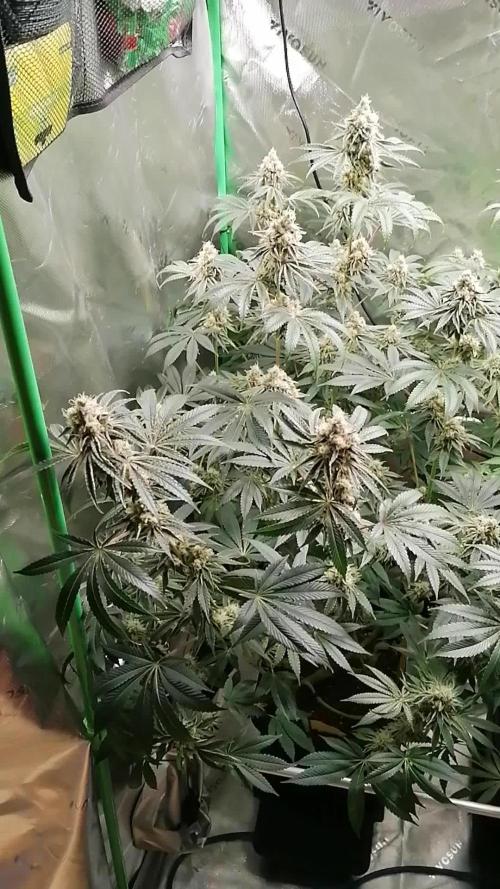
Beginn 8. Blütewoche
Langsam kommt der Endspurt.
Schätze mal noch 2 bis max. 3 Wochen dann sollten die 3 es geschafft haben.
Likes
93
Share


@Roberts
Follow
Auto Opium has filled in and is starting to look good in the course of her bulking. She has about 2 weeks left roughly. She has endured some light burn or bleaching on the upper leaves. Everything is looking really good. She is starting to develop her smell. As it is becoming more every day. She will likely go to ph water around the next update time. Thank you Medic Grow, and Divine Seeds. 🤜🏻🤛🏻🌱🌱🌱
Thank you grow diaries community for the 👇likes👇, follows, comments, and subscriptions on my YouTube channel👇. ❄️🌱🍻
Happy Growing 🌱🌱🌱
https://youtube.com/channel/UCAhN7yRzWLpcaRHhMIQ7X4g
Likes
13
Share


@ernest_twwg
Follow
April 25th:
Planted this little gem on sunday, didn't check the room Monday, and Blam! Tuesday brought a surprise. I think it may have popped on Monday, to be honest.
9 Gallon bucket
Light cycle is 16/8 until she gets moved outside in the middle of May. We have a late start where I'm at because the frost likes to stick around for a while.
Light intensity is at 60%.
Processing
Likes
15
Share


Likes
5
Share


@2x2UkGrow420
Follow
Buds growing fast (fastbuds) lol, so far so good, no major problems as of yet, counting the days now roughly about half way there! Getting a nice smell from both plants now😬👊🏻.
Likes
40
Share


@KingSalomonsWeed
Follow
15.12. Tag 84 Blüte 58.
Das gesunde Grün scheint einem blendend ins Gesicht. Der Stamm ist sehr stabil.
Gut, denn sonst würde sie unter ihrem eigenen Gewicht der gewaltigen Knospen zusammbrechen.
Erstaunlich, sie wächst.
22.12. Kotelett
24.12. Ich lasse sie im Topf trocknen.
03.01. 1,6 g eins komma sechs Gramm. MUHAHA EINS KOMMA SECHS GRAMM.
Der Titel ist mir sicher.

Likes
26
Share


@siL01337
Follow
I mean it looks like it works..... I can't wait 4 this lovely mix of indica and sativa.... I want to taste and smell the ready product... But it needs 2 months of cure minimum.....

Likes
1
Share

@Nickeluring
Follow
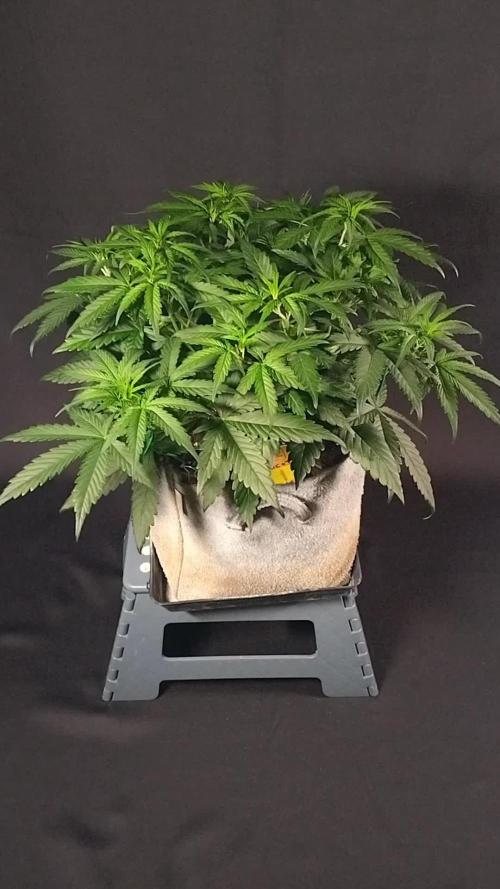
This week they have started to stretch, especially Lemon Cherry Cookies. Their lengths are now:
L.C.C: 33 cm
Guava: 31 cm
Apricot: 27 cm
Guava and Apricot started to stretch later, and they're getting bushy. LCC has stretched to a great wide shape. Sadly I rushed the training session a bit, and one of the four main branches on the Guava plant snapped right off. I taped it and now it has recovered and it is growing well.
I have set the lights to full effect, but I have risen it to 80 cm above the canopy to get less light intensity in the beginning of flowering. It's starting to get warm, and I have to try to keep the temperature down...