


Likes
Comments
Share

@Northern_Ent
Follow
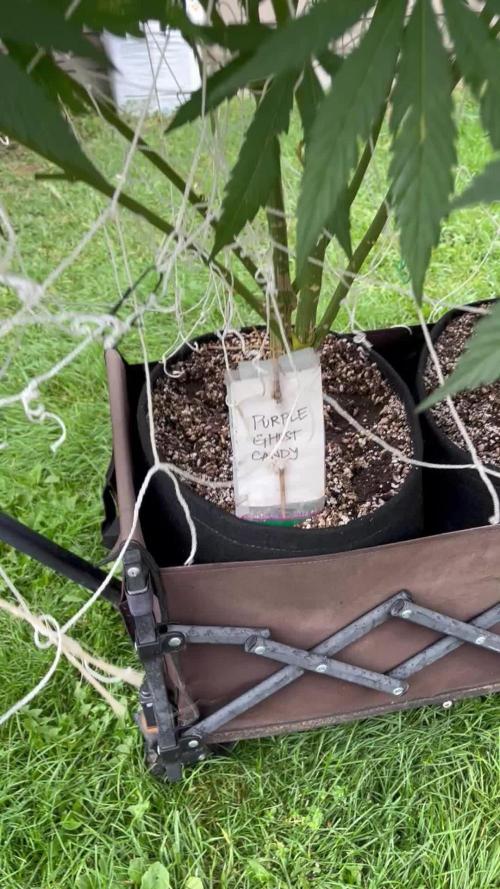
Sep 5: Purple Ghost Candy continues to bloom and the buds are filling in. She is the tallest and most sativa leaning of my four plants.
No signs of any problems and heading for the finiah in a few weeks. Right on track for my early schedule to use the good light before it gets too weak in the fall.

Likes
7
Share


@Mr_nugs_lover_David
Follow
I've enjoyed a lot growing this plant, I had to deal at tje end of thr cycle with fungus gntas but she resisted without problems, each day the flowers stink more and more, amazing genetic, I would definitely like to keep on working with this genetic, it's a pleasure to smoke, I recomend you to grow her organically like I did snd you'll see!
Likes
65
Share


@Dendegrow
Follow
The colors of autumn are in full display 🍂 – deep purples, fiery reds, golden yellows, and even shades of black. The garden is alive with vibrant beauty, a final burst of energy as the cycle nears its end 🌿✨. The plants are absolutely stunning, their buds sparkling with trichomes, and the aroma is mesmerizing – a sweet and fruity scent reminiscent of ripe cherries filling the air 🌺🍒.
Week 7 is behind us, and while I managed to increase the nutrients again, it came a bit too late. The result? Potency is reaching its peak, but the potential for quantity has passed. Still, the plants stand proud, exuding beauty, sweetness, and character in every bud.
As the holidays approach, so does the conclusion of this grow 🎄🌺. By the end of the week, it’ll be time to bring this chapter to a close – a moment to celebrate the journey, admire the elegance of these plants, and look forward to the harvest.
Wishing you all a wonderful holiday season and a fantastic start to the new year 🎉✨. Stay tuned for the final updates and the results of this colorful and aromatic adventure 🌿📸.
---
Die Farben des Herbstes zeigen sich in voller Pracht 🍂 – tiefes Lila, feuriges Rot, goldenes Gelb und sogar Schwarz. Der Garten leuchtet in seiner ganzen Schönheit, ein letzter Energieschub, bevor der Zyklus zu Ende geht 🌿✨. Die Pflanzen sind einfach atemberaubend – ihre Buds glitzern vor Trichomen, und der Duft ist unwiderstehlich: ein süß-fruchtiges Aroma, das an reife Kirschen erinnert und die Luft erfüllt 🌺🍒.
Woche 7 liegt hinter uns, und ich konnte die Nährstoffe wieder anpassen, aber leider ein bisschen zu spät. Das Ergebnis? Die Potenz erreicht ihren Höhepunkt, aber die Menge ist nicht mehr zu steigern. Trotzdem stehen die Pflanzen majestätisch da und verzaubern mit ihrer Schönheit, ihrem süßen Duft und ihrem Charakter in jeder Blüte.
Mit den Feiertagen vor der Tür nähert sich auch dieser Grow seinem Ende 🎄🌺. Am Ende der Woche ist es soweit – Zeit, dieses Kapitel abzuschließen, die Eleganz dieser Pflanzen zu bewundern und sich auf die Ernte zu freuen.
Ich wünsche euch allen eine wunderschöne Weihnachtszeit und einen großartigen Start ins neue Jahr 🎉✨. Bleibt dran für die letzten Updates und das Ergebnis dieser farbenfrohen und aromatischen Reise 🌿📸.

Likes
12
Share


@SSKNFbyHAZE
Follow
Throughout the week, I give compost tea, and fermented plant juice once each ^^
Hope you guys have a wonderful day today ^^v
*** Please Like, comment & share ***
Highly appreciated -----/-----<@

Processing
Likes
22
Share


@DankBudz
Follow
Well tying down is no longer an option, now the fight is to get them to stand up!! #shittyproblems
No let up on white hairs yet!!
It makes me sad and happy at the same time lol

Likes
3
Share


@Canaryweed_tf
Follow
Está semana la HellfireOG de Kannabiaseeds va creciendo muy bien, lo que se me está volviendo un poco amarilla. Para solucionar eso le he estado echando fertilizantes de crecimiento que tienen bastante nitrógeno asique espero que vuelva ha tener un color bueno 💪



Likes
13
Share


@DeepSouthDank
Follow
Another fantastic week!
The girls grew nicely during the stretching phase filling out most of the space, but have now started to calm down. It has been 14 days since switching to a 12/12 light cycle.
We lowered the light and are running it at 100% power.
The girls are being fed five times a day through a drip feed system @1500EC.
No problems so far. Happy daze 😁

Likes
9
Share


@TheUsualSuspect
Follow
Went a bit ocerboard with the nutes last feeding, touched on >900ppm and they looked like they need a light flush down to 600ppm and start over from there.

Likes
98
Share


@DogDoctorOfficial
Follow
Her green still not were i want so i am keeping the nutrispray for a few days more at least until i like the colors better, apart from that she is growing great actually, wen looking at last week defoliation and now , i mean lol
Sorry so short update i will keep updating among this week <3 <3 <3
Decided to connect my spider-farmer to increase my PPFD, i love this MARSHYDRO TSW2000 but in my humble opinion a 4x4 needs a bit more PPFD Power wen in flower mode bringing up my average PPFD to 1000 umol/m2/s lets see if she likes the idea or not.
And like i suspected she did like more light and the color is changing bringing her green colors back to normal, did a leaf inspection just in case and posted some photos of my under leaf microscopic view, all good by the way lol , with this meaning that next week i will provably stop Nutrispray since i don't like so very much to apply any type of foliar during flower.
And As i suspected i have an bug infection lol freaking trips found them way in to my closets, them a i dont know if mites, but i have something in this closet that webs and i cant find it RRR, i guess its part of the game, just been long long long time since i encounter any situations like this, and that is why its happening, i got way to comfortable and lazy on my IPM.
This is one of the reasons why is so important to checking in a microscopic way under leafs etc
Im ordering a bunch of beneficial insects , traps etc and going in from all sides lol non so ever she is looking great, not the best color leafs i know , but she is moving fast and furious .
I will keep you all posted as for what i am doing and how i will deal with this situation so stay tuned since this can go one way or the other lol <3 <3 <3
As always thank you all for stoping by, for checking my journey , for the love support and for it all, i am blessed and humble with you all.
Just a reminder , all i grow is medicine for myself, for me and for my best friend with is me nothing to sell, so don’t even ask.
All info and full product details can be find in can find @
https://ganjafarmer.com
https://aptus-holland.com/
https://marshydro.eu/
#aptus #aptusplanttech #aptusgang #aptusfamily #aptustrueplantscience #inbalancewithnature #trueplantscience #Ganjafarmer #growerslove
With true love comes happiness 💚🙏 Always believe in your self and always do things expecting
nothing and with an open heart , be a giver and the universe will give back to you in ways you could not even imagine so 💚💚💚
More info and updates @
https://growdiaries.com/grower/dogdoctor
https://instagram.com/dogdoctorofficial
https://youtube.com/channel/UCR7ta4DKLFMg2xxTMr2cpIg
💚💚💚Growers love to you all 💚💚💚


Likes
10
Share


@KushManF
Follow
Some of the leaves are yellow/ brown. Did a bit of research, looks like soil might be dry (especially due to high temps during this time of year) and possibly leaves being burnt by sun.
Watering with a little bit more volumes of water, based on extra heat. Will track and see how week goes. The 2 bad fan leaves which looked really bad, I cut them off. Increase in volume of water for plants really helped due to really hot temperatures.
Week 10 no nutrients (only used on 1st day and 2nd day of week 10) , just straight water.
Likes
11
Share


@Stacks
Follow
Started with some light feeding at the beginning of week 3. A third of the normal dose.

Likes
8
Share


@nelgrow
Follow
Ho iniziato ad implementare fertilizzanti perché alcune foglie si stavano ingiallendo...hps agro 150watt
La prima cosa che ho notato è stata la crescita esponenziale della pianta
Processing
Likes
27
Share


@Rap_a_cap
Follow
Update July 30
102 °F
Plants now need to be watered twice a day with 3/4 gallons. All my garden is burned except these incredibly girls, is a hard challenge. I can't understand not how much these plants survive but how they thrive instead
Very hard to stay outside, very hard to take decent pics, very hard to sleep, to breath too. Closed at home I am building a dry trimming dock with a 120 microns sieve which I will then use to beat the dry trim in the Moroccan way.
On Monday 27, the first day of the second heat wave, 90 ° F, the plant already begins to show signs of low heat stress and the forecasts are very bad, this could last for 2 weeks. This is a problem for me because I have planned to start stressing the plant with underwater, an impossible mission in this heat. For the same reason I'll stop to defoliate. I was forced to bend the tallest branches again for privacy reasons, this girl is fucking vigorous. From now on I will stop counting the height and the water, the first because the plant is completely folded 3/4 times and has exceeded 75 inches abundantly. The latter because I water them directly with the water hose. I will report only nutes when gived. Grasshoppers are starting their fucking job chewing leaves but I don't care, this resilient girl has tons of leaves so I'll let them to make defoliation in my place, checking only the new sprouts and for mites. Occasional mealybugs are prompted burned by my lighter, the best method!!!
Still waiting for stigmas.
RG is very leafy, she's still stretching but lots of pistils are appearing. Strong cheese/coffee scent. Unstoppable & resilient. She slips into any hole, through one of them one of her branches has finally reached the other two sisters, in a few square inches 3 buds of different strains are forming, embracing one another. Shape and thickness of the branches make me think of a not generous harvest, according to the breeder.
Hope you enjoy the garden
Happy to see U come back for updates.
Cheers & Happy Growing!
See ya soon

Likes
3
Share


@Dargaville_Dukes
Follow
Started training this week with bud clips, removed lowest branch and fan leaves on main stalk. Plant is performing well. I'll give it a final topping this week and transplant into 5 gallon pot.
Likes
21
Share


@MadeInGermany
Follow
Flowering day 57
since time change
to 12/12 h.
Hey guys :-)
The lady is slowly coming to an end 😍.
The buds start to swell extremely .
The trichomes mature day by day.
This week she was given a very light flush with Clean Fruits so that she can use up her remaining nutrients in the coming days 👍.
It will be harvested in the next 10-14 days 😍.
I can't wait to try them all :-) .
Otherwise everything was cleaned and checked.
Have fun and stay healthy 💚🙏🏻
👇🏼👇🏼👇🏼👇🏼👇🏼👇🏼👇🏼👇🏼👇🏼👇🏼👇🏼👇🏼
You can buy this Nutrients at :
https://greenbuzzliquids.com/en/shop/
With the discount code: Made_in_Germany you get a discount of 15% on all products from an order value of 100 euros.
👇🏼👇🏼👇🏼👇🏼👇🏼👇🏼👇🏼👇🏼👇🏼👇🏼👇🏼👇🏼
You can buy this strain at :
Clearwater Seeds
Water 💧 💧💧
Osmosis water mixed with normal water (24 hours stale that the chlorine evaporates) to 0.2 EC. Add Cal / Mag to 0.4 Ec Ph with Organic Ph - to 5.8 - 6.5
MadeInGermany

Likes
23
Share


@BedroomGrower
Follow
Day 59: There is little left to my first harvest in 2019. As buds continue to swell and resin starts to see some orange pistil. I think that in order to complete the cycle of these six Gorillas, there are only a couple of weeks to get to the standard eleven weeks. The smell of the resin is very strong and I have to ventilate the room several times during the day. Given the approach of the first harvest I put some other seeds in the soil. 😄
P.S. If you want to listen to some music while reading the posts on this fantastic site I'm creating a musical playlist with my rework dedicated to ganja, of course both listening and downloading are free 😉
This is the link: https://www.orfium.com/playlist/767069/420-ganjatimemusic-c4in0/
As I wrote earlier I had to speed up the times of the first harvest because this Saturday is my birthday. I chose one of the predominantly indica plants for the first taste. This plant has received only water for the last five days instead of the usual 10/12 and although I would have to wait another 10/15 days before it is completely dry, this Saturday I will break some buds smaller and I will smoke it 😋 Once the first plant has dried, and the crop is tasted, I will add more data such as flavor and real definitive weight. For the remaining five plants I will follow all my standards without breaking basic rules and I will make a progressive crop. For the 2 plants that showed a photoperiodic predominance, I will open a separate diary once the harvest is over.
P.S. I posted some sexy photos to take part in the Naked Buds contest. The girl portrayed in the pictures is called Laura and is a friend of mine who likes to smoke, pics are from webcam because she lives in other country by now. Although right now I'm single, like all men I have lots of videos and photos in the company of girls and given the fact that I am a chronic marijuana smoker in many of these it often appears as a joint or a bong. For the moment I do not intend to share anything without having first received the consent of the girls portrayed, I'm not a piece of shit. My friend sent me the photos knowing that I would share them, she saw them and wrote to me that I will send others in the future.
For Laura: Thank you baby! 😘
Day 66: As written above I must hasten the times and to do so I have to break some rules for perfect cultivation. After choosing and cutting the smaller plant and having made it stand upside down in the shade for two days I dissected all the buds and put them to dry in my cage. At a first estimate I should have gotten between fifty and seventy grams of buds, I will be more precise in a couple of days. With the smaller buds and sugar leaves I will subject them to decarbosillation and I will make some good butter 😋 while with the small branches covered with trichomes I want to flavor some bottles of vodka, I put aside even the largest leaves and branches and when I have also dried out the waste from the next crops I'll do a bit 'of ice-olator hashish using the bubble bags system...I thank everyone and I apologize for my approximate English and any errors, but as you may have already guessed it is not my language.
March 10, Day 69: Final taste and effect ratio for the first plant. The exact weight of dried buds, excluding the wads, sugar leaves and small branches is 58 grams. Even having pushed all the final procedures to the limit, the product is fantastic. No chemical taste despite the short flushing. Yesterday was my birthday and I got to smoke a lot (about 45 grams) in the company of twenty friends, everyone appreciated the taste and power of the effect perhaps amplified by some beer, but still very strong. No one has coughed, the smoke goes down smooth and clean and the effect is practically immediate. The terpenes of limonene and pinene dominate every flavor. The aftertaste is fresh and sweet and smoking a lot at the end the limonene prevails. For a final consideration on the edible taste I will have to wait to have made some butter to make biscuits or brownies. As I wrote the effect is very strong, salt immediately and at the beginning seems energizing, but shortly after passing the joint hits you with a baseball bat to the back of the neck 😵 After the fifth joint you are now on a psychedelic journey and you will continue to laugh for hours. At the moment I do not have a THC analyzer (object I want to buy in the future) but based on my personal experience I think it is well over 20%. Stimulates appetite, thirst (excellent if combined with a double malt blond beer) and can be used to effectively fight insomnia. 👊
Processing
Likes
21
Share


@LittleBigTrees
Follow
Been feeding just water ready for the chop.
Some of them have all brown pistils and have pretty much stopped all together.
The kalimist indica pheno is still flowering so I'll let it go until it looks ripe 👍
Likes
15
Share


@northern_rookie
Follow
Hifi 4G seems to be a bit sensitive to the current and previous feeding levels. Had multiple leaves exhibit nutrient burn. Otherwise all seem to be happy. Hifi 4G, NL/Skunk and Blueberry continue to lead the pack on Bud development. God I hope I don't screw this up!

Likes
3
Share

@Minuteman_Organics
Follow
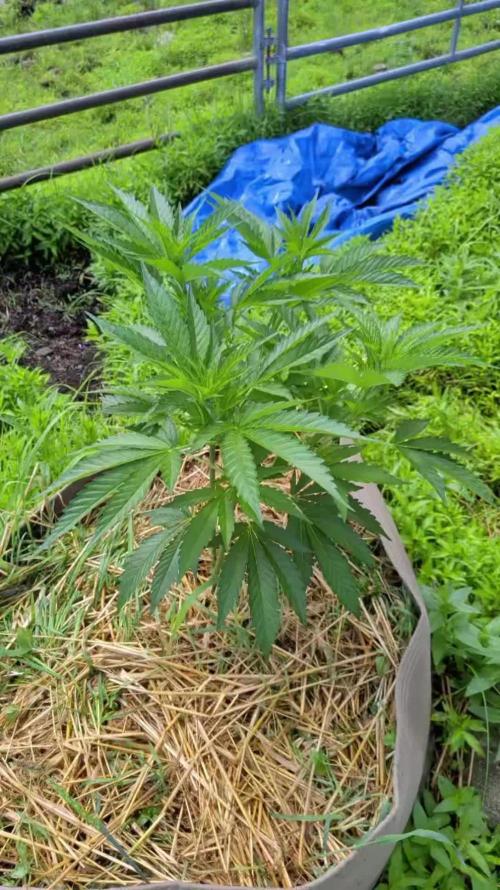
Another week gone by. I am going to need to trellis these girls next week and move them to their final resting place about 30 yards over. It's a little bit more of a sunny spot and it will allow them to get about about 2 hrs of sunlight come autumn. Last year I noticed some trees that blocked the sun as it dropped closer to the horizon, so we are going to avoid that...or Ill just chop down the couple trees blocking the sun
Plants are looking great! They're doubling in size every week about
The grandpas stash r2's are thickkkkk
They smell very similar to my hash plant bx1. Skunky, hashy, spicey
The og kush bxf2 all over the place in terms of smell. My favorite have to be the grapefruit one I found. It's so goddamn citrusy kinda crazy....others I would say are more piney
The lemon Berry's are what ever. Not my fav by who knows what will happen in the next month. Sativas always look sickly to me so I'm very biased
