
Likes
Comments
Share


@JUNGLE_B4RNS
Follow
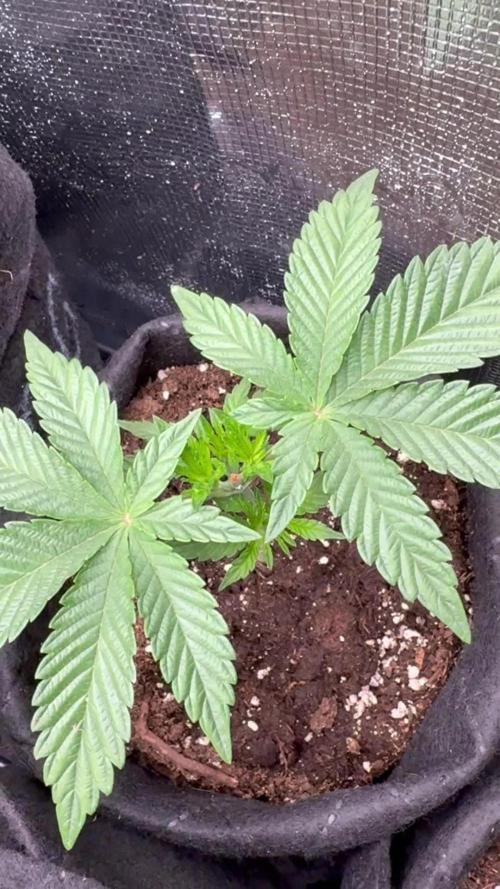
Growing feminized seeds from White Label Seed Company is an affordable and easy method of obtaining a high quality harvest. White Label was the first company associated with the Sensi gene-bank to make feminized varieties available to the public. As the popularity of growing feminized cannabis has grown, the number of White Label feminized varieties has increased to keep pace with the demand.
Topping the plants after the 3rd node, in late stage once the 4th node start to push out.
Spreading the plants to give them place to grow.
⛔️ Still no nutrients at this stage ⛔️ Only RootBooster ☝️
Cellmax BIO Soil is good enough for 2-3 weeks ⚠️
Lifting the pots to check the water weight, watering once a week when the pots get lightweight just before the soil start to dry, to keep it moist and wet !
(I’m looking for a job in the Cannabis industry as Master Grower, Mineralogist, Quality Control)

Likes
213
Share


@DevilsBud
Follow
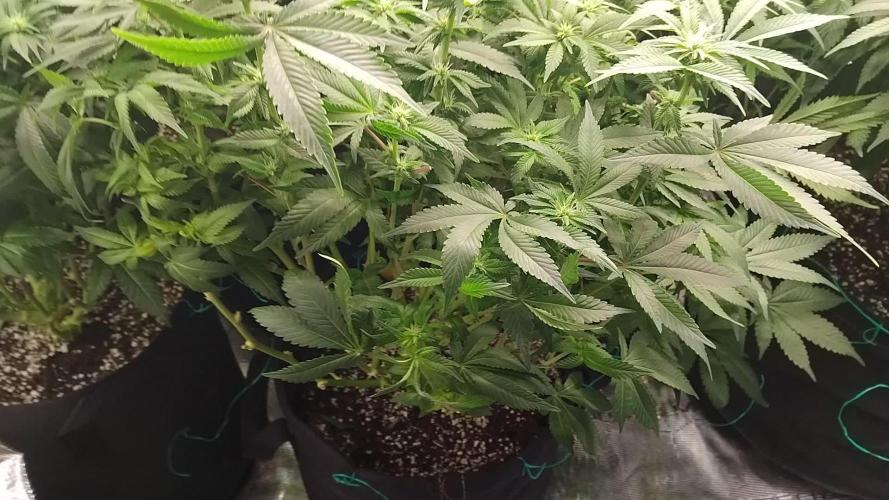
New week for the imperium X
She definitely a week behind the other's but still growing i will be leaving this one alone topping and LST wise it's already smaller then the rest so i let this one just grow how it is
Made video today enjoy 🤘🏻
See you next week Growmies
visit www.marshydro.eu
for your best gear and use the PROMO CODE: DEVILSBUD
Some info about the Marshydro FC-4800
Superb Quality LED Chips: The whole light is composed of 1206 pcs Samsung lm301b and Osram 660nm chips. More than two times as many LEDs are used to drive the grow lights at low currents and to avoid overdrive. Quality is guaranteed and efficiency is up to 2.8 μmol/j.
Even PAR Distribution and High PPFD Output: The multi-light bar design and the densely distributed light chips enable the LED grow lights to achieve the optimum PPFD required for plant growth over the entire effective coverage area.
Specifically Designed Spectrum: To ensure even plant growth, blue and red light are enhanced on the basis of a full spectrum combination. Not only does this accelerate plant growth, but it also improves the yield and quality of the plants at the same time.
Dimming Daisy Chain Function: The dimming function saves on electricity costs and enables brightness from 10% to 100% for the different stages of plant growth. A single master light can connect up to 30 lights in a daisy-chain system.
Business LED Grow Light: The light's wavy heat sink dissipates heat quickly and the IP65 waterproof allows the light to operate in humid conditions. 180° collapsible feature for easier installation. All these features provide favorable assistance for commercial cultivation.

Likes
8
Share


@Dirtysouthgrower27
Follow
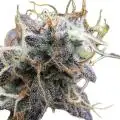
Super easy grow , i hst & topped this girl early & I think that really helped her out !!! She was grown in living soil so no NPK was given to this girl at all .. she smells just like lemonade, and finish on day 71 from seed !! Super happy with this girl ... she’s drying now , I can’t wait to smoke her!! She smokes super smooth, taste exactly how she smells!! Great job fast buds

Likes
Comments
Share

@hassehujasse
Follow
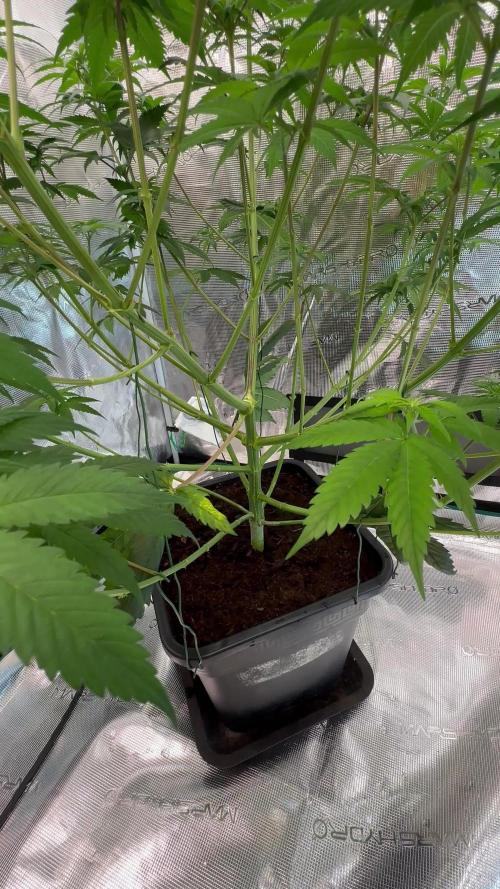
She is ready to go like F1 RS11 going well after trasnplantation and topping
RS11 Se esta empesando poner en la marcha

Likes
3
Share


@coolesrat
Follow
This week things are swelling quick great ! The purple is showing up more but still only trace amounts. The black has no signs of changing colour however I already know my pheno ain’t the one ☝️ . But the purple shows promise!! Slow at cloning and a higher mortality rate then the black amnesia haze. This one almost every single clone I made all root amazingly ! Highly recommend for its yields and ease in the grow room. You can really feed it high . Still unknown why the purp has curling leaves but from others grows I see it’s fairly common . I’m guessing it prefers a slightly more alkaline PH . I’ve been using citric acid to ph correct and every time I sway a little low like 6.4-6.2-5.9 the plants leaves curl slightly more. Most mixes are in the 6.8-6.5 range however.


Likes
12
Share


@PEAKYPLANTERS
Follow
OMFKG!!!!!!
I've been vía for a few weeks and this doll has exploded! 💣💣💣💣 I've never seen such a big growth in all this time! "My preparation with hydroponic cultivation is paying off the hours of study." ...unfortunately his mastodons have given him some small burns... but I'll know how to get it back.
Likes
14
Share


@BatGuano
Follow
This is the final week right before the harvest. I am very pleased with the results.
I am also glad that Spider Mite problems ceased once and for all with the harvest :)


Likes
12
Share


@CheeRz
Follow
We finally made it ladies and gentlemen. It is an honor to introduce you to the beautiful Lady Wedding Cake and the beautiful Cookies Kush twins. Even though I'm pretty sure cookies kush #1 would have needed another week, she had to go under the knife and was finished just in time for the super bowl. we also need the space now for the next round of the Eternity Grow Cup. Next Stop Zami Runtz and Blue Gelato 41
Likes
44
Share


@Buffynuffy
Follow
I’m actually Super happy they sprouted on the 1st it just makes keeping track of what day your on so much smoother l think, but I think one was having a hard time getting the shell
Off so I helped just I tiny bit!
Likes
Comments
Share


@Gabarram
Follow
After one week flushing, it's time to harvest. I could have given her one more week but powdery mildew was spreading so I decided to do only one week for flushing, I don't worry much because since I have always been doing low dosis of fertilizers during her life, my plants never need so much flushing time to detox form all those chemicals.
After I cut off shoots, I submerged them into a H2O2 solution (200 mL H2O2 10% in 20 L tapwater). The residue that was left floating on the bathing water was very little, because infestation was not very extended. I left the buds hanging in a rope for the day. On the evening I'll take them inside, tomorrow I'll trim.


Likes
Comments
Share

@Topshelf_only
Follow
Remove a lot of the lower branches this week . Everything looking pretty good at the moment

Likes
32
Share

@Scandinavia
Follow
8/10 - Got around 50g per plant, very frosty and compact too for an autoflower. Wanted to share the final product and the whole journey in once. Hope you like it.
BTW:
why can i only make one harvest when i dont harvest all the same time? And ive seen others be able to harvest week after week.
Peace & Love
Likes
Comments
Share

@Budhunter
Follow
Week 1 flowering - Day 5 of flowering & Day 61 of life
Finally flowering here. It’s been 5 days on flowering, still pre flowering but finally the best is coming. Lemon tree is a monster 💪🏼 far the biggest plant in the tend and growing 😅 time to fat up 🔥 I have added bloom fertiz and bud candy to the mix. Let’s go
Likes
8
Share


@mikearon
Follow
June 14th - Day 118 : Heavy defoliation today as I can’t lower my humidity and tried everything from cleaning to lowering the humid in the lung room... But I mean...!!! Looooooks at theses beautiesssss

Likes
13
Share


@Lickey
Follow
Going to end this romance. Too smelly and poor smoke reports. I still love her.
Made rosin and rso. In both cases she stays runny and sticky. Even in colder temps. Different strain for sure!

Likes
22
Share


@drgreentips
Follow
I feed water till the day 10 mark now shes had the chop filled the smell proof weed dryer and the was left hung for drying
Likes
10
Share


@Colectivegrow
Follow
Comenzando la 3era semana en donde nuestras Tropicannas Poison de Sweet Seeds. van super y con un olor.
La alimentacion es la misma en variando en un poco las dosis.

Likes
13
Share


@Ledbelieve
Follow
Really good week with this lady. She is putting on weight in all the right places. Sprayed with BT and neem oil last night. Gave her 1 feeding this week and 3 waterings. Gave her a little hair cut to allow more air flow. Getting close and super excited!! Happy growing!!

Likes
27
Share


@RDWCGrowing
Follow
5/23/2023
Week 7- Day 1 of Flower (Day 110 overall) (Day 49 of Flower)
There was a couple of small super small sucker buds on the lower stocks that needed to be cleaned off but that was it. Just watching them Flower!!
5/24/2023
Week 7- Day 2 of Flower (Day 111 overall)
Tucked a few fan leaves below lower buds but didn't see any blatant offenders that needed to be removed. I typically do start my checks in Week 8 but since this is a new strain I decided to go ahead and do a Trichome check just to see what was what.. Just as I thought nothing but clear glassy Trichomes. I will check again in one week....
5/25/2023
Week 7- Day 3 of Flower (Day 112 overall)
Just letting them grow today!! Smell is getting stronger I would say it is a hint of Pine and a heavier fruity smell.
5/26/2023
Week 7- Day 4 of Flower (Day 113 overall)
I did Nothing but took some pics and I enjoyed it!!!! It is nice to be able to just sit back and watch them on auto pilot.. :-) Tomorrow Water Change Day!!
5/27/2023
Week 7- Day 5 of Flower (Day 114 overall)
I admit it.. I had to defoliate a little bit.. I looked in while changing the water today and there were just a couple blatant offenders blocking the light from lower bud sites and those leaves they just had to go. Other than that I changed the water and this week is where I drop everything and start preparing them for this last phase of the grow. Loving a few of these buds they are starting to beef out very nicely.
I added 36 gallons
Mammoth Silica = .5Mil/Gal= 18Mil
Root DRIP = 1Mil/Gal= 36Mil
CalMag= .5Mil/Gal= 18Mil
FloraMicro = 3.8Mil/Gal= 137Mil
FloraGro= 2.8Mil/Gal= 100Mil
FLoraBloom= 4.6Mil/Gal= 166Mil
LiquidKoolBloom= 2.5Mil/Gal= 90Mil
TPS SIGNAL= 4.0Mil/Gal= 144Mil
ORCA = .5Mil/Gal= 18Mil
Water Temp= 70.1
Tent Temp= 76
Humidity =64 ** I have two dehumidifiers running on Ink bird controllers to try and keep the humidity down, In late in flower I like to keep the humidity above 45 but below 60.
5/28/2023
Week 7- Day 6 of Flower (Day 115 overall)
Opened the back of the tent today and boy did she need some defoliation love in the back. Other than that I took off a few little sucker buds trying to form. I did start to setup my Dry space as well as did a Trichome Check today and the brown tips are coming in nicely.
5/29/2023
Week 7- Day 7 of Flower (Day 116 overall)
Found a few baby sucker buds trying to form so I removed them. Other than that I am enjoying watching her mature.
I also started my Reverse of the Clone I took 6 weeks ago in Apr from #3. I am uploading footage of the reversing process for your viewing pleasure.

Likes
1
Share


@SpartacaZ
Follow
E stata una battaglia bellissima ben 230 grammi !!!!
Sapore di 🍋 limone e arancia incredibili