


Likes
Comments
Share


@Chisinh0
Follow
Hola a todos! Esto va por la semana 12 desde la germinación, subo fotos y video seguimiento, espero alguien me pueda dar algún consejo (faltan algunas fotos recientes que subiré pronto). Un saludo y gracias


Likes
46
Share


@Daweed83
Follow
Last daaaays 😍😍 Im trying not to rush the flush and I rather wait a few more days to bring this ec right down.
Still looking pretty healthy but the first one look on the end of the cycle. This might be the first one to go down ⚔️
Note to myself : stop thinking of cutting stop thinking of cutting ....

Likes
42
Share


@TheCannaProphet
Follow
~Humboldt Seed Co. AMHERST SOUR DIESEL~
???Secret origins???
The mystery of the unknown🧐
Amherst Sour Diesel is a cannabis seed whose origins are kept a secret. This wonderful vigorous marijuana plant will reward your work with large, elongated, compact buds complemented by a rich complex aroma. Indoors it performs best with a short growth and outdoors, in temperate, warm, dry and Mediterranean climates or in a greenhouse. A marijuana plant that boasts balanced properties.
-Top-notch flavor and effect
-Idyllic feelings to treat the senses
-The aroma of this cannabis hybrid is a pleasant combination of ripe fruit and oil. The flavor is rich and complex, with hints of tropical fruit, oil and exotic wood.
-The effect, typically Sativa, is euphoric, uplifting, powerful and long-lasting. A cannabis strain Sativa lovers will know how to appreciate.
________________________________________________________________________________________________________________________________________________________________________________________________________________________________________________________________________________________________________________________________________________________________________________________________________________________________________________________
Tech Specs:
~Amherst Sour Diesel~
Feminized
Genotype: 20% Indica / 80% Sativa
Cross: Chemdawg x Amherst Super Skunk
Suitable for: Indoors and outdoors
Indoor flowering: 65-70 days
Indoor yield: 400-600 g/m2
Outdoor harvest time: Late October
Outdoor yield: 2000-3000 g/plant
Outdoor height: 2-3 m
THC: 27%
CBD: 0.1%
________________________________________________________________________________________________________________________________________________________________________________________________________________________________________________________________________________________________________________________________________________________________________________________________________________________________________________________
THE SETUP:
~Planted into Jiffy Peat Pellets that were hydrated with de-chlorinated water with SuperThrive added then ph'd to 6.0 @ 80℉
~Grown 100% organic in 10g fabric pots with Mother Earth 70/30 Coco/Perlite medium amended with 2tbs/g of Down To Earth 4-4-4 / 2 cups/g of Earthworm Castings / 1tbs/g of Dr. Earth Flower Girl 3-9-4, 1tbs/g of Dr. Earth Bat Guano, 3/4 cup of Down To Earth Azomite and 1 tsp/g Down To Earth Fish Bone Meal.
~24hr light cycle during Germination / 19/5 light cycle for Vegetation and 12/12 for Flower
~Straight water ph'd @ 6.2-6.8 when needed and weekly Compost Tea's.
________________________________________________________________________________________________________________________________________________________________________________________________________________________________________________________________________________________________________________________________________________________________________________________________________________________________________________________
WEEKLY UPDATES:
9/20- 💥BOOM!💥 Week Six of flower is here and my girl's in high gear, stacking her flowers and pumping out trichomes!
Today I watered her with 1.5g de-chlorinated water with 5ml/g of Botanicare CalMag+ added, then ph'd to 6.2 @ 72℉. I turned her pot and plucked a couple of yellow shade leaves...the basic daily maintenance.
9/22- I didn't water her yesterday as she looked great and was 'praying' hard. Today she was given 1.5g of de-chlorinated water which was ph'd to 6.2 @ 72℉ which I gave her through her drip pan (bottom chuggin) and I also gave her pot a turn.
She continues to have a great deep green color that is beautifully contrasted by the snow white trichomes piling up on them! Her height has not really increased but she is extremely bushy with tight node spacing which will necessitate plucking some leaves to keep the light penetrating into her canopy.
9/24- We're getting close to wrapping up Week Five of flower in a couple of days and she'll be past the half-way point with the most exciting weeks yet to come!
I didn't water yesterday and today I went ahead and Top Dressed her with 2 tbsp/g Dr. Earth Flower Girl 3-9-4, 1 tbsp/g Dr. Earth Gold Premium 4-4-4, 1/2 cup Down To Earth Bio-Fish, 1/3 cup Down To Earth High Phosphorus Bat Guano and 2 cups of Worm Castings.
I watered in the Top Dress with 1.5g of de-chlorinated water which was ph'd to 6.2 @ 72℉ and let her enjoy her meal! 😜
9/26- After her heavy watering on the 24th I didn't water yesterday and when I checked her today at 'lights on' and she still had some weight to her pot and her leaves were praying hard so I held off on watering today and will hit her tomorrow with her usual 0.75g watering.
~Thanks for stopping in! Things should be getting a lot more interesting in the coming weeks...Stay lifted and be Blessed! 😎🙏~

Likes
Comments
Share


@MumboJump
Follow
Flowering is starting and i did some defoliation. Watering only with water but the Glookies got just 2 times in 2 weeks some biobizz flowering, top max and growth because it got kind of brighter. Also supercropped some of the to high mains so that the central canopy stays mor or less even.

Likes
4
Share


@brosef_b_baggin
Follow
Start of week 7(May 3rd 2022). I’ve been using Lotus Grow every watering and so I decided to flush the pots with 7x their water holding capacity in the bathtub. I will be alternating between Lotus bloom/boost and a plant based “tea” from Dragonfly Earth Medicine called Fat Flowers. Lights were too close and caused marks on the leaves which look like deficiencies, I’ll keep a close eye until I can be sure. The petioles are purpling on the indoor plants as well(might be genetics though from the Strawberry Nuggets).
Likes
54
Share


@ASCBOOGS
Follow
Day 30 noticed some white/yellow small looking maggots when i was defoliating which i believe to be thrips i have cleaned the grow area and gave all the plants a foliar spray of dr schimmel mite killer which seems to be doing its job and it says it can be used throughout the flowering stage going to give the 3rd application tomorrow hopefully then should be back on track but things are looking much better after thr first couple applications i am still going to continue big bud for another week due to the thrips interupting then will pk after for a week and finish with overdrive then flush please fee free to leave your input

Processing
Likes
3
Share


@camo420
Follow
NEW BOX: 130x60x120
DIY: storage shelf, solid sheet metal
ELECTRO ################################
thermometer top
thermometer bottom
hydrometer
wlan ip cam (+ir filter)
----------------------------------------------------------------
input: x2 USB PC fan
exhaust: x2 USB PC fan
circulation: x2 USB fan
----------------------------------------------------------------
led panel 1: 300W ASUNDOM LED (Veg/Bloom/Full)
led panel 2: 300W XHGrow Reflector-Series LED (Full)
----------------------------------------------------------------
studio light 1 (vegetation): 36W TaoTronics LED Gold
studio light 1 (vegetation): 50W Balai LED full
studio light 2 (vegetation): 8W VINGO LED blue ligh
studio light 2 (vegetation): 50W Balai LED full
----------------------------------------------------------------
studio light 1 (bloom): 36W TaoTronics LED Green
studio light 1 (bloom): 36W TaoTronics LED Gold
studio light 1 (bloom): 50W JADIDIS LED IR full
studio light 2 (bloom): 36W TaoTronics LED Green
studio light 2 (bloom): 36W TaoTronics LED Green
studio light 2 (bloom): 36W KINGBO LED Deep red 660nm
3x PLANTS ###############################
FastBuds Girl Scout Cookies
pots: 14L
soil: plagron grow mix

Likes
167
Share


@DeepWaterGrower
Follow
⭐ TrolMaster tracking ⭐
I started to track my crop during week 15, when I got the Tent-X TCS-1 by TrolMaster. First impression was: this is too professional for me, I can't handle setting it up and using it well. Then I started reading some posts on Instagram, I visited their site and in 5 minutes my cultivation experience took a huge step forward with disarming simplicity, I couldn't believe it.
I have uploaded tracking videos from the TrolMaster app for each week from the 15th to the 19th, as well as the two weeks of drying stage.
⭐ Controller Chronicles ⭐
Day after day I appreciated the clarity and precision for data, access to all settings and instant readings by connecting a WIFI router to the controller's LAN port. I loved the possibility to dim my lamps remotely, or even automatically based on the temperature in the box!
🌱 GERMINATION (2 days)
Seeds in a glass of EC 0.4 tap water for 10 hours, then in root riots and under the lamp. They sprouted after 48 hours from dry seed.
🌿 GROWING STAGE (10 weeks and half)
I decided to give these plants a long vegetative growth and this allowed me to do a lot of training on both.
Starting from the 4th veg week I started with defoliation sessions every two weeks, for a total of four during the entire vegetative phase. The last defoliation was done a couple of days before the switch, in order to allow the lower parts of the plant to get as much light as possible.
Furthermore I did Topping on week 6, cutting the apical branch, then on week 8 I did Topping again on several sites, as well as SuperCropping on the highest branches to make the canopy uniform.
The light cycle I used is 18/6 and the last two veg weeks I lowered the light hours to 16/8 first and 14/10 then.
During the veg stage I made 4 DWC change, PH was always between 5.5 and 6, about EC I started with 0.6 and was 1.4 on the last veg week.
🌸 FLOWERING STAGE (9 weeks)
I started this phase after 36 hours of darkness, I then changed the DWCs solution (adding a flowering stimulator).
Then I mounted the ScrOG-net about 50 cm from the base of the plants and I wove the phenotype #1 through the net occupying at least 60% of the available space; the phenotype #2 stretched shortly after the switch and I used the net only to widen the central branches.
They showed the pre-flowers two weeks after the switch, then I made two defoliations on week 3 and 5 flo.
During the last four weeks of flowering (weeks 6-9) I simply paid attention to the PH-EC levels to provide the roots with optimal conditions. I then kept the TEMP-RH-VPD-PPFD values under control and this also thanks to the Tent-X controller by TrolMaster which allows me to provide optimal conditions also above.
I chopped them when trichomes were about 85% milky and 15% amber.
During the flowering stage PH was always between 5.8 and 6.2, about EC I started with 2 and was 2.3 on the last week before flush.
✅ HARVEST
- From dry seed to harvest: 140 days (2 days germination + 75 days veg + 63 days flo).
- Chopped after 4 days flush and 48 hours in dark;
- Wet trim, removed fan leaves.
✅ DRYING STAGE
- Time: 14 days;
- Average: 20° C - 50% RH.
- After that I made a dry trim, removed branches and sugar leaves.
⚖️ DRY WEIGHT
- Phenotype #1: 230 gr buds + 25 gr larf;
- Phenotype #2: 105 gr buds + 50 gr larf.
So, the overall dry weight is: 335 gr buds + 75 gr larf.
✅ CURING STAGE
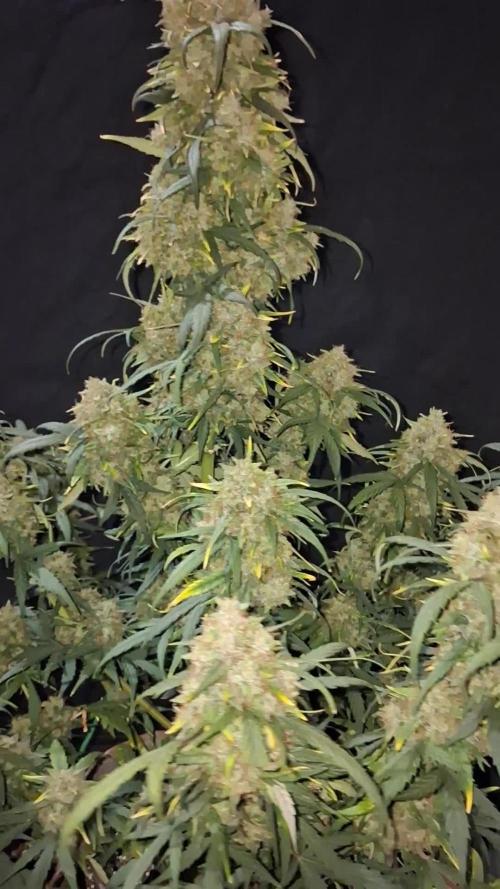
- Curing is done after 30 days with Boveda 62%.




Likes
8
Share


@SmokingTiki
Follow
Tiny pot, tiny harvest hehe. This grow was only for fun and I really enjoyed doing it! :)
- I didn't weight wet buds.
- Drying was made around 21°C and around 55% of humidity.
Veg time : 31 days.
Flowering time : 46 days.
Total time from seed to harvest : 81 days.
Height : 36cm
Pot size : 0.35l
Likes
6
Share


@Naujas
Follow
That's how I know the crop was harvested too early:( ..... but only because someone started visiting my place of cultivation and took my two girls, and left two, so that he wouldn't come back a second time and take them, I decided to cut her down earlier:( that's it such news awaited me when I returned from vacation, but overall the girl looked very beautiful, although she got a lot of stress when the snails ate her, but she endured it and recovered very well:) I will dry the bigger flowers and make bubble hash from the rest, good luck to everyone be careful in nature :).

Likes
26
Share


@SwissKush
Follow
Week 14, Flowering week 9, flush week 2
The ladies are almost ready to harvest! We are going for the long haul here!!
The DWC has about 6 litres of mineral water left in it, will let plant drink all.
Indica phenotype plant is about 10% covered in amber trichomes, the rest are milky white.
Sativa phenotype plant is abput 90% milky and 10% amber also.
The light schedule will remain 12/12, with 48 hours of darkness before harvest.
Harvest will likely happen this week, checking trichomes every morning while dark.
Day 92 - resin explosion from 12/12 lighting
a. I remove a few large fan leaves here and there that are drying up.
b. the plants are eating all the nutrients from the leaves
c. some of the small lower tiny buds I make bain marie qwiso, tastes incredible.
Day 93 - getting very close, they are stinking soooo loudly
a. the trichomes are at 15-20% amber on the Indica Phenotype and 10% on the Sativa phenotype
b. all trichomes are milky, rarely see a clear
Day 94 - need to harvest tomorrow
a. its time, the DWC is nearly empty, the ladies have been in the dark, the hash I make is banging, time to harvest.
Day 95 - Harvest
Will create harvest week when buds are all dry

Likes
3
Share


@bigsmoke42069
Follow
Week 8 of flower 9/27/24
Stopped giving T.A. FinalPart after a week because plant showed sings of nutrient burn.
Started watering with only water to leech out nutrients from the media to get the plant to cannibalize itself.
Hand watering ones a day at the beginning of the light schedule.
You can see in the video, one of the colas and the area near it got heavily burned from excessive nutrient salts in the media,
I attribute it to the 3 days I watered the plant without runoff in mid flower.
A couple more days and it is time to chop :)

Likes
Comments
Share

@Philhsy
Follow
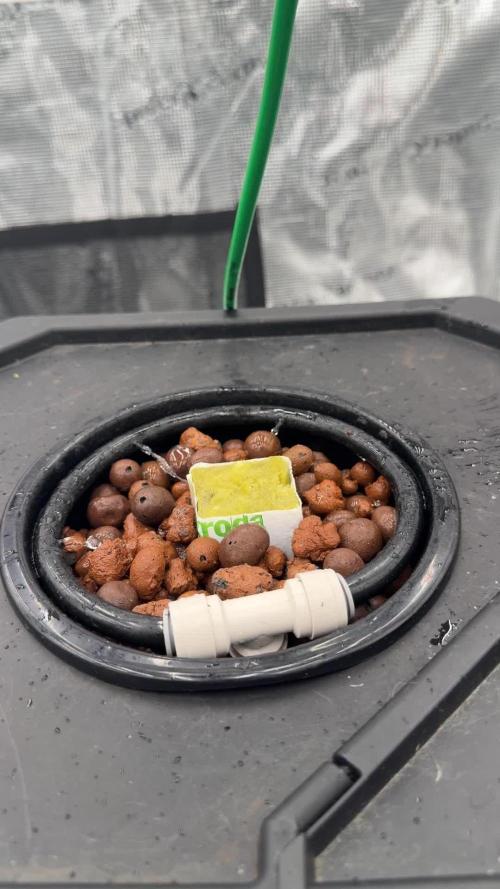
Starting this studio 54 Auto in a DWC setup
Germinated with CannaKan under a heat mat to give the seed a warm, stable environment during the early stage. Looking forward to seeing how she develops once the roots get established just put her in her cube today and into the dwc. 💚

Likes
2
Share


@Ryno1990
Follow
The Strawberry Banana from Canuk seeds is doing good she is the smallest girl so far an the only one still not topped I don't think I'm going to top her an mite just let her do her Christmas tree thing she would be a little taller but she grew with a curved stock for some reason she's been growing great tho have not had 1 problem with her
Ending week 4 of veg this girls is starting to pick up some good pace so she has been topped an has been doing great since she is deff doing great with this cultured biologix nutrients with her big fan leafs soaking in all the light from the medic grow fold 6


Likes
7
Share


@Pjm70
Follow
She has started her bloom. She is growing so well.
This week I took off all her tie downs. Then 2 days later decided to tie her back down.
She has had steady tension on her branches. So when I released her, she tightened back up. With the ties on, there is little reason for defoliation, as of now.
She gained height, but nothing crazy. All her main top branches have always been pulled down to be side branches. Everything else was let to grow that came up the center. Really the side branches are the top of the canopy. Surprised I have not broke a branch.
8/26 2 gallons Fed 8 tablespoons Foxfarm Big Bloom, 15 MLS Tiger bloom and Foxfarm Open sesame 1/2 teaspoon.
8/30 Gallon and a half of tea. Cow and worm poop.
Every year I'm going to grow a photo in a different shape. This year I just wanted to see how many tops I could make.
Looking forward to next year's design. However not as much as I want to see what this voluptuous beauty produces.
Voluptuous seems to be very fitting for her. Love this plant, she has been very fun to grow. She also thought me a lot.
Likes
42
Share


@DogDoctorOfficial
Follow
Yup as i suspected the defoliation, despise on her case a almost no leafs one since she is an auto and she was on her first week flowering, but she did took it like the champ she is and she is aiming to the moon as i like them to do, her bud formation is peculiar and beautiful to my eyes <3 <3 <3 i think i am in live with this Lavender, big shout out to the @SeedsMafia on this outstanding creation of them, very exited to see what she will tell me next <3 <3 <3
As always thank you all for stopping by and for supporting me on this journey, i am super passion about growing and fell blessed to have you all with me on this new journey <3 <3 <3
Genetics -Seeds Mafia Lavender Automatic
Light - LUMATEK ZEUS 465 COMPACT PRO
Food - APTUS HOLLAND
All info and full product details can be find in can find @
https://seedsmafia.com
https://aptus-holland.com/
https://autopot.co.uk/
https://lumatek-lighting.com/
<3 <3 <3 Growers love to you all <3 <3 <3
Auto Lavender Feminized is a very popular type of cannabis, whose strong therapeutic effects are highly appreciated. It has a flowering period of approximately 9-10 weeks and can be grown both indoors and outdoors. It is a resistant variety which can be cared for easily.
This variety is mostly appreciated because it produces strong, durable and resistant plants. Its branches and stem usually grow vertically rather than horizontally. It reaches heights of 120 cm and the harvests amount to 90 grams/plant. In addition, it contains high levels of THC- up to 20%.
As their name suggests, the plants that grow from Auto Lavender Feminized seeds have a smell and taste similar to those of lavender, also comprising mint and rosemary tones. This is a variety of cannabis that is usually appreciated for its pleasant fragrance and high productivity, seeing as its buds and stem produce an impressive quantity of resin. If you’re looking for another kind of feminized, autoflowering variety, Auto Lavender Feminized will not disappoint you for sure!
auto Lavender Feminized is a feminized, autoflowering variety, obtained by crossing the Lavender and Lowryder 2 species. The plants that grow from this variety have a very specific structure: they are tall, vigorous, and have large branches. At the end of the flowering period, the plants acquire an orange-gold shade

Likes
13
Share


@FreakShow
Follow
Lover her fruity smells 😍😍
Starting to develop some early trichoms 😍😍😍🤤🤤


