
Likes
Comments
Share


@CocoLogic
Follow
August 30th: (F13)
Fertigation once a day with same recipe (1150 EC 6.1 PH) watered until 10-20% run-off
August 31th: (F14)
Fertigation once a day with same recipe (1150 EC 6.1 PH) watered until 10-20% run-off
Sept 1st: (F15)
Fertigation once a day with new recipe (Mid-Bloom)(1200 EC 6.2 PH) watered until 10-20% run-off
Screwed each QB Board to the roof of each tent to gain some height space
Supercropped two branches on the TUT
Sept 2nd: (F16)
Fertigation once a day with same recipe (1200 EC 6.2 PH) watered until 10-20% run-off
Sept 3rd: (F17)
Fertigation once a day with same recipe (1200 EC 6.2 PH) watered until 10-20% run-off
Sept 4th: (F18)
Fertigation once a day with same recipe (1200 EC 6.2 PH) watered until 10-20% run-off
Sept 5th: (F19)
Fertigation once a day with same recipe (1200 EC 6.2 PH) watered until 10-20% run-off
Defoliation on both plants
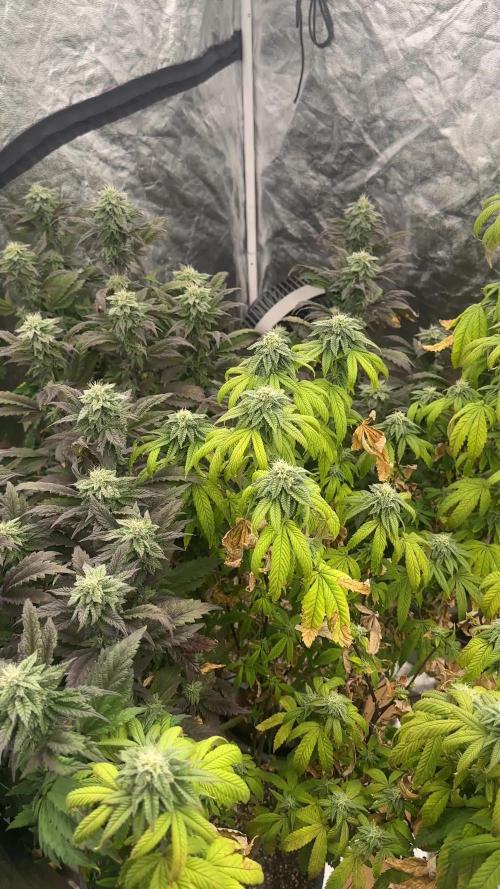
Note: Im happy the TUT stretch is finally over, we are on the extreme limit on the light distance from plant in the TUT tent, I don't see any stress sign so far, will have an eye on this for sure in the next week! :)


Likes
9
Share


@High_Grade_Dadli
Follow
This week was good did some defoliation and training to get some more growth out of side branches turn dem to crown......the baby that's in full flower is fatten up don't kno how much more fatter she will get jus have to wait and see...until then happy growing
Likes
16
Share


@Marshydrots1000
Follow
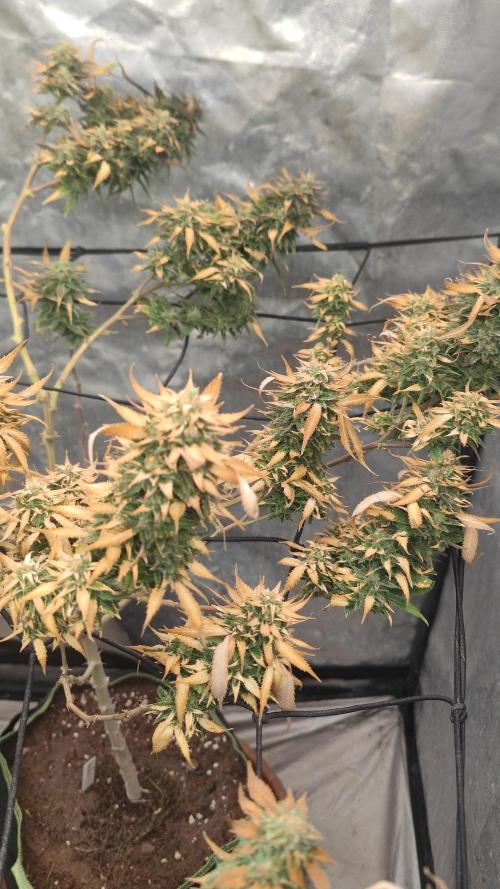
Sure are stinking the place up now ! Unbelievable. Still maturing nicely buds arnt supper tight on one on the left the right side is looking better. But still a week or so yet I would say one will be done a week or so before the other also. All in all things are looking good.

Likes
49
Share

@RockoCalenberg
Follow
Tag 35 – gut eingegroovt, jetzt wird Struktur sichtbar
Nach dem Umtopfen haben sich inzwischen alle drei gut gefangen und merklich stabilisiert. Der Wechsel in die großen Töpfe wurde insgesamt ordentlich verkraftet, gerade auch in Kombination mit der Mikrobengabe nach dem Umtopfen. Man sieht, dass sie das gut angenommen haben und jetzt wieder sauber durchstarten.
Größenmäßig liegen wir aktuell so bei rund 29–30 cm, wobei Chicken & Waffles klar die Nase vorn hat und aktuell den Spitzenreiter stellt.
Chicken & Waffles geht im Moment am meisten ab. Sehr robust, wächst zügig weiter und zeigt eine kompakte, aber gleichzeitig angenehm luftige Struktur mit guten Internodienabständen. Macht insgesamt den stabilsten Eindruck im Feld.
Fruit Bomb Punch bleibt dagegen die empfindlichste. Das Toppen und die „heiße“ Erde wirken immer noch leicht nach, auch wenn sie natürlich weiterläuft. Sie braucht einfach länger, um sich komplett einzugrooven. Auch auf Training reagiert sie aktuell eher zurückhaltend und wirkt insgesamt sensibler als die anderen.
Strawberry AK läuft dafür unauffällig, aber auf einem richtig starken Niveau mit. Sehr kompakt, schöne Struktur und insgesamt ein sehr sauberer, stabiler Wuchs. Bin ich aktuell echt zufrieden mit.
Unterm Strich wird jetzt immer deutlicher, wie unterschiedlich die drei Kandidaten ticken: von sensibel bis robust, von kompakt bis luftig. Genau das macht den Run gerade spannend.
Der Terp-Test läuft – am Ende entscheidet das Glas. 🌱
🇬🇧 Day 35 – settling in, structure is starting to show
After the transplant, all three plants have recovered well and clearly stabilized. Moving into the bigger pots was handled nicely overall, especially in combination with the microbial watering afterwards. You can see they responded well and are now picking up momentum again.
Height-wise, they’re currently around 29–30 cm, with Chicken & Waffles clearly taking the lead as the current front runner.
Chicken & Waffles is pushing the hardest right now. Very robust, growing fast, with a compact yet nicely airy structure and good internodal spacing. Overall, it looks like the strongest and most stable plant in the run at the moment.
Fruit Bomb Punch remains the most sensitive one. The topping and the “hot” soil are still slightly affecting her, even though she keeps progressing. She just needs a bit more time to fully settle in. She’s also reacting more cautiously to training and overall feels more delicate compared to the others.
Strawberry AK is running quietly but on a very strong level. Very compact, great structure, and overall a clean, stable growth pattern. Really happy with her at this stage.
All in all, the differences between the three are becoming more and more obvious: from sensitive to robust, from compact to airy. That’s exactly what makes this run interesting.
The terp test is on – in the end, the jar decides. 🌱


Likes
24
Share


@TerpTurtle
Follow
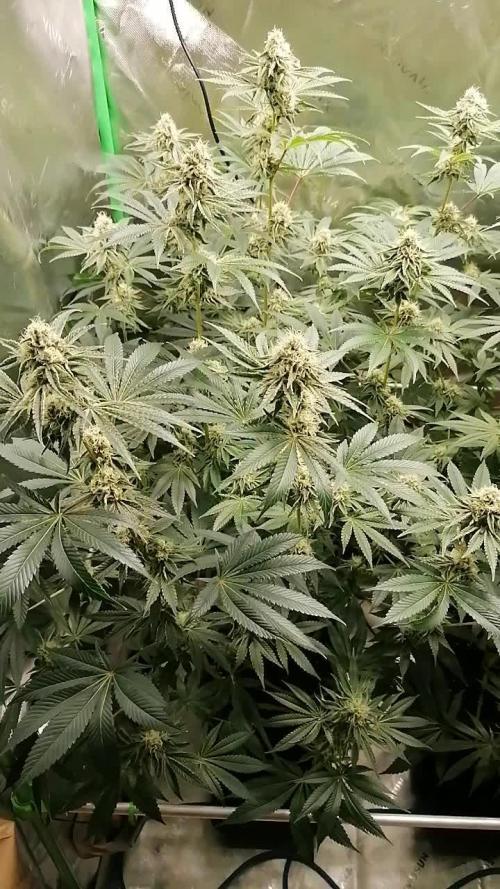
Week 2 from flip & All is well, plants are starting to uptake more water-about to get loud&wild.
Small stretch!
Likes
5
Share

@Chrisandweed
Follow
Pues la catastrofe pasó. Usé una bomba de descarga (un spray de esos que apretad y tira todo) que en teoria es compatible con las plantas dentro.... Se lío, ya se ve en las fotos y video que muuuuuchas hojas han reaccionado, fitotoxicidad y capúm. En fin, el cultivo lo voy a terminar, se salva mucha cosecha, en principio, pero eso.
Esta planta me duele en el alma lo que le ha pasado, de estar verde como ella sola preciosa super resinosa... Fuah... Si no me la cargué se quedó a poco. Una lastima que no de repetirá.
Likes
21
Share


@Fullmeltalchemist
Follow
6.6 D66 - Hail satan motherfuck3rs
6.7 D67 -
6.8 D68 - Just keep growing just keep growing just keep growing just keep growing just keep growing just keep growing just keep growing just keep growing just keep growing just keep growing just keep growing just keep growing just keep growing just keep growing just keep growing just keep growing just keep growing just keep growing
6.9 D69 -
6.10 D70 -
6.11 D71 -
6.12 D72 -


Likes
13
Share


@Robeeriegenetics
Follow
Replacement seeds not fairing well lol but chosen mothers are thriving
Likes
19
Share


@GoldenWeedGrower
Follow
Legend
Timestamp: 📅
Measures: 🛠️
Water: 🌊
Actions: 💼
Thoughts: 🧠
Events: 🚀
________________________________
📅 D50/F11 - 12/10/23
🛠️ EC 1.3 (stable) pH 5.5 (raised) -- pure water
🌊 RES Changed 💦💦💦
💼 Made some LST on the little one. No more work on the bigger
🧠 I'm going to change the water within today and run it for 12-24h and then put only bloom nutes
🚀
________________________________
📅 D51/F12 - 13/10/23
🛠️ EC 1.3 (by set up) pH 5.5
🌊 New water, calmag, bloom A and B and B52
💼 Removed all LST constraints on the big one. Some spouts removed from the little one. Some defolation
🧠 All training was removed now I will let her grow normally
🚀
________________________________
📅 D52/F13 - 14/10/23
🛠️ EC 1.0 (falling) pH 6 (rising) -- EC 1.3 pH 6.1
🌊 No water added. Added Big Bud and Bud candy to raise EC until 1.3
💼 LST and defolation on the little one. Made Timelapse video.
🧠 She's eating a lot: very good
🚀 The little one is sprouting out the first petals
________________________________
📅 D53/F14 - 15/10/23
🛠️ EC 1.1 (falling) pH 5.2 (falling) -- EC 1.45 pH 5.4
🌊 Water decresed a lot. Added 4L and Bloom A-B - Calmag and a little of Rhino Skin (silica)
💼 LST on the little one, some defolation on the big
🧠 I would like to have only nice big fat buds, so I need to work on this goal
🚀
________________________________
📅 D54/F15 - 16/10/23
🛠️ EC 1.5 (rising) pH 4.7 (falling) -- EC 1.4 pH 5.4
🌊 Water decresed a lot. Added 6L Bloom A-B and lot of Calmag
💼 Only a little defolation
🧠 Next time, no calmag at all
🚀 By mistake I added a lot of calmag so to balance I have to add lot of water and now the pot is completly full. Keep in mind there is a lot of Calmag in it
________________________________
📅 D55/F16 - 17/10/23
🛠️ EC 1.5 (stable) pH 5.2 (rising) -- EC 1.2 pH 5.4
🌊 Added pure water and a little of silica (Rhino skin)
💼
🧠
🚀 Some leafes tips are burning, so I'm going to go back to 1,2, trying to have a good pH range
________________________________
📅 D56/F17 - 18/10/23
🛠️ EC 1.2 (stable) pH 5.7 (rising)
🌊 No water neither nutes added
💼 Little defolation
🧠 Maybe the Thrips from Granada come out and infected Marlene. I will spray also her tonigh
🚀 Some symptoms of insects like leaves bitten


Likes
2
Share


@EyeMKing
Follow
Started the first top dressing of Gaia Green All Purpose and Power Bloom at a 50/50 ratio of 1tbsp/gal each.

Likes
19
Share

@Flavors
Follow
Another week in the books! 📅 Red Hot Violet is still thriving — stacking leaves and holding strong 💪💚. The Amaretto Sour is still tucked in beside her, and while I haven’t separated them yet, both are adapting to the shared space surprisingly well 🤞🌿.Growth is steady, color is deep, and the canopy looks lush 🍃✨. I’m keeping an eye on root competition, but so far they’re coexisting like stubborn siblings sharing the same room 😅.Nutrients and watering schedule are locked in 🔒💧, and I’m continuing to prep for that upcoming flip to flower soon 🌸🚀.Patience and balance — that’s the theme this week. 🙏🌱

Likes
11
Share


@Madman2020
Follow
Day 12
Starting to show preflowers. Seems a bit late.
I will take clones today from top 3 plants
81f/76%.
1100ppm.
1000co2 37-53kluxx
4 very sickly and ugly plants
Plant stems are all pretty stiff by now.
Looks like i could have fit 2 more plants
Day 14
Plants are doing well with height control.
I did a second Topping of the main 4 branches for each plant the week before flower flip.
Most plants are 22-25inches tall
3 of my White Weddings are looking very weird. Not a clue as to what is wrong.
Flowers are developing well on each plant
No more LST from here in out. I will let them grow how they are(minimal stress)
Started Defoliating

Likes
7
Share


@GERGrowDesigns
Follow
Welcome to Flower Week 5-6 of Divine Seeds Auto Black Op1um
I'm excited to share my grow journey with you all as part of the Divine Seeds Autoflowering Competition 2025. It's going to be an incredible ride, full of learning, growing, and connecting with fellow growers from all around the world!
For this competition, I’ve chosen the Feminized Automatic strain: Auto Black Op1um
Here’s what I’m working with:
• 🌱 Tent: 120x60x80
• 🧑🌾 Breeder Company: Divine Seeds
• 💧 Humidity Range: 50
• ⏳ Flowering Time: 8W-10W
• Strain Info: 25%THC
• 🌡️ Temperature: 26
• 🍵 Pot Size: 0.5l
• Nutrient Brand: Narcos
• ⚡ Lights : 200W x 2
A huge thank you to Divine Seeds for allowing me to be a part of this amazing competition and Sponsoring the Strains. Big thanks for supporting the grower community worldwide! Your genetics and passion speak for themselves!
I would truly appreciate every bit of feedback, help, questions, or discussions – and of course, your likes and interactions mean the world to me as I try to stand out in this exciting competition!
Let’s grow together – and don’t forget to stop by again to see the latest updates!
Happy growing!
Stay lifted and stay curious!
Peace & Buds!

Likes
41
Share


@Skinnytalls420
Follow
Day 94-23/01/22 still got 4 that are takeing really long time the rest are drying
Likes
34
Share

@Brujha77
Follow
Start Woche 6 Blüte
Die 3 machen bisher absolut keine Schwierigkeiten 👍👍
Ausser Tank auffüllen und ab und an paar Blätter wegmachen ist nix zu tun🥀
Nur die 🤐🤐 Trauermücken, die Biester wollen einfach nicht weg. Geht zwar noch, aber ich denke ich werd nochmal SF Nematoden benutzten.


Likes
8
Share


@ghost8782
Follow
proud of what i did for my second grow i have 2000 grams of wet bud and i still have 2 plants to go double grape is amazing


Likes
10
Share


@Hix57
Follow
La semaine 6 avec la Banana Purple Punch est une vraie fête! Elle semble adorer l'engraissement, bien mieux que la LSD 25 qui n'a pas apprécié l'excès d'azote. La Banana Purple Punch, elle, semble s'en régaler et montre un appétit gourmand.
Croisons les doigts pour voir les têtes grossir dans les jours à venir, tout s'est déroulé comme sur des roulettes jusqu'à présent. J'ai boosté les nutriments au maximum avec des algues et le booster de floraison, restant prudent en dosant à la moitié pour les nutriments NPK, avec une exclusion d'azote et une réduction à la moitié pour le phosphore, suivant de près les recommandations du fabricant.
Un énorme merci à Louloutre pour sa patience et ses analyses perspicaces qui ont rendu cette aventure encore plus agréable! 🌿🌟