




Likes
17
Share


@TheReefinery
Follow
Week 12 complete and she's starting to fatten up a tad more.
Pistils are going brown but she kicks up new white ones every morning. 80-90% clear tricomes still and as I hoped she looks like she's got another week or two to go.
Slight clawing of the leaves and some brown spots but they're very few of them. I've raised the LED a couple of inches just in case of light burn. Or it may be she still has a lot of food in the coco as after checking the runoff of tds it was around 1000ppm but as it's living soil she should just take what she needs and stop when she's had enough.
And I'm still just feeding her water as I'm 'flushing' her. The Symphylans are still doing their job well from the looks of her!! After researching Symphylans, they are microscopic centipede like insects that are white and they mainly eat seedling roots or decaying organic matter..so they're essentially cleaning the medium..and they stay under the soil away from the light. They can makes holes in roots for pathogens to enter her..but as she's doing so well and as it's only a week or two away from harvest I'm not going to worry about it.
If you want to see Symphylans in action check the last video from this week!!
Next I'll be doing 2 x photoperiod Chocolopes 🍫
Thanks for stopping by - feel free to comment, give and feedback and follow - and I'll have another update next week!! 🤙

Likes
11
Share

@Growbody
Follow
Willkommen zu meinem Growbericht der Glue Gelato Auto von Barney's Farm. Die Samen sind von Zamnesias Tribe Programm als automatische Überraschungssamen angeboten worden. Das sind meine ersten Gorillas und diese hier soll schokoladig, fruchtig, beerig schmecken, da bin ich richtig wunderfitzig drauf 🍫
Der 15 Liter Stofftopf von ROOTiES kommt hier wieder zum Einsatz.
Die neue Bio Hanferde von Sonnenerde wird verwendet.
Und die zamnesia Smart Start Plugs mit Plagron's seedbooster plus haben sich bewährt.
Tag 57: 1,5 Liter Wasser.
Tag 60: Die Glue Gelato Auto von Barney's Farm schießt geradezu nach oben. Dabei hat sie jede Menge Blütenknospen. Im Growroom riecht es süß und pappig.
Tag 62: 1,5 Liter Wasser.
Schön, das du dir meinen Bericht ansiehst. Schau gerne wieder rein. Schöne Ostern 👋😎

Likes
29
Share


@BioGrowKing
Follow
Die dritte Woche war okay sie bekommt jetzt langsam rechts und links die zwei großen arme die ersten zwei Blätter sind auch voll ausgebildet sie streckt sich ein wenig aber ich denke das ist nicht schön heute am 24. September habe ich in Wieder enhancer benutzt allerdings hab ich es diesmal als eine Art Oberflächendüngen benutzt 0,5g pro Liter Erde sind vorgegeben ich habe etwa 0,2g auf die Oberfläche gestreut und einmassiert vor dem giesen

Likes
35
Share


@Grow_for_Happiness
Follow
Week 8 of flower is at a close and these girls are really starting to express themselves. They're slowly putting on their colours and getting ready to really shine. Some of the close up pics looks like a red trichome here and there, will have to break out the scope soon and keep an eye, aiming for the 5-10% range. They're smelling delicious and quite strong. Not as strong as the Pink Lemonade I did last run, but they're close! Nice fruity smell and a heavy dankness hahaha. Carbon filter on the 6" fan , don't even notice the tent smell being in the same room. Dropping humidity to 45%, will have the VPD between 1.1-1.3 for the remainder of the grow.
Let's keep these girls healthy and cruise to that finish line!


Likes
Comments
Share

@DogDoctorOfficial
Follow
🌱 Folder 09 | Candy Rain Auto
Week 1 – Finding Her Rhythm
Welcome to the first chapter of Candy Rain Auto in the 8×8 Adventure.
Unlike many of her neighbors, Candy Rain didn’t have the easiest start. She entered the room a few days later than the rest of the project, immediately placing herself at a slight disadvantage on paper. But plants don’t read calendars, and every phenotype writes its own story.
The purpose of the 8×8 Adventure has always been exactly this: documenting every individual plant honestly, allowing each genetic to express itself naturally under identical conditions. There are no races here. Every plant is given the same opportunity to demonstrate what it is capable of.
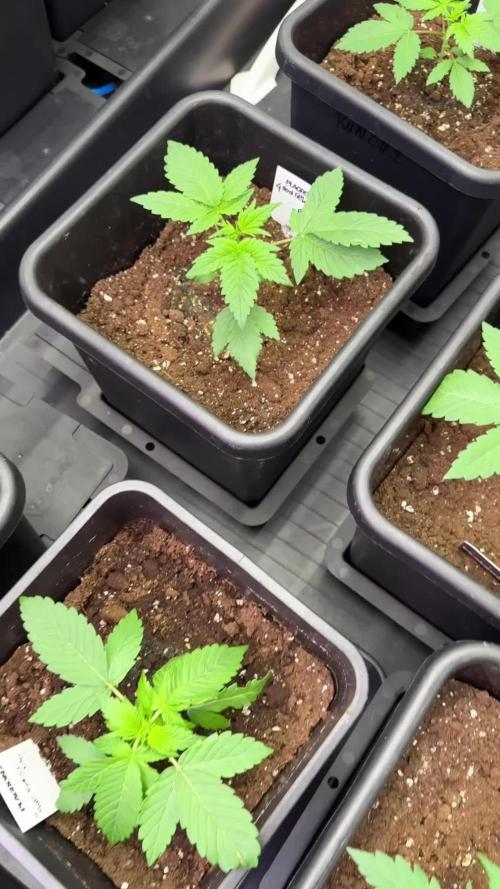
Already during this first week, Candy Rain is proving that patience is often rewarded. While initially producing only simple juvenile leaves, she quickly transitioned into healthy three-finger leaves, with each new set arriving larger, wider and noticeably more vigorous than the last.
The journey has only just begun.
⸻
🌿 Grow Environment
The entire room remains carefully controlled to provide every cultivar with the same stable environment.
Environmental Conditions
* 🌡️ Day Temperature: 27°C
* 🌙 Night Temperature: 25°C
* 💧 Relative Humidity: 55%
* 🌱 Substrate Temperature: 21°C
* 💦 Nutrient Solution Temperature: 20°C
* ⚡ EC: 1.3
* pH: 6.0
* 💨 CO₂: 666 ppm
* 💡 Light Cycle: 12 / 12 From Seed
* ? Pot Size: 15 Litres
Because Candy Rain emerged slightly later than the rest of the room, irrigation has been adjusted specifically to her needs. Rather than following the volume given to the larger plants, watering remains concentrated around the young root zone, encouraging the roots to actively search through the substrate while avoiding unnecessary saturation.
⸻
🌿 Nutrition
Candy Rain is receiving exactly the same Plagron Terra program as the rest of the garden, simply scaled appropriately for her stage of development.
Feeding Schedule
* Terra Grow — 1.8 ml/L
* Power Roots — 1 ml/L
* Pure Zym — 1 ml/L
* Sugar Royal — 1 ml/L
* pH Plus — adjusted when necessary
* Lemon Kick — adjusted when necessary
The objective during these first weeks isn’t rapid top growth—it’s establishing a healthy root system capable of supporting explosive development once flowering begins.
A strong foundation always pays dividends later.
⸻
🌱 Plant Development
Watching this week’s progression has been incredibly satisfying.
The earliest photographs show a delicate young seedling still carrying its juvenile characteristics. By the end of the week, however, the transformation is obvious.
The stem has thickened considerably.
Leaf spacing has become more symmetrical.
The newest growth appears increasingly vigorous.
Most encouraging of all is the transition into beautifully formed three-finger leaves, signalling that the plant has fully entered active vegetative development. Each new node displays noticeably more energy than the previous one, suggesting that the initial establishment period is already behind her.
Despite being the smallest plant in the room, she doesn’t appear weak. Quite the opposite—she appears determined.
⸻
📸 Behind This Week’s Photos
Sometimes the smallest plants create the most rewarding photographs.
The early overhead images capture a tiny seedling standing almost alone within a large container, emphasizing just how much potential still lies beneath the surface.
As the week progresses, every photograph tells a different story. The side profiles reveal a stem becoming stronger each day, while the overhead shots beautifully document the increasing symmetry of the canopy.
One of my favorite moments is seeing those first fully developed three-finger leaves spreading confidently across the frame. They’re small, but perfectly formed, and they represent the moment where Candy Rain truly begins her journey.
Macro photography reminds us that growth doesn’t always happen dramatically. Sometimes the biggest victories are measured in millimetres.
⸻
🌿 Looking Forward
Next week should be particularly exciting.
With the root system now becoming established, I expect noticeably faster vertical growth, larger fan leaves and shorter intervals between new nodes. The gap separating Candy Rain from the rest of the room should gradually begin to shrink.
Autos often surprise us with sudden bursts of development once they settle into their final containers, and there are already signs that she may be preparing for exactly that.
Her story isn’t about catching up.
It’s about revealing what she’s capable of.
⸻
💚 Thank You
As always, thank you to every single person following this adventure.
Whether you’ve been here since day one or you’ve only just discovered this diary, your encouragement, feedback and conversations are what make documenting every week so rewarding. This project isn’t simply about growing plants—it’s about learning together, sharing experiences and celebrating every stage of the journey.
A huge thank you to GrowDiaries for providing a platform where growers from all over the world can learn from one another and document their passion.
My sincere thanks also go to Plagron for providing the Terra nutrient line that is powering this entire 8×8 Adventure. Their products continue to deliver consistency, simplicity and reliability throughout every stage of growth.
Finally, thank you to the incredible breeders whose genetics make projects like this possible. Every seed carries its own personality, and watching those differences unfold under identical conditions is one of the most fascinating parts of this journey.
And of course…
Growers Love and,
Thank you for taking the time to follow along.
One week at a time.
One photograph at a time.
One plant at a time.
The 8×8 Adventure is only just getting started. 🌱💚

Likes
6
Share


@420DeepGrow
Follow
📆 Semana 6
La Candy Bubatz XL comienza la floración real.
Los cogollos empiezan a tomar forma, los pistilos se agrupan y el estiramiento ya ha terminado. La planta se muestra equilibrada, sin estrés, con buena estructura y ramas listas para engordar. El aroma empieza a notarse y todo avanza según lo previsto.
¡Seguimos creciendo fuerte! 💪

Processing
Likes
12
Share


@rhodes68
Follow
9/6 Week 8 And she is doing very well
No signs of any problems nuets doing a great job
Added another light, custom 90w LED
9/8
Buds beginning to form tent is VERY full doing what we can to alleviate some crowding
She has caught up with her tentmates
9/9
She is passing up her neighbors hitting 32"
Increased nuets due to purplish stems seen on the indicas. CocoTek to 10ml/gal A&B
Just trying to get things to behave in the tent its really full humidity is very low so thats helping
Took longer for things to get into full flower than we wanted, have to work on that.
9/10
Pics vid

Likes
Comments
Share

@Antarctic
Follow
Week 7 update (start of flowering):
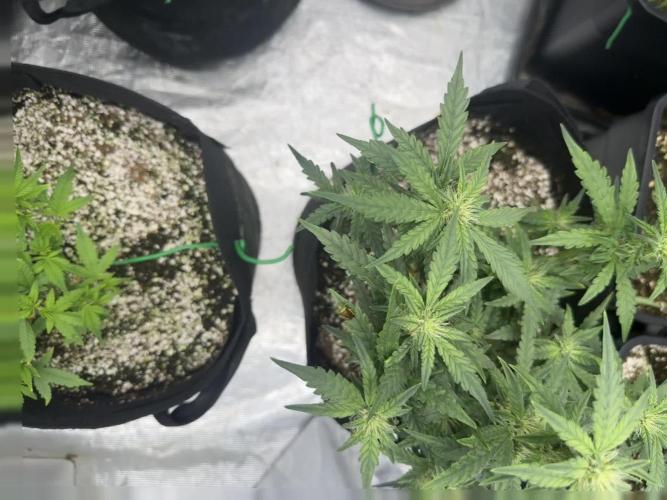
The autos have officially entered early flower – pistils are popping everywhere, and the stretch is slowing down. The canopy is already pretty filled, so I’m focusing now on feeding for bloom.
Nutrients this week:
• Terra Aquatica Grow A + Grow B → lowered slightly as plants shift into flower (~650–750 ppm).
• PK booster added for the first time to support early bud development.
• CalMag still at 1 ml/L to keep leaves healthy and prevent deficiencies.
• Silic Rock 1 ml/L for stronger stems.
• Microbes (Great White + Trikologic) to keep roots active.
Training:
• Final round of LST to open budsites before flowers set fully.
• Light defoliation on big fan leaves shading potential bud areas.
• No more heavy stress training – from now on just guiding.
Observations:
• Runtz is clearly leading with stronger bud formation, pistils are already stacking.
• Amnesia autos are slightly slower but catching up.
• Mike Tyson is still behind (due to earlier overfeeding) but slowly recovering.
• Plants are smelling more day by day – fruity and sweet terps are starting to come out.
Plan:
• Keep PK booster in rotation.
• Watch EC/PPM carefully (don’t push too hard – better to underfeed than burn at this stage).
• Prepare for rapid bud growth in weeks 8–9.
Processing
Likes
41
Share


@Frosty_farm
Follow
Week 9, day 57.... started this week with a feeding of pH 6.0 plain water. Hope she start to fatten up really soon. I'm going to take it a little light with the feeding this week because I gave her some nutrient burn.i also noticed some of her older leaves are getting a little yellow, is that something I should worry about? Day 58..... she's ok, took a few pictures of her leaves that has those dull spots. Hopefully someone can lead me in the right direction. I see very little progress with her buds swelling. I do have a heater in my tent which is right next to this plant(not facing or touching) and I was reading about heat stress, could it be that she's this tall because of it? I did switch around my 2 plants in the tent. I'll monitor and let you guys know in a few days. Day 59.....this plant is really big, she's taking up more than half of my tent. About the deficiency, I don't know exactly what it is but I tested the ppm runoff and it's about 3500 which is really high. I honestly never tested the ppm of my feedings. She's going to get a nice flush and I'll be monitoring my ppm from now on. He buds do seem to be fattening up slowly but it's noticable every day. Day 60.....well her leaves are looking better but you can see the nutrient burn on the tips. This plant looks very different from the rest of @fast_buds girl scout cookies. I just hope she swell up before she's ready to harvest. Day 61......took a look at her trichomes and to me they look milky. I don't know if her buds will get any bigger. 😥. Day 63......last day of week 9, gave her pH 6.0 plain water today. Took a macro shot of her trichomes, let me know what you guys think.
Likes
9
Share


@northsweed
Follow
happy new year, everyone!
plants are thriving, stretch is happening and the experimental is showing buds already (it's been switched one week earlier) 😊
---
another major defoliation done – Barney claimed that lateral branching is heavy and it's indeed 😂

Likes
1
Share


@Papabro2k
Follow
This plant grew great and then one of my bigger plants over took it. She turned out so tiny But I will learn from my mistakes
Likes
20
Share


@eldruida_lamota
Follow
Que pasa familia, vamos a añadir la octava semana de floración de estas Apple Fritter de RoyalQueenSeeds, empezamos con la temperatura que la tenemos entre los 21/25 grados, la humedad está entorno al 50%, el ph está en 6.2 , el foco actualmente lo tengo encendido 12 horas y la potencia es al 100% de lo que da el foco.
También añado la gama de nutrientes de Agrobeta, que no falla, sin duda de la mejor alimentación que hay para tus plantas.
Las flores estan tricomandi
Muy bien y se están formando buenas flores, estas semanas acabarán de madurar.
Mars hydro:
Code discount: EL420
https://www.mars-hydro.com/
Agrobeta:
https://www.agrobeta.com/agrobetatiendaonline/36-abonos-canamo
Hasta aquí todo, Buenos humos 💨💨💨
Likes
1
Share
@DrShotzUK
Follow
Not a bad strain inbox for info on growing it
Seem to keep wasting money with fast buds as out of 3 seeds I never get 100vpercent germination success never have so might try diffrent genetics from now on as I’m a loyal customer to them only ever grew there strains and they never send me care packages like other growers I see and other company’s have done to me so yeh time for
DRSHOTZUK 🍀🍀🍀🍀
Likes
12
Share


@MaxMo8
Follow
I will be careful every time I encounter an insect problem and use an insecticide, I will eventually get rid of it with a water care method

Processing
Likes
2
Share


@CanadianFillmore
Follow
Steady increase in the yellowing and spots on leaves. Buds sites are developing nicely, plants look much healthier at this stage, then the previous grow.

Likes
35
Share


@Chedderbob112
Follow
Have been waiting to upload the results of ma swazzenger teqnique a took a chance n hopefully it pays off man juicy chronic is the strain a like it so far hope for decent harvest but hav learned a lot n am happy for the support of ma fellow growmies tips n advice knowledge is power
Likes
19
Share


@Brustwehr
Follow
2018-11-19 Flowering in full swing. Pulling slows down. In the morning, on the day of the compote replacement, my PPM-meter broke down. Therefore, the new solution was kneaded by eye. Tomorrow a new device will arrive and I will clarify what I have mixed there.
2018-11-24 Buds swell, there is time to figure out how to do time lapse video.
Likes
22
Share


@julian100614
Follow
La planta ya empezó su etapa de floración 🔥💪
En este caso hemos aplicado una pequeña cantidad de Monster Bloon de Grotek pulverizado para la creación de tricomas de forma foliar y con ello absorba todos los nutrientes posibles
Hemos bajado la temperatura 2°C y la humedad 5% para su floración
La malla de scrog esta haciendo muy bien su funcion y esta respondiendo fácilmente al entrenamiento.
Esperemos que siga en esta línea 👌


