


@Microsun
Follow
Alright, the time is here, I’ve started the harvest but I don’t want to press the harvest button until I have all my info correct, but I’ll show some photos from my baby, we started a slow 6.0 flush about 2 weeks ago and finishing flush about 4 days ago. She was already fading but I had some problems since I fed her without thinking after having some drinks witch is obviously a very rookie move. But as I’m still learning it’s just another oof under the bridge, she was fading and I got some nice looking tricombs and I’m happy with the smell and size for her life cycle, I’m aiming for a slow dry and cure but my space is limited in my appointment and grow room so I have a drying tent set up but conditions could be hard to handle since the season change. Cheers. (And yes I didn’t wanna flush my auto but I figured it was the safest route.)


@cookingwithninja
Follow
Week 2 day 7F. 2x bridal party on left, 2x queen on right. Added more lights day 7, now about 1000w.


@pifflestikkz
Follow
Day37
05/08/24 Monday
Feed today using de-chlorinated tap water pH 6.
She has bounced back from topping so now applying LST this week.
Day 39
07/08/24 Wednesday
De-chlorinated tap water pH 6 today with calmag.
Day 41
10/08/24 Saturday
Feed today using de-chlorinated tap water pH 6 only.
Day 42
11/08/24 Sunday
End of week
de-chlorinated tap water pH 6 with calmag.
She has recovered well from topping and lst. Presenting a beautiful structure so far 😁
Picture and video update ✌️💚


@Vet4weed
Follow
Pretty exciting week. Been doing last-minute prep to switch from Veg to flower, by moving lights around and adjusting them between blue and red to encourage growth in that last little stragglers.
More significant though, we had a power outage in the middle of the day, mid week, that caused me to scramble to find light. This gave an added bonus because I the weather is getting better and I was able to expose my plants to some natural sunlight and air.
You can see in the timelapse the combination of blue, red, and white light as I shift things around. NOTE: This week was also the start of the COVID-19 Self Quarantine, so the time at home gave me a lot more flexibility to tend to my babies.
Plants have reached as high as 20 inches or more, but topped off the tallest ones because they were overpowering the smaller guys and also starting to droop. Plus I broke one trying to weave through the net.
Next Week: Switch to Flower Stage!

shorts_status_processing


@The_Projexx
Follow
Welcome to my third week of veg lady's and gentlemen ! This week I start adding some Cal-Mg and Veg nutrients . I'm going to start them off slow in case of any unforeseen damages come haha ( nute burn ) GG (1) is doing really well and GG (2) is catching up to her big sister ! I can't wait to see them all grown up :D . Remember folks check my diary's daily for updates !
-Happy Growing !


@MrPipi
Follow
doing great. we can see, Lance is a little behind, but he´s the one who got some issues in the first 2 weeks.



@The_Kitchen_Raccoon
Follow
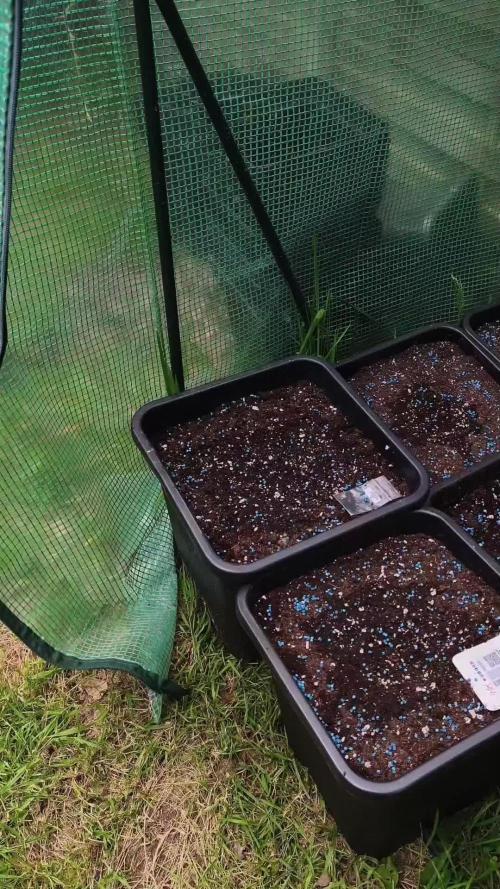
Hi everyone and welcome to week 1 of this outdoor organic Fast Buds competition 🌱
Not much to report just yet, but the seedlings are off to a good start. They’ve now been placed straight into their final 14 litre pots and are currently in the nursery greenhouse. The sun is shining and the journey has officially begun 😎
So why go straight into the final pots?
Autoflowering cannabis plants don’t respond well to transplanting, mainly because of their biology and fixed life cycle.
Autos come from Cannabis ruderalis, which means they start flowering automatically after just a few weeks of growth, regardless of light cycles. Because of that, their vegetative stage is very short, usually around 2 to 4 weeks. Any stress during this early stage, like transplant shock, can slow them down and affect the final size and yield.
Unlike photoperiod plants, they don’t have time to recover. They keep moving forward no matter what, so early setbacks stick with them. Root development is also key at this stage, and transplanting can disturb or limit that, which impacts the plant’s overall potential.
You can transplant autos if it’s done very early and carefully, but it adds risk for very little benefit, especially with such a short cycle.
Hope you all had a great weekend !
Happy gardening 😎💚


@Bluemels
Follow
Tag 35: Zeit zum entlauben und ich beginne mit LST.
Tag 38: Die Pflanze hat meine Maßnahmen sichtbar gut überstanden und ist wieder wohlauf!


@Ensign420
Follow
Greetings fellow growers 🖖 and welcome to my first grow ever. This adventure actually started several months ago when I decided to stop buying flower from dispensaries and just grow my own bud. How hard can it be!?
This is actually my second seed of this strain. The first bean sadly died due to over watering (sorry girl, RIP). I was literally watering the cube to the point where water was dripping from the bottom, then heavily sprayed the humidity dome and tray with the vents completely closed. Everyday. Multiple times. I never let the dome or try dry out. So after about 8 days of not sprouting, there was a funky smell of rot. So that was that.
Later I learned that rockwool retains a lot of water and can easily drown seeds. So a wet/dry cycle is best for rockwool germination.
So even after hours of researching and digging through forums and tutorial videos, I was still under prepared for this journey. Did not consider how delicate the germination phase is. Oh well. Lesson learned. Reset and try again!
I hope everyone is safe and stoned during this corona crisis. Just like everyone else in the world, I want this pandemic to be over with. But in the meantime, let's grow some weed! 🖖
[START OF WEEK 01]
Day 01 - Monday - 08/03/20 - Total Days: 001
-----------------------------------
- [0830]: Light Schedule: 24Hrs/0
--- Soaked cube in 5.5 PH water for 10 min. Did not shake water out.
--- NO NUTES! Only PH'd down to control the PH levels.
--- Did not use the default hole (way too deep).
--- Flipped cube upside down and made a shallow hole for the seed (less than 0.25" deep).
--- Placed seed in and pinched hole close. No additional water added.
--- Sprayed the tray and dome with straight water (5.5 PH).
--- Vents are cracked opened a for ventilation (about 1/4 opened each).
--- Distance between the light and tray was 53"
--- AC was set to 80 °F
--- Exhaust fan was set to 86 °F
--- Room average temp was at 85 °F
--- Dome humidity was at 85-99% when sprayed.
--- Allowing to completely dry before respraying.
- [2200]: Dome and tray were completely dry! Sprayed only tray and dome with more water.
Day 02 - Tuesday - 08/04/20 - Total Days: 002
-----------------------------------
- [0845]: Sprayed dome and tray in the morning. Everything was dry.
--- Hoping for the best!
- [2130]: Everything was dry again, so sprayed dome and tray at night along with a light spray on the cube.
Day 03 - Wednesday - 08/05/20 - Total Days: 003
-----------------------------------
- [0830]: Everything was dry again. Resprayed dome and tray. Slightly sprayed cube.
- [2125]: Hooo damn!! She popped! Am little stub is visible! Resprayed dome and tray again.
--- Still going 24/0 for lights.
- [+0033]: Just checked up on her and I swear she grew a bit taller! Getting excited!
Day 04 - Thursday - 08/06/20 - Total Days: 004
-----------------------------------
- [0845]: Wow! Went from a little stub to fully sprouted overnight! Everything was pretty dry again so resprayed dome and tray.
- [2200]: Tap root is visible! Over 1" long too! Just resprayed dome and tray again.
-- Going to prep for hydroton transplant tomorrow!
Day 05 - Friday - 08/07/20 - Total Days: 005
-----------------------------------
- [0930]: She keeps growing!
-- Added a bit of CalMag to the spray bottle (8 drops to 650ml of distilled water). Resprayed dome and tray. Water was at a 5.4 PH with 141 PPM.
- [1045]: Prepped the bubble bucket with 4.5gal of water. Water is high enough to reach about 0.25" above the bottom of the net pot.
--- Added 3 drops of Superthrive
--- Added 3.5ml of CaliMagic
--- Added 2ml Hydroguard
--- Then PH'd down to 5.6
--- Solution Strengh: 120 PPM
--- Water chiller is set to 20 °C
- [1100]: Transplant time!
--- Filled the net basket 1/3 with hydroton. When placed in the bucket, air bubbles are not visible, but are slightly below the surface (slight digging will reveal the water/bubbles below).
--- Removed plastic on rockwool cube and placed in basket, then filled around and covered with hydroton. Making sure to block any light from passing through the net pot and into the nutrient solution.
--- Covered with a half-bottle dome sprayed with the CalMag water from earlier.
--- Hoping for the best!
- [1300]: Raised Bucket 5" higher. Now light distance is 48" to top of bucket.
- [1820]: Lowered tent exhaust temp to 76 °F
--- Lowered AC to 75 °F
--- Raised bucket even higher so light distance is 30" to top of bucket.
- [2300]: Looking good!
--- Sprayed dome and surrounding hydroton with more CalMag water.
--- Attached timer to light! So new 18 Hrs On/6 Hrs Off light schedule.
--- Lights On: [1600] (4pm)
--- Lights Off: [+1000] (10am the next day)
--- Decided to go with lights on during the evening/night and off during the later mornings/afternoon (the hottest part of the day) to see if temps can be controlled better.
--- Please survive girl!
Day 06 - Saturday - 08/08/20 - Total Days: 006
-----------------------------------
- [0800]: Everything was dry. Resprayed hydroton and dome.
- [2000]: Here first night cycle seemed to go well! Get'n taller!
--- Dry again. Removed the dome.
--- PH went up to 6.5 so PH'd down to 5.7
--- Ran the top feed drip ring for a bout a minute to wet the hydroton and rockwool with the nutient solution.
---Too scared to leave the top feed on 24hrs (I don't want over water her and cause dampening-off). Will let dry before re-watering.
- [2100]: After closer inspection, I think she's looking a bit yellow.
--- Decided to add a bit of grow nutes to the bubbler solution.
--- Added 2ml of Sensi Grow A
--- Added 2ml of Sensi Grow B
--- Solution strength after adding more nutes: 176 PPM
--- PH went up to 6
--- I hope that the extra chelating properties of the 'PH Perfect' solution is enough of a buffer for proper nutrient uptake.
Day 07 - Sunday - 08/09/20 - Total Days: 007
-----------------------------------
- [0800]: Water dropped a bit (mostly due to evaporation) so solution strength was at 190.
--- Checked PH again. Was still at 6, so PH'd down to 5.4
--- Ran the top feed for a minute to wet the hydroton a bit.
- [0915]: Since she's looking perky but still a bit yellow. So decided to up the nutrient concentration even more before lights out.
--- Added 2ml more of Sensi Grow A
--- Added 2ml more of Sensi Grow B
--- Solution strength after adding more nutes: 199 PPM
--- PH went up to 5.8
- [1700]: Checked nutrients.
--- PH: 5.9
--- Solution strength: 202 PPM
--- Added 4ml of Voodoo Juice
--- Added 4ml of B-52
--- PH after adding more nutes: 5.9
--- Solution strength after adding more nutes: 238 PPM
- [2130]: Decided to make a new foliar spray to address the continued yellowing.
--- Started with 500ml of distilled water.
--- Added 3 drops of CaliMagic
--- Added 3 drops of Sensi Grow A
--- Added 3 drops of Sensi Grow B
--- Added 3 drops of B-52
--- Added 1 drop of Superthrive
--- Solution strength: 164 PPM
--- PH was at 5.9 and did not adjust.
--- Gave her one spray.
--- Also sprayed the surrounding hydroton.
[END OF WEEK 01]


@SlowerLowerGrower
Follow
Harvested the second plant. She was smaller bud her buds were STACKED. She is 164g wet so let's hope for an oz. UPDATE: 1.4oz out of the smaller plant for a total of 3.5 oz for the whole grow. Thanks for following along everyone!


@Sammuray
Follow
Exelente creciendo y engordando, muy buena altura y producción, con rapidez y aroma a mango muy fuerte, resistente y fácil de cultivar, muy recomendable.



@FrontRowAG_BrianG
Follow
WEEK 5 START OF DAY 29
⭐️NUTRIENTS USED THIS WEEK⭐️
Front Row AG Si .5g per gallon
Front Row AG Part A 2.9g per gallon
Front Row AG part B 2.0g per gallon
Front Row AG Phoszyme .4g per gallon
Front Row AG Bloom 2.3g per gallon
Front Row AG CleanUp .2g per gallon
FLUSH NUTRIENTS
Canna PK13/14 60ml per 10 gallons
GH CalMag 6ml per gallon
End of week 5 I flush the plants with 1.0EC solution of Canna PK13/14 and CalMag. This is also done at end of week 2. I believe it kickstarts the flower phase and continues stalled growth that can happen at end of week 5 going into week 6.
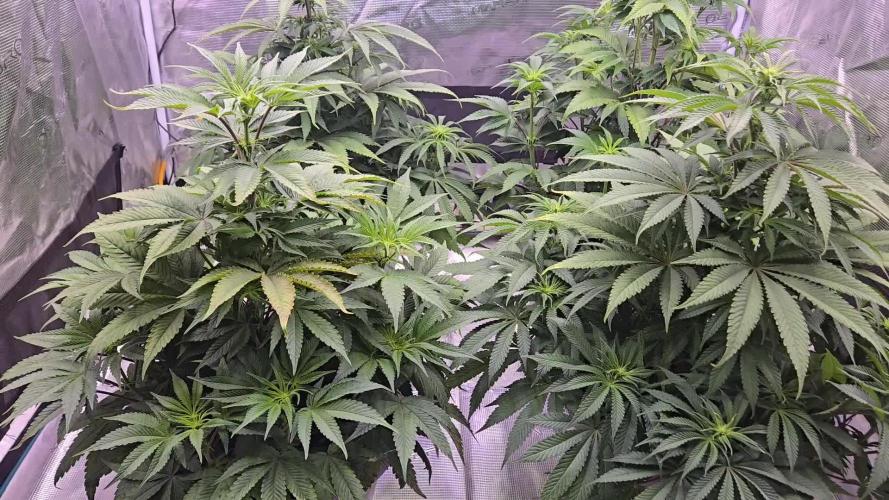
This week I am starting to see all around growth come to an end. I’ve implemented a trick over the last couple years that seems to work well. Along with the swell that takes place the last few weeks of flower we are gonna try and boost flower production a bit as well 😁.
Thanks for all the likes and especially the comments. I’ve got a few huge shout outs coming the way of a few growers for next weeks update. See you then!


@Tropicannibis_Todd
Follow
Alrighty Then 👈
Well we just moved into the second week of pre flower , and all is well my friends
Happy Growing


@m0use
Follow
The time is finally here to post the harvest. I waited till it was all done and dry before updating the dairy so will add in the dry weights next on the 2nd half of the harvest entry.
I enjoyed this plant a lot, its grew well and loved how it was shorter and fatter. I wonder if it was at the dame distance from the plant if It could have done even more. Had some issues with the yellowing that was happening on the other plant in this tent. I should have treated this faster with a flush but was super reluctant and it may have hurt the yields a bit. The top best looking buds looked and smelled amazing even the lower buds where doing well not so larfy like the other plant.
There was crazy strong smells with this plant, sour berries and hints of lemon, it was a best smelling plant I have grown to date. This would be a great plant to grow for beginners, cant take a lot of stress and still produces quite well and even on lower wattage leds it was good. It was not the most crystally looking plant, not like the maltezerz but still had some finger hash buildup but a small amount. I feel this plant would be a winner for a rosin press.
I don't plan on growing this strain out again despite me liking a lot of qualities about it. I'm only trying to grow cbd dominate plants is the main reason. If my friends really like this I have some clones so can always give them some. Speaking of clones they are doing well outside, greened up a lot and showing signs of revegging.
Took some photos of the weed hang drying on day 1 in the tent and a week later to show how much they shrink.
Only some of the lower growth is larfy, will make good edibles or hash, that will be a fun project to do and may include that in my projects diary.
That's about all I can think of if you have any questions just ask.
m0use
Disclaimers:
1. I have divided the total watts of light in half, 300w(150w) for this diary. It will accurately reflect the g/w ratio as the two plants growing in this tent are listed in two separate diaries.
2. I include any shake/trim in my gross totals as I use them to make edibles.
3. I did not follow any proper ways of listing my nutrients. Some are ml/l of total solution watered, others ml/l of total medium and some are just the total amounts I added, not as a ratio.
If you have any questions let me know!
+++++++++++++++++++++++++++++++++++++++++++++++++++++++++++++
Cost + Time Analysis Of Growing Cannabis. m0use’s Breakdown
+++++++++++++++++++++++++++++++++++++++++++++++++++++++++++++
Light Schedule
===
Veg [Dec 18th 2021 - Mar 11th 2022]
18h on 6h off - 6am-12pm
Flower [Mar 12th 2022 - May 10th 2022]
12h on 12h off - 9am-9pm
This is extra tricky this harvest as I went through 2 different hydro rates in three different periods, plus a veg and bloom switch between them.
Mon-Fri are TOU rates, all weekends are off-peak pricing all day.
Off Peak = 7pm-7am + all weekend
Mid peak = 11am-5pm
On peak = 7am-11am + 5pm-7pm
TOU rates:
Dec 18th 2021-Jan 17th 2022
Cost of kwh with on-peak "17.0c", mid-peak "11.3c" and off-peak "8.2c".
Jan 18th 2022 - Feb 7th 2022
Cost of kwh with on-peak "8.2c", mid-peak "8.2c" and off-peak "8.2c".
Feb 8th 2022 - Current
Cost of kwh with on-peak "17.0c", mid-peak "11.3c" and off-peak "8.2c".
—
Dec 18th 2021-Jan 17th 2022
Weekdays “21 days”
6am - 7am -- 1hr @8.2c/kwh off-peak
7am - 11am -- 4hr @17.0c/kwh on-peak
11am - 5pm --6hr @11.3c/kwh mid-peak
5pm - 7pm -- 2hr @17.0c/kwh on-peak
7pm - 12am -- 5hr @8.2c/Kwh off-peak
Weekends “10 days”
6am - 12am – 18hr @8.2c/kwh off-peak
6h @17.0c/kwh
6h @11.3c/kwh
6h @8.2c/kwh + [email protected]/kwh weekdays/weekends
—
Jan 18th 2022 - Feb 7th 2022
Weekdays “15 days”
6am - 7am -- 1hr @8.2c/kwh off-peak
7am - 11am -- 4hr @8.2c/kwh on-peak
11am - 5pm --6hr @8.2c/kwh mid-peak
5pm - 7pm -- 2hr @8.2c/kwh on-peak
7pm - 12am -- 5hr @8.2c/Kwh off-peak
Weekends “6 days”
6am - 12am – 18hr @8.2c/kwh off-peak
18h @8.2c/kwh + [email protected]/kwh weekdays/weekends
—
Feb 8th 2022 - Harvest
Veg
Feb 8th - March 11th 2022
weekdays “24 days”
6am - 7am -- 1hr @8.2c/kwh off-peak
7am - 11am -- 4hr @17.0c/kwh on-peak
11am - 5pm --6hr @11.3c/kwh mid-peak
5pm - 7pm -- 2hr @17.0c/kwh on-peak
7pm - 12am -- 5hr @8.2c/Kwh off-peak
weekends “8 days”
6am - 12am – 18hr @8.2c/kwh off-peak
6h @17.0c/kwh
6h @11.3c/kwh
6h @8.2c/kwh + [email protected]/kwh weekdays/weekends
—
Flower
March 12 - May 10th 2022
weekdays “42 days”
9am - 11am -- 2hr @17.0c/kwh on-peak
11am - 5pm --6hr @11.3c/kwh mid-peak
5pm - 7pm -- 2hr @17.0c/kwh on-peak
7pm - 9am -- 2hr @8.2c/Kwh off-peak
weekends “18 days”
9am - 9pm – 18hr @8.2c/kwh off-peak
4h @17.0c/kwh
6h @811.3c/kwh
2h @8.2c/kwh + [email protected]/kwh weekdays/weekends
—
Total hours in each peak period
126+144+168 = 438h @17.0c/kwh
126+144+252 = 522h @11.3c/kwh
306+378+288+300 = 1,272h @8.2c/kwh
Lights
===
LED’s I use are 48w and 18w, per stick, they are arranged on an array totaling 300w.
6400k 18w*6 = 108w + 3000k 48w*4 = 192 108w+192w=300w | 300w/1000 = 0.3Kw
* note I am using 150w as stated in my disclaimers to account for the missing plant in a separate diary.*
Using the previous c/kwh numbers above I can find out the total cost of the lamps in the 3 peak periods. I converted the cents into dollar amounts beforehand to avoid dividing by 100. 8.2c/h = 0.082$/h
438h * 0.17c/kwh = $74.46kw * 0.15kw = $11.17 on peak
522h * 0.113c/kwh = $58.99kw *0.15kw = $8.85 mid peak
1,272h * 0.082c/kwh = $104.30kw *0.15kw = $15.65 off peak
The "h" hours and "kw" kilowatts cancel out and we are left with a value of $ dollars per peak period, add all the peak periods up and you get your total cost of running the lights in dollars.
$11.17 + $8.85 + $15.65 = $35.67 for the grow light only.
My light grew for 20 weeks and 4 days, or 144 days. almost 21 weeks total.
$35.67 / 144d = 0.2477$/d average of about 25c a day in electricity
337.2kw for the entire grow.
Using the regular calculation of grams harvested divided by watts used is not accurate to me, it does not account for all the time the lamps are on, the length of grow to the over all cost. The calculation that makes sense to me is this, harvested dry weight of usable cannabis buds/trim/keif/whatever in grams divided by total kw used. Could also combine it with grams per total single use costs “anything you used only for this grow and wont reuse in the next, or fractions of multi use items like fertilizers if they ½ full” and see how much you’re investing per gram.
"kw" ÷ "g" = kw/g
"$" ÷ "g" = $/g
I have harvested 4.57oz or 129.6g on 337.2kw.
337.2kw ÷ 129.6g = 2.60 kw/g of usable cannabis. This is not an ideal ratio for me and looks like a lot of energy waste happened from the extended veg period.
$35.67 ÷ 129.6g = 0.28c/g
It cost 28c/g when comparing total electricity cost to gross yield, almost identical to the comparison of total electrical cost to the number of days in the grow 25c/day.
Neat!
legend,
kwh = kilowatt per hour
kw = kilowatt
w = watt
h = hour
c = cents
$ = dollars
d = day
LED= Light Emitting Diode


@AlpenZilla
Follow
🗓️ Veg – Week 4 complete (2 days late 😅)
Nothing but good news this week:
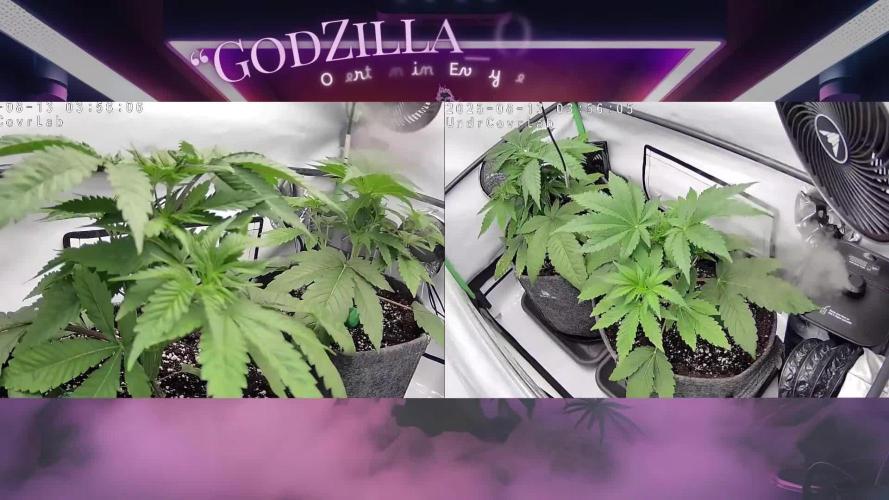
The 15L pots are already fully rooted after just one week – much faster than expected.
The plants are looking healthy and full of energy 🌿
I’m still going very light on the nutrients – currently at about 50% of the Advanced Nutrients schedule.
Still, they’re clearly starting to take in more – you can feel the momentum building 🚀
Regular LST has also paid off – the structure is opening up nicely, staying compact and well-exposed to light 🔧🌱
And here’s a major milestone to wrap up veg:
I switched to 12/12 right at the beginning of Week 5 – flowering phase is officially on! 🌸
