
Likes
Comments
Share


@ReefsDad
Follow
Lost my notebook with all my notes on this grow. All I have are the pics which I'll post. The dates of the pics may not correspond with the weeks in the diary. Keep up to date if you are going to keep a diary online and keep a written one. I definitely learned my lesson. Several weeks of notes on 5 different strains lost. Well enjoy the pics at least.


Likes
49
Share


@AsNoriu
Follow
Day 88. Last of Zamnesia girls is down.
Thank You Zamnesia Seeds one more time for lovely strains to try out. I think I found one diamond even ;)
If you wanna try out Zamnesia seeds, here is 10% off from your buy :
Use code - GROWITGD
Happy Growing !

Processing
Likes
29
Share


@Grey_Wolf
Follow
Ginger Nut Cookies & Aussie Music Videos
Week 16 Harvest
17 th April 2020
This Entire feminised seed making and growing project was a very good learning experience for me. Right from the very start, when I successfully got a Cutting ,taken from a Barneys Farm Red diesel female plant to produce feminised pollen after treating it with a silver thiosulfate solution.
I then used it to pollinate a Fastbuds Girl scout cookies auto plant and let it grow to maturity.
This only produced 3 viable seeds one of which is the subject of this Diary.
I made up the name "Ginger nut cookies" after a variety of cookies we have here in Australia that are made with ginger. They are the same colour as the distinct red hairs on the red diesel buds.
And would you believe those same vivid red hairs were passed on to this plant
so I wasn't too far off the mark with the strain name.
Her flavour however is nothing like red diesel or girl scout cookies and infact as taken on a smell and aroma all of it's own.
She has a lovely tropical fruit like taste and the smell is a bit like fruit yoghurt. It has an unreal after taste on the exhale and the lingering second hand smoke smells very sweet and enticing.
She has a pretty well balanced high too not as potent as the GSC nor as energenic as the red diesel but just a
pleasant mix of the two.
It was a very easy to grow and undemanding plant that didn't seem to require a lot of extra feeding other
than the 100% organic nutrients that were within the soil and a few things like compost teas etc.
The other element of this diary was of course the weekly Aussie music videos
That I provided the links for and put up a little video clip preview of each Artists song.
Week 1 Dance Monkey
Week 2 Gotye
Week 3 AC/DC
Week 4 INXS
Week 5 Dire straits
Week 6 Yothu yindi and Midnight oil
Week 7 Divinyls
Week 8 Was Request week where I asked growers to pick and because only 3 growers put in a request I decided to choose all three which were
Kylie Minogue , Flume & Airbourne
Week 9 Paul Kelly
Week 10 Daddy Cool
Week 11 Cold chisel
Week 12 Jimmy Barnes
Week 13 The Angels
Week 14 Crowded House
Hoodoo gurus Mental as Anything
Week 15 Empire of the sun
Big Pig , Silverchair , Peking duk
Grinspoon , Hilltop hoods and the White stripes
And Finally for the last lot of music videos I have chosen another multi
list bonanza of Aussie Music with the artist/s name and Youtube link below.
So in no particular order here are my last choices for this Diary its been a fun grow with a steep learning curve.
John Williamson
True Blue
https://youtu.be/ceWKrsJX9N4
Nick Cave and Kylie Minogue
Where the wild roses grow https://youtu.be/lDpnjE1LUvE
John Farnham
Your the Voice
https://www.youtube.com/watch?v=tbkOZTSvrHs
Powderfinger
Pick you up
https://youtu.be/4Ha-dtNXTM8
Slim Dusty
Pub with no beer
https://www.youtube.com/watch?v=8E0aZ387M_I
Men At Work
Down Under
https://www.youtube.com/watch?v=XfR9iY5y94s
Icehouse
Great southern land
https://www.youtube.com/watch?v=3mkidP2OUCk
Before I go I'd like to thank all of you who read & like my diary updateseach week you are all awesome!! This is a great platform full of great growers and great people : 1:
The End.......
Likes
1
Share

@pareto
Follow
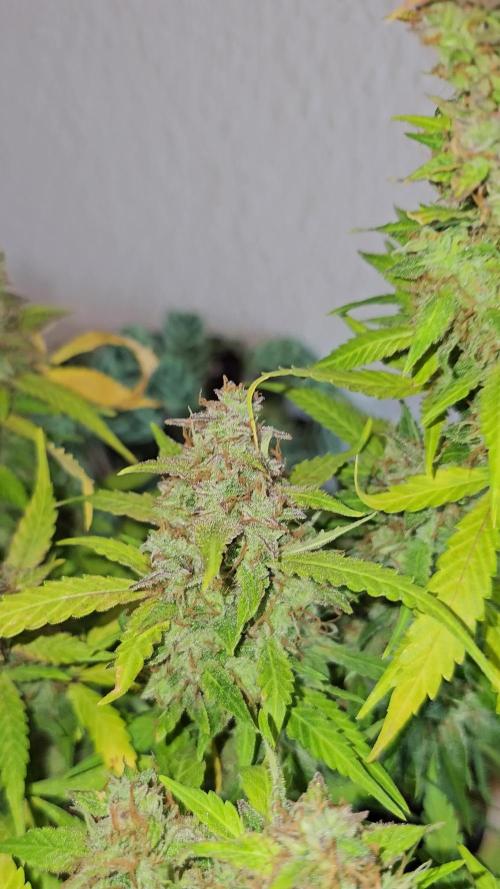
The summer was super wet and humid so she lost 2 of the big buds to mold.
Other than that she did great! really big, vigorous and heavy, dense buds. All arround winner. Really looking forward to the seeds.
These plants are not mine. I am just documenting them.
Total Runtime: 81 days
--------------------------------------------------------------------------------------------------------------------------------------------------------------------------------
Set up cost (fixed costs)
-Lamp: 40€
-Timer: 3,5€
-Pot: 4€
-Total fixed costs: 47,5€
Given 5 years (or 15 grows) usage time translates to around 3,17€ per grow in materials.
Variable costs:
-Seeds: 13,17€
-Soil: 6€
-Fertilizer: 3,50€
-Power (100 days 18h/day): ~25,92€ (exact figure after harvest)
-Total variable costs: ~48,59€
-Total costs per grow: ~51,76€


Likes
1
Share


@ChitownCannaChica
Follow
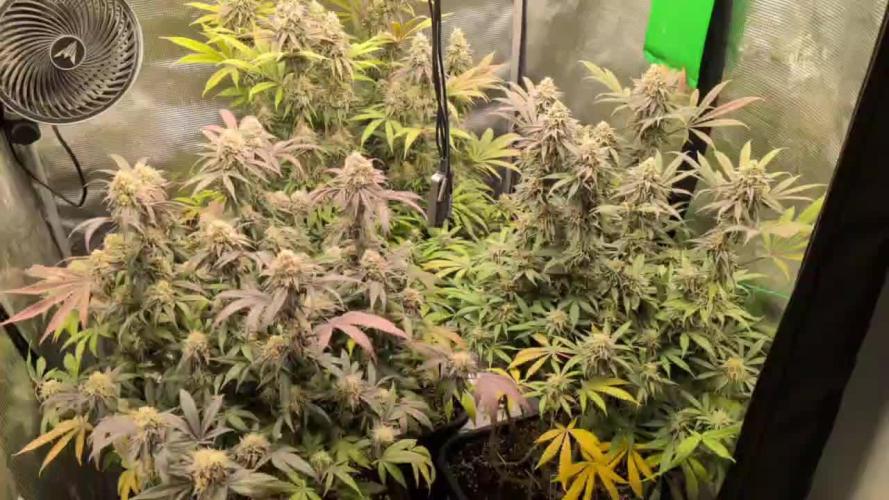
She was getting pressure from catepillars this last week so I harvested up earlier than I wanted- didn’t find it to be good for quality to be spraying bt the last weeks of flower- so rather earlier
Rain, heat, drought, wind, pest, humidity, all of it-


Likes
21
Share


@cadur
Follow
Buds just getting bigger, oscillating fan packed up so turned up the extraction fan.
Watering now with no nutrients and she is still drinking a lot.
Must be patient!!!


Likes
1
Share

@LokalGrenz
Follow
7/28 some light lead pulling removing bottom area and sites that I fill be waste of time taking energy from the tops still RO water and tea every other week


Processing
Likes
Comments
Share


@Fergie
Follow
hey guys so here is ty f.b.t 3 girl coming along real nice . Got a little wind curl on one leaf finger but nothing worry about . IVe started to reuse my Aircon unit waste water running it through my r/o water system and adding my 5ml each of calcium and magnesium supplements to each 3 gallon bucket produced . all good so far til next week 😀
Processing
Likes
77
Share


@BipolarHellas
Follow
Hello world,
🇬🇷
the previous week was training week for Michelle,who was LSTed and for Lucy who was topped...the girls are fine and growing...they also got fed with the Enhancer,which scares me a bit,but everything went well...
WEEK 5:"MAGIC PEOPLE,VOODOO PEOPLE"
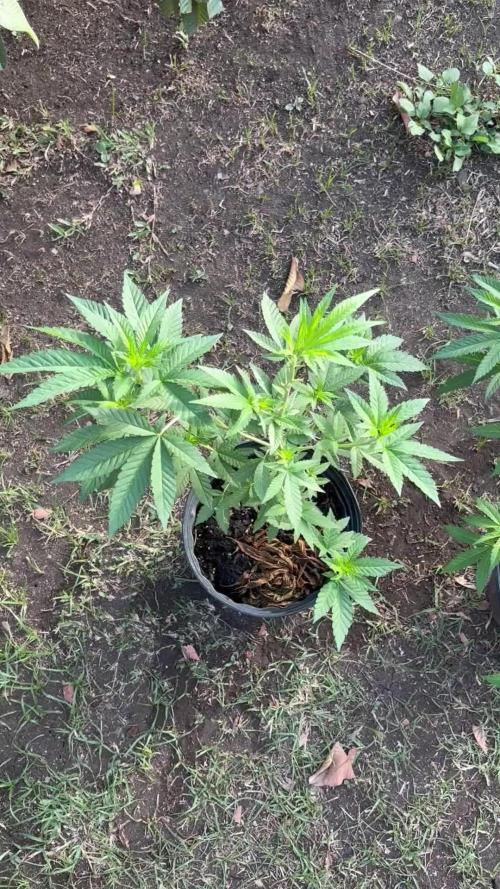
☠️Day 29...out in the sun with normal temps and no wind...watered with ph 6,4,about 500 ml...I have changed my water pattern with these girls...I used to water every 3 days with 1,5 L but now I do it daily with less water...What I need now is light...I grow with the sun and the last days haven't been too sunny here...now the weather is changing again...come on Sun,give me some light!Meanwhile when it's sunny it's too windy,so windy that I have to put them inside as they will be seriously damaged...
☠️Day 30...I think instead of topping I may have fimmed Lucy...not sure as I have never done fimming before...Now I inderstand why they call it like that...in my case: Fuck,did I miss???🤣🤣🤣...we"ll see...however new shoots are growing well...
☠️Day 31...as I was watching my girls with pride and love,the sunlight revealed hundreds of tiny white bugs jumping on the soil..I mean they are hundreds...I sprayed with vinegar just the top layer of the soil and waiting to see...
I made a grow question and I got a very interesting advice from a fellow grower...I sprayed with cinnamon extract...hope it will help...
Today I applied LST to Lucy as she is getting very tall and lunky...she's been topped,LSTed and she will be topped again when time comes...
☠️Day 32...windy and rainy outdoors...the girls are inside...Today I adjusted Michelle's LST...
☠️Day 33...the weather is fucked up...one week ago we had 40°C and today it's cold and rainy...summer is not here yet....I realized I Fimmed Lucy instead of topping her as new growth came up on the cut stem...I cut it off again as I can't experiment now,I have never Fimmed before and don't know what to expect...
☠️Day 34...no sunlight for the girls...its very cloudy and may rain again...meanwhile the bugs are vanished...cinnamon and vinegar did their job...
☠️Day 35...finally we have some sun and the girls are outside...they have stayed a bit behind all those days inside without proper light...
the week is ending,thank u all for watching..see u next week ☠️
Likes
10
Share


@FrulaFrulaki
Follow
Done the first round of training this week, they're also showing some dificiences but I corrected them with some Grow and CalMag. The difference between the Big bang and Auto Banana Blaze is showing with how quickly they're reacting to nutrients. Banana was way quicker just a few days till I saw some resaults. With the Big bang it takes a week.
Likes
6
Share

@Thedibber
Follow
Final few weeks left of the Bubba cheesecakes just tapwater from now on no microben 👌

Likes
1
Share


@Poleeg1986
Follow
It was a very good experience for me because they were most bigger and higher than when you using soil, I didn't expect that)) It was my first time when I used DWC...
Likes
8
Share

@Organic473
Follow
These girls are not getting even like distribution however they are coming up pretty good with branche.
Likes
3
Share


@Elguacho420
Follow
Buenas a tod@s... Cuarta semana de estás green poison, van de lujo, van creciendo muy bien y muy fuertes... Ningún problema alguno hasta ahora después de lo ocurrido con las otras variedades... Estás van muy bien, aún les falta crecer y engordar pero ya verán como se van a poner mas adelante 👌🏻🔥
Bueno pues al margen de la putada del problema, seguiremos trabajando duro y aprendiendo cada día más...eso es todo x hoy... Un saludo y buenos humos para tod@s...⚡💪🏻😎⚕️
🇦🇷🤝🏻🇪🇦


Likes
4
Share


@Luckydope69
Follow
Sie haben in der ersten Woche ganz schön Form an genommen. Nun werden sie eine weitere Woche in der Vegi stehen lasse und dann gehts ab in die Blüte.
Likes
1
Share


@Skinnytalls420
Follow
#1-03/02/23 the first one to come down!!! Will update as I chop them down!!!

Likes
95
Share


@Roberts
Follow
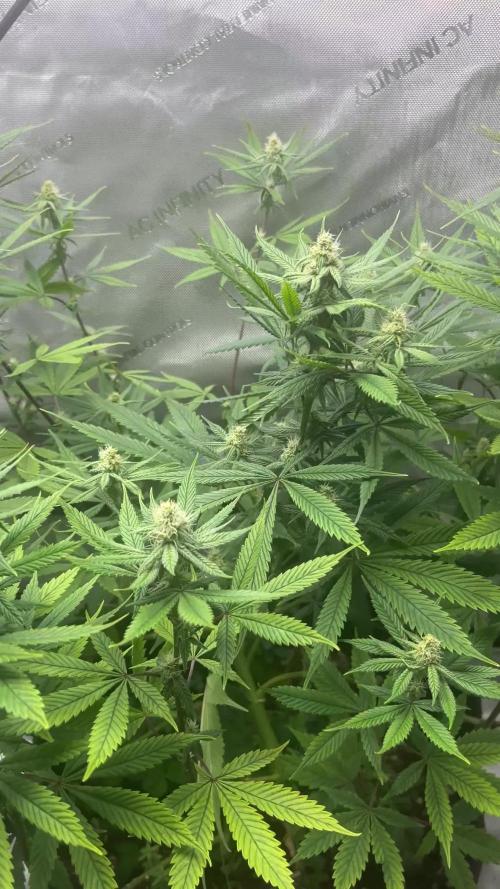
Northern lights has been doing great. She has started to show maturity signs in last few days. I did the video on it for the week. She was moved into the small Spider Farmer tent I have under the SE3000. I will veg her for about a week, and let her get use to any spectrum changes. I will likely flip her to flowering next update if she has little to no issues. I feed her about once a week. She get water almost daily as she has been drinking a lot. I still have not had run off during watering. I have fed super light as more of a supplement to the soil when I have given feed. On her next feed I will aim for run off. As I wish to test it for ph and the tds. I already know I have a little salt build up, but it has not become a major issue yet with light feeds. Everything is looking great and hopefully continues. Thank you Medic Grow, Spider Farmer, Pro-mix, and Divine Seeds. 🤜🏻🤛🏻🌱🌱🌱
Thank you grow diaries community for the 👇likes👇, follows, comments, and subscriptions on my YouTube channel👇.
❄️🌱🍻 Happy Growing 🌱🌱🌱
https://youtube.com/channel/UCAhN7yRzWLpcaRHhMIQ7X4g
