Likes
Comments
Share
@coriander
Follow
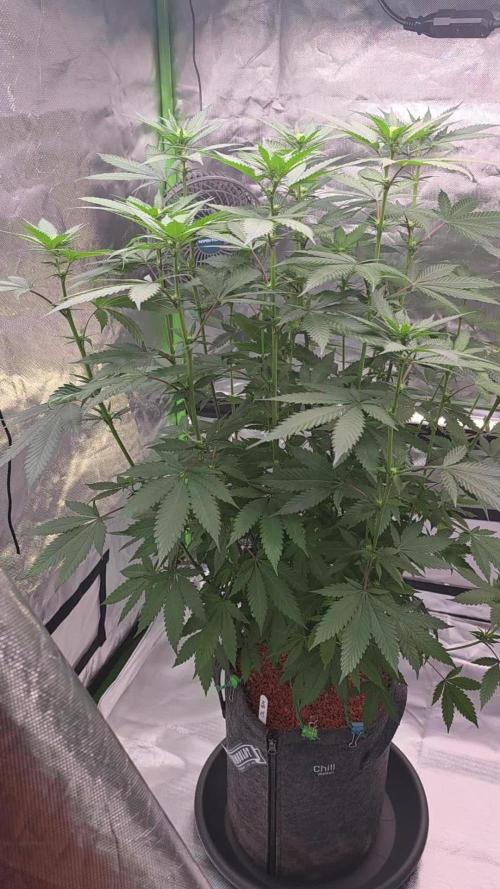
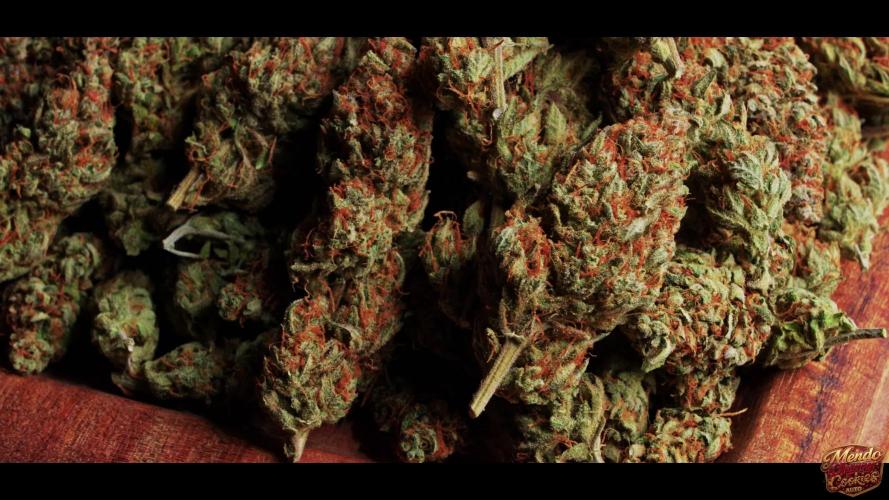
Day 99 - Finally got to chop a plant! Chopped the cheese, did a rough wet trim and hung it all in my diy drying chamber (see video above). I knew I was going to be chopping one before the other, so I threw together a cheap unit out of a garment box I bought from a moving company. -It came with a cross bar, so I cut the box and re-taped it the way I wanted it, to conceal everything proper. -Then, I drilled some holes in the sides for ventilation and taped some carbon filter from my air purifier overtop to keep pests and dust out. -Outside of the box, I've got a Coway air purifier pulling out the smell and adding a bit of air circulation (pulls air passively through the vents in the sides) . -For added flair 😉, I threw some velcro on the flaps and built a thermometer/hygrometer into the front to keep an easy watch. They will hang from some clip hangers I grabbed, for a week or so, or until they're ready. Then I'll do a dry trim and time to cure! Super Lemon Haze is still plugging along and getting dense. Smells great, and although the leaves show a past of issues, the buds are looking amazing. Can't wait 'till she's done! It's really nice to have the extra space in the tent now too. It was getting a little cramped. Day 105 - Cheese is doing well in the drying tent. Stems aren't snapping quite yet, so will need a day or two more. Drying chamber is working great. No smell whatsoever. Super Lemon Haze is STILL GOING and looking good. Done with nutes now and watching trichs everyday. Buds are beefing up. The leaves are starting to fade, but the look and colour of the flowers is wild. Can't wait for it to finish up. Should be sometime in the next week or so. Will post a final harvest for the cheese soon! Thanks for stopping by! 🥦
Likes
116
Share
Как и ожидалось, растение резко увеличивается в размерах, надеюсь я всё правильно расчитал. Идея с кольцом мне всё больше нравится, как только растишка войдет в активную стадию цветения — сделаю дефолиацию. 30/03 PH7,0 PPM860 31/03 PH6,9 PPM790 01/04 Дал Delta9 по листу. Откалибровал PH-метр, оказывается я невольно кислил компот, а буфер возвращал показатели до нормального значения. 02/04 PH6,1 PPM858 Сделал дефолиацию. 03/04 PH6,0 PPM940 05/04 PH6,1 PPM744 За прошедшее время в моём гроубоксе появились: 3 маленьких горшочка - проращиваю чили-перцы, 2 больших кирпича - в случае необходимости готов опустить на них горшок, а это плюс 10см высоты. В первый раз в жизни покупал кирпичи.😕 Открываю новую рубрику "а знаете ли вы, что": Green Gelato — Soft Secrets award winner — voted “Best New European Strain for 2019” Grow Champions! 💪 👉Планирую сделать интересный досвет низов по периметру, оставайтесь на связи. Спасибо, что заглянули, и будьте здоровы! 🙏 Продолжение следует ...😶
Likes
23
Share
@Prop207
Follow
Duckies are blowing up again. They look a bit rough, that's alright to be expected from 3 weeks with no water change or nutes. First full week of nutes, with add back calmag, getting the ladies to flex.
Likes
4
Share
@Ensign420
Follow
|»» LOG DISCLAIMER: Not intended as a grow guide. Grow log entries are usually posted 3 weeks later and are for my learning reference. ««| Introduction - Week 26 Summary - Ensign's log, stardate 17608.3, Wow what a week! Drying is always pretty simple and been checking daily. Buds are drying nicely and terps are smelling pretty dank!! Most of the week has been in the veg tent with tissue culture! Mixed another batch of establishment media and took proper explant cuttings. Also super-cropped the mothers to even out the canopy. Ahh yea! Getting hyped for trim day next week! Next week will also be the last week for this grow log, but am already planning out the next cycle. Anyways! Onwards to next week! [START OF WEEK 26] ========================================================== ---------- [ 4x4 MAIN TENT ] ---------- Heady OG BX1 #1 [Round4 ~Wk19] - WEEK 26 - Dry Wk1 ----------- [ 3x3 VEG TENT ] ------------ TKO - WEEK 09 - Full Veg Gorilla Goat #1 - WEEK 05 - Full Veg Heady OG BX1 - WEEK 09 - Full Veg Garlic Budder OG#1 - WEEK 05 - Full Veg 10/13/25 → 10/19/25 This Week's Estimated Goals ---------------------------------------------------------------------------------------------- DLI: ~0 mol/m²/d PPFD: ~0 μmol/m²/s VPD: ~1.5 kPa This Week's Meter Readings & Averages ---------------------------------------------------------------------------------------------- Light On/Off: 00:00 - 00:00 | Wattage: ~000.0W [LV00] Distance From Canopy: ~00” DLI: ~0.00 mol/m²/d PPFD: ~0 μmol/m²/s VPD: ~1.17 kPa Soil %: [47.4, 34.1, 35.0, 55.7, 43.7, 43.6, 44.0, 43.3] ========================================================== Day 01 - Monday - 10/13/25 - Total Days: 183 ----------------------------------- Daily Averages ~[+01:00] - Temps: 78.8°F [26.0°C] - Humidity: 64.4% - VPD: 1.19 kPa - Soil %: [49, 34, 35, 57, 44, 44, 44, 42] ----------------------------------- - [22:05]: Night check on the 4x4 tent. --- Ca-Caw!! Looking great! --- Heady OG BX1 #1 is drying along and no signs of mold. Also airflow and RH is stable and within the 60-70% range. --- Getting stoked! Trim day is 9 days away! - [22:09]: Checked the Ecowitt soil moisture sensor data: ------------------ [ 4x4 MAIN TENT ] --------------- ------ 48% - [CH01 FT » G30 - Heady OG BX1 #1] ------ 35% - [CH02 FB » G30 - Heady OG BX1 #1] ------ 35% - [CH03 BT » G20 - TKO] ------ 56% - [CH04 BB » G20 - TKO] ------------------ [ 3x3 VEG TENT ] ---------------- ------ 46% - [CH05 BL » GR7 - TKO] ------ 40% - [CH06 BR » GR7 - Gorilla Goat #1] ------ 40% - [CH07 FL » GR7 - Heady OG BX1 #1] ------ 40% - [CH08 FR » GR7 - Garlic Budder OG#1] --------- Veg: 38% - 45% | Flower: 45% - 55% --------- General: 30% [Dry] «| 45 - 60% [Moist] |» 70% [Wet] - [22:18]: Checked the 3x3 veg tent. --- Looking healthy in the veg garden! --- All of the vegging mothers are looking great and the canopy is starting to even out. --- Also clones look healthy and no need to water yet. --- The stems, err, I mean, explants, don’t show any signs of contamination. --- Staying positive, glad the growth media is sterile and the overall procedure was successful. --- Anyways! Plan to create more establishment media and cut proper explants soon! - [22:21]: Checked the humidifiers. --- Tanks are still full and no leaks found. Day 02 - Tuesday - 10/14/25 - Total Days: 184 ----------------------------------- Daily Averages ~[+01:00] - Temps: 76.9°F [24.9°C] - Humidity: 64.8% - VPD: 1.11 kPa - Soil %: [46, 34, 35, 56, 43, 43, 44, 43] ----------------------------------- - [21:44]: Night check on the 4x4 tent. --- Looking good in the dry tent! --- Heady OG is drying along and humidity levels look great! --- Nothing to do but maintain and wait to trim in 8 days! - [21:55]: Checked the Ecowitt soil moisture sensor data: ------------------ [ 4x4 MAIN TENT ] --------------- ------ 45% - [CH01 FT » G30 - Heady OG BX1 #1] ------ 34% - [CH02 FB » G30 - Heady OG BX1 #1] ------ 35% - [CH03 BT » G20 - TKO] ------ 56% - [CH04 BB » G20 - TKO] ------------------ [ 3x3 VEG TENT ] ---------------- ------ 41% - [CH05 BL » GR7 - TKO] ------ 40% - [CH06 BR » GR7 - Gorilla Goat #1] ------ 47% - [CH07 FL » GR7 - Heady OG BX1 #1] ------ 46% - [CH08 FR » GR7 - Garlic Budder OG#1] --------- Veg: 38% - 45% | Flower: 45% - 55% --------- General: 30% [Dry] «| 45 - 60% [Moist] |» 70% [Wet] - [21:59]: Checked the 3x3 veg tent. --- Looking healthy and growth is raging! --- All mothers are looking beautiful! --- Clones are getting taller and looking healthy! --- Gorilla Goat #2 needs watering. Let’s go Ensign! - [22:03]: Here is the starting initial watering range: ------ Gorilla Goat #2 » 255.4g → 300.3g and was last watered 4 days ago. --------- General Solo Range: [Dry] «| [Initial Cup Weight] + ~55-100g |» [Wet] --- Took the starting weight before watering, ------ Gorilla Goat #2 » 230.8g --- While on a scale, --- Gently misted her straw mulch with RO water. --- Tried to keep the top growth dry. --- Misted 5-10 sprays. Waited a few seconds, then misted again. --- Made sure to reference the watering weights. --- Repeated this process until the cup weighted at least 300g. --- There was no runoff. - [22:23]: Took the saturated weight after watering, ------ Gorilla Goat #2 » 345.7g --- Marked the watering date on the side of the cup. Also marked the saturated weight on the back. --- Placed her back into the tent. --- Decided to train and super-crop both clones. --- Bent the taller branches to lower the canopy. - [22:38]: Checked the humidifiers. --- Tanks are still full and no leaks found. --- Onwards Ensign! Day 03 - Wednesday - 10/15/25 - Total Days: 185 ----------------------------------- Daily Averages ~[+01:00] - Temps: 75.6°F [24.2°C] - Humidity: 63.8% - VPD: 1.09 kPa - Soil %: [48, 34, 35, 56, 44, 43, 44, 42] ----------------------------------- - [+01:33]: Quick night check on the 4x4 tent. --- Looking great in the dry tent! --- Also starting to smell dank! --- 7 more days until the big trim! - [+01:37]: Checked the 3x3 veg tent. --- Veg garden is healthy and growth is green! --- Both the Heady OG BX1 #1 and TKO mothers will need another topping soon. --- Clones in the propagation tray also look great and no need to water. --- The explant media is still looking sterile with no signs of contamination. --- Easy night in the garden. Nice! - [+01:40]: Checked the humidifiers. --- Tanks are still full and no leaks found. --- Okay! Tomorrow plan to dive back into tissue culture and prep more growth media. --- Onwards Ensign! Day 04 - Thursday - 10/16/25 - Total Days: 186 ----------------------------------- Daily Averages ~[+01:00] - Temps: 74.6°F [23.7°C] - Humidity: 62.2% - VPD: 1.11 kPa - Soil %: [46, 34, 35, 56, 43, 44, 44, 45] ----------------------------------- - [11:41]: Alright! Back to tissue culture and time to start another batch of establishment media! --- Took the plant growth regulators out of cold-storage (my fridge). ------ [ » SMOKES A BOWL « ] --- While the products warmed up, gathered the necessary supplies and setup my workstations. --- Currently, focusing on: ------ PHASE 01 » ESTABLISHMENT --------- » DAY 01 » MEDIA - PART 01 - Mixing the growth media --------- » DAY 01 » MEDIA - PART 02 - Sterilization of media and tools [via autoclaving] --- Going to use the same establishment formula, but doubling the yield. --- Also using RO water instead of distilled water. --- Here's the establishment media formula: --- [» VER.0001 |» INITIAL TROPICAL PLANTS FORMULA |» 0.5L (500mL) RO WATER «] ------ MS [Muashige & Skoog] --------- » 2.22g ------ Sucrose [Cane Sugar] --------- » 15g ------ BAP [6-Benzlaminopurine | Cytokinin] --------- » 0.5mg » 0.5mL » 500μL ------ IBA [Indole-3-Butyric Acid | Auxin] --------- » 0.05mg » 0.05mL » 50μL ------ AGAR [Jelling Agent] --------- » 3.5g ------ PH [Potential Hydrogen] --------- » 5.7 --- [» 1mg/mL CONCENTRATION ratio | 1mg = 1mL | 1mL = 1000μL «] - [12:59]: Time to prep the growth media! --- Made sure to turn OFF the lung-room's oscillating fan. --- Filled a measuring cup with 400mL of RO water. --- Dropped a clean magnetic mixing bar into the measuring cup. - [13:05]: Placed the measuring cup on the magnetic stirrer. --- Turned the unit ON and have the unit on LOW. - [13:11]: Using a precision scale (sensitive to 0.01g) along with a micro-pipette (1000μL capacity along with tips) and disposable (100mL) weigh boats, ------ Added 2.22g of MS [Muashige & Skoog] ------ Added 15g of Sucrose [Cane Sugar] ------ Added 500μL of BAP [6-Benzlaminopurine | Cytokinin] ------ Added 50μL of IBA [Indole-3-Butyric Acid | Auxin] ------ Added 3.5g of AGAR [Jelling Agent] ------ Then filled the measuring cup to the 500mL line before covering the top with plastic wrap. --- Alright! - [13:46]: Let the media mix on the magnetic stirrer for a bit. --- Have the unit set to LOW with a steady vortex. ------ [ » ~20 MINUTES LATER « ] - [14:09]: Okay! Time to pH the establishment media! --- Gently removed the bottom cap of the AC Infinity PH Meter PRO [AC-PHM7]. Placed the cap in the storage case for later. Covered the top with plastic wrap (KCL solution still inside the cap). --- Swirled the probe in a cup of RO water to rinse off the storage solution. --- Shook the excess water out and wiped the unit with a clean paper towel making sure all mineral buildup was removed (kept away from the very tip of the probe). --- Temporarily placed the meter back into the cup of RO water. --- Removed the plastic wrap of the establishment media. - [14:13]: Using the AC Infinity PH Meter PRO [AC-PHM7], --- Took the establishment media's initial pH reading. --- The pH was at 5.14 --- Using the micro pipette, ------ Added pH Up solution. --- Made sure to let the media solution mix for a bit before checking for pH readings. - [14:21]: Adjusted the media's pH until it stabilized to 5.58 --- For this batch, tried to go for a range of 5.4 to 5.8 pH. --- Also glad that I did not need to add PH down. - [14:43]: Poured the pH'd establishment media into separate polypropylene containers. --- Made sure to re-mix the media solution between container fillings. --- Ended up splitting the media solution into 12 containers. ------ 8x » 125mL Polypropylene Bottles [with screw cap lids] ------ 4x » 236mL (0.5pt) Glass Mason Jars [with polypropylene jamming lids] --- Have the lids of all vessels loosely on and set each aside for later autoclaving. --- Also filled 12 empty polypropylene bottles with RO water and placed the lids on loosely (4 bottles are re-used). - [14:58]: Prepped the tools for sterilization. --- Took a new 5.25in x 10in sterilization pouch and added the following tools: ------ 3x stainless steel forceps ------ 3x stainless steel scissors --- Before placing into the pouch, wiped each tool with a paper towel sprayed with 70% isopropyl alcohol. --- Sealed the bag and marked the date. --- Time to autoclave everything in the pressure cooker! --- Filled a Presto 23qt-Pressure Cooker with 12 cups of RO water. - [15:06]: Added a few aluminum foil balls to the bottom of the pressure cooker. --- Placed the first rack on top of the foil. --- Made sure the rack was level and stable resting above the water. --- Gently placed the containers of media into the pressure cooker and onto the first rack. Lids are still loose. --- Made sure to give space for each container and kept them away from the sides of the pressure cooker. --- Placed a second pressure cooker rack on top of the containers of media. --- Placed the containers of RO water onto the second rack. Lids are still loose. --- Placed the third rack on top of the containers of water. - [15:16]: Lastly, placed the sterilization bag of tools on top of the third rack. --- Took the pressure cooker lid and made sure the release vent was clear of debris before placing it on. --- Sealed and secured the lid. --- Pressure vessel has been sealed! --- Alright! Time to sterilize! --- While keeping the vessel level and straight up, moved the sealed pressure cooker to the kitchen for heating. - [15:23]: Placed the pressure cooker onto a butane-gas stove. --- Turned the stove ON and set it to HIGH. ------ [ » ~20 MINUTES LATER « ] --- Once steam was venting out of the release vent, --- Placed the metal rocker onto the vent. --- Shortly afterwards, the pressure top-lock sprung up to indicate the vessel was under pressure. --- Then the pressure gauge started to rise. ------ [ » ~10 MINUTES LATER « ] --- At 15psi, the metal rocker started to rock! - [15:56]: Turned down the stove down to LOW. --- Set a timer for 15 minutes and began monitoring the pressure gauge. --- Maintained the 15psi by making minor adjustments to the stove. ------ [ » ~15 MINUTES LATER « ] - [16:12]: Turned the stove completely OFF and waited until the pressure cooker's top-lock dropped down which indicated that pressure levels were safe to open. ------ [ » ~40 MINUTES LATER « ] --- Once the pressure cooker was at safe levels (0psi) and the top-lock was down, - [16:48]: Moved the pressure cooker into the lung room. --- The pressure cooker was still quite hot so was careful to keep the vessel straight up and level during transport. --- Used towels for insulation. --- Rested the hot pressure cooker onto a stack of 5-gallon buckets covered with layers of towels and folded paper bags. --- Gently opened the pressure cooker and set the lid aside. - [16:57]: While wearing nylon gloves, sprayed my hands with 70% isopropyl alcohol. --- Gently removed the bag of sterile tools placed it onto a Pyrex dish. --- Removed the top rack and set it aside. --- Then one container at a time, --- Gently tightened and secured the lids of each bottle of sterile water before placing onto the Pyrex dish. --- Removed the middle rack and set it aside. --- Then one container at a time, --- Gently tightened and secured the lids of each bottle and jar of sterile media before placing onto the Pyrex dish. --- Throughout the entire process, kept the gloves on and sprayed my hands regularly with 70% isopropyl alcohol. --- Decided to store all the bottles in the Pyrex dish. - [17:16]: Have the dish resting on a shelf in the lung room. The jars of media are set right next to the Pyrex dish on a towel. --- To prevent dust, covered everything with towels. --- Done for now and will check on the growth media tomorrow. --- If all goes well, should be taking new explant cuttings in a couple days! - [17:39]: Night check on the 3x3 veg tent. --- Looking beautiful and healthy in the veg garden! --- All moms are getting bushy and getting pretty close to the grow light. --- Since I plan to take explant cuttings soon, not going to top or train quite yet. --- Clones also looking healthy and seem unaffected by the super-cropping. Nice! - [17:57]: Checked the Ecowitt soil moisture sensor data: ------------------ [ 4x4 MAIN TENT ] --------------- ------ 45% - [CH01 FT » G30 - Heady OG BX1 #1] ------ 34% - [CH02 FB » G30 - Heady OG BX1 #1] ------ 35% - [CH03 BT » G20 - TKO] ------ 55% - [CH04 BB » G20 - TKO] ------------------ [ 3x3 VEG TENT ] ---------------- ------ 43% - [CH05 BL » GR7 - TKO] ------ 45% - [CH06 BR » GR7 - Gorilla Goat #1] ------ 42% - [CH07 FL » GR7 - Heady OG BX1 #1] ------ 44% - [CH08 FR » GR7 - Garlic Budder OG#1] --------- Veg: 38% - 45% | Flower: 45% - 55% --------- General: 30% [Dry] «| 45 - 60% [Moist] |» 70% [Wet] - [17:59]: Checked the 4x4 main tent. --- Ca-Caw!! I got Headies! --- Wow! Heady OG BX1 #1 is drying along beautifully and she is smelling dank! --- Also no signs of mold and RH levels look stable! --- 6 more days until the big trim! - [18:11]: Checked the humidifiers. --- Tanks are still full and no leaks found. --- Wow what a day! --- Still gots more to do! --- Let’s go! Let’s grow! --- Onwards Ensign! Day 05 - Friday - 10/17/25 - Total Days: 187 ----------------------------------- Daily Averages ~[+01:00] - Temps: 76.0°F [24.4°C] - Humidity: 62.0% - VPD: 1.16 kPa - Soil %: [48, 34, 35, 55, 44, 44, 44, 42] ----------------------------------- - [22:57]: Night check on the 4x4 tent. --- Ca-Caw! Headies is smelling dank! --- RH levels are getting a bit dry, but are okay. --- Wow buds are frosty with trichomes! --- With 5 days until trim day, getting stoked! - [23:04]: Checked the Ecowitt soil moisture sensor data: ------------------ [ 4x4 MAIN TENT ] --------------- ------ 47% - [CH01 FT » G30 - Heady OG BX1 #1] ------ 34% - [CH02 FB » G30 - Heady OG BX1 #1] ------ 35% - [CH03 BT » G20 - TKO] ------ 55% - [CH04 BB » G20 - TKO] ------------------ [ 3x3 VEG TENT ] ---------------- ------ 46% - [CH05 BL » GR7 - TKO] ------ 40% - [CH06 BR » GR7 - Gorilla Goat #1] ------ 45% - [CH07 FL » GR7 - Heady OG BX1 #1] ------ 50% - [CH08 FR » GR7 - Garlic Budder OG#1] --------- Veg: 38% - 45% | Flower: 45% - 55% --------- General: 30% [Dry] «| 45 - 60% [Moist] |» 70% [Wet] - [23:11]: Checked the 3x3 veg tent. --- Looking healthy in the veg garden! --- Mothers are getting bushy and tall! --- Super-cropped and trained the taller branches down to lower the canopy. --- Plan to take tissue culture cuttings tomorrow so glad there are plenty of tops to choose. Still deciding on which mother to preserve next. --- Clones in the propagation tray look healthy! --- The original Garlic Budder #2 clone needs watering. - [23:26]: Here is the starting initial watering range: ------ Garlic Budder OG#2 » 256.4g → 300.2g --------- General Solo Range: [Dry] «| [Initial Cup Weight] + ~55-100g |» [Wet] --- Took the starting weight before watering, ------ Garlic Budder OG#2 » 258.9g --- While on a scale, --- Gently misted her straw mulch with RO water. --- Tried to keep the top growth dry. --- Misted 5-10 sprays. Waited a few seconds, then misted again. --- Made sure to reference the watering weights. --- Repeated this process until the cup weighted at least 300g. --- There was no runoff. - [23:40]: Took the saturated weight after watering, ------ Garlic Budder OG#2 » [000.0]g --- Marked the watering date on the side of the cup. Also marked the saturated weight on the back. --- Placed her back into the tent. - [23:45]: Checked the humidifiers. --- Tanks are still full and no leaks found. Day 06 - Saturday - 10/18/25 - Total Days: 188 ----------------------------------- Daily Averages ~[+01:00] - Temps: 76.8°F [24.9°C] - Humidity: 60.3% - VPD: 1.25 kPa - Soil %: [47, 34, 35, 55, 44, 44, 44, 47] ----------------------------------- - [15:19]: Decided to decrease the VPD level a bit. --- Within the AC Infinity App, --- Changed the schedule name from 'Flower [12/12]' to 'Drying [0/24].' Oops. --- For the Main Tent [4x4] controller, --- Adjusted the 'Drying [0/24]' Schedule for the exhaust fan. ------ Decreased the VPD LOW trigger value from 1.5kPa to 1.4kPa --- Adjusted the 'Drying [0/24]' Schedule for the humidifier. ------ Decreased the VPD target value from 1.5kPa to 1.4kPa --- This should increase the relative humidity a bit and will maintain a 60-65% range - [16:59]: Evening check on the 3x3 veg tent. --- Wow the veg garden is raging with healthy growth! --- Even with the lower veg temps, growth has been perky and bushy! --- The TKO mother has been looking a bit on the purple-side, but I plan to increase the temps back after trim day. - [17:23]: Okay! Time to continue the tissue culture journey! --- Checked on the sterilized media, water, and tools. --- Ooo yea! The growth media in the glass jars have solidified nicely! --- The media in the bottles also look great! Found only one that did not gel properly. --- Hmm. The sterile water bottles are not looking sterile. Unlike the first batch (using distilled water), each RO bottle had tiny white particles floating in the water. --- I think this was due to the water source. The RO water used was from the plant reservoir. For the next sterilization, will try using water straight from the tap. Will discard the entire batch and try again later. - [17:34]: Anyways! Time to cut and sterilize another batch of explant cuttings. --- Using the similar protocols as last time, but with a few changes. --- Instead of distilled, using reverse-osmosis (RO) water. --- Also simplifying the workflow and will not be using the sterile water. --- Only taking cuttings from one cultivar. --- Today, attempting to preserve Heady OG BX1 #1 --- Unlike the last attempt, going to be cutting apical nodes and will leave all leaf growth on. --- Last attempt was more for monsteras and not cannabis. - [17:35]: Made sure the lung room's oscillating fan was OFF during the entire process. --- Put on a fresh pair of nitrile gloves. --- Okay! Let's grow Ensign! - [17:47]: Filled a glass beaker with 180mL of RO water. --- Using a micro-pipette, ------ Added 20mL of Clorox bleach --- Mixed the solution. - [17:52]: Poured the bleach solution into a glass mason jar. ------ Added 1 drop of Dawn dish soap. --- Dropped a magnetic mixing rod into the jar before setting it onto the magnetic stirrer. --- Turned the unit ON and set it to a low setting. --- Placed a polypropylene lid loosely on. - [18:02]: Rinsed and filled the glass beaker with 70% isopropyl alcohol. --- Filled another glass beaker with RO water before adding a drop of Dawn dish soap. Mixed the solution. --- Okay! Time to take the cuttings! --- Using a clean pair of trimmers, - [18:09]: Gently cut two clone cuttings from the Heady OG BX1 #1 mother. --- Stripped each cutting down to 2-inch apical nodes making sure to leave about 0.5 inch of stem growth for planting. ------ Prepared a total of 2 nodal cuttings. --- Dropped the nodal cuttings into the cup of soapy water. --- Swirled the cuttings in the soapy water for a bit. --- Opened the jar containing the 10% bleach solution. --- Using clean tweezers, --- Took each cutting out of the RO water and carefully submerged it into the beaker of 70% isopropyl alcohol for about 30 seconds. --- Then transferred the cutting from the isopropyl alcohol straight into the jar of bleach solution. --- Once both cuttings were in the jar, sealed the top with the polypropylene lid. - [18:23]: Flipped and set the entire bleach jar upside down onto the magnetic stirrer. --- Started using the magnetic stirrer. --- But the cuttings were getting hit by the bar so ended up turning the unit OFF. --- Instead, made sure to swirled the bottle every few minutes to agitate the cuttings. --- For a proper sterilization, the cuttings should be agitated in the hypochlorite (bleach) solution for at least 20 minutes. --- While waiting for the explants to sterilize, prepped the still air box. - [18:39]: Unfolded and placed a Safloga still-air box onto my desk. --- Thoroughly misted the inside of the air box with 70% isopropyl alcohol making sure to coat the entire chamber. --- Then isopropyl misted and placed the following items inside of the still air box, ------ x1 » Jar of Establishment Media ------ x1 » Bottle of Establishment Media ------ x1 » Glass-Bead Sterilizer ------ x1 » Roll of Plastic Wrap [pre-cut] ------ x1 » Sterilization Bag Containing: --------- x3 » Stainless Steel Forceps --------- x3 » Stainless Steel Scissors --- Made sure to fully coat the outside of the tool bag and each of the containers with 70% alcohol. --- The bag had a torn corner (Oops), so made sure to spray the inside with a few mists of isopropyl alcohol. --- For the glass-bead sterilizer, ------ Wiped the entire unit with isopropyl alcohol. ------ Before filling the unit with the included beads, misted the heating chamber with a spray of isopropyl alcohol. ------ Misted the glass beads again with a spray of isopropyl alcohol. --- Set the cleaned glass-bead sterilizer into the still air box. - [19:02]: Still air box fully prepped for explants! --- Okay! Explant nodal sterilization complete! --- While still wearing gloves, --- Misted the outside of the explant jar with 70% isopropyl alcohol before placing it into the still-air box. --- Turned the glass-bead sterilizer ON. --- Made sure to re-seal the chamber. - [19:05]: Okay! Finally time to start the tissue culture transplant! --- Let's go Ensign! --- Sprayed my gloved hands with 70% isopropyl alcohol (also put on a pair of cloth arm sleeves), --- Placed my hands through the arm holes and into the still air box to begin the process. --- Started by laying out my initial workspace: ------ » Far Left Quadrant » Jar of Sterile Establishment Media ------ » Far Center » Bottle of Sterile Establishment Media ------ » Far Right Quadrant » Glass-Bead Sterilizer ------ » Mid Center » Bleach Jar with Explant Cuttings [Main Workspace] ------ » Near Left Quadrant » Empty [Trash Area] ------ » Near Right Quadrant » Bag of Sterile Tools & Roll of Plastic Wrap --- Opened the bag of tools and placed the forceps and scissors into the pre-heated glass-bead sterilizer. --- Set the bag in the trash area (near left quadrant). --- Loosened the lids of both containers of sterile media but did not remove the lids. The lids were resting on top and could easily be lifted. --- Also took lid off of the bleach jar and gently set it on the table. --- Took the jar of sterile media and set it in the center of my workspace (to the right of the bleach jar). --- Using my left hand, took a set of scissors from the glass-bead sterilizer and gently cut the bottom of the first cutting. --- Once the bottom cut was made, placed the scissors back into the glass-bead sterilizer. --- Using my left hand, lifted the lid off of the jar of sterile media and inserted the trimmed end of the cutting straight into the growth media (using my right hand). --- Covered the jar with the lid and placed the forceps back into the glass-bead sterilizer. --- Tighten the lid of the jar and set it aside. ------ [ » REPEATED THE ABOVE PROCESS FOR THE BOTTLE OF GROWTH MEDIA « ] --- Once the last cutting was transferred from the bleach jar into the sterile media, --- Turned the glass-bead sterilizer OFF. --- Cleaned up my workplace and placed the scrap stem tips and bleach jar out of the way (near left quadrant). - [19:28]: Wrapped the lid of each explant container with plastic wrap before setting it in the center of the workspace. --- Explant transplant completed! - [19:59]: Using a label printer (Brother DT410), made a set of labels for each container: ------ Heady OG BX1 #1 | 04.24.25 | Photo | Reg ------ Formula: v0001 | ExBatch: 0002 | Lot: 01 | Pod: 01 ------ Establishment Media | Sealed On: 10/18/25 --- Opened the still air box. --- Then one container at a time, took an explant out and wrapped the lid with a label. --- Set the labeled containers onto the propagation tray (in the 3x3 veg tent). - [20:07]: Done! ------ The explants are around 37 μmol/m²/s which gives a DLI of 2.40 mol/m²/d under an 18/6 light cycle. --- Will check daily for contamination. --- Ca-Caw!! Ahh yea! --- Heady OG BX1 is now officially my first true attempt at cannabis tissue culture! --- Using this new workflow, I may try reusing the TKO media. Do plan to take new cuttings soon. May even try using the liquid media. --- Shout out to microclone and Bill Graham! His 'Tissueponics' video contains tips and tricks of the trade that have straight up changed the way I think of DIY cannabis tissue culture. --- Plan to further refine my process and will continue to refine the workflow with each attempt. - [20:15]: Checked the Ecowitt soil moisture sensor data: ------------------ [ 4x4 MAIN TENT ] --------------- ------ 54% - [CH01 FT » G30 - Heady OG BX1 #1] ------ 34% - [CH02 FB » G30 - Heady OG BX1 #1] ------ 35% - [CH03 BT » G20 - TKO] ------ 55% - [CH04 BB » G20 - TKO] ------------------ [ 3x3 VEG TENT ] ---------------- ------ 43% - [CH05 BL » GR7 - TKO] ------ 48% - [CH06 BR » GR7 - Gorilla Goat #1] ------ 42% - [CH07 FL » GR7 - Heady OG BX1 #1] ------ 45% - [CH08 FR » GR7 - Garlic Budder OG#1] --------- Veg: 38% - 45% | Flower: 45% - 55% --------- General: 30% [Dry] «| 45 - 60% [Moist] |» 70% [Wet] - [20:56]: Checked the 4x4 tent. --- Ca-Caw! Looking great my ladies! --- Humidity levels are still a bit on the dry side, but still okay. - [21:08]: Checked the humidifiers. --- Tanks are still full and no leaks found. --- Wow what a day! --- Oh yea, 4-more days until trim day!! Ca-Caw! Let’s go! Day 07 - Sunday - 10/19/25 - Total Days: 189 ----------------------------------- Daily Averages ~[+01:00] - Temps: 76.7°F [24.8°C] - Humidity: 59.4% - VPD: 1.27 kPa - Soil %: [48, 35, 35, 55, 44, 43, 44, 42] ----------------------------------- - [07:08]: Quick morning checked on the 3x3 veg tent. --- The veg garden is healthy and perky! --- All moms and clones are healthy and raging with growth! --- Both Heady OG BX1 #1 explants also look alive and green! - [19:26]: Night check on the 4x4 tent. --- Ca-Caw! We got MENDO DOPE in the trunk! --- Wow terps are getting loud and buds are drying along nicely! --- Looking frosty and coated in trichomes! --- Three more days until trim day!! - [19:33]: Checked the Ecowitt soil moisture sensor data: ------------------ [ 4x4 MAIN TENT ] --------------- ------ 46% - [CH01 FT » G30 - Heady OG BX1 #1] ------ 35% - [CH02 FB » G30 - Heady OG BX1 #1] ------ 35% - [CH03 BT » G20 - TKO] ------ 54% - [CH04 BB » G20 - TKO] ------------------ [ 3x3 VEG TENT ] ---------------- ------ 40% - [CH05 BL » GR7 - TKO] ------ 43% - [CH06 BR » GR7 - Gorilla Goat #1] ------ 47% - [CH07 FL » GR7 - Heady OG BX1 #1] ------ 41% - [CH08 FR » GR7 - Garlic Budder OG#1] --------- Veg: 38% - 45% | Flower: 45% - 55% --------- General: 30% [Dry] «| 45 - 60% [Moist] |» 70% [Wet] - [19:35]: Checked the 3x3 veg tent. --- Vegging along beautifully in the garden! --- Mothers are getting taller and probably could train, but will wait until tomorrow. --- Clones and explants also look healthy and green! --- Gorilla Goat #2 needs watering! - [19:44]: Here is the starting initial watering range: ------ Gorilla Goat #2 » 255.4g → 300.3g and was last watered 5 days ago. --------- General Solo Range: [Dry] «| [Initial Cup Weight] + ~55-100g |» [Wet] --- Took the starting weight before watering, ------ Gorilla Goat #2 » 244.9g --- While on a scale, --- Gently misted her straw mulch with RO water. --- Tried to keep the top growth dry. --- Misted 5-10 sprays. Waited a few seconds, then misted again. --- Made sure to reference the watering weights. --- Repeated this process until the cup weighted at least 300g. --- There was no runoff. - [20:04]: Took the saturated weight after watering, ------ Gorilla Goat #2 » 345.6g --- Marked the watering date on the side of the cup. Also marked the saturated weight on the back. --- Placed her back into the tent. - [21:41]: With a few days before the big trim, decided to sample a few buds! --- Cut and trimmed branch for sampling and wow she’s got terps! --- Buds are dense and have a gassy diesel funk! Ca-Caw!! Wow! --- Without even curing, pretty sure she’s the one! --- Plan to grow out another cycle (in clone of the same pheno), but I think I found my female for my first breeding project! - [22:01]: Checked the humidifiers. --- Tanks are still full and no leaks found. --- Ahh yea! Three more days until the big trim! --- Also next week will be the last for this log. --- But already stoked for the next! --- Planning on popping more seeds and continuing the pheno hunt for another female! --- Since I lost TKO this harvest cycle, plan to grow a clone cutting of the same pheno (#2). --- As for seeds, popping more regulars and going to attempt to grow some of Mr. Grow-It’s Chillout OG! --- Got a pack of F3s and am stoked to give them a try! --- Also going to sprout some beans of Dead Ops OG from Zaza Genetics! --- Chillout OG, Dead Ops OG, and another round of TKO! Let’s go! Let’s grow! --- Hunters of the dank! Ca-Caw! --- Anyways! --- Onwards to next week! [END OF WEEK 26]
Likes
5
Share
Die Damen wachsen in meinen Augen prächtig, der Blüte Strech hat nachgelassen und die Blüten bilden sich nun langsam aber sicher und sehen sehr schön aus. Ich hab festgestellt das die Ladys rote Blatt Stiele entwickeln und sich bei der somango ein Blatt gelb verfärbt, hab daher auf Nährstoff Mangel getippt vermutlich war der PH wert zu niedrig habe daher die Nährstoff Zufuhr erhöht und hoffe nun das sich das Problem regelt. Fall es das nicht tun sollte werde ich mit Mineralischen Hesi Dünger nachhelfen und minimal pK dazu geben. Ich freu mich auf die nächsten paar Wochen. Leider ist das Alter der Ladys im Beitrag etwas falsch. Sie sind in der 4. blütewoche ende Februar werde ich wahrscheinlich ernten dürfen Grüße Flaky
Likes
5
Share
We are going to continue on with tying and tucking and spreading. I cannot wait to see what suprises this strain has, as I get the feeling her true colors will be wild. This week I also show the HydroHalo system I have installed to better assist with watering these girls under the net. There is a 5 gallon bucket with lid as resivior, tubing, T fittings x2, valves x2, a small submersible water pump, air pump with hose and air stone in the resivior to keep it aerated.
Likes
4
Share
🌱: 💧 : 8l 💡 : Dli: 45 mol/m²/d 🤔:
Likes
Comments
Share
@BIYEI
Follow
Planta Madre en Conservacion Maximo 6 Meses mismos parametros de Nutrientes y Condiciones Esquejes Comienzan el Proceso de Enraizamiento 06/01/2025 Se comienza corte de ramas secundarias a planta madre, se realiza el procedimiento adecuado en corte, preparacion del tallo y aplicacion de hormona, se colocan en un domo germinador con ventilacion cerrada obscuridad total primeras 24hrs y se mantiene con humedad relativa de 90% y 20 y 26 grados Celcius.
Likes
175
Share
Day 8 Flower (Day 50) The first day of the second week of flower and the strech is real. The right girl is getting pretty damn big and keeps on drinking a lot. I gave her another 3 liters of pH 6.4 water today. On the other hand, the left girl drinks hardly anything, so I didn't need to water her. I also did some lollipopping today and got rid of a whole bunch of undergrowth. I saved some clones off the big girl but no clue what to do with them. We'll see what happens. Day 9 Flower (Day 51) Chill day today. All I did was to give each girl 3 liters of pH 6.5 water and snap a few pics. Day 10 Flower (Day 52) Today I finally got around to re-organize the small tent to move the light as high up as possible to give the canopy some additional space. I moved the exhaust fan to outside the tent, so it was out of the way for the light, and then put the circulation fan below the canopy, blowing upward. Finally, I adjusted the light so it was reading about 900 PPFD in the center of the canopy. The left girl didn't need any water today, but the right girl got 3 liters of pH 6.2 water. Day 11 Flower (Day 53) They're back! The fungus gnats are back in the tent, although I'm not surprised, and let me tell you why. When the light for my tomatoes and peppers broke down, I had to move them so that they get some daylight. It is still cold here (the coldest May around these parts ever, I think), so they have to stay inside even though they usually would have moved outside long ago. The best place to keep them in my apartment is by the window in the same room as my grow tents. The last time I had gnats, I only had enough nematodes to treat my girls, but I didn't do the rest of the apartment even though I should have. So currently, my peppers and tomatoes all have a ton of gnats. Put plants with gnats in the same room as your grow, and it is only a matter of time before the gnats find their way into the tents. So yeah, it wasn't a surprise at all when I noticed the gnats in my tents some days ago. I put up some yellow sticky traps to deal with the adults and ordered more nematodes, enough to treat my girls, plus all other plants in my entire apartment. Twice. The nematodes arrived today, and I mixed up 10 million of them into 6 liters of water and gave each girl half at pH 6.5. That was it for today. Day 12 Flower (Day 54) Exhausting day today. I opened the tents, took pics, closed the tents. Phew! I think I need to lay down for a bit. Day 13 Flower (Day 55) Late last night I decided to supercrop the right girl to slow her down and get the canopy to even out. We're almost at the end of the second week of flower so this is the last training I will do besides some defoliation later on. I think I cropped around 10 branches or so. Today, most of the branches were already standing up again and she was VERY thirsty so I gave her 4.5 liters of pH 6.4 water. The left girl on the other hand didn't need any water. Day 14 Flower (Day 56) The last day of the second week of flower and the right girl is in flower. Early yet so still small and no smell, but they are there. The left girl is in flower as well but isn't as far along, but that isn't unexpected considering the different lights. The left girl is 68 cm tall (18 cm increase in a week), and the right girl is 100 cm tall (23 cm increase in a week) but would have been even taller without super-cropping. I gave each girl three liters of pH 6.3 water and removed the tape from the right girl's broken branch. She looks fully healed, so I removed the supports as well, and she was looking great. However, thinking about it for a second, I put back one of the supports, just in case.
Likes
8
Share
I'm slowly becoming happy with the plant's growth; they're turning into lovely buds. The smell really is lemon gelato.
Likes
11
Share
@PanGrower
Follow
The leaves continue to turn yellow from the bottom. It seems that I started fertilizing too quickly and the tips of the leaves burned a little
Likes
17
Share
@BlumenBot
Follow
2/8 - first flower feeding after 24 hours of being promoted. She was thirsty and I think I'm going to have to feed almost daily to keep up as the pot isn't big enough for a full gallon watering...mistake made. Need to defoliate and prune out some small sucker bud sites. Tomorrow or Wed for that. 2L distilled water Bloom 2g Phosphorus 0.44g Kelp 0.38g Cal/Mag 0.58g (too much) Microbes Bloom Stage 0.98g Amino Acids 0.69g Enzymes 0.27g (too much) 6.0pH 68.5*F 760ppm 2/10 - feeding today, removed all rubber wire restraints, minor defoliation of bigger fan leaves on top, removed some sucker shoots from down below and I am wondering what else to prune out. This thing is going to be a 2 foot x 2 foot monster! 2L distilled water Bloom 2g Phosphorus 0.38g Kelp 0.39g Cal/Mag 0.32g Microbes Bloom Stage 1g Amino Acids 0.68g Enzymes 0.15g 6.0pH 68.5*F 660ppm Oh and it's a girl! 2/12 - feeding and mass defoliation with sucker shoots pruning...removed about 20% or more. Now she has room to breathe and good light penetration to the soil. Also tied her down gently to open up the canopy and spread out the tops a bit. 2L distilled water 6.0pH 675ppm 69.4*F Bloom 2.1g Phosphorus 0.41g Kelp 0.44g Cal/Mag 0.34g Microbes Bloom Stage 1g Amino Acids 0.65g Enzymes 0.13g 2/14 - flush feeding 2L distilled water, 6.0pH, 69.5*F
Likes
7
Share
Week 8 for Lemon OG by SSSC (indoor runt) 😂 She's still not happy whatsoever... don't think her roots are doing much when i feed her from the bottom her leaves don't perk up or anything only when I water from the top when she's unhappy. Think its going to take a while for her to start doing any serious growing to be honest. She's currently at 12 tops but just takes forever to bounce back. Have a new LED light coming in this week to handle the temps of the summer better. No more yellowish looking photos 😂
Likes
2
Share
Mon: Day 71: Chopped small plant. Day 73: Watered big plant Day 76: Watered with just phd water.
Likes
6
Share
@Pblc_10
Follow
03.12.25 Die Mädels stehen richtig gut da. Alles wirkt gesund, gleichmäßig und schön kompakt. Im Schnitt sind sie jetzt bei etwa 25 cm angekommen. Das Topping und das LST haben sie ohne Probleme mitgemacht. Die CO₂-Bags hängen seit ein paar Tagen drin. Vor zwei Tagen gab’s nach dem Umtopfen das erste Mal Dünger, was sie gut wegsteckten. Beim nächsten Gießen gehe ich auf ungefähr 80 % vom Schema. Mein Leitungswasser ist zurzeit etwas hoch im pH (zwischen 7.2 und 7.9), deswegen muss ich inzwischen regelmäßig mit pH-Down korrigieren. Ich lasse sie noch ungefähr eine Woche in der Vegi und schicke sie dann in die Blüte darauf freue ich mich schon am meisten. 06.12.25 In 2 Tagen gibt's nochmal Dünger ansonsten passiert nix weiter und wenn alles passt gehen sie am 13.12 in die Blüte Hat zwar doch ne Woche länger gedauert als geplant aber ich bin optimistisch das es sich lohnen wird nochmal 7 Tage zu warten👍 Verbesserungsvorschläge sind erwünscht ✌️🍀
Likes
9
Share
Day 32-26/08/22 so I’m feeling better now so time to get these diaries back on track!!! All 5 girls are doing good 👍 one of them has a few damaged leafs but very healthy will start to give them bloom tomorrow or later depending on if they need watering or not!!!
Likes
7
Share
@FrostyB
Follow
Now this baby was a delight to grow and grew real big. I decided to leave this lady to do her own thing and she ended up finishing just short of 6ft! The main cola was huge and juicy and all round the end result was really nice and super strong just the way it should be.