Processing
Likes
Comments
Share
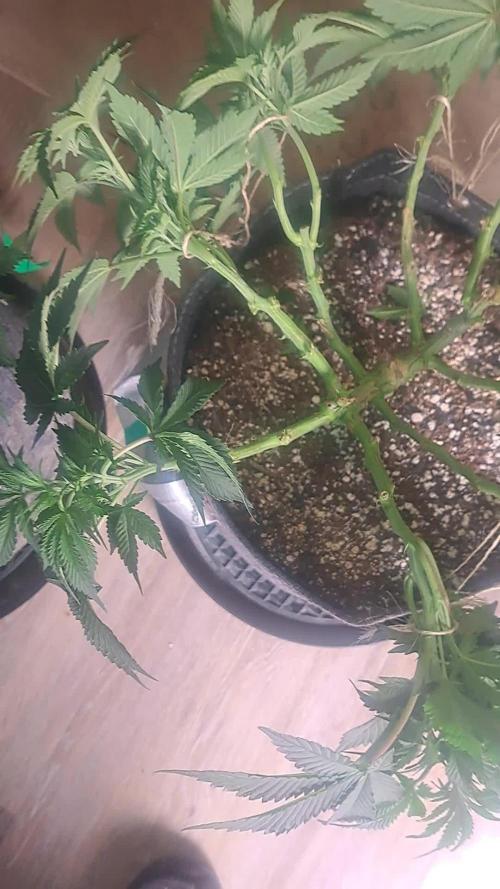
Forgot to defoliate whole way through so lost a lot of yield
Likes
3
Share
Día 6 de diciembre ,tenemos una amanecida de gran niebla que se mantuvo en la mañana con ello una alta temperatura en la noche del cultivo amaneciendo este a 90% de humedad Después del encendido de la luminaria y colocar dos pequeños humificadores de usar y tirar..en dos horas ,la humedad se mantiene bien. 55% En el día de antes de ayer se le aplicó un buen riego. Día 7 Humedad en el cultivo de un 60% Hoy le e metido otro riego con todos sus nutrientes de vegetación y metiéndole un poco de floración La EC 1100 El ph 6 Un ventilador dejó de ser oscilante para quedarse fijo.. hahaha meteré otro en unos días más grande y oscilante .
Likes
96
Share
Greetings, fellow cultivators! Week 9 with our illustrious Big Cheese Auto is like witnessing a botanical sprint to the finish line, and the excitement is hitting a fever pitch. A massive shoutout to Seeds Mafia for the genetics that keep our green queen in perpetual amazement. Our green sprinter is charging through her ninth week of flowering, and oh my, the acceleration is breathtaking! She's growing at an astonishing speed, embracing her full potential. The Autopot system remains the orchestrator, providing her with a nutrient symphony that propels her towards the grand finale. It's like the final act of a botanical masterpiece. In response to the swift growth, a tactical adjustment is in play. I've cut back on nitrogen (P-Boost) and increased potassium (K-Boost). Picture it like fine-tuning a racing car for the last lap. Nitrogen, essential for vegetative growth, takes a backseat as potassium takes the wheel. Why? Because potassium is a key player in the flowering game, boosting bud development, enhancing taste, and improving overall quality. It's like switching gears for a turbocharged bloom. The trichomes are stealing the show! Their numbers are skyrocketing, covering every inch of our Big Cheese Auto like a blanket of shimmering diamonds. It's like a botanical galaxy forming right before our eyes. The visual spectacle is not just mesmerizing; it's a testament to the plant's potency and readiness for harvest. Ah, the unmistakable scent of cheese is now an aromatic symphony that fills the air. Each day, it becomes more robust, like a crescendo building up to the grand finale. The olfactory journey is now at its peak, promising a flavor profile that will linger in the memory. Our TDS remains robust at 390, and the pH orchestrates a harmonious melody at 6.0. The Autopot and the nutrient adjustments are now conducting a final symphony, ensuring every element harmonizes for the best possible finish. The final grooming session is in progress. The leaf-bending ballet continues, creating an even canopy that bathes in the natural light. Defoliation is like the last-minute touch-ups before the grand performance. It's like preparing for the curtain call of this extraordinary botanical journey. A colossal thank you to Seeds Mafia, Aptus Holland, Grow Diaries, and the phenomenal community. Your support has been the guiding melody of this green odyssey. As we approach the climax of Week 9, the excitement is tangible. Our Big Cheese Auto is not just growing; she's hurtling towards a botanical crescendo. I can't wait to witness the final act of this sprint to greatness. Let's continue to cultivate greatness together! Genetics -Seeds Mafia Big Cheese Automatic Light - LUMATEK ZEUS 465 COMPACT PRO 
Food - APTUS HOLLAND 
 
All info and full product details can be find in can find @ https://seedsmafia.com 

https://aptus-holland.com/
 

https://lumatek-lighting.com/ As always, thank you all for joining me on this journey, for your love, and for it all. My horticultural odyssey would never be the same without you. Your love and support are cherished, and I feel both honored and blessed to have you in my life
Likes
44
Share
**Encontrarás la traducción a español al final de la descripción** From/Desde: 01/03/19 || To/Hasta: 07/03/19 From day/Desde día: 8 || To day/Hasta día: 14 You can find the Money Maker Diary here: ** Podéis encontrar el diario de las Money Maker aquí:** https://growdiaries.com/diaries/25667-gorillamakingmoney-gorilla-vs-money-m -----IMAGES & VIDEOS----- Video 1: Timelaspe video covering 5 days, from Monday 4th night to Sunday 9th afternoon/night. One second Blackouts on video represents night times. I'm sorry for the dancing of colours specially first days, i will try to do it better next time. The background song is from the old awesome album "Deep Forest" of Deep Forest "Sweel Lullably" song (I think i'm going to use this song for almost all timelapse plant growing videos). -----WEEK SUMMARY----- I'm sorry about the delay updating this week, i traveled to Venice at the end of this week and that's why it's late and i have very few or non photos of the next week. I wish the almost 5 days timelapse video can cover the lack of images for the next week. At time, among the 4 plants you can see on group photos, there is one of the 2 gorillas that stands out from the others. The other one is not growing as fast and strong as this one, and also is growing with discoloration areas in the leafs (it will be much more visible next week). I will perform the first Topping/Man Linning/LST on the plant that stands out the next week, and probably will leave the second Gorilla untouched to perform tests and comparsions. Also, among the 2 genetics, the Gorillas are growing much more robust and fast than the Money Makers are. LST STRUCTURE: To prevent breaking or making holes in the pot i designed this LST structure in blender and printed in 3D. They fit perfectly in the 8l RootPoch pots, so at time i didn't fixed them to the pots. If i see any of the plants lifting the structure i will just add weigh over it. -----WATERING CALENDAR----- 06/03/19 - 1.250 ml with all week nutrients and 1 CO2 tablet over the soil @ 0.4~0.5 E.C. PH5.5 (I'm going to travel to Venice till Sunday so i watered well) *****ESPAÑOL***** -----IMÁGENES Y VÍDEOS----- Vídeo 1: Vídeo TimeLapse que cubre 5 días, desde el lunes 4 por la noche hasta el domingo 9 por la tarde/noche. Los negros de 1 segundo que aparecen en el vídeo indican las noches. Siento mucho las variaciones de color entre los días, especialmente los primeros, la siguente vez intentare tener mejor color y más estable. La canción que suena de fondo es de un album antiguo maravilloso llamado "Deep Forest" de Deep Forest, la canción es "Sweet Lullably" y creo que la voy a usar en todos los timelapses de cultivo). -----SUMARIO SEMANAL----- Siento el retraso en el update de esta semana, me pilló el fin de la semana con un viaje que he hecho a Venecia y por esta razón llega tarde esta semana y de la siguiente tengo pocas fotos, espero cubrirlo bien con el vídeo timelapse que he hecho de casi 6 días De momento de las 4 plantas que podéis ver en las fotos de grupo hay una de las 2 gorilas que destaca sobre el resto de las plantas. He de decir que la otra está creciendo con manchas de decoloración en la hojas (se hará mucho más evidente la semana que viene). Por como va creciendo la Gorila que destaca, esta es a la primera a la que le realizaré el Man Lining y LST, y probablemente deje a la segunda gorila sin hacérselo para ir haciendo pruebas y ver diferencias. Así mismo, de entre las 2 genéticas diferentes, sin duda las gorilas crecen con más robustez y velocidad que las Money Maker ESTRUCTURA LST: Para no agujerear los tiestos he diseñado esta estructura para LST con blender y la he impreso en 3D. Se ajusta a la perfección a los RootPoch de 8 Litros pro lo que de momento no la he fijado al tieso ni suelo mediante nada, si veo que alguna de las plantas la levanta, simplemente pondré peso sobre la estructura. -----CALENDARIO DE RIEGO----- 06/03/19 - 1.250 ml con todos los nutrientes semanales y una pastilla de CO2 sobre la tierra @ 0.4~0.5 E.C. PH5.5 (Como voy a viajar unos días he regado bien)
Likes
5
Share
@Svansson
Follow
Keine Besonderheiten oder Komplikationen 👍🏼 Wie immer ein wenig Liebe und Wasser geben und zusehen wie sie von Tag zu Tag schöner wird 😍
Likes
Comments
Share
Likes
23
Share
Espectacular aroma a dulce!!!!!!! 😍😋😋
Likes
10
Share
@Pechu420
Follow
The best plant I have ever grown. Very resistant, and great flowering, fat buds, large flowers and beautiful colors on top of a whitish resin. This week there is no fertilizer, so as not to have problems with the harvest regarding taste. The leaves turn yellow quickly.
Likes
18
Share
@Stonyways
Follow
trimmed and netted the plants last night, 12/30, and the energy pushed the plants to stretch another 1/2 inch+ this will be the last week of vegetation as I prep this light leaking tent for flower, not a fan of mars hydro at all right now. their poles are the weakest I've encountered yet, too many light leaks and this is the first grow with it. My high cfm fan , which is only a 4", is pulling the fabric too much and causing the leaks to grow a bit. This is not new, its been happening with indoor tents for a while now but I thought a grow company such as MH would have a decent, respectable tent. My solution is Blackout Curtains draped over the sides. However, I am hesitant to do this with the MH tent as the poles for the tent are too weak as it is, tsk tsk tsk mars hydro. will continue to increase the watts the next 6 days HAPPY NEW YEAR a combination of light and fresh soil has made the plants stretch so I will finish tightening up the MH tent today and ill start flower tomorrow, day 62. while adjusting the height I must have nudged the dial for the dimmer and sent it to 184w. this would have been a big jump but manageable but I lowered the light 7" and the plants took a bit of a hit. I adjusted the light back down to 160w and I'll let the plants recover before anymore adjustments.
Likes
35
Share
Bonjour à tous les padawans et les maîtres jedis Pour cette semaine je prévoit de pratiquer comme technique spéciale le LST et juste un arrosage. Pour cela comme à mon habitude j'attend le cinquième noeud ou que je juge la plante robuste. Je profite que cette semaine qui va être relativement calme pour faire un LST appliqué et vous faire un rappel de ce qui est pour moi la meilleure technique pour arroser une autofloraison et la façon dont je pratique le LST. En suivant ces quelques simples conseils vous obtiendrez un résultat optimal tout au long de votre culture : Le cannabis est une plante qui n’aime pas recevoir un léger arrosage en continu. Il est impératif de l’arroser en grosse quantité, puis d’attendre que la terre soit bien sèche avant d’arroser à nouveau! Pour calculer la quantité d’eau nécessaire à chaque plante, suivez cette règle : Le volume d’eau à donner lors de chaque arrosage doit représenter au moins environ un quart du volume du pot !! Exemples : pour un pot d’1L, donnez 0,25L d’eau à chaque arrosage pour un pot de 4L, donnez 1L d’eau à chaque arrosage pour un pot de 12L, donnez 3L d’eau à chaque arrosage pour un pot de 30L, donnez 7,5L d’eau à chaque arrosage !etc… Pour donner un tel volume d’eau, il est souvent nécessaire d’arroser en deux (voir trois) fois, lentement et uniformément sur toute la surface. Disposez de bonnes coupelles sous les pots, celles ci se rempliront d’eau qui remontera dans le pot par capillarité en moins d’une journée. Il est également très important d’utiliser un bon terreau de qualité, avec une bonne capacité de rétention d’eau mais qui assure également un bon drainage (celui ci doit contenir de la perlite, et/ou de la coco, etc..) Il vous faut alors maintenant attendre quelques jours en sous-pesant régulièrement les pot avec vos bras. Quand ils seront redevenus très légers, vous pourrez arroser à nouveau !! En effet, comme l’eau pèse beaucoup plus lourd que la terre, un pot gorgé d’eau pèse plusieurs fois le poids d’un pot d’une plante prête à être arrosée. Avec un peu d’entraînement, vous apprendrez donc très rapidement à sous-peser vos pots pour savoir quand une plante a soif. C’est une technique à la fois très facile et très efficace, et qui peut être appliquée à toutes les plantes en pots ! En arrosant de cette façon, en général vous devrez arroser vos plantes tous les 3 à 6 jours. Pour cette semaine 3 au jour 17 ma plante fais 12 centimètres et son cinquième noeud apparaît je décide donc de pratiquer un LST sur ma plante. Pour ce j'utilise du fil de fer galvanisé que je plante directement dans le substrat en faisant attention de ne pas endommagé les racines car n'oublions pas que ce qui pousse dessus pousse aussi dessous. Jour 17 je pulvérise du une solution composé d'une cuillère à café de savon noir mou dilué dans un litre d'eau en prévention d'éventuels nuisibles. Je corrige mon LST suivant la pousse de ma plante ... Pour ma par c'est la manière dont je procède. Comme promis petit rapel de: Quand commencer à appliquer la technique LST De nombreux cultivateurs commencent la manipulation dés que les plantes possèdent entre 3 et 6 nœuds ou une paire de feuilles. Durant cette première étape de la croissance, le tronc encore flexible est pliable sans risque qu’il ne se casse, même si au fur et à mesure du développement de la plante il sera de plus en plus difficile de le plier. Nous pouvons continuer à guider la croissance des branches durant toute la culture, même durant la floraison, ce qui pour cette étape représente un grand avantage face à la taille, qui n’est pas du tout recommandé une fois que la formation des têtes commence, cela stressera en effet la plante, ce qui aura pour effet de retarder la récolte. Comment appliquer la technique de guidage LST Si nous sommes prudents, la flexibilité naturelle des fibres du cannabis permet de plier leur tronc et branches avec une relative facilitée, même durant la floraison des plantes. En utilisant une corde fine, nous pouvons accrocher la pointe de la plante à la base du pot par exemple ou à un tuteur que nous aurons planté dans le substrat. Nous plierons le tronc avec précaution et nous le fixerons avec la corde, à partir de là, nous pouvons augmenter progressivement la tension de la corde, chaque jour un peu plus, jusqu’à obtenir la position souhaitée. Soyez attentif à la réaction de la plante, essayez de ne pas appliquer trop de pression sur la corde et rappelez-vous que la flexibilité des branches peut varier d’une plante à l’autre. Pour obtenir de meilleurs résultats, il suffit de suivre quelques règles simples. Pour commencer, nous devons choisir une corde fine mais pas trop pour ne pas blesser les troncs au fur et à mesure qu’ils grandissent et qu’ils deviennent plus gros. Nous pouvons utiliser des crochets en plastique souple ou de n’importe quelle autre matière flexible pour éviter d’endommager les plantes. Spécialement en intérieur, utiliser des cordons en plastique de couleur (voir les diaries de @Silky) est très pratique pour voir facilement les accroches et faciliter le travail au milieu du réseau formés par les cordes, les tuteurs, les mailles ou les supports que nous aurons dans la culture. Bien entendu, en culture extérieure et surtout en guerilla nous ferons juste le contraire et nous utiliserons des matériaux de couleur qui n’attirent pas l’attention pour que notre jardin reste discret. Pour stresser les plantes au minimum, la mieux est de réaliser ces manipulations le soir ou juste après que les lampes en intérieur s’éteignent, ce qui leur permettra de se remettre durant la nuit. Normalement, le jour suivant nous pourrons observer comme les pointes des branches que nous avons pliées se dressent de nouveau vers le haut à la recherche d’une source de lumière. Que la force soit avec vous
Likes
14
Share
Comenzando la quinta semana, sin novedad. Aún queda una semana para que pasen a flora. Esta semana las riego solo con agua, ya que el sustrato tiene los minerales, microorganismos y materia orgánica suficientes.
Likes
2
Share
●End of day 59. Both plants are showing signs of flush. I will be watering tonight (5/13/202)and saturday (5/16/2020)will be the final watering. Plan on giving the 36hrs darkness starting the 19th or 20th and probably be harvesting on the 21st. I will be going through and giving a light defol to the girls picking off the "flushed" sugar leaves. ■Big Bud is turning on a heavy bubble gum smell and Agent Orange smells like a orange farm in Florida. Any suggestions tips or things you would like to see let me know. Happy gardening ✌️🖖🤙🌱🙏
Processing
Likes
12
Share
@Siriuz
Follow
Hey guys! Started week #8 Day 52 Sorry for not uploading many pics these past few days ago but you get it we busy and sometimes can't do much even tho we want to! Please check on the last picture at Day 50 and compare to new picture on day 53 You will noticed many changes! We also expanded the net and modified some other lights from setup. We've been good and theyve been great Outdoors everyday and tons of lights and love so she can continue to flower :). Day 53 Fed them medium hard 1710ppm /3.79g floranova bloom Only 300ml followed by 900ml plain water Plus outdoors from 7.30am til 2.30pm Day 54 Ladies are looking good Great day great weather All day outdoors til 6pm Now under CFL til 6.30am Then back outdoors Got some videos today! Day 55 we've updated our set of lights to a new LED grow lights 600 watts plus 100 watts CFL :) Day 56 It's already rocking their bodies Rich in THC Content Look at those crystals!!!! Day 57 End of week 8 Start of Week 9 coming up soon
Likes
24
Share
This week went a lot better than last, although still not optimal. After last week's transplant they all did well, as you can see in the time lapse. They do all have one or more deformed leaves and a slight calcium deficiency but look otherwise healthy. Increased base water (RO+calmag) EC from 0.3 to 0.4, feeding 0.7EC in total. At the end of the week, the root systems looked very well developed and I transplanted them into their final 5L pots. Decent so far.
Likes
2
Share
Lámpara: Bestva Quantum Board LED LM301B Sustrato: 2 Jiffy fino : 1 Floragard Especies: Charlotte Dream CBD - Auto Dark Purple - Purple Kush - Triping 25 - Gelato Ice Acontecimientos 1. Hoy 11/01/2022 se completarán las 10 macetas con tres plantas que ya germinaron y están listas para poner bajo la lámpara. Van a tener 1 semana de diferencia respecto a las otras 7. 2. Agua reposada, viento y Luz 20 h/día. Buenos humos
Likes
22
Share
@Hawkbo
Follow
These are just about done, I chopped the first grape god in the 1 gallon bag yesterday. I started the flush way too early because the 1 gal needed it and I didnt feel like mixing separate feeds so I just hit them all. So the leaves are crispy and crinkly but the nugs will be clean and smooth so it's all good just wont get the best pics out of it. I love these little autos they are frosty as hell and have some beautiful buds. The rest will come down this week doing the final flush today.
Likes
12
Share
@Daggstein
Follow
Week 1, She is responding well to the flower nutrients at 900 ppm but, she wants a little more. The ppm dropped to 820, so i decided to slightly increase ppm to 990. . Day 9 . toped up the reservoir with 5 lts of ph balance water , after the hack i gave her to defoliate she almost immediately stoped taking in nutrients and ppm shot up to 2060 but drank 5 lts of water in two days. all adjusted now , lets see tomorrow.
Likes
8
Share
The buds are pretty airy.. Not dense at all. But still very happy with the outcome. Can't wait to have it all weighed out.. (Dry of course) The root ball was HUGE... I always have an issue with drying too quick (3 days) so, I'm hoping that the box with the computer fan will still move enough air to keep mold from growing.. But not too much to dry out too fast. Also, keeping it in an unused room that stays alot cooler than the rest of the house. Will update when dried and ready for jars! 50 hours of drying.. She still seems pretty moist.. At least.. That's what she said.. Lol.. Had to.. Anyways.. Yeah leaves are still pretty soft almost lively kinda still.. Not crispy.. Trying to make this dry super slow.. And NO hay smell so far.. That's a good thing.. I think.. As long as it still smells like dank.. Tired of drying my buds too quick or too much if I push for 4 days.. 3 days is not good enough.. Im pushing for at least.. AT LEAST 5 days drying and the buds still able to produce about 65% humidity, or so, on their own.. That is what has worked best for me.. Even if it dried in 3 days.. As long as I get the humidity right for curing it wont ruin the terpenes from what I have been experiencing.. Anybody got any other ideas? Lol cuz what I find on the net doesnt work for me.. I didnt wanna use a fan on this.. And im only using a very small weak computer fan that I rigged up to use even less power.. Just scared to dry this too quickor too much.. Thinking about turning the fan off for a little bit.. Maybe the rest of the day and night.. Ok.. So 6 hours after I turned the fan off.. Still reading 55% RH and 20.5C.. It shouldnt mold *crosses fingers* 74 hours drying.. The buds seem very very airy.. And it seems like its one of those types that look like alot but really weighs half of what it looks.. Maybe when I trim her up she'll look better.. Still a very fun and interesting learning experience! On to the next! Still going to update more!!! Probably tomorrow lol Its been a little over 100 hours of drying and the buds and leaves are feeling pretty crisp.. If I wait till the branches "snap" then it usually comes out too dry.. And so far jars 1 and 2 which are the popcorn buds is ready 70% after being in the jars for about 2 hours.. That is too wet still.. Just going to burp very frequently (3 or 4 times daily) and using a fan for a few minutes to help pull that moisture out and let her go right back into curing.. That's the best way I can get it to not smell like hay.. So far so good.. Still smells pretty dank. Some of the nugs are so linky it reminds me of Dr. Grinspoon's from Barney's Farm.. The calyxs are just spaced apart by stem.. Still looks pretty and smells great.. And smokes even better!.. Will update as I go... After about 24 hours in the jars.. The hygrometers are reading 70% - 75% so I left them out overnight to dry out a bit more.. Just put them back into the jars and will check on them when I get home from work tonight.. I'd much rather not dry enough.. Than over dry ANY DAY.. ifit was overdried, it would smell like hay.. But it still smells dank asf.. Plus.. This is just technically giving more time to dry before the cure.. I read that this is considered the "pre-cure phase"... Wish I would have read that before my last 3 - 4 harvests.. But I have learned it now.. So no more excuses for fuckin it up anymore lol.. https://www.cannabisprogrower.com/curing-cannabis/ That is the link to the way that I have started curing.. It seems to be working pretty well. This has details that I could not find anywhere else and basically had to try and figure out on my own... Then I came across this page.. This is the perfect method for curing in my opinion.. Works great for me! Its been in the jars for 6 days.. I now have the hygrometers reading 61% - 63%... According to that website.. I should stop burping daily.. That makes me a little nervous.. I will atleast open each jar daily to get a wiff of them lol.. They smell pretty good.. Not the best I've smelled.. But atleast I know I'm doing it right this time.. Geez.. The drying and curing is the most detailed part of growing.. My first time i thought you just dry it and throw it into the jars.. No matter how long or short of time it took lol.. My first grow was reading 49% after 3 days of drying.. With a fan!.. So glad I got it figured out finally! Made some Bubble Hash with the trim.. Havent weighed it.. But judging by the size (plus I used to be addicted to black tar heroin) it looks like it could be just about 2 grams.. I'll weigh it later.. Still haven't smoked any of it. I only used the 220 micron and 25 micron bags.. 220 to remove all the leafy substance and the 25 to catch all the trichomes.. Usually my bubble hash turns out very dry and breaks apart.. This stuff is super gooey.. Even after drying for 4 days.. Hmm... Smells amazing.. Wish I could smoke it.. I wonder if I could make capsules of this stuff.. And just take it like vitamins.. Lol.. If anybody has tried that or knows anything about it, comment please.. I'm curious A little after 2 weeks of curing.. The buds smell and taste pretty dank! I feel like I got the curing and drying down.. Yessss!
Likes
Comments
Share
Seeds germinated no problem. Put straight into 3 gallon pots with only substrate around the young seedling - as the roots stretch they will move into the fertilized soil.