


Likes
13
Share


@SufalloBoldier
Follow
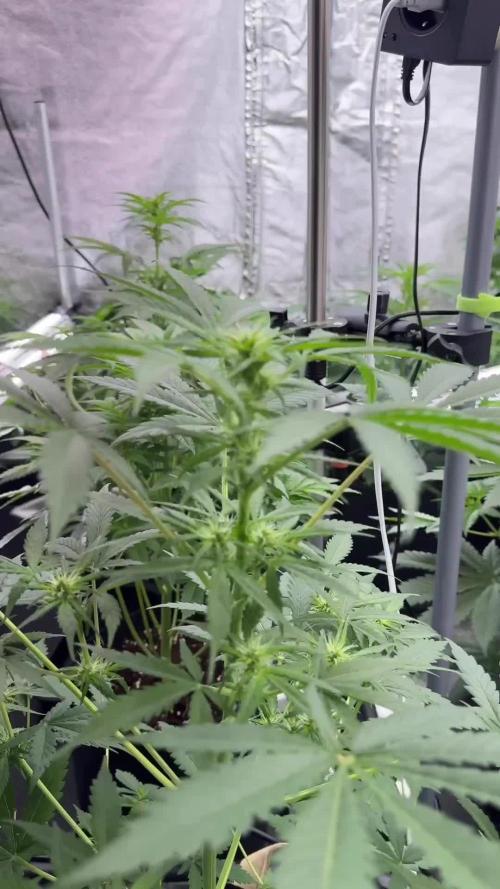
100% power now on the ts2000 @ 24inchs. Trying to follow this rough guide of DLI for autoflowers, stumbled across on it on a random forum, seems to have worked great so far;
AUTO FLOWER LED LIGHT INTENSITY
Recommended LED PPF/PAR Values / DLI Based on 20 hrs. of light.
Seedlings 150 - 200 umol / DLI 10.80 - 14.4 moles per day
Veg up to 9" 450 umol / DLI 32.40 moles per day
Early bloom 500 umol / DLI 36.00 moles per day
Mid bloom 650 umol / DLI 46.80 moles per day
Late bloom 750 umol / DLI 54.00 moles per day
Ripen 400 umol / DLI 28.80 moles per day
*** Use extreme caution going 700 umol or higher @ 20 hrs/day this could cause leaf burn***

Likes
6
Share


@victortripp
Follow
Plants are now what appears in Week 4 of flower, even though the natural light cycle is still above 14 hours per day. It’s likely that the streak of cloudy mornings over the past couple of weeks has contributed to the transition by simulating shorter effective light periods.. that in addition to going from indoor to outdoor
Nutrient Activity:
• Started the week with a cap mag-only feeding to address ongoing signs of magnesium deficiency.
• Later in the week, applied a strict Epsom salt feeding at 1 tsp per gallon, one dose per plant.
I also moved my watering schedule from late in the evenings too early morning and midday to address a potential cold shock.
Observations:
• Minor yellowing remains present, particularly in the older leaves. Still leaning toward a magnesium deficiency as the primary cause.
• Toward the end of the week, tip burn began to appear, likely due to nutrient buildup from trying to aggressively correct the deficiency.
It’s a delicate line right now between resolving deficiencies and avoiding overfeeding.
⸻
Next Steps / Adjustments:
• Reduce feedings to no more than twice per week going forward to minimize the risk of nutrient burn.
• Monitor new growth and bud development closely for any signs of stress or improvement.
• If tip burn continues or worsens, consider a mild flush to rebalance the root zone.
If the yellowing stabilizes and tip burn is contained, I’ll resume light feeding adjustments in the following week.


Likes
55
Share


@Roberts
Follow
Fruity Pebbles in blue planet nutrition has grown really nice. She has a good fruity, sweet aroma. Loaded in trichromes, and looks like she will give me roughly a good quarter lb or more in a dry yield. Everything went fairly well in the grow. No major issue I can think of. Thank you Medic Grow, and ILGM. 🤜🏻🤛🏻🌱❄️🌱
Thank you grow diaries community for the 👇likes👇, follows, comments, and subscriptions on my YouTube channel👇. ❄️🌱🍻
Happy Growing 🌱🌱🌱
https://youtube.com/channel/UCAhN7yRzWLpcaRHhMIQ7X4g
Likes
3
Share


@OrthoGrow
Follow
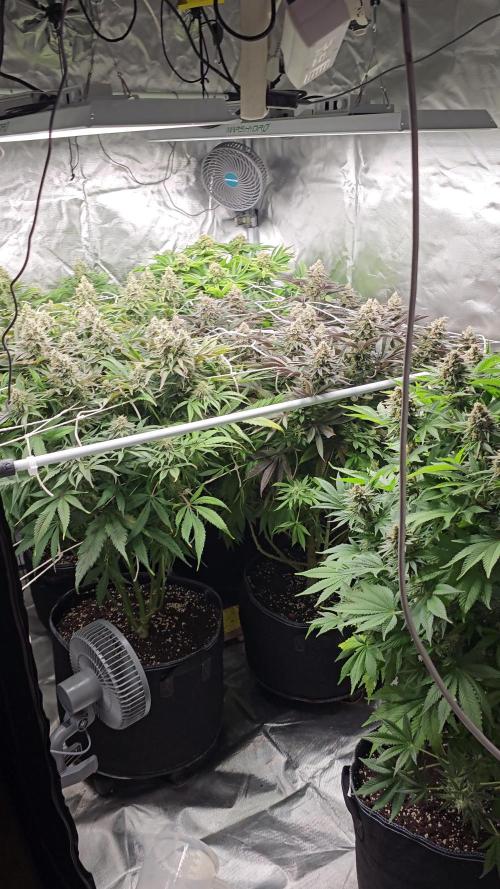
Week 10
I actually thought it will be ready soon, but the trichomes still need time. I hope to harvest it before the end of the week. Not growing anymore, I’m pretty happy about the size, can’t wait to harvest it!
looks healthy

Likes
5
Share


@banditman1200
Follow
just about to go into week 9 and i noticed a few midges or so i thought.as the next day there were more ..i noticed that they seemed to be coming out of pot bases.upon closer inspection these turned out to be fungus gnats.(never heard of them. Never had a beastie problem).No idea how or why but problem seems to be sorted as you can see from photos ,sticky traps and plant magic Bugicide


Likes
4
Share


@Young_agronomist
Follow
Благодаря успешной LST , растение доставило больше побегов(я насчитал 12 молодых побегов )и продолжает активно рости )
Стал давать 80% от максимума удобрений
Растение чувствует себя хорошо . Ждём

Likes
51
Share


@nonick123
Follow
Día 71 (30/12) Christmas holidays. Only watering
Día 72 (31/12) He recibido mi nueva lampara Mars Hydro FC1500 EVO Led Grow Light (2024 NEW FC 1500-EVO Samsung LM301H 150W LED) - https://marshydro.eu/products/fc1500-evo-led-grow-lights/ - https://www.amazon.de/dp/B0CSSGN5D8?ref=myi_title_dp
Procedo a instalarla, de modo que tengo la tienda de 120x60 cm perfectamente cubierta con las DOS (2) lámparas FC1500 EVO
Es ideal tener dos lámparas, porque así puedo ajustar la distancia a la lampara en función de la altura de capa planta
Ajusto ambas lámparas al 75% de potencia (Total 225W), que es más que suficiente para cubrir el área de 120x60 cm
Día 73 (01/01) CBD Auto 20:1 #1 - Muestra una ligera deficiencia con algunas puntas de las hojas dobladas hacia arriba y clorosis... Creo que le voy a dar otra ración de BIO PK 5-8
OG Kush Auto - Está apilando cogollos de forma brutal. Increíble el olor y la cantidad de tricomas que está formando 😍
Día 74 (02/01) CBD Auto 20:1 #1 - Se empiezan a formar tricomas entre los incipientes cogollos
OG Kush Auto - Una pena que se haya intensificado la deficiencia de CalMag en las hojas, porque los cogollos son gordos y densos, y cubiertos de tricomas
Día 75 (03/01) CBD Auto 20:1 #1 - Voy a darle un boost para las 4 semanas que le quedan hasta la cosecha con SILICIUM FLASH
Hago un pequeño agujero cerca del tallo, espolvoreo 25g de SILICIUM FLASH en el agujero, lo cubro de tierra.
Riego con una solución de 2g de BACTREX por litro de agua.
OG Kush Auto - Impresionante densidad de los cogollos que empieza a doblar las ramas 😍 La ventana de cosecha se acerca! 💥
Día 76 (04/01) CBD Auto 20:1 #1 - Investigando me doy cuenta de que lo que le pasa es quemadura de luz, ya que la parte externa de la planta sufre clorosis, y la parte interna (donde no alcanza la luz) está completamente verde
Ajusto la lampara sobre esta planta para 40 DLI
OG Kush Auto - Sigue poniendo los cogollos duros como rocas y muy llenos de tricomas! 😍💥
Día 77 (05/01) CBD Auto 20:1 #1 - On going
OG Kush Auto - Empieza la senescencia en las hojas de abanico, acelerada por la deficiencia de CalMag que ha tenido.
💦Nutrients by Bio Tabs - www.biotabs.nl/en/
🌱Substrate PRO-MIX HP BACILLUS + MYCORRHIZAE - www.pthorticulture.com/en-us/products/pro-mix-hp-biofungicide-plus-mycorrhizae
"GDBT420" 15% DISCOUNT code for the BIOTABS Webshop https://biotabs.nl/en/shop/
With 2 x Mars Hydro FC1500 EVO Led Grow Light (2024 NEW FC 1500-EVO Samsung LM301H 150W LED) - https://marshydro.eu/products/fc1500-evo-led-grow-lights/ - https://www.amazon.de/dp/B0CSSGN5D8?ref=myi_title_dp
Likes
29
Share

@DogDoctorOfficial
Follow
eek 1 Flower – Light Shift, Energy Shift: The Sundae Driver Flip Begins
The light has changed. The rhythm has changed. And so begins the next phase of our journey with these two beautiful Sundae Driver phenos—F2 and F3, strong, structured, and ready for the path ahead.
Light Flip: 11/13 Schedule
This week marks the official light flip, we’ve moved from 18/6 to 11 hours ON, 13 hours OFF.
This is more than a timer tweak, it’s an intentional signal to the plants. It tells them:
“It’s time to shift your energy. It’s time to bloom.”
Why 11/13 and not the classic 12/12?
From past experience, this slightly reduced light period tends to:
• Encourage faster onset of flowering
• Mimic natural seasonal changes more closely
• Push plants gently but clearly into the bloom phase
• Slightly reduce internodal stretching, depending on strain
It’s a subtle technique for growers who want to bring their genetics into flower with intention, not just automation.
⸻
Current Plant Stats
Both Sundae Driver phenos are looking phenomenal:
• F2 (Pheno #2): 7 to 8 solid nodes, well-structured branching
• F3 (Pheno #3): 6 to 7 nodes, evenly spaced, healthy top growth
• Height: ~40 cm each
• Structure: Symmetrical, thriving, ready to stretch
They’re not showing pistils yet—no visible pre-flowers, no white hairs, but that’s expected.
It’s Week 1 Flower by light schedule, not by physiology. The hormonal shift has just begun.
⸻
Nutrient Shift – From Start to Top
This week also marks a change in the feed program.
We’re saying goodbye to Aptus Start Booster and welcoming Top Booster into the rotation.
• Why the switch?
Because the plants are transitioning from root-zone stimulation to pre-flower induction.
• Top Booster is designed to:
• Initiate floral development
• Begin the phosphorus-potassium push
• Provide trace elements aligned with bloom-stage signaling
We’re using the same measurements as Start Booster, no shock, no surge. Just a clean hand-off, keeping the biological engine running smooth.
Current Feed Includes:
• Aptus Regulator
• Aptus CalMag Boost
• Aptus All-in-One Liquid
• Aptus Top Booster (new this week)
⸻
Environmental Stats – Pushing the Edge, Managing the Heat
• PPFD: 760 µmol/m²/s – Measured on the TrolMaster MBS-PAR sensor, dialed in
• Temp: 31°C – Yes, a bit high, but the girls aren’t complaining
• Humidity: 50%
• VPD: 2.23 – High, but within tolerance while waiting for AC upgrade
We’re riding the edge this week. It’s warm, it’s dry, but the plants are thriving, showing no signs of stress. Their resilience is a testament to your setup, your genetics, and your love.
⸻
Looking Ahead – What to Expect
We’re now in the hormonal build-up phase. The girls are about to stretch, about to signal floral commitment. Here’s what we might see by next week:
• First white pistils
• Stretch kicking in
• Top growth pushing harder than lower nodes
• Nutrient demands subtly shifting—watch potassium and magnesium uptake
What not to expect yet:
• Buds
• Resin
• Drastic shape changes
That comes soon—but not quite yet.
⸻
Closing Thoughts – A Sunday Drive Into Bloom
This isn’t just a new phase, it’s a new pace. The grow has shifted gears, and you can feel it in the rhythm of the room.
Light is shorter. Energy is tighter.
But the intention is louder than ever.
The Sundae Driver girls are leading us gently into bloom, graceful, balanced, and full of promise.
Thank you for following along. Let’s keep this community connected, curious, and committed to the craft.
—
Your Grow Companion
Dog Doctor Official
📲 Don’t forget to Subscribe and follow me on Instagram and YouTube @DogDoctorOfficial for exclusive content, real-time updates, and behind-the-scenes magic. We’ve got so much more coming, including transplanting and all the amazing techniques that go along with it. You won’t want to miss it.
• GrowDiaries Journal: https://growdiaries.com/grower/dogdoctorofficial
• Instagram: https://www.instagram.com/dogdoctorofficial/
• YouTube: https://www.youtube.com/@dogdoctorofficial
⸻
Explore the Gear that Powers My Grow
If you’re curious about the tech I’m using, check out these links:
• Genetics, gear, nutrients, and more – Zamnesia: https://www.zamnesia.com/
• Environmental control & automation – TrolMaster: https://www.trolmaster.eu/
• Advanced LED lighting – Future of Grow: https://www.futureofgrow.com/
• Root and growth nutrition – Aptus Holland: https://aptus-holland.com/
• Nutrient systems & boosters – Plagron: https://plagron.com/en/
• Soil & substrate excellence – PRO-MIX BX: https://www.pthorticulture.com/en-us/products/pro-mix-bx-mycorrhizae
• Curing and storage – Grove Bags: https://grovebags.com/
⸻
We’ve got much more coming as we move through the grow cycles. Trust me, you won’t want to miss the next steps, let’s push the boundaries of indoor horticulture together!
As always, this is shared for educational purposes, aiming to spread understanding and appreciation for this plant. Let’s celebrate it responsibly and continue to learn and grow together.
With true love comes happiness. Always believe in yourself, and always do things expecting nothing and with an open heart. Be a giver, and the universe will give back in ways you could never imagine.
💚 Growers love to all 💚
Likes
2
Share


@Viccrazyweed
Follow
Saturday 25 February;
The big one keep growing nice and healthy, the tiny has started growing but its like a week delayed, if both born at the sane time maybe the tiny one is gonna produce less, the shock of repotting has punished her a lot… in still worried about her…
Anyway im still super excited with this project
Custom 0.8 m2 tent, x2 Solux 50W LED, Canna profesional soil 5% perlite
Thank you Super Sativa Seed Club
To create Auto Purple OG Punch we crossed our feminised Purple Punch with an autoflower OG Kush. The original Purple Punch is a cross between Larry OG and Grandaddy Purple, illustrious and stable indica dominant THC-rich heavyweights!
The total grow cycle from autoflower seed to harvest is a short 9 weeks. You will be rewarded with a large yield of sticky resinous buds, up to 600g/m2 indoors. If you’re looking to grow a high quality indica auto made with cannabis cup winning genetics you will love Auto Purple OG Punch. THC content is always up-to/around 20%. Auto Purple OG Punch effects are intense, euphoric and relaxed. She also contains around 1% CDB which contributes to the very smooth, chilled smoke. Expect a mouthwatering blend of sweet tasting candy, dark fruit and hints of spice. A real connoisseur cocktail with powerful effects!
She normally reaches around 1m tall. But in optimised conditions with LED grow lights you can see occasional monster plants up to 2m tall with XXL yields. Auto Purple OG Punch is easy, potent and heavy yielding indoors. She also delivers well outdoors - such as the balcony or garden.
Auto Purple OG Punch is a perfect, powerful strain for a quiet relaxed day. The calming indica body effect is very satisfying and de-stressing.

Likes
22
Share


@Spliffi
Follow
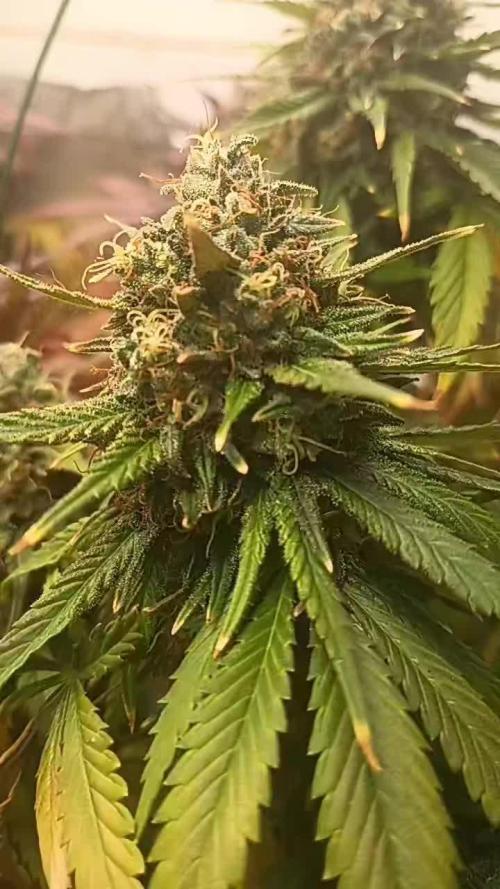
Week 9👍🤙👍🌱
I'm starting to get some Funk Sweet Flower smell.
Jon Dabs
Check them out here:
https://jondabs.com
@jondabs Instagram
The Sponsors
Check them out here:
Dutch Passion
https://dutch-passion.com/en/
Hydroponic.co.za
https://hydroponic.co.za/hydroponic/harvesting-and-growing-accessories/
Bud Juice
https://www.gohydro.co.za
The Best Grow
https://thebestgrow.co.za
Dynomyco
https://www.dynomyco.com
Nuclear Roots
https://www.nuclearroots.co.za
Photronic
https://shop.photronic.net
Special Thanks to Hydroponic.co.za. I buy all my products from them. Best service.
Daily updates coming...

Likes
10
Share

@AsNoriu
Follow
Day 90 since seed touched soil. Girl is on final stretch, took all nutes out last watering. Today gave 6.3 phed water for last time, maybe if few other girls will show signs of bulking, ill do one more watering.
Last week installed dehumidifier, so all environment is way better.
Most mature girl from all, youngest, but fastest to bulk up. Cant wait to take her out from scrog and see real beauty of her.
Happy Growing !!!

Likes
14
Share


@LokalGrenz
Follow
Got a dehumidifier it’s reading different from what mine controller 69 is saying but I have it set at 40% it’s the lowest so it’s going pull humidity regardless right now it’s about 53% which is okay would like it to get down to the 40’s I also changed the light schedule today to 20/4 the humidity raises at in my tent when lights are out so I figured change it to 20/4 instead of the 18/6 I’ve been running so if humidity does go over it won’t be for as long as before hopefully this works just trying to avoid any mold situation
So far the Amneisa Haze 2 is at stretching she’s going be big I can but the haze 2 is done seems to just be flowering the sour diesel is looking good as well so far I’m happy with its looking like left town for two days and the auto watering pots worked!

Likes
4
Share

@KurtThePlantGuru
Follow
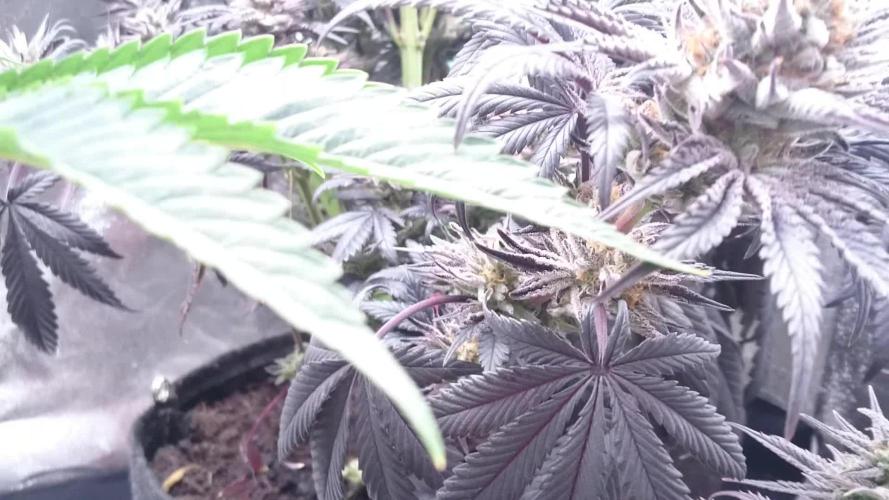
Not the prettiest girl in the show, but where she lacks in beauty she picks up in straight gassy fumees. Very nice trichome coverage.
She reeks. Although they both absolutely stank I feel like I smell this deep rotten fuel over the other.
Would definently consider running again to cross it to something more pretty or maybe to see if I can get any other purple phenos from it!
Likes
5
Share


@84ruk
Follow
Está 5 semana de vegetación la planta dejó de estar en indoor y fue puesta en el patio, aquí recibe el sol de 11 am a 4 pm, al parecer se está espigando un poco pero en mi indoor estoy cultivando plantas automáticas correctamente desde el principio para mejorar la producción.

Likes
6
Share

@PatriciaGant
Follow
Dane, We all should help one another.
Human beings are like that.
We should live by each other’s happiness - not by each other’s misery.
We don’t want to hate and despise one another, share the Joint.
And mother earth is rich and can provide for everyone.
We can Grow enough Happiness, In this paradise, there is room for everyone.
We only exist to bring joy into the world and The way of life can be free and beautiful,
but we have lost the way.
Grow High and Give the world A smile.
At the end we own nothing more then all our memories, lets make them amazing for everyone,
nothing to lose only everything to win.
for those who come after, right.
A last kiss goodby, a second one, softer and long as a sign, that you are woth it.
That Everyone worth, who loved and given.
Enought Hippie Talk, now have a nice day and an even better grow, thx for watching by.
((From Seed 🌱
week report:
Likes
11
Share


@Bluemels
Follow
Tag 39: Nicht mehr lange dann hat die Chocolate Haze das Netz ausgefüllt. Heute habe sie ein wenig entlaubt, so kann ich sie gleich besser gießen. 😁

Likes
12
Share


@Tmasm
Follow
obrigado Royal Queen Seeds por fornecer a genéticas, hipérion F1 e bolo de casamento.
Entrega segura, dentro do prazo e muito discreta, entrega prevista em 5 a 10 dias, recebi em 5 dias, por serviço de entrega não trabalha ao fim de semana, senão recebia em 3 dias.
Experiência para possível plantio em massa, dependendo dos resolvidos.
1/5 hipérion F1 estará germinado, nos próximos dias.
1/5 bolo de casamento estará germinado, nos próximos dias.
Restantes hipérion F1 e bolo de casamento, germinarão assim que estás, terminar seu ciclo de vida, devido organização de esposo, e com isso estudo diferentes épocas do ano.
O diário será atualizado toda semana, espero que gostem (eu também)
Likes
48
Share


@MG2009
Follow
She is falling over because the weight,and density of the buds, tips of single bud leaves turning purple,. What would have normally been popcorn buds, are super dense. I love LED Lights. This will be my last week of feeding , next two weeks water only. Any one have thoughts about dark period before harvest?
Or maybe only blue spectrum for final two weeks?,
( to bring out more resin glands ).?


