


Likes
Comments
Share


@TheBudWhisperer
Follow
Week 1 of the latest cycle and starting out with some new hardware and an expanded grow print👍. We’re running 4 autos via a recirculating Dutch bucket system. First time on a dutchy so it’s gonna be interesting to see how it stacks up against DWC. I’ll give a full rundown on the system I’ve cobbled together on the next update.
So far - all seedlings have germ’d without issue using the standard p-towel method. Why more people don’t use this method on GD is beyond me. It’s so reliable that some breeders even warranty your seeds if you use this method and more than 1 seed fails to crack. We’ve got little sprouts coming up now and it’s all just waiting for those first couple fan leaves to come out and those roots to run to the bottom of each bucket. They’ve been placed in root riot cubes (essentially a version of rapid rooters) like most of our runs and I’d recommend their use with all autos. Time and stress on young autos is key so they need the absolute best start you can give them👌.
End of week update - looks like we got 4 quality little seedlings here👍. Alls good other than battling a ph issue for most of the week. Keeps spiking overnight for no real reason - hopefully it’ll even out and isn’t the early sign of a major problem🤞.
Background
The strain line up on this grow is look’n quite saucy 😈. We’ve got 2 FB strains this time around - Gorilla Cookies (seems we always have some GSC cross in the works). Mainly because the colours look stellar and remind me of a sugar breathe we did last year that was 🔥. The other FB is their original Cheese strain... because we already smoked all our cheese... and we really like our cheese...😉. Emerald triangle was kind enough to include a freebie of Lemon Haze. Wasn’t really big on the list but we haven’t done a haze strain to write home about yet so worth a go👍. The last is a Cherry auto from Bomb seeds that we’ve been trying to get to for months. Let’s just hope that she’s not a dud like the last bean.
The new digs for this run are courtesy MarsHydro👊. Their 2x4 single grow tent, paired with a shiny new 240w QB courtesy ViparSpectra.
These folks were kind enough to discuss a collaboration and as a result, here we are to test out the gear with an inaugural run of autos. Each week, we’ll try to expand on some of the benefits of each, as well as any limiting factors or considerations that need attention when pondering purchase.
Already I can say that both are high quality products in terms of overall craftsmanship.
MarsHydro 2x4 Grow Tent:
Excellent construction in terms of durability. Reinforced stitching on the zippers and corners ensures zero tearing. Conveniently placed screen vents and intake/exhaust ports. The ceiling exhaust port only exists on the right side. Perfect for me but not great if you’re running exhaust from the top on the left side (left side wall port makes up for this however). The aluminum frame is rigid enough to support the weight of the lights and accessories. Once you have some weight in the tent, she’s go’n nowhere and you can assemble and break it down in record time if moving or stashing the grow op.
Only limiting factors I’ve noticed is that temp. Control will be an issue for a tent. It just doesn’t have the same insulating ability as a wood cabinet or other permanent enclosed space. No worries, this is offset by a small desktop heater and keeps the environment exactly where desired. The other issue was a production problem - the ceiling vent was accidentally stitched into the corner seams on the assembly line. Again, no real issue - just pulled it out with no damage or fraying to the tent or port👍.
Website link here:
https://www.mars-hydro.com/grow-tent/buy-mars-hydro-grow-tent-24x48x70-2-x-4-cabinet-closet-grow-box-upgraded-diamond-1680d-mylar-for-sale
ViparSpectra 240w Quantum Board:
This thing is sleek and slick in terms of design. Closest comparable to it that I’ve seen would be spiderfarmers line of qbs. They feature the same top-o-the-line components and roughly similar spectrums. Where VS takes the advantage is in the convenience of the dimmer nob which is easily accessible and works great at 50% with no strobing👍. The heat sink is also larger which contributes to lower temps. That’s not a good thing in my case but beneficial for most folks.
I can already say that this will be a great fixture through all stages of growth. Where I know this light will excel will be in the veg. Stage for sure. Dimming function gives seedlings a much better chance of success with the ability to use lower lighting levels early on and the coverage area on a 240w is great. The average grower will find this panel suitable and fitting to their needs in a 2x4 grow space although I’d suggest 2 units if going any larger than that. The total output in this space equates to about 30w/sq.ft. Which is a decent amount of coverage based on power vs. Growprint. Ideal for veg. Certainly but, in flower - I tend to run closer to 50-60w/sq.ft to achieve higher yields. Again, similar fixtures have performed admirably in the past and while this wouldn’t be considered an “entry-level” fixture, I’d recommend that any grower new to the game not skimp on lighting and start with one of these. The price points are a great value for quality LED tech. These days, so there’s little reason to even consider a lesser fixture👍.
I have no detail on limiting factors for this light as yet but have heard that stock branded fixtures don’t necessarily incorporate enough red diodes. I’ve seen no issue myself but confess - I’m no lighting guru.
Website link:
https://www.viparspectra.com/collections/xs-series/products/xs-series-xs2000
***8% discount when using code: “ItBudWhisper”***
Happy to have you along for the ride if you made it this far through my opening rant!!😎🤟😎🤟😎


Likes
2
Share


@Herbangardener671
Follow
Vaped some lower buds and the taste is as advertised like tropical fruit or fruity pebbles

Likes
7
Share


@ShiftyGaijin
Follow
Day 58____________________________
- Trimmed lots under the canopy and opened up some light by taking a few fans up top.
- Found a few leaves with spots on them.

Likes
43
Share


@Ju_Bps
Follow
Hello friends
Still good with this plant,
For the moment no problem with her, easy grow, she like be touched, and fertilizer.
This week I've start pk 13-14.
She have a really nice smeel and lot of pollen, I think bud will be not really big, because short vege, next time I'll put more plant.
All continue to be good, I hope harvest for end of this month or start December.
Next week I'll start to publish pic of trychromes.
I'm in late in my diaries, my phone was broke and needing to got my pics in my old phone.
Have a good week, grow and smoke.
See you next week 😊😊

Likes
16
Share


@BLAZED
Follow
1-11
At the end of the day i chopped her down, did a small wet trim removing some big leaves, and hang the buds to dry.
2-11
Temps: 19.3 to 20.5 degrees
Humidity: 55% to 64%
3-11
Temps: 17.1 to 20.4 degrees
Humidity: 54% to 66%
4-11
Temps: 18.1 to 19.6 degrees
Humidity: 62% to 66%
5-11
Temps: 17.9 to 20.1 degrees
Humidity: 56% to 64%
6-11
Temps: 17.6 to 19.4 degrees
Humidity: 59% to 67%
7-11
Temps: 17.8 to 19.2 degrees
Humidity: 60% to 66%
8-11
Temps: 17.4 to 19.9 degrees
Humidity: 58% to 67%
9-11
Temps: 17.8 to 20.1 degrees
Humidity: 62% to 64%
10-11
Temps: 18.2 to 20.5 degrees
Humidity: 62% to 65%
11-11
Temps: 18.7 to 20.4 degrees
Humidity: 57% to 65%
12-11
Temps: 18 to 20.1 degrees
Humidity: 54% to 66%
13-11
Temps: 17.8 to 20.2 degrees
Humidity: 61% to 67%
Started trimming today.
14-11
Finished trimming.
I was afraid of finding a lot of budrot, luckily it was only the one cola.
The buds are very frosty, the bottom at the base of the branch looks a bit brownish on some buds, i inspected it with a microscope and didnt find any mold or weird things. There are a lot of amber trichomes tho.
I think that's why it looks brown like that. It smells and smokes good, so i think its fine.
If someone thinks otherwise, let me know!
End results:
Buds: 92 Grams
Small Buds: 18 Grams
Trim: 16.7 Grams
Total weight of the buds: 110 Grams.
I calculated that i used a total of 72.3 watts this grow, that makes it 1.52 grams per watt!
Very happy with the end results, and its by far my personal record hahaha.

Likes
6
Share


@Reidy_B
Follow
So far my confidence in this next go around is very high! 😃☀️ Putting the seeds straight into a jiffy pellet is the way I am going to proceed with germination going forward. You are just adding extra variables to what should be a simple equation (seed in sterile medium + warmth + moisture = seedling) unlike with the paper towel method, where you need to transfer them to the medium. But this is just one opinion of a rookie grower.


Likes
45
Share


@AsNoriu
Follow
Day 48. They look very nice for such pitty UK summer. Days are in low 20, nights as low as 11.... constant rain ....
Happy with that strain a lot !!! Copes through everything without any issues. #1 lost one set of bottom branches , #2 and #3 lost two sets each. They needed good clearing.
Cleared all garden from fresh grow, aerated soil, put slug pellets and thats it.
Came late so leaves are droopy.
Will visit in two weeks to top up with PK boost.
Happy Growing !!!

Likes
17
Share


@CanadianFillmore
Follow
Week 5 begins for Mandarin dreams and Divine storm. All four ladies look happy and healthy with minor deficiency signs. All four are bulking up and frosty as my windows (it's -21 °c)!
The Mars-Hydro TSW2000 is performing awesome, very happy with it. Thank you Kaoritracy for hooking me up!
Thanks for stopping by growfessors 👽🌳💚


Likes
3
Share


@Pirangueiro
Follow
My first plant! I think the setup exceeded my expectations!! Just 60w led. 1 week to dry and know healing in glass pot! Im satisfied.
Likes
6
Share

@Jardineiro_Br
Follow
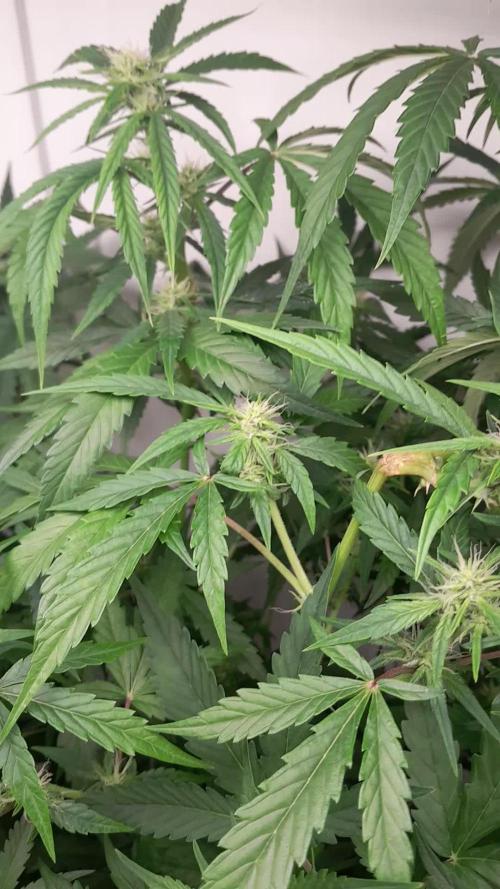
Agora sem aplicações de técnicas, apenas fertilizantes e água, para que a energia da planta seja usada nos botões, quero ver lindos botões, densos e resinados . Por enquanto estou bem satisfeito com o resultado, essas próximas 3 semanas , acredito, serão decisivas para definir um boa produção.
Likes
7
Share

@DogDoctorOfficial
Follow
LSD — Week 13 From Seed | 12/12 From Seed, No Veg
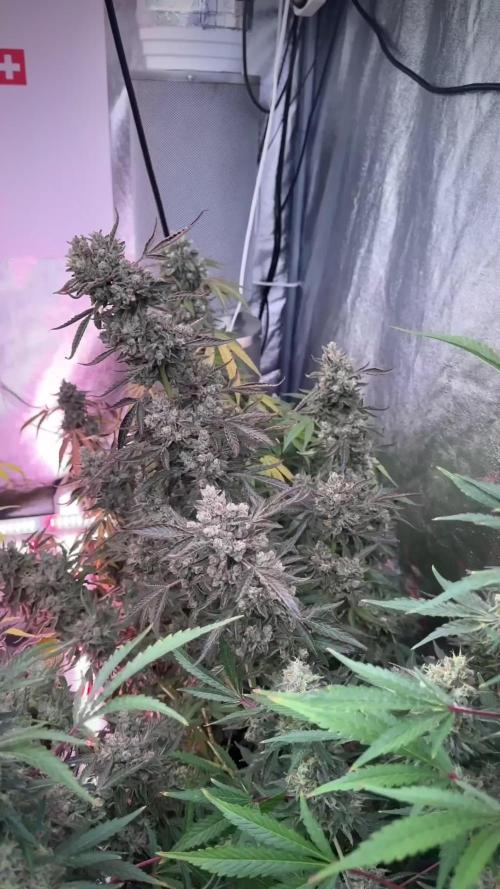
Week 13 from seed, and this room is fully alive.
What started as a true 12/12 from seed run—no veg, no transplant games, no extended shaping, just straight into flower from the beginning—has now matured into exactly what this style is meant to show: natural structure, honest expression, and plants allowed to speak for themselves.
From day one, these LSD were asked to do one thing only: grow with intent.
No long vegetative period.
No oversized training sessions.
No forced bush structure.
No attempt to make them become something they were never meant to be.
Just seed, root, stretch, stack, mature.
And that is exactly why this room looks the way it does now.
⸻
Why They Look Like This
One of the most beautiful things about 12/12 from seed is that it reveals plant character early and honestly.
Without a long vegetative period, these plants never had the time—or the pressure—to build wide, heavily manipulated frameworks. Instead, they followed a more natural vertical rhythm: apical dominance stayed intact, main tops remained leading, and side branching developed in support rather than competition.
That is why this room carries that classic spear-shaped structure:
strong central leaders, supporting side branches, elegant vertical stacking, and that clean “natural Christmas tree” silhouette from top to bottom.
For many growers, this shape reads visually “sativa.”
Not because the cultivar suddenly became sativa-dominant, but because the growth pattern expresses more like one under this method: taller posture, longer frame, more pronounced central cola, cleaner lateral support, and less squat horizontal bulk.
Genetically, that is not the full story.
Structurally, though?
That is exactly what they are showing.
And they are showing it beautifully.
⸻
The Room Is Alive
At this stage, the room has changed.
This is no longer a room pushing for biomass.
This is no longer a room chasing stretch.
This is no longer a room trying to build flowers.
This is now a room finishing them.
And there is a difference.
Everything still breathes.
Everything still drinks.
Everything still moves.
But the energy has shifted.
The room feels quieter now. Heavier. More deliberate.
The metabolism has slowed, but it has not stopped. The plants are still active, still processing, still ripening, still making decisions. They are simply no longer spending energy on building mass the way they were before.
Now the focus is density.
Oil.
Maturation.
Expression.
Completion.
And you can see it everywhere.
In the fading leaves.
In the shifting greens.
In the swelling calyx.
In the resin weight.
In the smell.
In the silence.
This room is not slowing down.
It is finishing.
⸻
Why We Are No Longer Feeding Nutrients
At this stage, we are no longer feeding for growth.
The heavy work is done.
The plant has already built the frame.
It has already stacked the flowers.
It has already done the bulk of nutrient-driven expansion.
Now the goal is not to keep pushing.
Now the goal is to let the plant finish clean.
That is why we have moved away from active nutrient feeding and into a much softer finish: water, balance, and enzymes.
Not because the plant needs nothing.
Because the plant needs less.
Late flower is not the moment to keep forcing nitrogen, forcing bulk, or trying to squeeze one more week of artificial push into a plant that is already trying to mature.
At this point, more food often does not mean more flower.
It usually means more delay.
So now we reduce input, reduce excess, reduce waste, and let the plant focus on what matters most:
ripening what it already built.
⸻
Why Enzymes Still Matter
This late, enzymes are not here to “feed the plant.”
They are here to support the system around it.
That matters.
Enzymes help break down dead root material, leftover organic residue, and unused matter in the medium into simpler compounds the microbial life can continue processing.
That keeps the rhizosphere cleaner.
More stable.
More oxygenated.
Less stagnant.
In simple terms: enzymes help the root zone age gracefully.
And in late flower, that matters more than force-feeding ever will.
Especially in a run like this, where the medium is still alive, still active, and still worth preserving after harvest.
Because the goal is not just to finish the plant well.
The goal is to finish the soil well too.
What remains after harvest still matters.
That living medium still has value.
That biology still has work to do.
That soil still has another life ahead of it.
So we are not just finishing flowers.
We are finishing the cycle properly.
⸻
Trichomes, Calyx, and What Maturity Actually Looks Like
This is the stage where people often mistake “more pistils” for “more time” or “fading leaves” for “finished.”
Neither one tells the full story on its own.
Late flower maturity is not judged by one signal.
It is judged by the conversation between all of them.
And right now, that conversation is getting very interesting.
The calyx are swelling.
The flowers are tightening.
The resin heads are becoming heavier.
The pistils are changing, receding, darkening, and curling back.
The leaves are beginning to fade with purpose.
That does not mean they are done.
It means they are transitioning.
This is the window where the plant stops looking like it is building flowers and starts looking like it is sealing them.
That is a very different phase.
Calyx swelling means the flower is maturing inward.
Pistil change means reproductive signaling is slowing.
Trichome development means chemistry is shifting.
Fade means mobile reserves are being reallocated.
None of these alone call harvest.
Together, they begin the conversation.
And that conversation is clearly underway now.
⸻
PPFD, Light, and the Final Adjustment
This late, the job of light changes too.
Earlier, high PPFD was there to drive growth, stacking, and metabolic demand.
Now that demand is lower.
So light intensity comes down with it.
Not dramatically.
Not suddenly.
Just intelligently.
As plants approach the end, reducing PPFD helps lower unnecessary stress, reduce excess transpiration, and let the plant focus on ripening instead of defending itself from intensity it no longer needs.
Late flower is not about maximum push.
It is about controlled finish.
And just like nutrients, light now becomes less about force and more about guidance.
⸻
What to Expect Next
From here, do not expect explosive growth.
That part is over.
Do not expect dramatic new stacking.
Do not expect sudden weight jumps.
Do not expect fresh white explosions everywhere.
What to expect now is subtler.
Denser flowers.
Heavier resin.
Slower drinking.
More fade.
More aroma.
Less urgency.
More definition.
The next stage is not louder.
It is deeper.
This is where the plant sharpens.
This is where the room gets quieter.
This is where harvest starts introducing itself before it arrives.
Whether this is the final update before chop or simply the one that stands right beside it, one thing is certain:
we are close now.
And they know it.
⸻
Final Thoughts
This room has been a pleasure to walk through.
To the team at Zamnesia for the genetics.
To Plagron for helping feed the cycle.
To GrowDiaries for the platform.
To the old heads who have been here since day one.
To the new eyes just arriving.
To the growers, the learners, the lovers, the skeptics, the silent ones watching, the ones who support loudly, and the ones who just happened to land here by accident—
thank you.
For the time.
For the energy.
For the presence.
To everyone watching this room evolve in real time:
thank you for walking it with us.
More soon.📡 DELETED @ 1K Please stay tuned.we never quit https://www.youtube.com/@TheDogDoctorOfficial NEW 🙏 Thank you for your patience and continued support.
FOR DISCOUNT CODES AND MORE JUST FOLLOW THE LINK https://website.beacons.ai/dogdoctorofficial
📲 Don’t forget to Subscribe and follow me on Instagram and YouTube @DogDoctorOfficial for exclusive content, real-time updates, and behind-the-scenes magic. We’ve got so much more coming, including transplanting and all the amazing techniques that go along with it. You won’t want to miss it.
GrowDiaries Journal: https://growdiaries.com/grower/dogdoctorofficial
Instagram: https://www.instagram.com/dogdoctorofficial/
YouTube: https://www.youtube.com/@dogdoctorofficial Deleted by Youtube - https://www.youtube.com/@TheDogDoctorOfficial NEW
Vimeo : https://vimeo.com/dogdoctorofficial Under construction stay tuned ⸻
Explore the Gear that Powers My Grow
If you’re curious about the tech I’m using, check out these links:
🔆 Lighting & Environmental Control
• Future of Grow — Advanced LED lighting technology
https://www.futureofgrow.com/
DISCOUNT CODE: DOG20
• Lumiflora — Under-canopy LED lighting
https://lumiflorade.com/
• TrollMaster — Environmental controllers and automation gear (past collaboration)
⸻
Genetics
• Zamnesia Seeds — Genetics used in this project
https://www.zamnesia.com/
⸻
🌱 Soil, Substrates, Boosters & Root Support
• Plagron — Substrates, bio mixes, and supportive products
https://plagron.com/en/
⸻
🎒 Storage, Curing & Preservation
• Grove Bags — Curing and storage solutions
https://grovebags.com/
⸻
📸 Photography Equipment & Tools
(Not sponsors, but part of my creative toolkit)
• Sony A6700
• Sony full-frame macro lens + few more
• Stacking photography workflow - learning
• iPhone (for behind-the-scenes shots)
We’ve got much more coming as we move through the grow cycles. Trust me, you won’t want to miss the next steps, let’s push the boundaries of indoor horticulture together!
As always, this is shared for educational purposes, aiming to spread understanding and appreciation for this plant. Let’s celebrate it responsibly and continue to learn and grow together.
With true love comes happiness. Always believe in yourself, and always do things expecting nothing and with an open heart. Be a giver, and the universe will give back in ways you could never imagine.
💚 Growers love to all 💚
📸 P.S. – The Eye Behind the Lens
All photos in this diary (for now — except for the ones showing the camera, which I took with an iPhone) are taken with a Sony A6700 paired with a Sony full-frame macro lens and a few more.
Photography is part of the story — it’s how we share the fine textures, the glow, and the quiet details that words can’t always capture.
I’ve also started experimenting with photo stacking — a technique where multiple images, each taken at a slightly different focus point, are layered together to create one perfectly sharp image from front to back.
It’s not digital enhancement or AI; it’s pure photography — a way to reveal the plant’s beauty in microscopic depth, from trichome to petal.
You’ll even see a few shots of "ghost me" capturing the shots — camera, lens, setup — because every grow deserves not just to be cultivated, but documented like art.
FOR DISCOUNT CODES AND MORE JUST FOLLOW THE LINK https://website.beacons.ai/dogdoctorofficial
NEW DISCORD - Official Server Invite Link : https://discord.gg/ksjAkA5T74


Likes
41
Share

@Tower84
Follow
🇩🇪 Cherry Limeade - Wochenkommentar
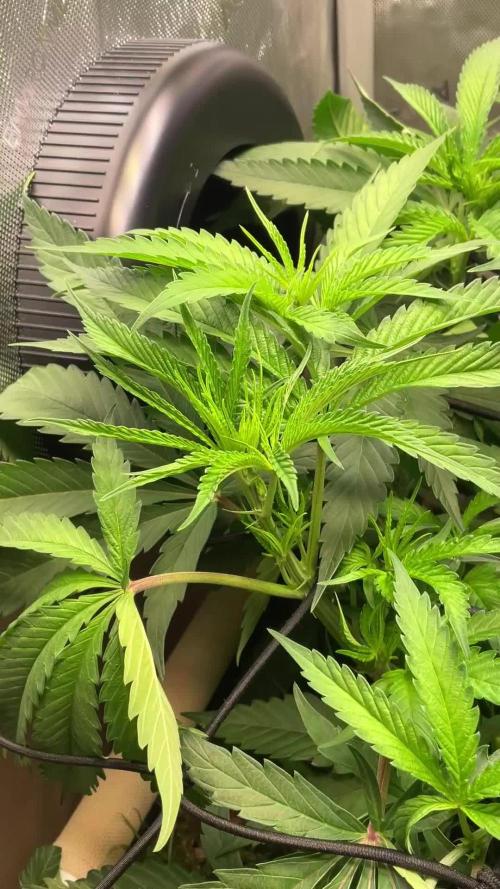
Die Cherry Limeade hat sich in ihrer ersten Woche nach der Umstellung auf 12/12 hervorragend entwickelt 🌱. Sie hat offenbar genau auf diese Bedingungen gewartet und ist förmlich explodiert 🚀. Mittlerweile füllt sie schon einen großen Teil meines 60er Zeltes aus und entwickelt eine richtig schöne, gleichmäßige Struktur 💚.
Auch diese Woche war ich beruflich wieder vier Tage unterwegs. Das Blumat-System hat während meiner Abwesenheit die Bodenfeuchtigkeit bei etwa 50 mbar stabil gehalten 💧. Der Pflanze scheinen diese Bedingungen ausgesprochen gut zu gefallen, denn trotz meiner Abwesenheit hat sie ordentlich an Größe und Masse zugelegt 🌿.
Nächste Woche bin ich wieder häufiger zu Hause und werde deshalb täglich die Triebe unter das SCROG-Netz flechten 🕸️. Im Moment ist die Pflanze durch das Training auf etwa 32 cm Höhe heruntergebunden. Der Stretch läuft bisher genau so, wie ich es mir vorgestellt habe, und ich vermute, dass er nächste Woche erst richtig loslegen wird 📈.
Ich bin aktuell wirklich sehr zufrieden mit der Entwicklung. Die Pflanze sieht rundum gesund aus und ich kann keinerlei Mängel erkennen 💚. Auch die Reaktion auf die Umstellung auf 12/12 gefällt mir ausgesprochen gut.
Seit heute habe ich den Luftbefeuchter aus dem Raum genommen und den VPD auf 1,1 kPa angehoben 💨. Gleichzeitig versuche ich jetzt, das Blumat-System langsam auf etwa 120 mbar einzustellen. Vor meiner Abwesenheit wollte ich allerdings bewusst nichts mehr am System verändern – ich wollte nicht kurz vor einer viertägigen Dienstreise an einem perfekt funktionierenden Setup herumschrauben 😅.
Gestern habe ich außerdem den Flower Komposttee von Almicanna angesetzt 🌸. Nach 24 Stunden Brauzeit habe ich noch etwas Melasse hinzugegeben und lasse ihn jetzt weitere 24 Stunden brauen 🫧. Morgen bekommt die Cherry Limeade dann ihre erste Portion Flower-Komposttee in dieser Phase 🌱.
Insgesamt könnte ich mit dem Start in die Blüte kaum zufriedener sein. Jetzt heißt es weiter flechten, den Stretch kontrollieren und die Pflanze ihr enormes Wachstumspotenzial ausspielen lassen 🚀.
📊 Parameter der letzten Woche:
💡 Licht: 750 PPFD / DLI 32 (12/12, Stufe 5, 40 cm Abstand)
🌡️ Temperatur: 27 °C
💧 Luftfeuchtigkeit: 72 %
📈 VPD: 1,0 kPa
🌿 CO₂: Ø 700 ppm
💦 Bodenfeuchtigkeit: 50 mbar
🇬🇧 GrowDiaries – Weekly Update
The Cherry Limeade has developed exceptionally well during her first week after switching to 12/12 🌱. She seems to have been waiting for exactly these conditions and has absolutely exploded in growth 🚀. She is already filling a large part of my 60 cm tent and is developing a really nice, even structure 💚.
Once again, I was away on a four-day business trip this week. During my absence, the Blumat system kept the soil moisture stable at around 50 mbar 💧. The plant obviously likes these conditions very much, because despite me being away, she put on a lot of growth and mass 🌿.
Next week I’ll be home much more often, so I’ll be able to tuck the shoots under the SCROG net every day 🕸️. At the moment, I have trained the plant down to around 32 cm in height. The stretch is progressing exactly as I hoped, and I suspect that it will really start taking off next week 📈.
I’m extremely happy with the development so far. The plant looks completely healthy and I can’t see any signs of deficiencies whatsoever 💚. Her response to the switch to 12/12 has been excellent.
As of today, I’ve removed the humidifier from the room and increased the VPD to 1.1 kPa 💨. At the same time, I’m now trying to gradually dial the Blumat system in to around 120 mbar. However, I deliberately didn’t change anything before last week’s trip—I didn’t want to mess with a perfectly functioning setup right before being away for four days 😅.
Yesterday I also started an Almicanna Flower Compost Tea 🌸. After 24 hours of brewing, I added some molasses and am now letting it brew for another 24 hours 🫧. The Cherry Limeade will get her first serving of Flower Compost Tea for this phase tomorrow 🌱.
Overall, I couldn’t be happier with the start of flowering. Now it’s all about keeping up with the daily tucking, managing the stretch, and letting this plant make the most of her incredible growth potential 🚀.
📊 Parameters from last week:
💡 Light: 750 PPFD / DLI 32 (12/12, Level 5, 40 cm distance)
🌡️ Temperature: 27 °C
💧 Humidity: 72%
📈 VPD: 1.0 kPa
🌿 CO₂: Avg. 700 ppm
💦 Soil moisture: 50 mbar

Likes
71
Share


@Herbz_Unkraut
Follow
22.12 • Cal/mag deficit looks solved, plants look healthy
23.12 • last watering was 1L / Pot right after repoting on 20.12 , right now soil feels moist
25.12 • added a bio CO2 reactor (4x 1L bottles with 800ml water, some mashed tomato and 100g sugar, 10g moist yeast)
25.12 • rotated one of the lights to maximize illumination
26.12 • watered all plants with 1L
26.12 • CO2 ppm went up from +-400 to +-600 i hope for some more as i increased room temperature to 26°C, (yeast should react more due to increased temp.)
27.12 • sunburn as the lights were under 30cm distance
27.12 • CO2 wasn't working when i arrived this evening, perhaps i used too much yeast, perhaps it was too cold, perhapy i need bigger bottles...either way: i removed 3/4 from the bottles and refilled water/sugar/tomato

Likes
2
Share


@cafer
Follow
The roots of my plants are growing incredibly, I will move on to the flowering period in the 3rd week.
Likes
54
Share


@TheWeedaltor
Follow
Tallest plants are yet 58 cm and start being lopsided, day 1 with flowering solution
Likes
31
Share


@Fruitgrower
Follow
So this strain was a wonder to grow, she grew fast and big, responded very well to topping (producing 4 tops, one of which broke) and producing a decent yield!
I forgot to weigh again the wet weight but will weigh all once it's dried.
Correct me if I'm wrong but it looks kinda big for an auto, I'm quite proud of this grow!
Will update next week with a dry weight and a smoke update. Happy growing motherpluckers 🌱👍😊
UPDATE
28.08
THIS IS SOME STRONG SHIT!
After one joint I feel incredibly stoned, makes me happy, hungry and sleepy.
It is so smooth to smoke has a beautiful orange aroma, can't wait to taste a cured bud in a few weeks.
Final weight (including the little test buds) was around 85 grams! Nearly double my last plant!
If anyone knows anything about bakery seed Co. Please let me know as it's impossible to find information on the Web and this was a free seed from grizzlys that came with my ggg pack.
Really happy!
Keep growing and push on.
🌱😊

Likes
30
Share


@MrGoonai
Follow
10/24/24 Short facts:
- Continued with LST
- Watered: 1 x 1.2L, 1 x 1L, 1 x 0.8L — 3L
- VPD @ 1.0 — raised by 0.1
- Light @ 70% ~580 to 720 PPFD
- Defoliation
- Nutrients increased and added: BioBizz Top-Max and Bio-Bloom
- No Root-Juice anymore
---------------------------------------------------------------------------------
I don’t know what happened, but my pictures are not very good this week. It’s probably time to buy a good camera, maybe a used one with a decent lens.
I defoliated the Lemon Cherry Cookies this week. I had to remove some leaves so that the branches and their tops could get direct light. But honestly, she looked pretty bad afterward. I really don’t like cutting off branches or leaves; it hurts me to see them like that. Sadly, I accidentally cut one of the better branches in half, which was really devastating.
On that occasion, I also did a bit more LST, but that was the only session this week. There probably won’t be much more LST to do in the upcoming weeks.
I increased the light intensity and also upped the nutrients.
The LCC (short for Lemon Cherry Cookies) is the smallest plant in the tent and has fewer branches than the others. She also doesn’t use much water. But it was incredible to see how fast she went into flower, it basically happened from one day to the next. Her buds are the biggest and prettiest in the tent.
Because she was the smallest plant, I put something under her pot on Day 28 to ensure she had the same distance to the light as the other two plants.