Likes
Comments
Share
March, 11th Tomorrow the autoflower CBD White Widow moves into another Tent Because all other Plants are Photoperiods, and moving into Floweringmode She will love it to have plenty of Space just for herself She has Fowers along the colas, and they are stacking up every Day Girl looks great March, 13th The CBD White Widow moved into another tent, where she has good Space for Flowering She just shares it with another Small Photoperiod Plant
Likes
92
Share
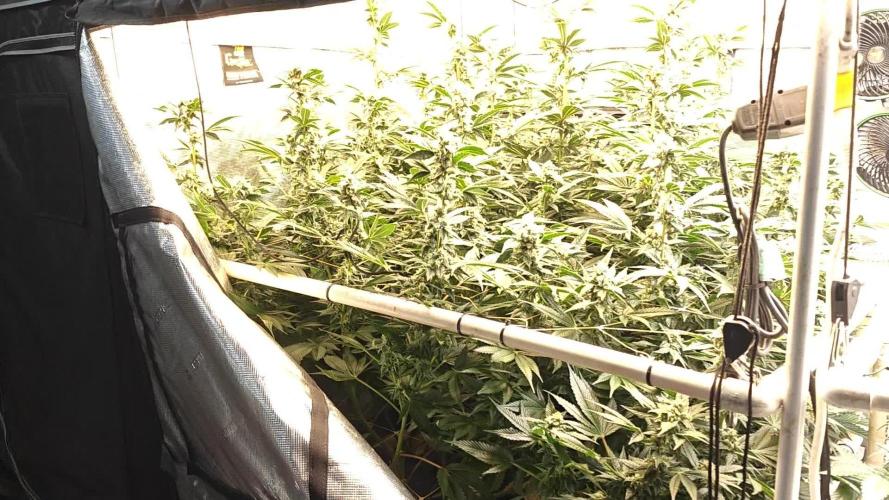
Week 9 - First Week of Flowering 🌸 The dark period has ended, and these ladies came back into the light fully energized and ready for action! It’s just the first week of flower, and they’re all praying, stretching, and absolutely thriving—filling up every inch of the tent. This grow space is officially packed from wall to wall, with each plant competing for its share of light and showing off some of the biggest, healthiest leaves I’ve seen yet! 🌱 A few strategic plucks here and there have kept airflow smooth and light penetration balanced. Those big leaves? They’re a sign of happy, healthy growth. Large leaves help the plant capture maximum light energy, essential during this stage, especially as they start focusing on developing those flowers. When plants grow huge, vibrant leaves like these, it means they’re well-nourished and content in their environment—a true testament to the well-balanced conditions we’ve got going in the tent! Flowering Parameters 🌡️ Room Environment: • Temperature: 26.7°C • Humidity: 63.3% • CO2: 960 ppm • VPD: 1.29 kPa (prime zone for flowering health!) Lighting: • Light Intensity: 835 PPFD (ideal for boosting flower growth) • Solution: pH 5.96, TDS 460 ppm, temp 21.1°C • Medium: Moisture: 100%, TDS: 520 ppm, Temp: 21.6°C Carbon Filter Installation & Smell Management 🌬️🌱 With the transition to flower, the scent profile is already starting to kick in—crazy for the first week, right? 🌸 To keep everything fresh and under wraps, I’ve set up a carbon filter system. Here’s how it’s working: I’ve connected the filter to my Aerofan, which pulls air directly from the tent. This air is cleaned by the filter and released into the main room, where it then passes through another filter before exiting my space. This dual-filter setup means no scent escapes into the wild, keeping things stealthy and the grow room a peaceful, scent-contained environment. Perfect for anyone concerned about keeping their home free from that telltale aroma! 🕶️🌬️ Enhanced Lighting with Emerson Effect 🌞 This week, I’ve introduced an extra 15 minutes of red light at the beginning and end of each light cycle. Why? Well, this red boost taps into the Emerson effect, enhancing photosynthesis efficiency, especially during the flowering stage. By stimulating a little extra wake-up and wind-down light, we’re mimicking the natural sunrise and sunset experience for these plants, which can help reduce flowering time. Not only does it encourage smoother transitions into day and night, but in theory, it’ll help these ladies finish a bit faster, while giving them a little nudge to build more substantial, quality flowers. 🌇 Nutrient Adjustments 🌱 Now that we’re in flower, I’ve swapped out the Start Booster for P-Boost and TopBooster to specifically support flowering needs. Here’s why: • P-Boost brings in additional phosphorus, vital for energy transfer and cell division as the plant channels more resources into budding sites. • TopBooster supports the flowering phase by improving flower quality and density, helping to build those big, aromatic buds we’re after. These changes bring the nutrient mix in line with what’s most beneficial at this stage. All this precise dialing in is easy to manage thanks to the TrolMaster system. From pH to nutrient scheduling, the TrolMaster ecosystem and ThinkGrow LEDs have been the ultimate teammates in this grow journey, giving me real-time data, fine control, and peace of mind. 💯 (Not introducing UV light just yet, but stay tuned as that’s coming soon for an added boost!) Looking Forward 🌟 Next week, we’ll be upping the reds, giving us an even greater chance of activating those flowering signals for a smoother, faster transition through the cycle. I’ll keep tweaking and fine-tuning every parameter to make sure these ladies get exactly what they need to thrive. Big thanks to the TrolMaster system for keeping everything in balance and optimized, along with the supportive Grow Fam following this journey! Your enthusiasm, advice, and support are a huge part of this grow’s success. Keep following for more updates, and stay tuned for what’s next! 🌿✨ P.S. Deep Dive: TrolMaster’s MBS-S8 CO₂ Sensor & Smoke Detector 🚨 The MBS-S8 CO₂ Sensor from TrolMaster is a powerhouse for growers, especially when it comes to optimizing plant growth and efficiency in a controlled environment. This sensor continuously monitors CO₂ levels and integrates directly with the TrolMaster ecosystem, giving you real-time data on CO₂ concentration. Ideal levels of CO₂ can significantly boost growth and yield during certain stages, so understanding and managing CO₂ is key. With the MBS-S8, I can control CO₂ levels precisely, keeping them within the optimal range for photosynthesis. This sensor is a game-changer because it adjusts CO₂ delivery automatically, giving plants exactly what they need without any extra monitoring from me. Meanwhile, TrolMaster’s Smoke Detector is an essential safety device, especially in spaces with electrical equipment, lights, and heat-generating components. This detector can be set up to alert me instantly via the TrolMaster app if any smoke is detected, allowing me to respond immediately to any potential issues. Fires and smoke are rare in controlled grow setups but having this safety measure provides peace of mind and lets me focus on the plants without constant worry. It’s an incredible tool for any grower prioritizing safety and proactive monitoring. Discount Codes so you can save big on your next check out 💚💚💚 Kannabia - DOGDOCTOR 30% off SeedsmanSeeds - DOGDOCTOR 10% off CannaKan- DOGDOCTOR 15% off terpyz.eu - DOCTOR 15% off The Neutralizer - PORKIT5-DOG 15% off As always thank you all for stopping by, for the love and for it all , this journey of mine wold just not be the same without you guys, the love and support is very much appreciated and i fell honored and so joyful with you all in my life 🙏
 With true love comes happiness 💚🙏 Always believe in your self and always do things expecting nothing and with an open heart , be a giver and the universe will give back to you in ways you could not even imagine so 💚 Friendly reminder all you see here is pure research and for educational purposes only Growers Love to you all 💚💚💚
Likes
65
Share
@Visions
Follow
10/21/19 - I believe this week will be the final week of nutrients then straight to a one day terpinator/molasses feed, then molasses, and then straight oh water until harvest. Her buds even on the 1 gal are looking nice and frosty. This strain definitely looks like she could yield more if she was mainlined.. if the end product ends up being worth the grow I seriously might do it. 10/22/19 - Hairs are almost 50% dark and trichomes are almost all cloudy. Very few clear left with a slight amber amount. Next feed with be the start if the flush. 10/23/19 - 3 gal is almost ripe enough. Going to flush until harvest for her. 1 gal isnt as fat but slightly frostier. Going to give her another boost then flush as well. Feeding should be tomorrow. Should have both phantoms harvested by next week. 10/24/19 - Give or take the 2 phantom OG's are 8 weeks old today or 56 days into flowering. They have less than 2 weeks to go IF that. Flushing from here on out while they finish fattening and ripening. She smells like sour diesel, spice, and berry. Very strong terp profile and fluffy looking flowers. If I decide to grow again I'll definitely use hid grow lights in flowering and hst them. Will yield so much more due to my slip ups of being high lol.... I've already noticed the difference on how HST affects here. It affects her significantly in a good way. For instance I slightly broke a main stem near the main stalk. Left it to heal and in flowering the buds and growth are obviously much bigger than the one stem that wasnt affected. I will also make sure her vegetative state is in perfect sync before I flower here. I sort of rushed this grow to get some bud in my stash. 1st growers eagerness gets the best so that hurt my yields when I could have just went to HST from the start. Live and learn 👌 UPDATE* She was flushed with molasses and 1 tsp of terpinator. Next feed will be bush doctor and ph water and maybe molasses again or the chop. 👍 10/25/19- we are past the 8 week marker. By next Thursday I believe I will chop them. If not next weekend. Will dry some in the tent. Slow dry to preserve terps. Will do a regular 7 day dry in a closed cardboard box with ventilation as well. Hoping for 2 oz from these 2 phantoms 👌 10/26/19 - Girls a losing color in their fans. SO CLOSE to harvest. Uploaded the last video before harvest enjoy 👽 10/27/19 - No updates today! Girls are ripening up.
Likes
15
Share
CHOP CHOP Okay so the LST worked, not great but it worked basically. The head tops from Olga and the one on the back where showing 30-40% Amber already so I decided to cut them already. I’ve read about the 2 days of darkness so I decided to give that a try. After 48hrs of darkness I chopped down the selected tops! Because it where head tops they are hanged in the closet in a dark room until the branches snaps. After 5 days the buds where dry and I decide to cure them. I’m curing them with the Boveda 65% and its really easy. Just burp the pot once a day or a while and check the hygrometer. The first day the % was 75max and 3rd already 70%. The rest is still going until I see enough amber spots, this cut will be done immediately after the day so I can see differences. I’m happy with the buds and the first cut is 23g Dry weight ✌️🏼❤️💛💚
Likes
5
Share
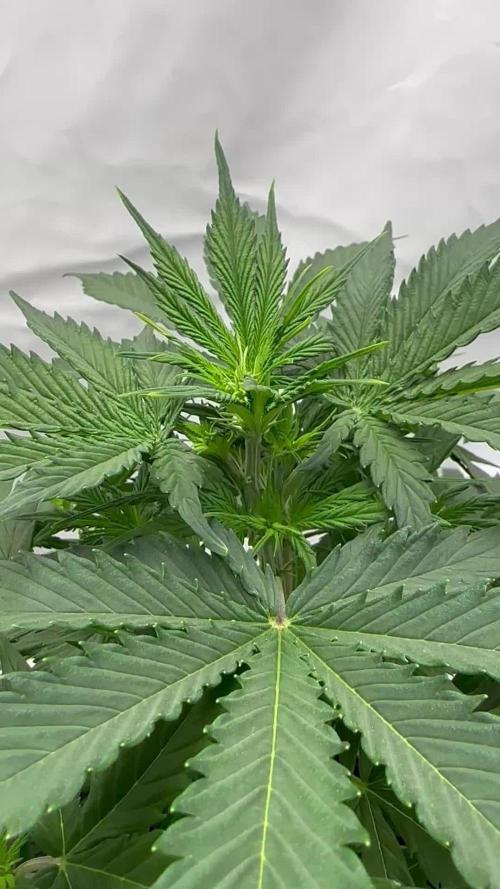
🌱 Ghost Train Haze — Week 4 Diary Photoperiod: 12/12 from seed Quick Recap (For New Joiners) This run follows a 12/12 from seed protocol, meaning plants are exposed to flowering photoperiod from day one. This approach typically results in: • Slower visible growth compared to veg-then-flower cycles • Earlier structural maturity • Compact, symmetrical architecture • A very honest expression of genetics Environmental conditions (temperature, relative humidity, airflow, and lighting intensity) remain identical to all other diaries in this project to allow clean comparisons across cultivars. ⸻ Week 4 Overview Both Ghost Train Haze plants are performing phenomenally. They are progressing steadily toward their 7th node, showing: • Excellent symmetry • Balanced internodal spacing • Strong apical direction • Calm, unstressed posture While growth under 12/12 is notoriously slower, this week reinforces an important lesson: slow does not mean stagnant. These plants are developing with intention and precision. ⸻ Leaf Morphology & Color One of the most striking features this week is the leaf quality: • Large, round, well-formed leaves • High surface detail and venation clarity • A lush, healthy green tone without excess darkness • No signs of deficiency, toxicity, or stress This visual expression reflects proper nutrient availability, stable root-zone conditions, and strong genetics working in harmony. ⸻ Structure & Symmetry Both plants are: • Highly symmetrical • Evenly stacked • Structurally clean and predictable This level of symmetry at Week 4 is a strong indicator of: • Stable hormonal balance • Correct light intensity for plant size • No need for corrective training at this stage ⸻ Containers & Growth Rate Observation These Ghost Train Haze plants are currently growing in plastic pots. A preliminary observation: • Growth appears slightly slower compared to plants in plastic grow bags used elsewhere in the run ⚠️ Important note: This is too early to draw conclusions. Container material, gas exchange, moisture dynamics, and root behavior need more time to show meaningful differences. This observation is logged for long-term comparison, not judgment. ⸻ Nutrition Strategy (Why They Look Like This) The plants are receiving the same locked nutritional protocol used across the project: • Balanced mineral nutrition • Root support additives • Enzymatic activity support • Controlled EC and pH Why this matters: This nutrition strategy prioritizes: • Root efficiency over forced top growth • Enzyme-driven nutrient availability • Stable uptake under 12/12 conditions The result is exactly what we see: Healthy leaves, calm growth, detailed structure, and no visual imbalance. ⸻ Studio Session Both plants were taken to the studio for a dedicated photo shoot, allowing: • Accurate visual documentation • Clear comparison week-to-week • Educational transparency for the community These visuals are part of the long-term archival value of the project. ⸻ What to Expect (and Not Expect) What to expect next: • Continued slow but consistent node development • Gradual increase in structural density • Early signs of transition in coming weeks What not to expect: • Explosive vertical growth • Stretch comparable to veg-trained plants • Immediate flower formation This is normal and correct for 12/12 from seed. ⸻ Community Note Due to YouTube community guidelines, our educational channel was taken down. While we firmly believe the content was purely educational, we respect YouTube’s decision and are actively exploring alternative platforms to continue sharing this work. 📡 Please stay tuned. 🙏 Thank you for your patience and continued support. FOR DISCOUNT CODES AND MORE JUST FOLLOW THE LINK https://website.beacons.ai/dogdoctorofficial 📲 Don’t forget to Subscribe and follow me on Instagram and YouTube @DogDoctorOfficial for exclusive content, real-time updates, and behind-the-scenes magic. We’ve got so much more coming, including transplanting and all the amazing techniques that go along with it. You won’t want to miss it. GrowDiaries Journal: https://growdiaries.com/grower/dogdoctorofficial Instagram: https://www.instagram.com/dogdoctorofficial/ YouTube: https://www.youtube.com/@dogdoctorofficial Deleted by Youtube Vimeo : https://vimeo.com/dogdoctorofficial Under construction stay tuned ⸻ Explore the Gear that Powers My Grow If you’re curious about the tech I’m using, check out these links: 🔆 Lighting & Environmental Control • Future of Grow — Advanced LED lighting technology https://www.futureofgrow.com/ DISCOUNT CODE: DOG20 • Lumiflora — Under-canopy LED lighting https://lumiflorade.com/ • TrollMaster — Environmental controllers and automation gear (past collaboration) ⸻ Genetics • Zamnesia Seeds — Genetics used in this project https://www.zamnesia.com/ ⸻ 🌱 Soil, Substrates, Boosters & Root Support • Plagron — Substrates, bio mixes, and supportive products https://plagron.com/en/ ⸻ 🎒 Storage, Curing & Preservation • Grove Bags — Curing and storage solutions https://grovebags.com/ ⸻ 📸 Photography Equipment & Tools (Not sponsors, but part of my creative toolkit) • Sony A6700 • Sony full-frame macro lens + few more • Stacking photography workflow - learning • iPhone (for behind-the-scenes shots) We’ve got much more coming as we move through the grow cycles. Trust me, you won’t want to miss the next steps, let’s push the boundaries of indoor horticulture together! As always, this is shared for educational purposes, aiming to spread understanding and appreciation for this plant. Let’s celebrate it responsibly and continue to learn and grow together. With true love comes happiness. Always believe in yourself, and always do things expecting nothing and with an open heart. Be a giver, and the universe will give back in ways you could never imagine. 💚 Growers love to all 💚 📸 P.S. – The Eye Behind the Lens All photos in this diary (for now — except for the ones showing the camera, which I took with an iPhone) are taken with a Sony A6700 paired with a Sony full-frame macro lens and a few more. Photography is part of the story — it’s how we share the fine textures, the glow, and the quiet details that words can’t always capture. I’ve also started experimenting with photo stacking — a technique where multiple images, each taken at a slightly different focus point, are layered together to create one perfectly sharp image from front to back. It’s not digital enhancement or AI; it’s pure photography — a way to reveal the plant’s beauty in microscopic depth, from trichome to petal. You’ll even see a few shots of "ghost me" capturing the shots — camera, lens, setup — because every grow deserves not just to be cultivated, but documented like art. FOR DISCOUNT CODES AND MORE JUST FOLLOW THE LINK https://website.beacons.ai/dogdoctorofficial NEW DISCORD - Official Server Invite Link : https://discord.gg/ksjAkA5T74
Processing
Likes
6
Share
@Moss420
Follow
Got a new light this week, it's basically a HLG 260 R-Spec except locally manufactured using the same Samsung LEDs. Big Mumma got her 60x60cm tent today and will go in there under one Viparspectra 300W blurple (130w from the wall). I trimmed her, super cropped her main stem and added a scrog net in preparation of flowering her in the next couple of days. Because my other plants were getting up past 75cm after 7 days of flower (100cm is my absolute max) , I decided to supercrop the canopy back down to about 60-65cm - it was pretty scary and I definitely broke the outer stem on some of them. Also gave them a good trim. Fortunately most bounced back strong the next day which are the most up-to-date photos you see (17/4/20).
Likes
4
Share
@SamDo
Follow
Hello growers, Welcome back for vegetative week 14 of the Pineapple Upside Down from Humboldt. This week was clearly a difficult one. The plant is still growing, but something was off. The overall development slowed down, and the lack of vigor became more noticeable compared to previous weeks. After checking all the usual parameters, the issue finally became clear. The reservoir pH was perfectly stable, sitting in the correct range around 5.7–5.9. However, the real problem was happening in the tray. The nutrient solution was sitting there for too long, and the pH was drifting significantly, reaching around 6.8. This caused the coco substrate to buffer at the wrong pH level, leading to a partial nutrient lockout. Since the plant wasn’t drinking enough, the solution had time to degrade and shift, which is one of the limitations of the Autopot system when the plant is not actively feeding. To correct the situation, I decided to fully reset the system. A complete flush was performed using FlashClean from Terra Aquatica, with a very low EC and a pH adjusted to around 5.5. The goal was to clean the substrate and remove any accumulated imbalance. After the flush, the system was left to drain and stabilize over the weekend. I then restarted feeding manually with a much more controlled approach. Instead of letting the tray stay filled, I used small amounts of nutrient solution at pH 5.7 and EC 1.7, allowing the coco to absorb it before removing any remaining liquid to avoid stagnation. The objective is to progressively bring the substrate back into the correct pH range and restore proper nutrient uptake. This method will be maintained throughout the week to observe how the plant reacts. If the plant shows a strong recovery and regains vigor, the Autopot system will be reactivated. Otherwise, manual control will remain in place. I also performed a light defoliation and cleanup, removing lower growth and excess foliage to improve airflow and light penetration. At this stage, the situation is under control, but the outcome will depend on how the plant responds over the next few days. The next update will be important to confirm whether this recovery strategy was effective. Alright growers, take care and see you next week.
Likes
21
Share
@NG420
Follow
Fattys are growing and seem to be thirstier.Used foliar spray to help the leaves and also started tucking. When the plant was topped pistils were seen for first time.
Likes
20
Share
- Plusieurs partenaires présentent des tiges violettes, sans pour autant affecté la floraison. Je suspects les différences entre les températures diurnes et nocturne ou ph du sol a ajuster. Période de Stretching terminé deux Phénotype se montrent ( photos ci-dessus) - aération+extraction haut régime odeur de bonbon citron 👃🤤🤤 - Petit bonus GG4 de DAWG STAR souche exceptionnel cassage de cerveau 🧠 intoxication fumeurs novice = Bad Trip assuré. -🌍🌎🌏 Frère cultivateurs clique et suivez venez partager vos connaissances. #LoveUnityAndPeace🙏🤲
Likes
19
Share
@Dunk_Junk
Follow
Been flushing in anticipation of cutting down. Day 100 (yes I'm late) chopped the two main colas. They are very dense and heavy!!!!! Just a few more days for the rest of the plant.
Likes
2
Share
Day 49 -well what do you know. this one is an photoperiod plant so now i need to flip to flower. -hoping 12/12 doesn't ruin the autos i've given cal-mag in the feed water and to the recharge feeding.
Likes
4
Share
11/10/2025 18:45 Everything good this week,full of Sunny days and temperature raised to 22°C during days and 12 °C during nights Plants are enjoying this climate even with cold nights,they will not be so big at the end but the quality Is on point #1 Coco Milk 84 days from seed This one has small buds pretty dense but glistering in resin ,the top nugs are greasy at the touch leaving the fingers sticky and smelly Didn't check the trichomes but they look like there Is some amber,the smell is super strong telling the finish Is near maybe earlier than i expected Brought a friend with me who has grown much more plants than me,also he tells the smell and the look are amazing,the flavour is fresh,deep,complex to describe I say it's like a good shampoo flavour when you enter in a barber shop not so pungent but creamy like a coconut milk exactly as the name says,AWESOME!!! There are some spider nets i think there will be some problems if this situation keeps going like this #2 and #3 Coco fresh 72 days from seed This plant keeps going fast even with cold climate,the buds are really fattening a lot and so dense Resin production Is not on point by now but It has to consider the late start of flowering,this plant Is blooming from only 30 days The smell Is now coming out,not strong but good fresh and flowery Leaves are starting to show some problems and the under sides are all purple with only a part of some leaves turning to a blue/deep purple colour Sorry for the bad quality of the last video,battery was running low and the final result Is pure lag😂 Next time i will bring an identifier and check,obviously Coco fresh will be the last one standing,if this keeps bumping maybe will end her life in november
Likes
18
Share
Привет друзья. Моей растихе сегодня 34 дня. Начал применять LST технику на 19 дне и продалжаю применять её через день, а 18 августа добавил ДЕФОЛИЗАЦИЮ С 20.08 ДЕФОЛИЗАЦИЮ делаю каждые 3,4 дня С 20.08 LST технику делаю каждые 3.4 дня На сегодняшний день влажность 63% Растение растёт хорошо. генетика радует. Всем мира и добра!
Likes
4
Share
The bud growth with the administration of URB is well evident. June 27, fungus leaves defoliated by hand.
Likes
11
Share
@Bncgrower
Follow
Another week almost finished, we are on the final phase and tomorrow I will start watering it only with water, to harvest this little girl later.. See you next week.. 🌱🌱
Likes
5
Share
@pzwags420
Follow
The start of week 5 is going well. Blueberry is smelling nice and my seedlings should be showing preflowers soon.
Likes
14
Share
@Gingobeaz
Follow
Und Ende! 75 Tage nach Einsetzen in die Erde ich die Banana Purple Punch fertig. Die Terpene riechen sehr lecker. Wahnsinnig viel Ertrag kann ich nicht erwarten, um im Legalen Rahmen zu bleiben wirds trotzdem etwas zu viel sein. Insgesamt ein sehr schöner Strain den ich definitiv wieder anbauen würde! Auch die Greenhouse Feeding Bio line hat mich absolut überzeugt. Den nächsten Indoor grow werde ich allerdings auf Kokoserde mit Athena Pro line starten. Seid gespannt 🏼 ______________________________________ And the end! 75 days after planting in the ground, the Banana Purple Punch is ready. The terpenes smell very delicious. I can't expect an insanely high yield, but it will still be a bit too much to stay within the legal limits. All in all, a very nice strain that I would definitely grow again! The Greenhouse Feeding Bio line has also absolutely convinced me. However, I will start my next indoor grow on coco soil with Athena Pro line. Stay tuned 🏼 🍌💜🥊
Likes
Comments
Share
Vamos familia, actualizamos la primera semana de floración de estas Frosty tooth de Seedstockers, salieron las 5 de 5, 100% ratio éxito. Aplicamos varios productos de Agrobeta, que son increíbles para aportar una buena alimentación a las plantas. Temperatura y humedad dentro de los rangos correctos dentro de la etapa de crecimiento. La tierra utilizada es al mix top crop, por cambiar. De 5 ejemplares seleccioné los 3 mejores para completar el indoor y trasplanté directamente a macetas de 7 litros, también cambien el fotoperiodo a 12/12 y aplique una poda de bajos, se ven bien sanas las plantas, tienen un buen color y progresan a muy buen ritmo por el momento, las plantas ya marcaron preflores. Agrobeta: https://www.agrobeta.com/agrobetatiendaonline/36-abonos-canamo Hasta aquí todo, Buenos humos 💨💨💨.
Likes
6
Share
Muy buenas amig@s!! Lleva 8 dias con el fotoperiodo a 12/12 horas de luz, en breve enpezaran a verse los primeros pelitos :)