


Likes
Comments
Share


@pkrwoodgravenugs
Follow
Lots of growth all around, black domina still seems a little lackluster like she's always tired,Mango,overflow are kickn ass.... Don't think I'll save any BD for momma's definitely keeping couple of the mango one is showing deformaty like a poly..along with strawberry guava,overflow so far love how they grow


Likes
90
Share


@AsNoriu
Follow
Day 127. Chop day !!!!
Zkittalicious #6 is my first plant without any airy or small bud !!!! Plus he will be like others in 100g range ...
#2 should beat all single plant records ;)))
Happy Growing !!!

Likes
17
Share


@Kitties_and_Colas
Follow
Her color is looking better (my camera makes the plant look a little more lime green than it actually is) but with the amount of N going in there she should be much darker imo...we decided to go ahead and flower her anyway..we go thru and remove any large fan leaves, small/lower growth beforehand ....she has been receiving bloom nutrients for almost 2 weeks by this point and we have a spot already cleared for her 😻
Likes
6
Share


@Staffedition
Follow
Привет друзья.
Наше знакомства продолжается с новым сортом автоцветущих растений от Smail_Seeds сорт TROPICANNA POISONZKITTLEZ XL AUTO F1 reg.
Сегодня растению 58 дней.
Растение очень хорошо развивается, ни каких сбоев в генетике не наблюдается.
Шишки наливаются😀
Сорт выводим сами.
Смотри мой профиль, у нас всегда есть что то интересное.
Не забудь поставить лайк❤️, если понравилась как прошла неделя
И читайте наш TELEGRAM: https://t.me/smail_seeds
#Smail_Seeds 😀
Likes
38
Share


@Silverback_Guerilla
Follow
8/10:
Seeing great growth now..lots of branching. I actually fed them yesterday, but didn't update...several have popped some pistils and pretty much the rest are about to, and I'm out of bat guano, so I went ahead and gave them Open Sesame so they'd have more P available over the next several days.
8/11:
I rearranged the garden a little. Moved all four #10's to the right side, the #4's are mostly in the middle...very branchy..the others, mostly to the left are the #2's and maybe a #3.
The big plant on the lower left is an auto, as is the runt, and the plant at lower right. The "fern-looking" plant is actually a Jacaranda Tree (blue fern tree)...it's about to get kicked out...
8/12:
I did a little training on some of the bushier #4's today. I don't have much space to work with, but I was able to do a little to encourage a race for apex dominance.
There were enough pistils on them that I decided to switch the week to "Flowering."
8/13:
I fed them today with ONE and added Open Sesame, Silica, Signal, and Sweet & Sticky.
I sprayed them all with Axiom (Harpin proteins) and Boom Boom Spray right at dark.
8/14:
BAM! They are poppin pistils left and right now...lotsa lovely little cotton tops.👍
8/15:
Day 15 since the flip to 12/12..good progress. The #2's and #10's are stacking up and stretching pretty well and the #4's just keep bushing up.

Likes
8
Share


@GhostByte
Follow
24/3 Harvested as soon as i saw a few amber thrichs here and there. I dont like too much cbn.
I learned i need to defoliate more next run, the bottom buds seem kind off airy because of lack of light penetration. I used to grow with stronger HPS lights before and now getting into the LED game. A little switch for me but ill get the hang of it.
I dont have a hanging scale, ill put the dry weight here on my next post in a couple weeks.
1/4 shes dry and started to trim. Gotta clean the scissors every bud 😄 onto trim jail and curing. Will test a popcorn bud tonight
2/4 everything is trimmed and in grove bags. Froze the trim overnight and the popcorn buds and made dry sift hash this morning.

Likes
53
Share


@Mz876
Follow
The week before I topped this baby’s and I’ve added some LST clips . Hasn’t started showing signs of preflower yet. What’s the longests it’s taken your autos to flower ? Just curious. Be back next week with another update . Happy Growing 🌱

Likes
1
Share

@Enochian
Follow
7.8.26
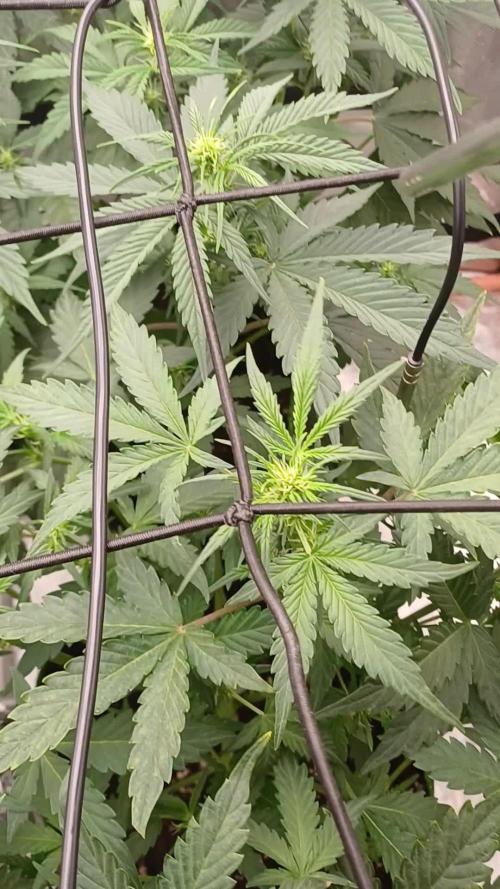
These ladies have grown beyond my expectations. Not sure if it is genetics or the dialled in approach to VPD, perhaps both. My other grows have produced smaller plants in the past as I have never had to move light up higher than normal but these girls are flying up. I am curious as to how tall they will get without using a scrog net. I am pretty sure I can accommodate them till harvest but I have installed a net just in case. Smell much stronger than past grows at this stage too.
I started these from seed while I finished a photoperiod grow so they spent first week or so on 12/12 light schedule. After harvest I ramped light up to 20/4. In doing this I may have misjudged how old they are. Diary says 5 weeks but they look more like 7 weeks to me. No worries though, as they seem to be thriving. Aiming for a VPD of 1.2 to 1.3 for coming weeks. PPFD at around 650 to 700 across canopy. Had to defoliate large leaves and tried a lollipop for first time to even out humidity and temp. Lots occurring in a small space. Having checked the info on OSS website Melon Mosh is a fast cycle of 60 to 65 days which would account for quick growth.

Likes
49
Share


@masterofsmeagol
Follow
5/10 Got up super early for wife's appointment at 7 came home and transplanted 4 of the purple punches. Transplants went good. Soil was too dry and a couple fell right in the hole but I was messing around showing my dad. It just got dropped in the hole a little harder lol. The other that happened to is fine though. Definitely make sure your soil is moist enough before transplanting. My transplanting technique for 3 gallon is to put soil on bottom. Set cup in at appropriate distance then replace cup with plant with soil filled cup and fill around it. Leaves the perfect hole. Then you just snip the cups twice on each side, peel it down and fold the cup down and cradle the bottom and in the hole it goes! Holes have mykoscand a little like water. I water a little after transplant. I misted soil whole mixing it up.
5/11 Dad left the windows open last night "because the soil smell was bothering Lynda." I couldn't ficking believe it. They were all fine when I got back but still. Everything is transplanted into 3 gallon containers bit that 1 purple punch that is a little bit dwarfed. I looked at the bottom of the cup and drainage wasn't as good. Must've been the last cup and the jail didn't go all the way through in a couple places. I increased the drainage on that little dwarf and I'll transplant it when I get time. We are going to have some good weather coming up. I need to get my cage moved, my bags sanitized and get on a good watering routine.
UPDATE: Went back over at four and everything's dry as fuck but the leaves are uo and every one of them looks happy so I'm holding off watering. I'll start with a quart probably tomorrow. Also cleaned out tge cage and secured the handles to move it. Only thing left is cleaning and sanitizing. These girls have a south facing window and they LOVE it. It was 80 today. I hope we have an early season.
5/12 Transplanted the last purple punch today. I could easily tell the problem was drainage. It was the last cup I had stacked when I drove the nail threw so it didn't pierce all the way the the other slips and tac holes apparently weren't enough. Used mykos and same soil mixture. Soil was extremely dry. I lifted a pot with dry soil and these were heavier. Commercial buddy said to start with a quart a pliant and see how it goes but I kind pussed out and only gave them 24fl 0z a plant. Half the quart. I asked if I should water more and he said to just wait and see how they like this water and up it to a quart next time maybe quart and a half. Im just leery of overwatering. When i watered SOME of them the water literally just sat there and took forever to absorb. Plants werent wilting though. Soon theyll be going outside during the day and in mdoors at night.
UPDATE: Went back over at two and everything looks AMAZING. Healthiest looking plants I've grown. Leaves all pointed up. I'm taking my commercial dudes advice and hoping the water next watering. For now, they're doing amazing.
5/13 Everything is doing greatcso far. Gotta figure out when to start nutes. Considering adding silica but don't want to raise ph to much. I'll consult with others but my the soil blend I'm using is full of nutes.
5/14 Rushed morning and I wanted to water bit the plants looked great still. Sticking my hands deeper I can feel a little moisture deeper down or in the drain holes so I decided to give the blueberry cheese and the 10th planet a "touch of kindness" which was a small circle of water from a small watering can around the outside edge of whete the rootball should lid be. I'm working on getting a watering g schedule down.
UPDATE: Went back over at five and everything was looking good with leaves praying. Maybe my half measure helped. Doubtful but still. Tomorrow I plan to water. Since the soil has tons of nites ill probably hold off a little while longer before starting the nutrient schedule. I want to make sure I've got the watering down first. One thing at a time.
5/15 The 10th planet and Blueberry Cheesecgot their first REAL watering since transplant. Still being cautious I watered 28fl Oz a plant. I phed the water with an indicator solution and ph down. I gave the purple punches a "cup of kindness" which was a circle of water around the transplant hole. Can't waif to get a watering schedule down. I wanted to start nutes but my soil is full of them and i believe it's too early. I didn't see ANY run off from this watering. I think that's good as I'm not looking to wash away the nutes in the expensive soil I use. I need to start HST as well but I'm doing things proper and "one at a time". That way if I run into a problem I'll know what I did and how to rectify it. At least I hope.
UPDATE: Went back over at 3 leary that I may have "overwatered" but the plants ALL looked AMAZING and had shot up like an inch! Looking into hst and will probable fim a few. Top a few and leave one to grow naturally. Can't wait to see how these girls do outside.
5/16 Wow. Just wow. Plants are doing phenomenal! Since the watering went really well I watered the purple punch bit I only used about 16fl Oz as the plants were a little smaller than the others. I'll up it to a quart next time like I did with the others. I want to USE the nutes in my soil so im not washing them all away by watering to run off. I topped 2 10th planet's and FIMed one of them. I want to see how the respond then I'll begin training the others. Off to a Great Start!
5/17 Glad I held off watering. It's raining today. Just showers. We haven't gotten any of that extreme wind we usually do. I have the plants supported but I still worry. Definitely more than I should. Plants are still doing good and acclikatimg to their new homes.


Processing
Likes
12
Share


@w33dhawk
Follow
Diese Woche war eine Qual es sind 2 Äste abgebrochen beim ein weben Sowas von scheisse! ich und meine wurst finger aber sonnst bin ich zufrieden mit der Sache läuft........


Likes
9
Share


@Wicked_Stix
Follow
This grape is a big frosty beast. I think she has the potential to put off an easy pound if she bulks up the way I think she will. I spread the plants out a little this week so they get better light and air flow. Other than that I haven't done anything besides keep the reservoir full. Still pumping nutrients 1 minute on 20 minutes off. They are getting .5 tsp maxibloom per gallon. Not going to run any boosters this round. They dont look like they want or need it.
Likes
170
Share


@Master_weeda
Follow
Bonjour à tous les padawans et maîtres jedis jour84 arrosage avec 25 centilitres d'eau ph6.3
Jour87 arrosage avec 30 centilitres d'eau ph6.3
Jour88 pratique de la techniques du tronc fendu (videos explicatives) et arrosage avec 20 centilitres d'eau ph6.3
COMMENT FENDRE LES TIGES DE VOTRE PLANT DE CANNABIS
Pour fendre les tiges de votre plant de cannabis, il vous faudra :
Une lame propre et aiguisée (une lame de cutter fonctionne bien)
Un mètre ruban
Une ficelle ou un adhésif pour marquer les coupures que vous ferez le long de la tige
Un crayon, une baguette ou une brochette pour séparer la tige une fois fendue
1. Tout d'abord, commencez par mesurer la partie de la tige que vous allez fendre. Il faut faire une incision d'environ 10–20 cm juste sous la branche la plus basse de votre plant. Utilisez un ruban adhésif ou de la ficelle pour marquer le début et la fin de l'incision.
2. Ensuite, prenez votre lame et faites une incision en travers de la tige, en commençant par le haut. Attention à faire une coupe propre, jusqu'au centre de la tige.
3. Utilisez votre lame pour tailler en descendant vers le bas, jusqu'à la marque inférieure de la mesure que vous avez prise auparavant. Essayez de tailler aussi droit que possible. Une fois que vous avez atteint votre marque du bas, laissez la lame au centre de la tige, puis utilisez un crayon/baguette/brochette pour ouvrir la partie coupée, puis sortez votre lame.
QUEL EST LE MEILLEUR MOMENT POUR FENDRE LES TIGES ?
Il existe de nombreuses théories sur le meilleur moment pour passer votre tige au couteau, mais la plupart des cultivateurs suggèrent de le faire à la dernière semaine de floraison. Même si certains cultivateurs recommandent de le faire dans les 3 derniers jours avant la récolte, nous recommandons de le faire un peu plus tôt (7–10 jours avant la récolte).
QUELS SONT LES RISQUES À FENDRE LES TIGES ?
Fendre les tiges est une technique à stress élevé très agressive que nous ne recommandons qu'aux cultivateurs expérimentés. Nous ne recommandons également pas de fendre les tiges sur les variétés à autofloraison, car cela peut être bien trop intense pour elles.
FENDRE LES TIGES, ÇA MARCHE VRAIMENT ?
Il existe un solide ensemble de cultivateurs expérimentés qui déclarent que le fait de fendre les tiges peut produire de bons résultats. Malheureusement, peu de données qualitatives le prouvent. Cependant, il semble que la fente des tiges soit originaire des Pays-Bas, où elle est pratiquée par des cultivateurs néerlandais experts depuis les années 1970.

Likes
18
Share


@Pokan187
Follow
The trichomes on the Runtz are all milky and I'm getting some amber on the sugar leaves, I think the end is near 😁
The G13 is looking great and smelling wonderful, the buds are getting heavier and same for the GDP
Likes
21
Share


@Lazuli
Follow
Was fun to grow and looks beautifull in any garden 💜 u can really taste the blueberry crossed in this strain

Likes
2
Share

@GERGrowDesigns
Follow
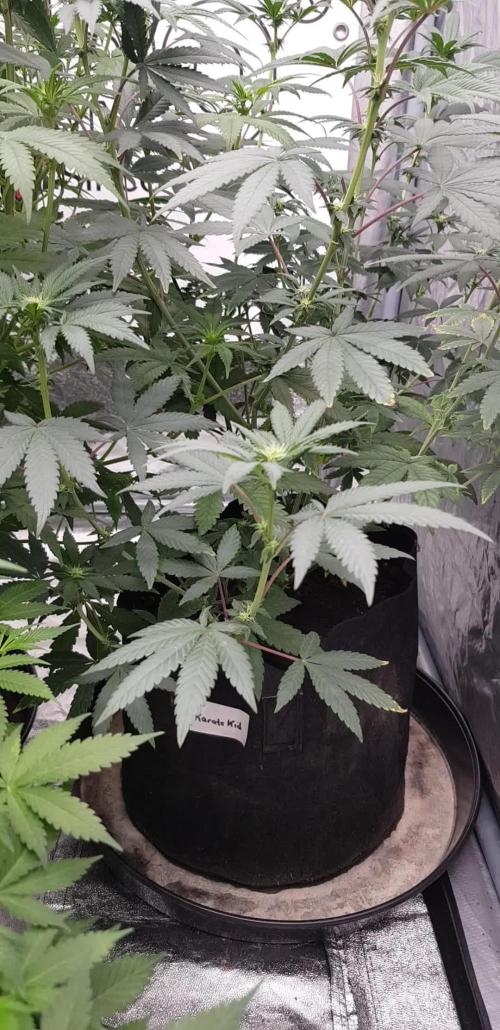
Welcome to Flower Week 2 of Sensi Seeds Karate Kid
I'm excited to share my grow journey with you from my
Sensi Seeds Project . It's going to be an incredible ride, full of learning, growing, and connecting with fellow growers from all around the world!
Karate Kid got a Hard Start and also a lot of Problems After transplanting in her 16litre pot as the only Strain from this Round
For this Project , I’ve chosen the Feminized Photo Strain Karate Kid :
Here’s what I’m working with:
• 🌱 Tent: 120x60x80
• 🧑🌾 Breeder Company: Sensi Seeds
• 💧Strain Info : 25-33%
• ⏳ Flowering Time: 8-10weeks
Likes
15
Share

@CanOli95
Follow
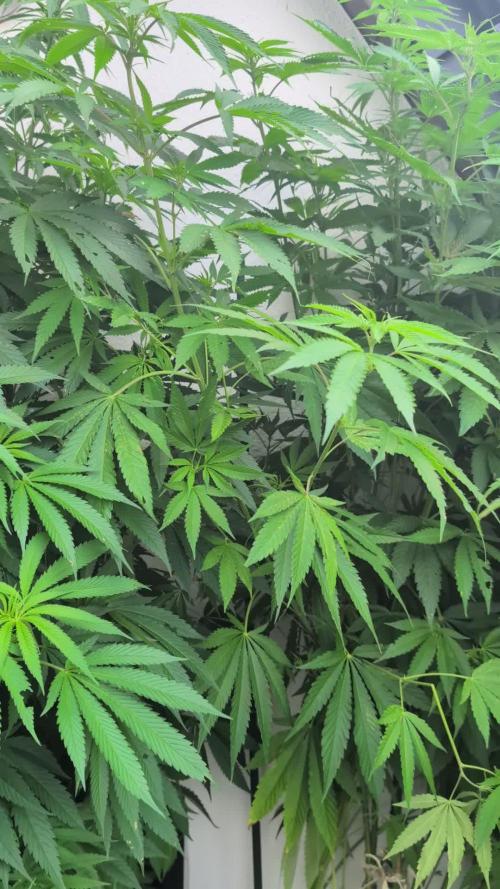
Es wird ziemlich frisch und windig
Die Pflanze, welche rechts steht, ist öfter Mal umgeknickt und hat den Autopot mitgerissen. Dafür steht sie noch ziemlich gut dar.
Umso mehr freue ich mich, dass man nun endlich die Blütenbildung eindeutig sehen kann.
Aus Seiten der Nährstoffversorgung sieht soweit alles top aus, das System funktioniert sehr gut. Es haben sich ein paar Raupen unter die Blätter gesellt, was man Fraßspuren erkennen kann. Dennoch werde ich nichts spritzen, ein wenig weniger Ertrag werde ich in Kauf nehmen.
Ich bin sehr gespannt, was der weitere Verlauf noch so hergeben wird.

Likes
7
Share


@sellem
Follow
Trouble in Paradise! Both experiencing all kinds of trouble. BUT theyre growing and swelling!
I put the blame solely on me, i overwatered in the early weeks and really havent had much time to take care of them in time. Also started flowering nutes way too late.
Im happy with both of their forms though! small and bushy, thats how i like them. Sad that the deficiencies had to happen, but oh well, theyre gonna pull through i hope!
i downed water to 2L from 2.5L just because it takes really low for them to dry out in between and i wanna get fresh batches of nutes in more often. 2L is also enough to get a tiny bit of runoff so no dry spots or anything. Will see how they like it!
due to deficiencies, i skipped giving them 2ml/L of bloom and went straight to 3, also added a good dose of calmag.
Didnt defoliate besides really effed-up leaves.
See you next week!

Likes
11
Share

@ZhulenejJohny
Follow
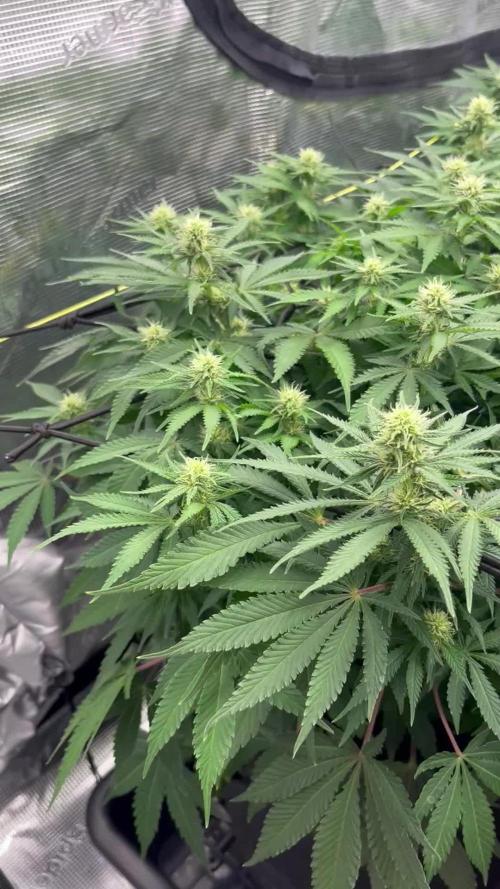
Dnes máme 19.den květu. Pijou jak o život, palice se krásně formujou. Zítra jdu na defo. Peace👽

Processing
Likes
12
Share


@2Stones1Bird
Follow
Checkout my Instagram @smallbudz to see the Small budget grow setup for indoor use, low watt, low heat, low noise, step by step.
07/12/2019 - Fed her 2l of 6.5PH water with 0,5ml of each Grow, Bloom, Max and Alga-mic, and 1ml of each Heaven and Vera,noticed about 10% run off, also added a green filter to the camera lens. Adjusted the light distance to 55cm again it was toooo close about 32cm.
10/12/2019 - Decided to go back and check the basics, removed led strip to give a proper 'night' time, changing light cycle to 20/4h no more 'exotic' 22/2h, re-checked the light distance every 2 to 3 days to ensure 60-45cm and I can tell all ready she is loving it.
Also added home made Co2 made with 1 tsp of yeast, 3/4 tsp of sugar 700ml of warm water in a 1l bottle with a tiny pin hole on the cap.
11/12/2019 - Fed her 1.5l of 6.5PH water with 0,5ml of each Grow, Bloom, Max and Alga-mic, and 1ml of each Heaven and Vera,noticed about 10% run off.
12/12/2019 - 8 weeks have passed and no flowers I guess I'm flipping to 1212h to see if she reacts.



Likes
12
Share


@SolitudeCorners
Follow
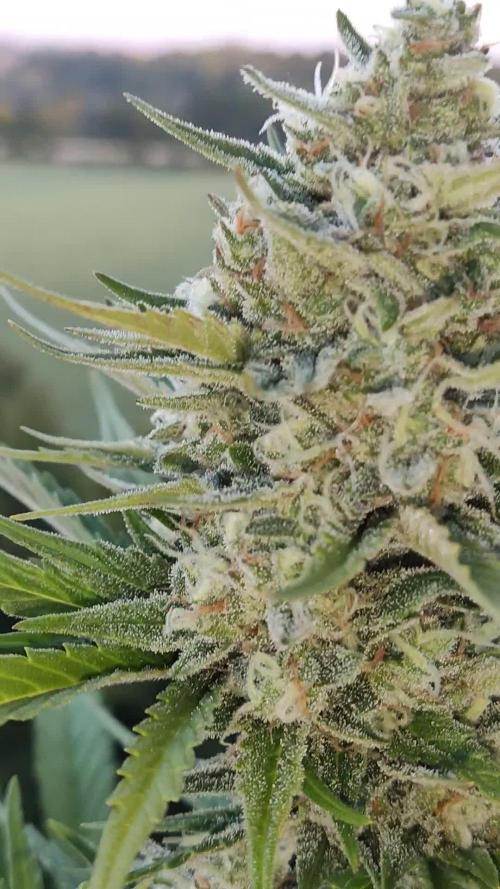
She almost dies once but came back after switch nutrients to advanced nutrients and recover her by reviving and great results! The best dense and snowy buds I ever grow.