
Likes
Comments
Share


@Slurpy_Terpy
Follow
==> Decreased the base nutrients for less Nitrogen
She is doing great!
Smelling stronger and with more personality than last week :D
There are not many calyxes but they are swelling slowly and nicely :)
Starting to get some purple colors in the buds already :D
Her branches are thin and buds are gaining in weight so she is starting to fall! I will tie her up soon :D

Likes
96
Share


@CBD_Sweden
Follow
The growing cycle it self worked out as expected, except that the pH-level was way off from where it should be, and I found out a bit too late. Because of this the outcome of the harvest didn't say much about the potential of this strain, but as soon as I got enough time and space, she will get a new chance to shine.
----------------------------------------------------------------------------------------------------------------------------------
2018-02-27.
This is my review / smoke report of this lovely cbd flower.
There are rock hard buds and almost no give at all, even in those smaller buds.
When you grind it the scent will appear more than just smelling on the buds.
It smells a little weak of grass, hay, pepper, some spicy and sweet.
The taste is grass, soil, pepper and exceedingly sweet fruit.
The effect is directly, the thc feeling above the eyes and in the forehead.
A little light ringing in the ears and a dry mouth.
After 10 minutes, the cbd kicks in and one feels that the neck and shoulders begin to relax and the feeling continues down over the back and chest down to the stomach.
A calm and well-being is found in the body.
After 15-20 minutes it is down in the legs.
But in a strange way, you also feel like doing something, or meeting some friends and just sitting and talking about fun things.
It is a very well-balanced strain and it fits in all sorts of contexts.
I also think it might be good for someone who needs something that makes you more social and dampens enough anxiety and rushing thoughts effectively.
I think this is a lovely strain and I highly recommend it to everyone but especially for more inexperienced people who want to soften with a pleasant medicine.

Processing
Likes
16
Share


@ElegantBuds
Follow
Hello growers
This week was a good week. The plants are still growing good. Good color. Happy.
In a week i will switch!
See you

Likes
8
Share


@Canadian
Follow
Nothing to really say except that they are growing very well Thank you for reading I will continue to update have a happy grow

Likes
2
Share


@Indicaianer
Follow
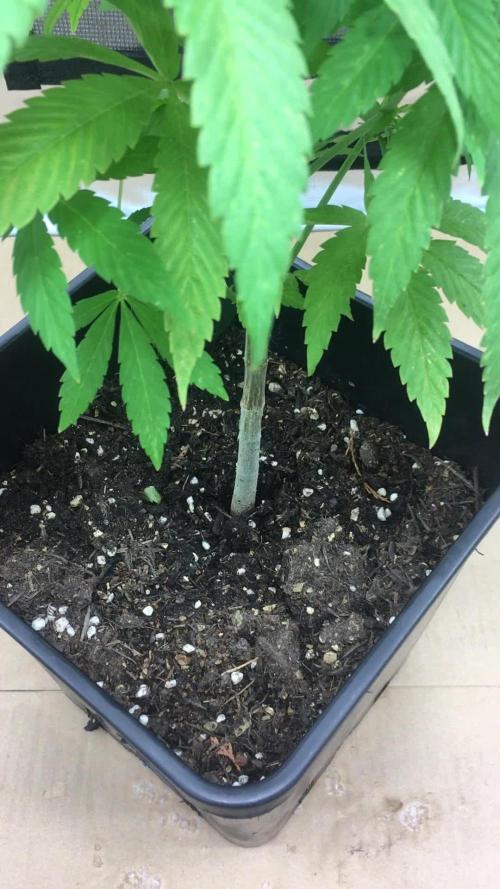
Die Samen wurden für 48 Std in Wasser gelegt, als sich die ersten wurzel zeigten wurden die automtiks in den endtopt (11liter) und die Feminisierten erstmal in einen kleinen Topf, wird später umgetopft
Likes
95
Share


@hannabis420
Follow
Quality strain but my buds could have been denser/chunkier, growers error, my first LST and I stressed her into flower too early

Processing
Likes
27
Share


@Silverback_Guerilla
Follow
1/14:
This morning, I did a foliar application of big bloom and fulvic acid, then about 5 hours later I watered them with about a half-gallon of rainwater each and added armor si, humic acid, endoboost myco/tricho, liquid molasses, and a bunch of cal-mag. Today, I also I wired up and mounted my new samsung sun board strips (660nm/730nm) and my Solacure FlowerPower UVB fixture.
I'm running the deep red/far red bud boosters a few hours per day right now, but will run them for the entire photoperiod once I start flowering them. I'll run the UVB for 4 * 15-minute sessions a day for the full flowering cycle, and if they don't protest too much I'll increase each session by 5 minutes and evaluate again. Some strains are more forgiving than others and I've got 5 different strains in this space...so really not sure much time I'll get away with exposing them to the deadly rays without damaging them too much...😈
1/15:
I received one of the rapid led/growmau far red initiator pucks today. With the placement of my UVB light, I'm realizing I'll need another far red puck to have even and intense far red coverage, so I'm ordering another with Prime delivery and waiting to start flowering until I receive it.
I sprayed them down really well with ph adjusted rainwater tonight to rinse off nutrient build-up from foliar applications.
1/16:
I'm really excited to try flowering under 14/10. I grew photos indoors on an off for 15 years before I semi-retired. If I added up all the additional flowering time I could have done through the years if LED technology existed, I'd have had an extra truckload of bud to smoke.
I did another application of Axiom Harpin a|b Proteins this evening, right before dark. I'm expecting a big growth burst this week, leading up to the flower stretch. I really need them to trigger under 14/10 within 4 or 5 days🙏
...if not, I'll switch to 13/11 and wait a few more days🙏😟..if still no pistils are poppin, I'll go to 12/12 and chalk it up as bad luck or varietal indifference to Pr and Pfr manipulation.
1/17:
I fed each of them about 3/4 gallon of full strength veg nutes. This will be the last. I'll go with half-strength veg and half-strength bloom for a week, then go with full strength bloom nutrients until I start flushing them in 6-8 weeks.
1/18:
I installed the second far-red flowering initiator today and got all my timers configured for flowering:
=========================================
timer#1 - power strip with qb's and red boosters
10:00am -12:00am
timer#2 - (dual/independent setting)
sideA- 3-way cube with uva bars
10am - 3pm
7pm - 11pm
sideB- flowerpower uvb
1pm - 1:15pm
4pm - 4:15pm
7pm - 7:15pm
11pm - 11:15pm
timer#3 - far red pucks
11:00pm - 12:15am
timer#4 - sub-canopy tube
10am - 1pm
3pm - 6pm
8pm - 11pm
========================================
I also did some testing on the timers and sealed myself into the closet to check for any light leaks. All good.👌
1/19:
Looks like the FIM job didn't take on one of them..but she's got perfect symmetry. WIll probably have to just top her again next week...gonna be a tall one I think. Tonight is their first long night. It's ON!👍
1/20:
I watered them today with about a half gallon each. I'm seeing calcium and magnesium deficiences here and there, so added some boomerang and heavy cal-mag-Fe along with liquid molasses, humic acid, and endoboost myco. I also foliar fed with big bloom and fulvic acid.
That's it for week 4-

Likes
16
Share


@ITAIvangrower
Follow
Questa settimana ho bagnato al giorno 10 con un po di root per la stimolatura. Vediamo come procede , fino ad ora è tutto perfettamente sotto controllo . Ci vediamo tra 7 giorni ,pace e amore da un coltivatore 🇮🇹
Likes
40
Share


@Kitties_and_Colas
Follow
~_~_~_~_~_~_~_~_~_~_~_~_~_~_~_~_~_~_~_~_~_~_~_~_~_~_~_~_~_~_~_~_~_~_~_~_~_~_~_~_~_~_~_~_~_~_~_~_~_~_~_~_~_~_~_~_~_~_~_~_~_~_~_~_~_~_~_~_~_~_~_~_~_~_~_~_~_~_~_~_~_~_
❤️💡🌱😽💨
We're back and these plants held up great while we were gone! They're getting limey tops and a little serrated so we gave them a full strength dose of calmag earlier today (will doc next week) and moved the light up a few inches..we expect they'll look better in a week or so...
We also removed any large fan leaf blocking the center growth..
The Solux350 is kicking ass at 75% power, it looks like plenty of light to the eye however we do intend to run it at 100% after their flowering stretch.. not too much else to report,, great genetics and lighting make for easy weeks! Thanks for reading if you made it this far and happy harvests everyone!! 🤘😼❤️🌱
⚡Hortibloom/Solux 350⚡
Specifications ⚙️:
Diodes: Samsung LM281 Pro / Osram DR (1,440 total)💡
Driver: Inventronics 350 watt🔌
PPF: 1015 μmol/s ☢️
PPE: 2.9 µmol/j 〰️〰️
Lifespan: 50k+ hrs ⌛
Weight: 14.3lbs lbs (6.5kg)
Veg Coverage: 5 x 5 ft 🌱
Flowering Coverage: 4 x 4 ft 🌼
-Uses an aluminum heatsink (no fan), quiet while operating 👂⬇️
-IP65 waterproof ratings, tolerant to high humidity grow environments 💦
-May be daisy-chained via RJ14 and managed from a single controller 💡~💡~💡~💡~💡
🌎 https://hortibloom.com/products/solux-350-led-grow-light
~_~_~_~_~_~_~_~_~_~_~_~_~_~_~_~_~_~_~_~_~_~_~_~_~_~_~_~_~_~_~_~_~_~_~_~_~_~_~_~_~_~_~_~_~_~_~_~_~_~_~_~_~_~_~_~_~_~_~_~_~_~_~_~_~_~_~_~_~_~_~_~_~_~_~_~_~_~_~_~_~_~_

Likes
35
Share


@GODSGIFT_2005_JM
Follow
🍼Greenhouse Feeding BioGrow & Bio Bloom
⛺️MARSHYDRO
The ⛺️ has a small door 🚪 on the sides which is useful for mid section groom room work. 🤩
☀️ by VIPARSPECTRA (models: P2000 & XS 2000)

Likes
13
Share


@gr3g4l
Follow
Una vez pasados los dias huele bién, sabe bién y buen efecto.
Sabor: Matices dulces y cítricos
fácil de cultivar.


Likes
Comments
Share

@Earthsower
Follow
At the end of the second week of bloom the Dough Boy feminised is doing well with no signs of deficiency. Her leaves are a stable green the stem is a healthy pale green and she has grown a stable 8cm. There’s signs of bloom with white stigmas appearing and she will receive feeding as required. Caution is needed until the lady consumes more! The Dough Boy feminised stands at approximately 58cm ta
Likes
95
Share


@Roberts
Follow
Northern lights grew great in the Pro-mix medium size hp bag. She had a struggle through the grow. She really wanted more space to root. I did have a salt build up towards the end of vegging. A few minor issues beside that. She did fill the little Spider Farmer tent. She turned out great. Thanks again Pro-mix, Medic Grow, Spider Farmer, and Divine Seeds. This wasca slightly different style grow compared to my usual methods using the Pro-mix. I really enjoyed it. 🤜🏻🤛🏻🌱❄️
Thank you grow diaries community for the 👇likes👇, follows, comments, and subscriptions on my YouTube channel👇.
❄️🌱🍻 Happy Growing 🌱🌱🌱
https://youtube.com/channel/UCAhN7yRzWLpcaRHhMIQ7X4g.

Likes
14
Share


@eldruida_lamota
Follow
Vamos familia cuarta semana de floración de estás Tropical Zmoothie de SeedStockers.
Que ganas tengo de ver el progreso de esta variedad, las plantas están sanas, se ven con buen color.
La cantidad de agua cada 48h entre riegos.
Esta semana añadimos nutrientes de la gama Agrobeta.
Las plantas están bastante bien y eso que subió par de grados la temperatura que en mi tierra hace mucho calor.
Estas próximas semanas veremos como avanzan y progresan las flores.
Mars hydro:
Code discount: EL420
https://www.mars-hydro.com/
Agrobeta:
https://www.agrobeta.com/agrobetatiendaonline/36-abonos-canamo
Hasta aquí todo, Buenos humos 💨💨.

Likes
78
Share


@ClubRiot
Follow
Week 6 ,
pH Perfect Connoisseur Bloom Part A ( 1 ml/L )
pH Perfect Connoisseur Bloom Part B ( 1 ml/L )
CarboLoad Liquid ( 2 ml/L )
Sensi Cal-Mag Xtra ( 2 ml/L )
Sensizym ( 2 ml/L )
Bio-Heaven ( 2 ml/L )
Big Bud ( 2 ml/L)
Nirvana (2 ml/L)

Likes
4
Share


@IamCy
Follow
Week 2. Just the normal stretch. Nothing eventful. After this week, I'll be giving random weekly updates due to my busy schedule.
Likes
7
Share


@CannabisCultivate
Follow
Lovey is setting up nicely and I am keeping her fairly clean. There is powdery mildew and she has been sprayed with a fungicide. She is at least 5” tall now, I may not great with the diary logging but she is great at the growing! Such a language she speaks!

Likes
23
Share


@MartinMedicinal
Follow
Bud is unbelievable its everywhere. Strong smell for sure and ultra sticky. Frost is really coming out. Cut off the enzymes komplete I read in flower it can stress the plant.
45 days from the flip
Always 5.8 ph
600 ppm
A little h202
Plant goes through about 18.9 liter jug every 2 days. I feed it RO water. Try to change and scrub the rez every 2 weeks.

Likes
6
Share

@DE_BW
Follow
Day 37 marks the official start of flowering, with strong stretch, healthy pistil formation, and a fully stabilized canopy after completing all LST work. Feeding is set at 2-2-2.5 (Micro/Grow/Bloom), no additives yet, and root pressure looks excellent with visible post-watering guttation and vigorous growth. Environment is stable at 23.5°C and 50% RH, main light runs at 100% from 80 cm to allow stretch before lowering both lamps for full flowering intensity next week.
Likes
4
Share


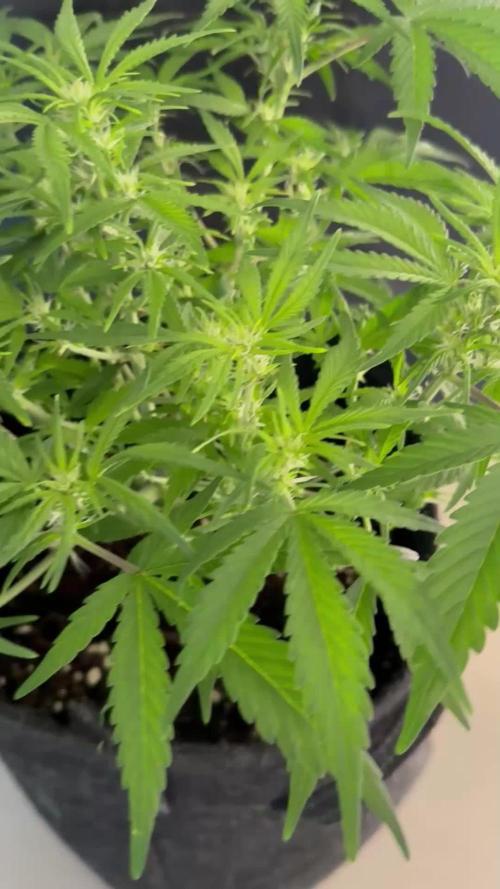
@Leroybrown
Follow
These babies are 4 weeks today. I think I might have stunted them abit. With coco staying wet for too long( cool temps and high humidity) so repoted with some perlite. I am going to try and follow the vpd chart and hence increase temperature abit. I was only planning on giving a 8 week veg but these might be longer. Still need to main line and repot to 12 lt pot so have 4 weeks to do that will keep you all updated peace out.