Likes
Comments
Share


Likes
7
Share


@JBOrganix
Follow
Super burnt lol. Ooops I'll still finish her off and hope for the best. Should still be some decent smoke 👌This girl still particularly blows my mind. Beautiful terpenes on her. Incredible nose. 👏👌

Likes
6
Share


@valiotoro
Follow
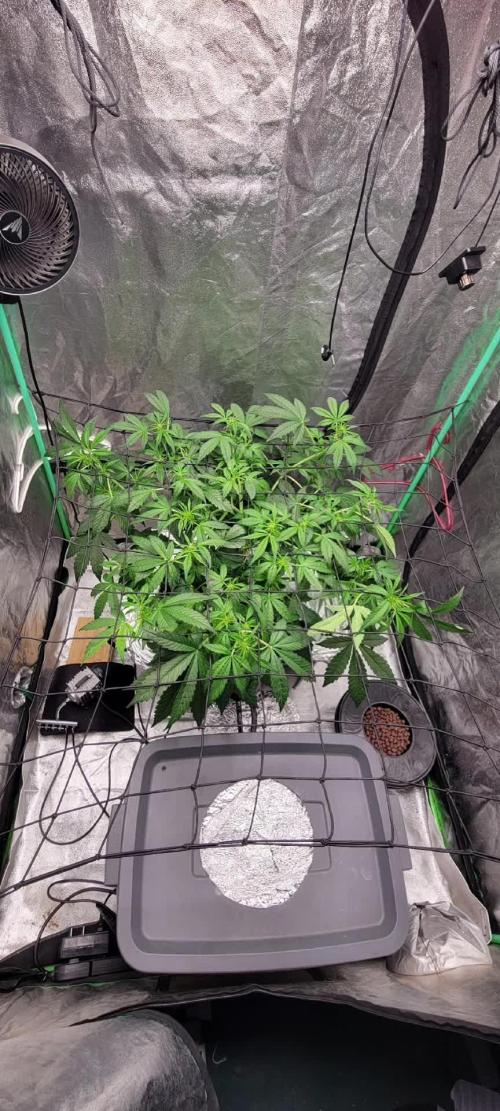
Hello everyone 😎
Day 30
she grew fast with a great structure and with a beautiful green colour on the leaves.
Homemade bloom powder for nice buds
Have a great day 👨🌾🏻

Likes
6
Share

@Stonerandgrower
Follow
It wasn't quite done but I was lol it tasted good and got me high last week so I figured I'd harvest now and move my dosido x strawberry cross in there. My scales already had the weight of the bucket off so it was actually 10.8lbs wet 29oz dry. I can't add a smoke report lol it's been dry for like 2 weeks


Likes
8
Share


@Simba732
Follow
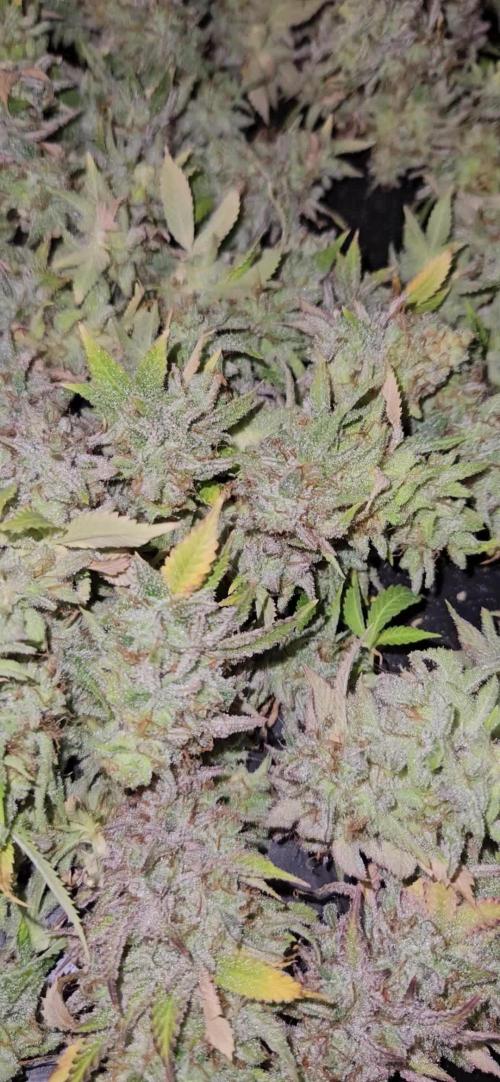
🎊 Week 12 is officially over !
I’m really pleased with the progress she’s finally stepping fully into that Purple Banana expression 🍌🍭
The buds are still packing on size, and every day brings us closer to harvest.
I checked the trichomes again and we’re starting to see a nice mix: mostly milky with a few turning amber. Since the last feeding, I’ve been giving her only RO water to avoid oversaturating the soil before the finish. With two more weeks as our target, we’ll push one final week of feeding before the flush 💦🌊
One of my biggest joys as a grower is bringing out the unique characteristics of the strains I pick up as close as possible to what the breeder intended. For me, it’s not all about chasing yield. Genetics vary, and sometimes even in perfect conditions, your plants won’t look like the online photos or hit those top shelf sizes you see everywhere.
But here’s the truth: If your environment, feeding/watering routine, and training techniques are on point, you’re almost guaranteed a potent, high-quality plant, regardless of final weight.
So don’t stress yourself Focus on mastering your craft, learning your strains, and dialing in your system. With time and consistency, everything clicks and seeing that progress in real time on this grow has been incredibly rewarding. 😊
One last week of feeding for this beautiful monster
Let’s finish strong! 🕺🏾👊🏾
Happy growing gang 💚🌱
Likes
1
Share


Likes
19
Share


@GoldenWeedGrower
Follow
📅 D119/D03 - 13/03/24
🚀 Drying
🎬 Added 22 pics and the timelapse of the harvest
________________________________
📅 D120/D04 - 14/03/24
🚀 Drying
________________________________
📅 D121/D05 - 15/03/24
🚀 Drying
________________________________
📅 D122/D06 - 16/03/24
🚀 Drying. First trim : 3 g and a tiny flower placed in the jar for curing
________________________________
📅 D123/D07 - 17/03/24
🚀 Drying
________________________________
📅 D124/D08 - 18/03/24
🚀 Drying. I've made the very first try and she's very promising 😍😍😍 @Pure_Instinto_Seed_Bank
________________________________
📅 D125/D09 - 19/03/24
🚀 Drying. Trimmed 7 grams and start curing of about 10 g for now. She's very sticky and very fragrant with an intense smell. Lot of rosin stucked to the scissor, good sign ! 😊
________________________________
📅 D126/D10 - 20/03/24
🚀 Drying. She's quite ready for trimming, I'll start tomorrow
________________________________
📅 D127/D11 - 21/03/24
🚀 Drying. Trimmed 14 g from one of the main bud.... Less than expected but very dense, high quality buds
________________________________
📅 D128/D12 - 22/03/24
🚀 Drying. Trimmed 11g
________________________________
📅 D129/D13 - 23/03/24
🚀 Drying. Trimmed 22g
________________________________
📅 D130/D14 - 24/03/24
🚀 Drying. Trimmed 11 g
________________________________
📅 D131/D15 - 25/03/24
🚀 Drying. Trimmed 12 g
________________________________
📅 D132/D16 - 26/03/24
🚀 Drying. Trimmed 16 g + 20 g + 16 g = 52 g. So far 132 g in total and 2 buds missing
________________________________
📅 D133/C01 - 27/03/24
🚀 Trimmed last 15 g - Total outcome is 147 g. First day of curing

Likes
72
Share


@HighFromHome
Follow
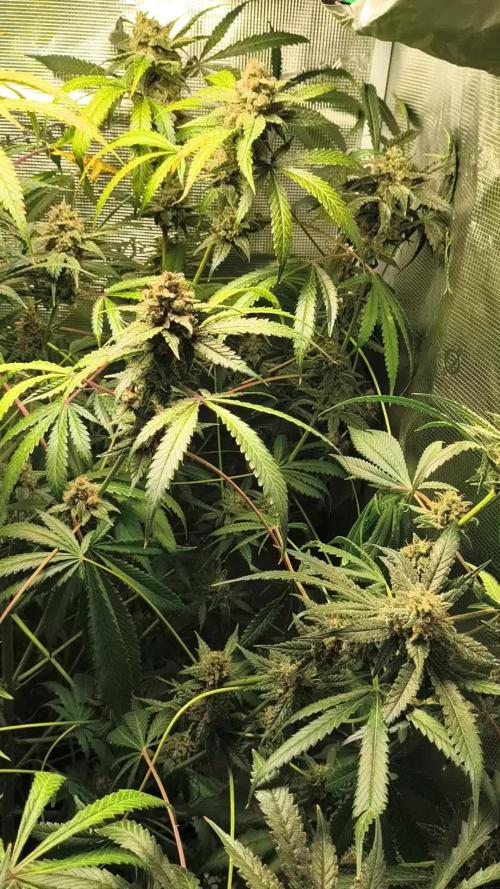
Had a productive week for growth and made a few improvements.
Bud development has been great this week. The buds are filling in the gaps mostly and creating nice colas. My plan is for the next 2 weeks to feed AN Overdrive. Then flush for 2 weeks i think.
She is very sticky and has a sweet smell of candy grape. Still not a blast of smell when i open the tent but smelling her close she's sweet :D
I re tied all the outside colas to make them have even spacing again.
The red poles were in need of some better reflection so i foil taped them.
The sealed box for my carbon filter was made when i was using the cfl. The way i needed to hang the light meant the outlet from the sealed box into the tent could only be 4 inches in diameter. With the Cob Led, it's attached on the side poles, so decided to max out the outlet. It is the full 6inches and cooling is more efficient now. (Maybe i should try origarmi)
The black clip on fan was touching the tent so not drawing air as well. Also made an annoying vibration if touching the tent wall. I used the extender i had on the side vertically and mounted it horizontaly. Has opened the tent out a bit and have free space behind the fan.
Have add photos of all improvements.
Checked on the outdoor grow and is looking good. Did improvements on it last week by adding a 'gate'. Had spotted deer when visiting previously so didn't want to take any chances. Attached photos from visit yesterday. Video is from week before when i did the gate and surround supports.
Left plant Glue Gelato Auto is my friends. It's the same age as my Wed Cake but grown outdoors it's whole life. Right plant is Purple Punch auto which is mine. 4 weeks younger than my Wed Cake and Glue Gelato but started indoors and then planted outdoors.
This spot was only for 1 plant originally but after the situation from the other spot we had to take the GG there.
Thanks for checking my diary
See you next week and happy growing

Likes
3
Share


@BR1CK_SANCHEZ
Follow
This week was a little rocky. Two girls on the outer edges are good, but the middle one is drooping and foxtailing already. It's weird because my middle plant was larfy last run as well. I might push her to the corner and let her do her thing with less attention... because I just got a photoperiod runtz clone that's gonna need some space and perhaps its own light. LST seems to be going well for the other two though. Sometimes with autos, it's just a genetic thing. They can be temperamental girls sometimes.
Likes
10
Share


@Bakeryguy420
Follow
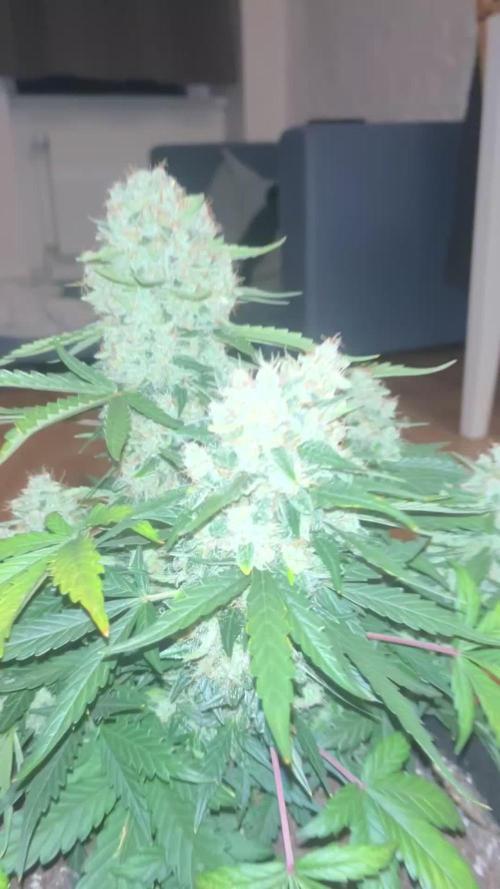
Start of week 2 flowering:) loving the structure like a little Bush! Moved her into the back under 1 3500 autocob :) all smiles people really happy the way she's coming along !
Ladybugs were introduced to help with my thrips issue huge differences :)
Some updated shots !! Almost start of week 3 of flowering !

Likes
7
Share


@logangrowgan2020
Follow
Topped soil with layer of aquarium rock. Treated rather dry pot to 3:1 tap water:hydrogen peroxide mix, two quarts. sprayed 3:1 mix around/in plant, doused areas of activity in rock/soil with vinegar. Classic overwatering-led-to-fungus-gnats!
pot placed on riser, towel sitting underneath to capture/monitor runoff. two days after 3:1 fed pot two quarts of water with added general hydroponics 1/2/3. kept tent dry with towel replacements, idea was to saturate soil with nutrient rich water after the peroxide flush. brutal. plant is not happy.

Likes
4
Share

@Eddy568545
Follow
So sorry I wasn't able to keep up with diary been very busy with work and taking care of the kids and of course my lil babies lol had to turn the gorilla cookie to a somewhat outdoor plant but still fed daily with coco nutes and that boy is a beast prob like 3 weeks behind if that outdoors gonna decrease nutes on my indoor cuz she seems about ready can't wait super super sticky
Likes
168
Share


@Tropicannibis_Todd
Follow
Well growmies , that was fun , I really enjoyed doing a outdoor run this year , it's really too bad about how the weather played out , but still I ended up getting a bunch of jars of some frosty Buds 👈 and thats what matters .....
Thanks to Ganjafarmers for the seeds ......
Would recommend to anyone, 👈
👉Big thanks goes out to all my growmies for sticking by me on my growing adventure 👈
And to NutriNPK Nutrients....
Well that's it's folks until next time
👉HAPPY GROWING 👈

Likes
15
Share


@Kitties_and_Colas
Follow
We didn't have much hope for this one, hence the light documentation... her PH was a rollercoaster for a while but still managed to yield around an oz..not too shabby for a plant we nearly tossed... if we grow this strain again it will most certainly be grown outside in the garden.. I believe this could of been a very large auto given optimal conditions...happy growing everyone!


Likes
24
Share


@Newbiegrower420
Follow
UPDATE: Day 2 of week 9 Saturday 17th October:
Nutes in today and more LST. Defo running out of space, so LST is proving more tricky and stems are less bendy now and much easier to crease! I’m tempted to not try too much more teasing of the plant and purely work on light height from here on in.. I don’t wanna mess up all my hard work by trying to force the plants too hard, damage them and stress them out.
Other than that all looking great and pistils coming through lovely 😊
UPDATE- Day 4 of week 9: Monday 19th October
Nutes in again. Increased the BioBizz Top Max this week to 3ml/l so let’s see how they respond. One girl looks like she’s a little slower than the others but other than that happy days. Oh and the crease I made in the main stem on one of my ladies last watering, doesn’t seems to have suffered any for it thankfully..
UPDATE: Day 6 of week 9 Wednesday 21st October;
Nutes in and a little defoliation. Have a mild case of thrips, so I’m concerned about what products to use as I’m now in the 3rd week of flower and don’t want to spoil the buds or taste.. Argh! Since putting in the dehumidifier temps have soared which is what’s causing the thrips.. Gonna use the cardboard box method for the dehumidifier to get it out the tent, just need to pickup an aluminium hose and ducting tape. Pretty pissed as I’ve had such a smooth ride up till now. Really don’t wanna spoil my first grow. Thinking some Neem oil may help but worried about spoiling the buds ☹️
Happy growing peeps! 💚✌️🏼

Likes
422
Share


@Crashoverite
Follow
Hi everyone 😁
Welcome back in another week update!
Thank you all for this amazing support on this bananas journey💚💚💚
Uploading and updating each week content on daily bassis so please revisit this diary if week not over yet.
So far all going great. Girls looking very healthy and happy. Due to my short trip had to leave my 🍌💜👊 girls unsupervised for 3 days. Was stunned when opened my cabinet on the Dec 5th. Athena stretched like crazy. Good 3 inches. She better slow down as not much roof space left for her. May tie some taller branches to netting if necessary. Introducing blooming nutes for the first time this week on December 6th at smaller dosage and on the second watering as listed.
Week 8
Dec 4 - Dec 10
Dec 5
Leaves tucking
Dec 6
Heavier selective defoliation on both girls. Athena fully lolipopped and Xena at 75%. Watered with 8 ltr beetwen both with perfect runoofs PH 6.4. Girls were very thirsty 🤤
Dec 7-8
Just enjoying how my girls developing. Frost has landed and they are start showing colours. All is looking great.
Dec 9
Second watering for this week 7 ltr beetwen both. Runoffs PH 6.4
Even with so much difrence in size of my 🍌💜👊 girls it seems that they are drinking my juice almost equally.
Dec 10
Applied selective defoliation and tied 3 tallest branches of Athena to netting to avoid any potential burns on these beautiful baby colas.
It's the end of the week!
Thank you all again for such a great support, all the likes, dm's, comments and follows 💚💜💚💜
Stay tuned for coming week update 😁✌️💚


Likes
6
Share